
")
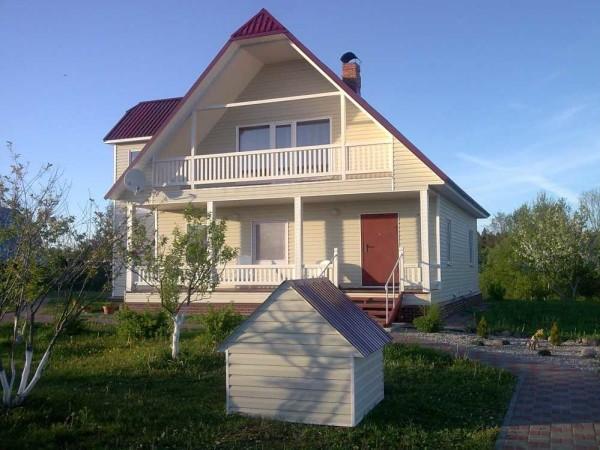
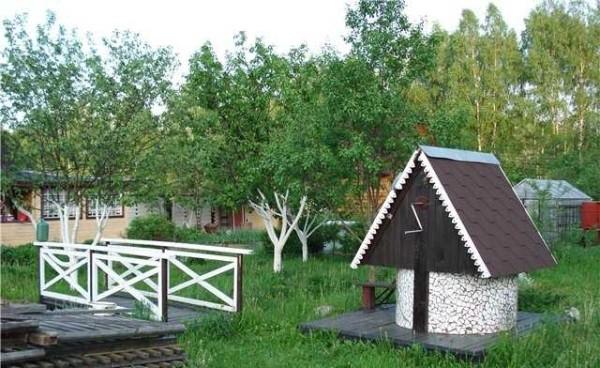
A well at the dacha, and sometimes near the house, is a necessary thing. But just a concrete ring sticking out of the ground with a cover is not very pleasing to the eye, and the comfort of use is below average. To remedy the situation, it is required to ennoble it and put a gate that will facilitate the rise of water. Sold ready-made well fences – with a roof and a gate, but they either have a solid price, or look pathetic. Therefore, most often built a house for the well with their own hands. Then you can put your imagination and design everything the way you need.
Contents of the article
Types of well houses and their tasks
The primary task of a well house is to protect the water from the ingress of various substances – dust, leaves and other similar contaminants. For this purpose, a tight-fitting cover is necessary. Open wells are possible only for technical water – for irrigation. For other purposes, water from them can not be used. So if you plan to wash dishes at least, the well must be closed tightly.
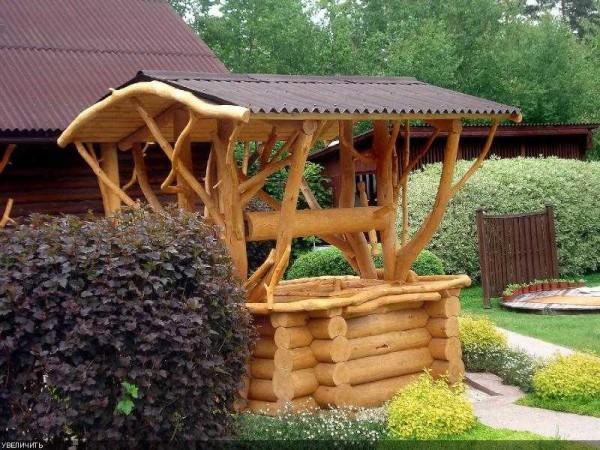
It is also necessary to protect against precipitation of any kind: rain and melt water carry very dirty water with dissolved fertilizers, animal waste, various debris and impurities. Its ingress into the well is fraught with serious pollution. For protection from precipitation make a canopy, most often – gable – so it is easier to divert precipitation.
Another task of the well house – to protect from intruders or, in any case, to ensure safety for children. To do this, make latches or cut locks.
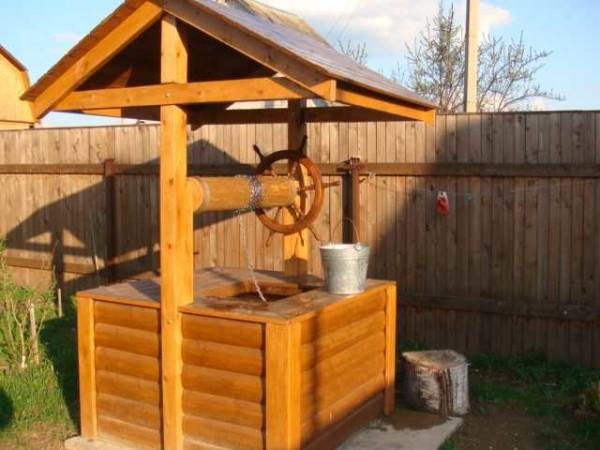
To raise the water was easier, install the posts and the gate – in the simplest case, a rotating log with a handle, to which a chain is attached. And all this together should still please the eye of the owners, but at the same time require minimal maintenance.
Open or closed
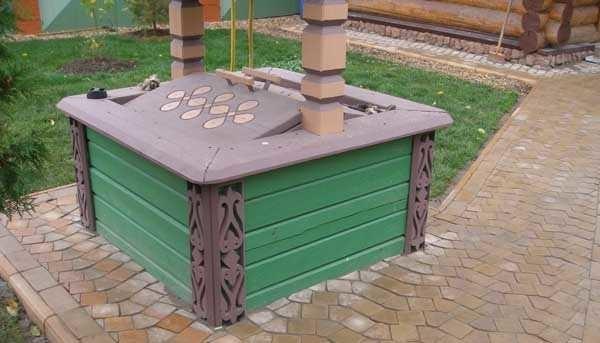
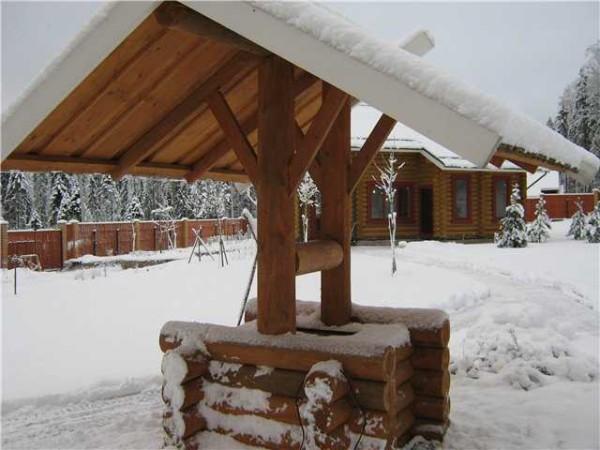
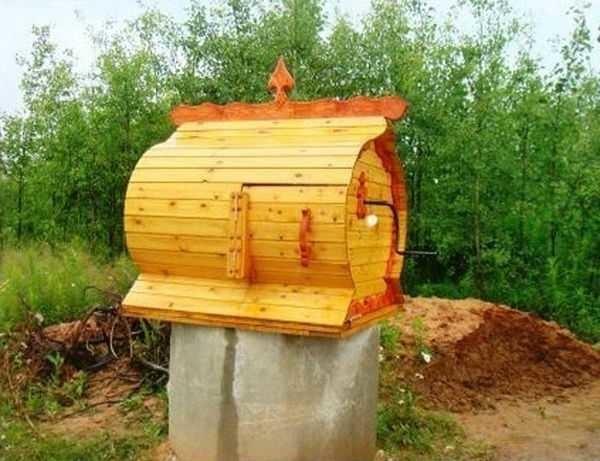
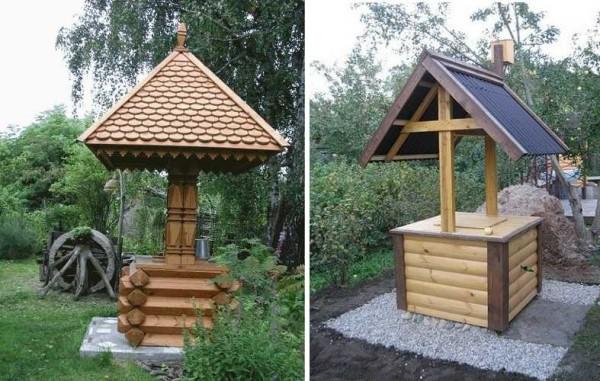
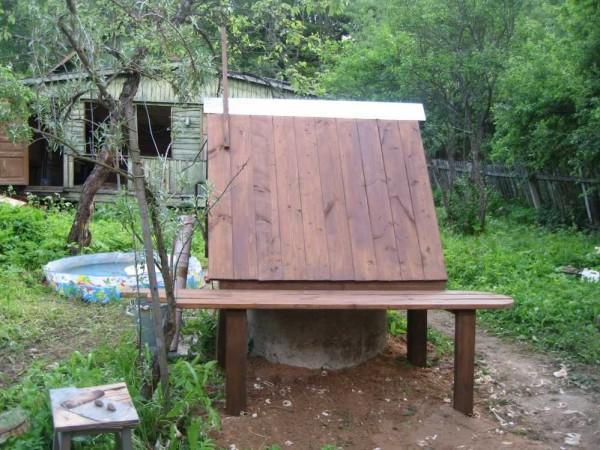
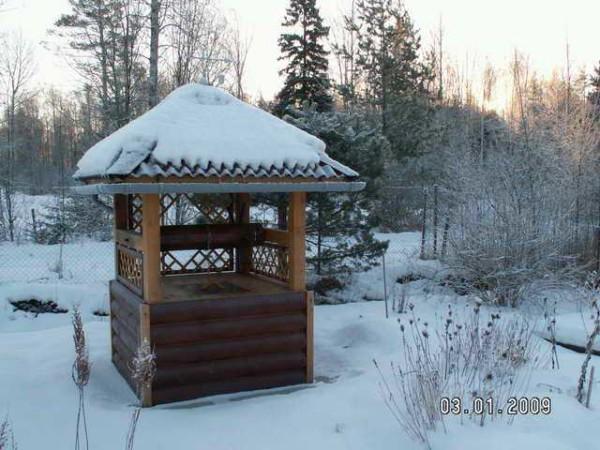
As you can see in the photo, the house for the well can be open and closed. It is cheaper and easier to make open: the well ring can be finished with stone or wood, the lid, posts and canopy – of wood or metal – to whom what is cheaper will cost. Materials for such a structure require a minimum. There is only one “but” – in winter in such a well can freeze water. If you do not plan to use it in frosts – no problem.
But for winter use requires an insulated well house. But even then it can be made open:
- buy a polystyrene foam “shell” for the well – they have a suitable size, fix it, and over it already put the finish;
- overlap the ring and the lid to make of several layers of wood, and lay the boards in different directions, covering the joints.
Another option is to make a closed house. It is slightly larger in size than the well ring. The existing air layer is already a good heat insulator, but you can improve the protection – by laying the gaps with foam, for example.
What to make of
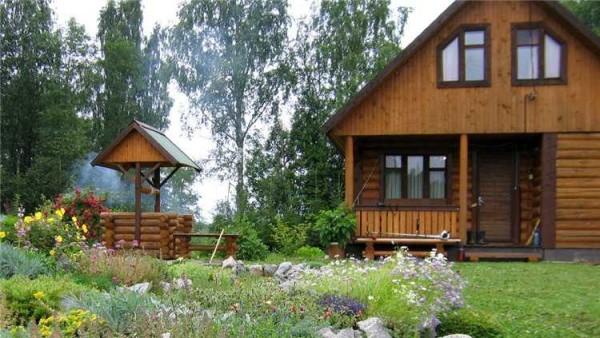
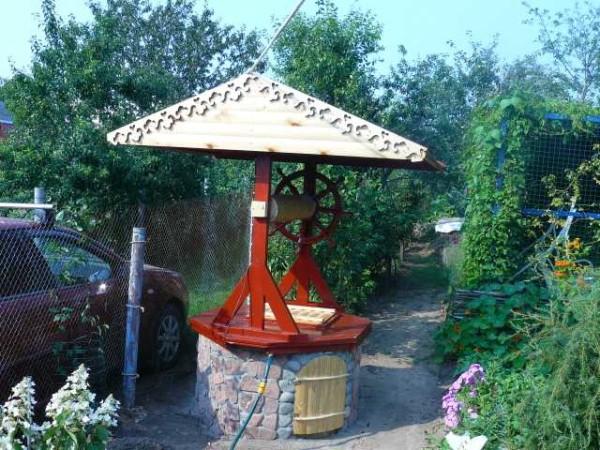
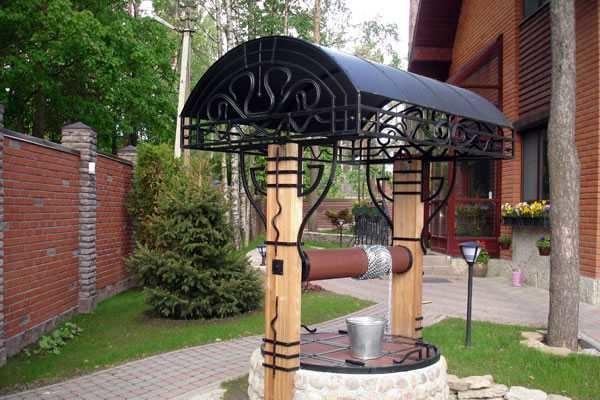
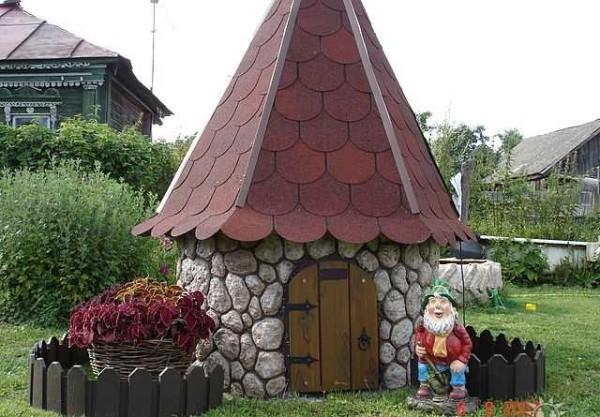
The choice of appearance sometimes takes a lot of time. Especially “suffers” the desire to decorate the well beautiful half of humanity, trying numerous options for decoration and spending a lot of time for this activity. In fact, everything is simple: if there is a house, and the well is next to it – it is worth to decorate it in the same style and if possible, in the same color. Agree, looks good.
What to do if the house is brick or plastered? Choose a finish that matches the style of the design of the site. If it is one of the first buildings on the site, just do as you like.
Often there is a question: to make of metal or wood. Wooden look, of course, beautiful. But without proper care quickly lose all the attractiveness and become gray and ugly. If you are not afraid of the prospect of regular, at least once a year, to update the protective coating (remove the old paint, then paint again), make of wood. If this is not for you, make it of metal. The whole structure or just the frame – your choice. How bad is the option: a frame of galvanized metal profile, clad with siding. Especially if the house is finished in the same way.
As you realized, there are a lot of options. Choose first the type – open-closed, then materials and finishes to taste, understand the design, make a house for the well with your own hands.
The organization of the water supply from the well is described here.
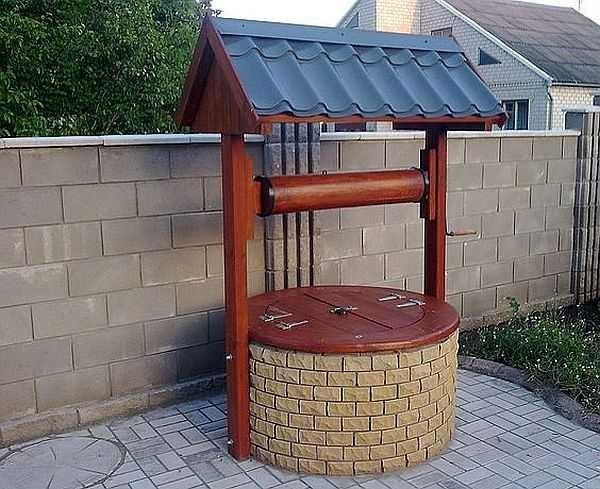
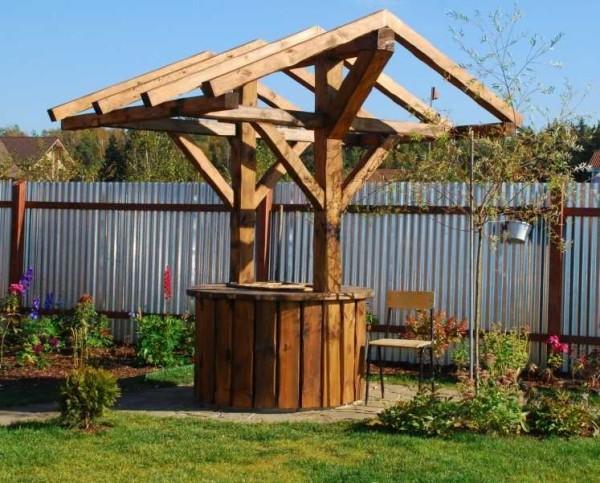
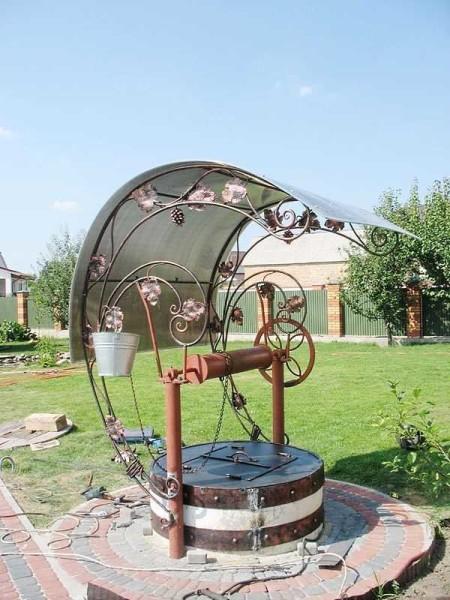
Canopy for a well with a cover – an open house
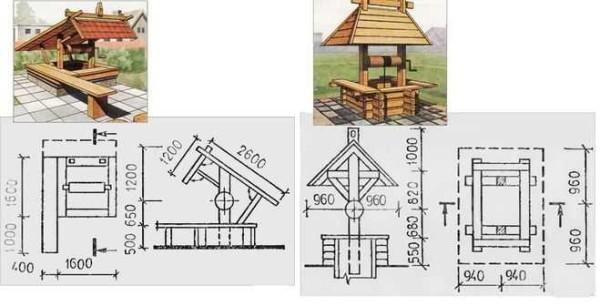
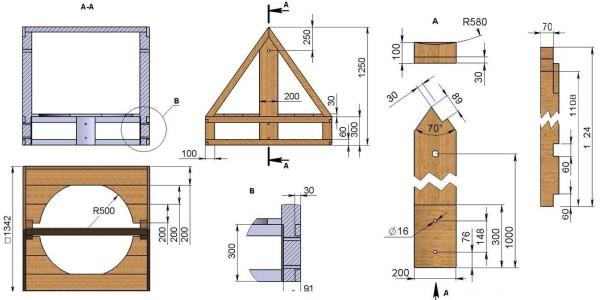
Structurally, the device is simple: there are two posts, located one opposite the other. They serve as a support for the canopy, and also on them is attached a gate – a device for lifting buckets of water. Drawing of the open house with dimensions, see the photo below.
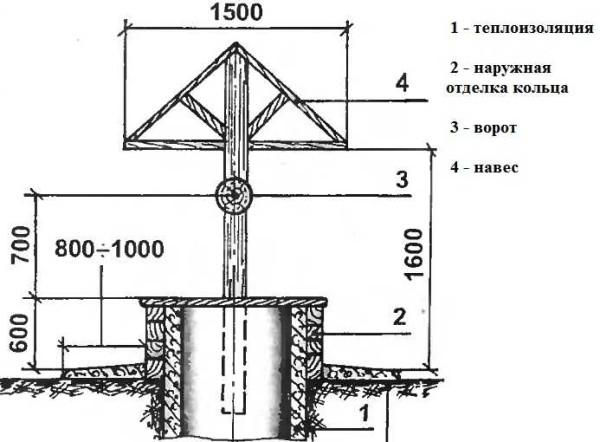
Note that the posts can be dug in after the finishing of the well ring is made. Depending on this, the order of work changes, but the design in any case remains the same.
About making paths on the site is written here, about benches you can read here.
How to make a canopy
First, the canopy is assembled. Make two side triangles according to the required dimensions. The drawing above shows only the approximate span of the two end points. If necessary, it can be made larger. The length of the canopy depends on where the posts will stand – close to the well ring or behind the lining. Approximate dimensions of the canopy with a ring diameter of 100 cm are shown in the photo below.
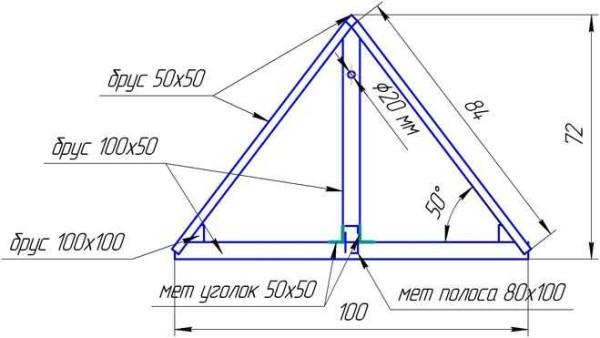
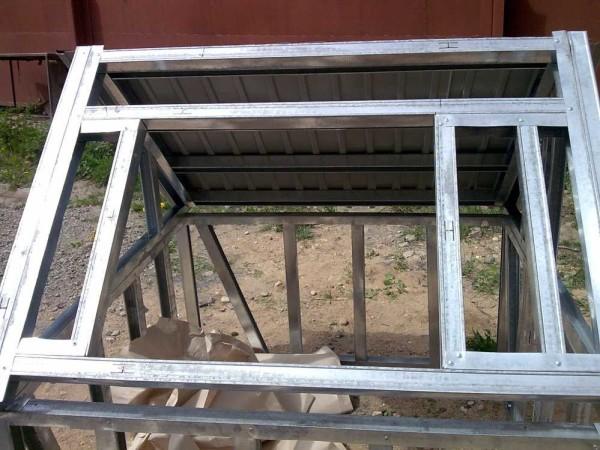
Assemble the structure can be made of galvanized profile, metal profile pipe or wooden bar. To prevent the profile from bending, it is reinforced at the door attachment points – you can put a wooden bar or a metal corner inside.
To ensure that the rain does not fall inside, the span should be made much larger than the size of the well – at least 20 cm on each side.
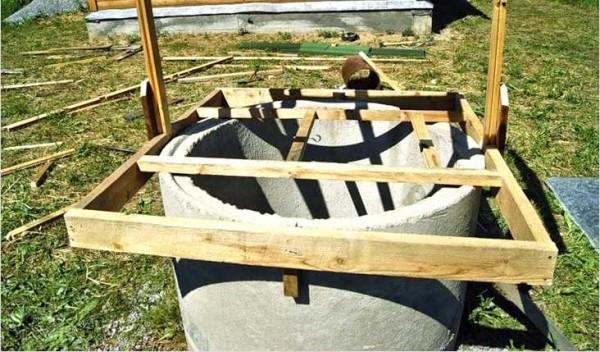
If the posts will be attached directly to the concrete ring, the order of work is slightly different. First assemble the frame that covers the ring. In the photo, it is made of a board 30 mm thick. The posts are also made of the same board, the place of attachment to the concrete is reinforced with overlays. They also play a decorative role.
If the canopy turned out to be heavy, it is desirable to use a beam of greater thickness, otherwise the load it will not withstand.
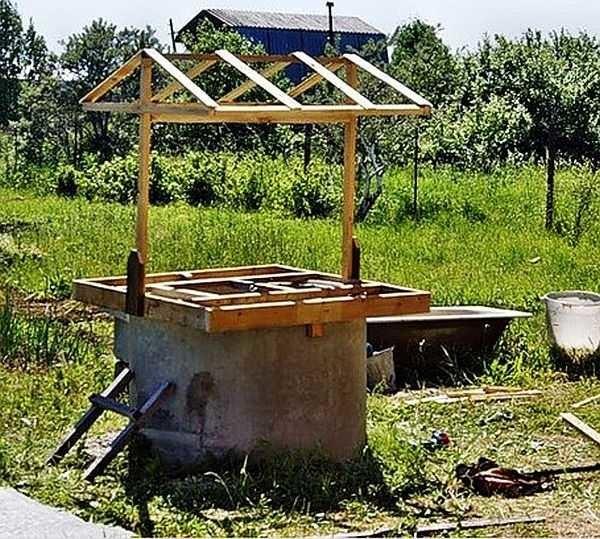
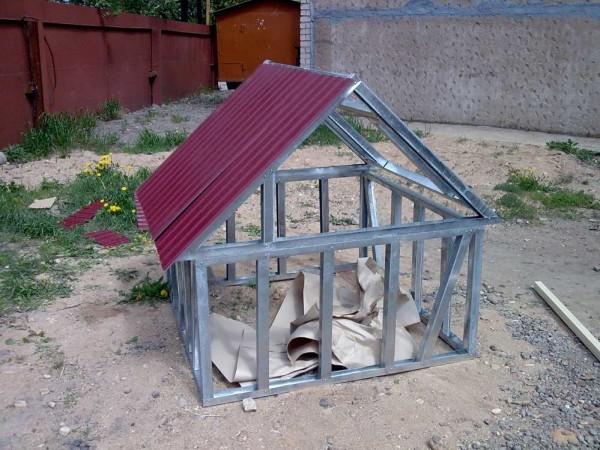
After the posts are fastened to the roof assembled earlier. You can make triangles immediately on the spot, but it is more convenient to prepare them in advance, collect the rafter system, and in a finished form vodruzhivayut on the posts.
Next – finishing. Cover with a board, wagon, roofing material. Only take into account that the boards, if used raw, after some time will dry out, between them will form gaps up to 5 mm thick. No hygiene is not a question then: and the rain will get in and dust … Use a dry board – also not very good – in wet weather it will swell, the flooring “will go wave”. In general, if you want to have clean water, build a house with doors – closed. There are more chances to keep moisture from contamination.
How to build a woodstove with your own hands read here.
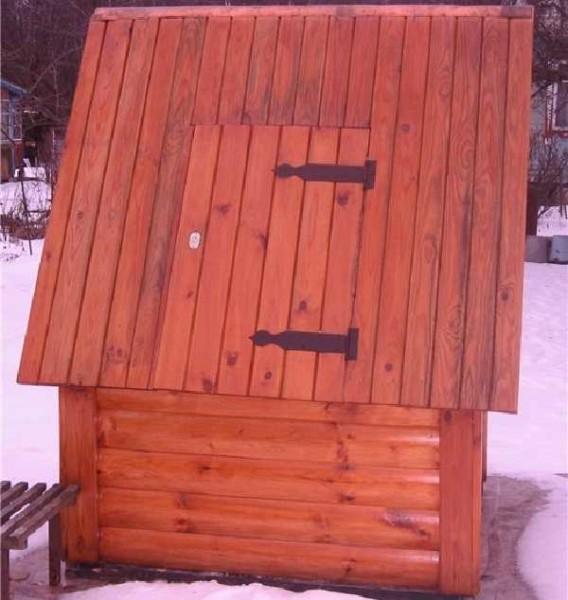
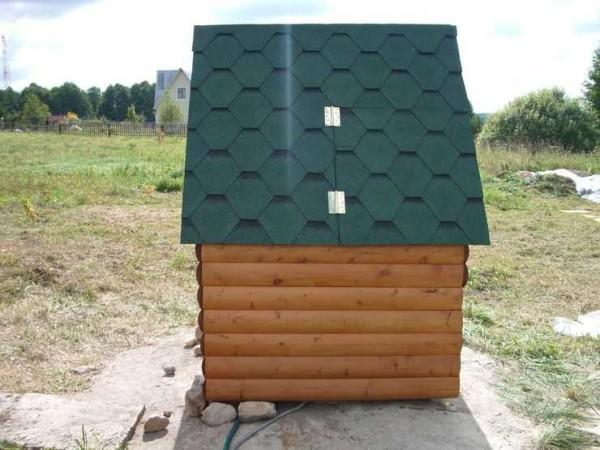
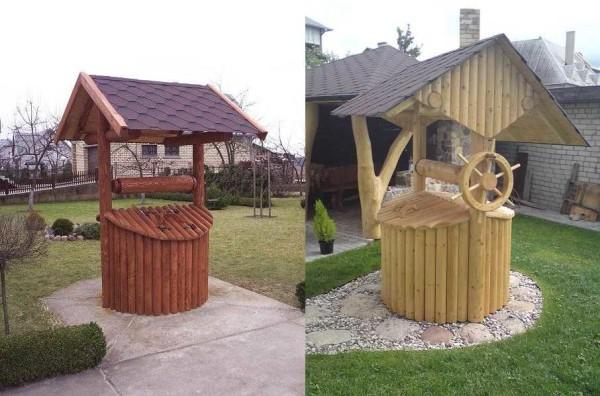
Closed house for a well with your own hands
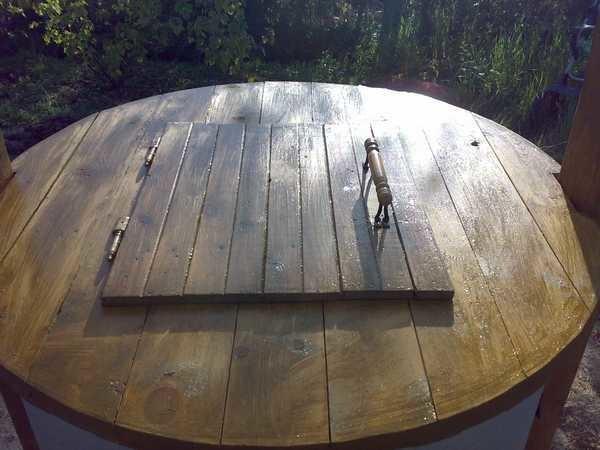
We are talking about such a variant of a shelter for a well – with a door. If you still make a cover inside, exactly dust will not get in.
A frame is built, then it is put on the well head and fixed with anchor bolts.

- support post made of 100*200 mm
- short supporting posts made of the same 100*200 mm timber
- fixing bar 30*60 mm
- triangular bar
The frame is assembled, with the help of short bars fasten to the ring. After that we start assembling the pallet. Assemble the planking from the board 30*100 mm or so. The frame is covered with boards or sheet material, such as waterproof plywood.
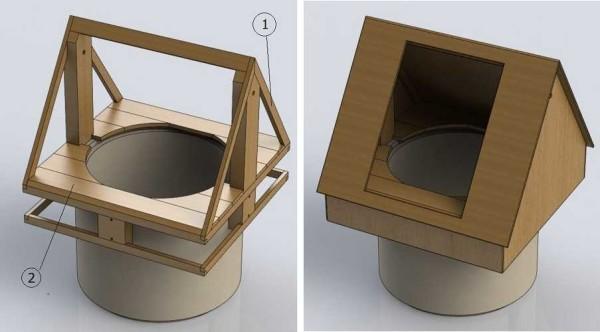
To keep the doors well, you can put additional braces. Hang the doors – one or two, as desired. To make it easier to navigate below are drawings with dimensions.
According to the same scheme, you can make a roof for the house from metal. If there is a welding machine, you can use a profile pipe. It is denser to attach the finishing material.
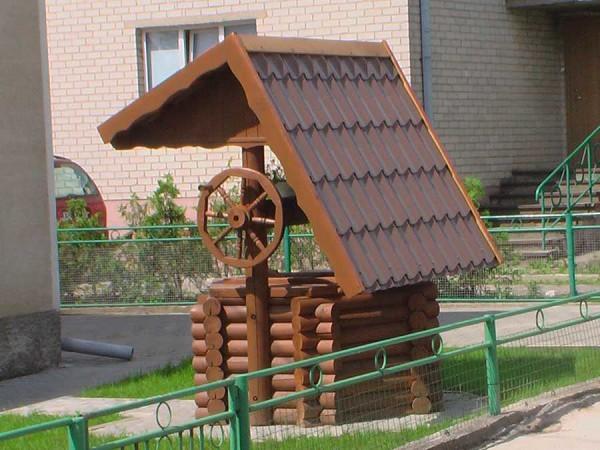
How to make a completely closed frame
You can hide and concrete ring in the house. In this case, the gate, as a rule, the posts are put separately, and then the frame is assembled. You choose the size so that the structure freely covered the ring. Height – above your height by 20 centimeters: so that you can safely bend over and get the bucket.

Profiles are taken from thick metal, galvanized. From the guide collect two identical frames – the “floor” and the upper level of the ring. They are connected by posts (profile for posts). We got a cube with filled sidewalls.
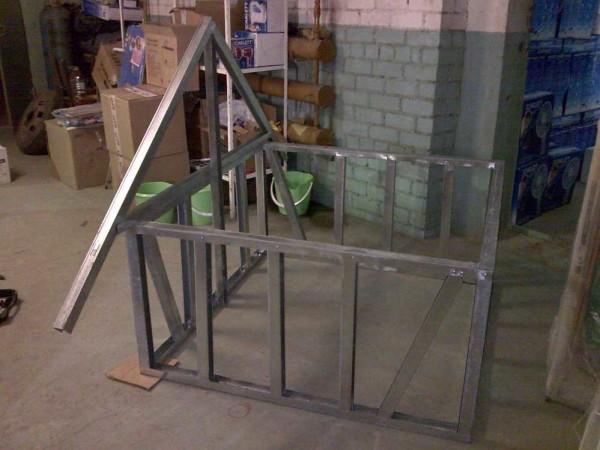
At the guide profile we trim the sidewalls, “back” leaving the whole. So it will be possible to make a triangle. Attach the post, which is equal to the height of the entire house. If you want to have equal slopes, the rack is attached in the middle. You can make the far slope steeper, then the rack is moved 15-20 cm from the center.
Attach the notched profile to the fixed post. We get one of the elements of the rafter system. The same operation is done on the other side. The resulting tops of the triangles are connected by a crossbar.
On the side of the door, we add posts – on both sides. It is better to reinforce them – put wooden bars inside and screw them with self-tapping screws.
Fix the roofing material, e.g. profiled sheet, cover with plywood. On the plywood then lay and nail soft shingles – who has what technology. “Foot” and sides of the roof is finished with any material. Want – you can wood – wagon, imitation logs or beams, want – siding.
In this case, the same materials are used as in the cladding of the house: so that everything looked a unified ensemble.
Another video example of assembly from the profile for drywall in video format.
The construction of a pergola from metal is described here.
Formation of the ring of the well with your own hands
If a headband or a canopy is made, the gray concrete ring remains in plain sight. The view is not the most attractive, so you want to decorate it.
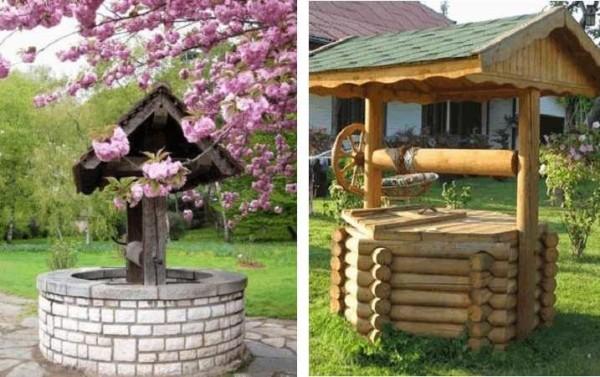
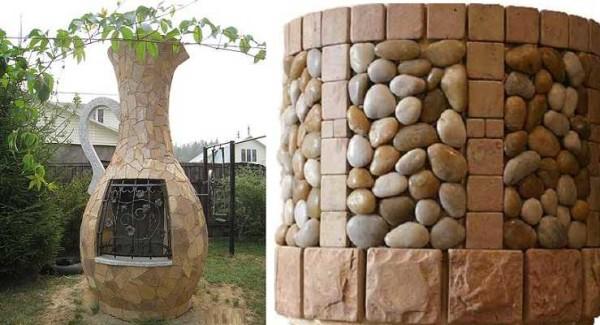
Finishing with stone
The most popular way to decorate the well is finishing with stone – pebbles or small crushed stone. If with the finishing material everything is more or less clear – buy or collect, then the question of what to hook it on, remains. There are several recipes:
- A bag of glue for tiles and natural stone 25 kg + a bag of dry mix 300 – 50 kg. All mixed, in dry form, diluted to a paste-like state with water. Soak the stones in water. A thin layer is applied to the ring – a vertical strip from top to bottom, pick up and lay the stones, sinking them into the solution. When some piece is done, before the mortar dries, the stones are cleaned, grouting the joints.

- M500 cement – 1 part, sifted medium-grained sand – 3 parts, PVA glue – 1/3 part, water – about 1 part. Work at about +20°C, wearing thick rubber gloves: it corrodes hands. Mix a small batch of mortar at once: 1 part is a 500 ml jar. This amount can be used before the mortar sets. The technology is similar: soak the stones, but also wet the well ring. Then a layer of mortar is applied to it, the stones are pressed in.
The third recipe for how to cover the well with stone, we offer in video format. The composition of the mixture here is very similar, but before applying the mortar, a grid is fixed on the ring. With this technology exactly nothing will fall off.
An interesting variant of the hinged lid on the well is offered in the following video: it hinges almost completely, but whether such a device is needed – you decide.


So, I recently spiced up my well house with some cute fairy lights and a rustic sign. It totally transformed the vibe! If you’re thinking of decorating yours, consider adding plants or some fun ornaments. It makes checking the well way more enjoyable!
OMG, I just decked out my well house! It’s got these cute fairy lights and a fun little garden around it. Such a vibe for summer nights! Closed wells can look fab too with some paint and cool plants. Can’t wait to show it off to my friends!