For normal life support, there must be water in the house or dacha at all times. The most common sources are a well or a borehole. Preferably – well. First, because as a rule, they reach rather deep aquifers with cleaner water. Secondly, they serve longer. Thirdly, they have a much higher flow rate (replenishment rate). It is also important that it is possible to drill wells for water with your own hands. There are several technologies, you only need to choose.
Contents of the article
Ways of independent drilling of water wells
Water wells are drilled or hammered – different technologies imply different ways. Drilling water wells with your own hands is not possible with all methods, but some are realistic to use.
Screw drilling
With this technology, the well is made with the help of a special drill – an auger. This is a steel pipe, with spirally welded blades. When rotating the shell is plunged into the ground. After it goes to its full depth, it is taken out, the soil remaining on the blades is poured out. The auger is lowered into the well again, and the pipe is added to the top and the excavation of the soil is continued. So, time after time taking out the shell and shaking off the soil, the borehole is drilled. Pipes at the ends can be threaded or connected by means of studs.
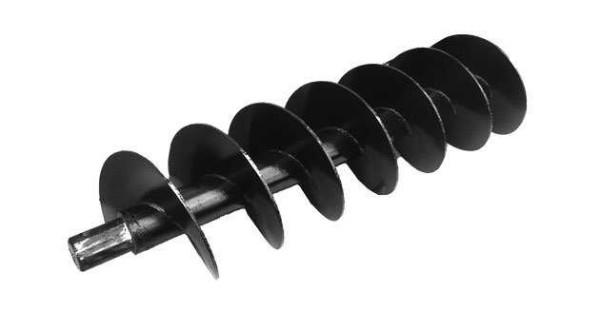
The disadvantage of this method is that it is not suitable for all types of soil. Soft or medium-hard rocks are normally drilled. If there is a stony or rocky layer, the work will be ineffective – the auger is powerless here. In loose soils there will be blockages, which is also problematic.
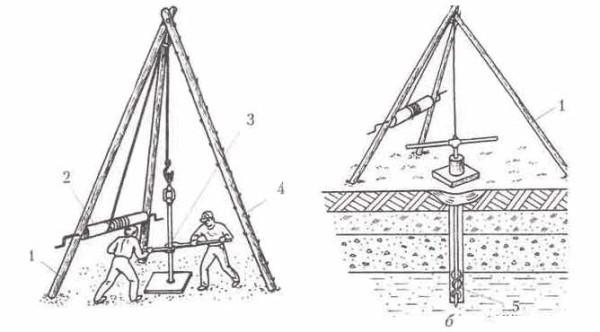
Quite powerful rigs work with this technology, but there are even hand auger drills. It is very hard to work with them, but it is possible. There is a simple device that makes auger drilling of wells for water with their own hands easier – it is a tripod with a gate and a block reinforced at the top. With the help of a cable, a winch and a block, it is easier to get the drilling shell, and it is necessary to do it often.
Motorized drilling rigs are more convenient, and not necessarily purchased. There are interesting self-made ones. In any case, it is a frame with a movably attached motor that drives the drill. An example of such an installation in the following video. The auger drill is not used for water wells, but the essence of the installation itself and the principle of operation from this does not change.
With the small size of the auger and rods, which increase the length (up to 1.5 m), this method of drilling wells for water can be used inside the house, cottage, bathhouse. The main thing is that the soils are suitable.
Hydrobudding (with the help of a pump or pump)
As is clear from the name, this method uses water for drilling wells. When used independently, most often water is fed by a pump into the pipe. It comes out through special holes at the bottom of the drill, flows out by gravity through the gap between the outer wall of the pipe and the walls of the well.
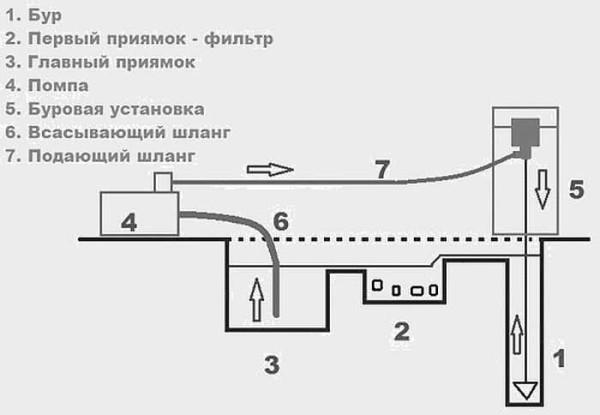
In addition to the drill and pipes with threads for this method, a pump is still needed. Before starting work near the future well, two pits are dug. In the first settles the main amount of soil, in the second comes water, deprived of most of the impurities. Water for the process needs a little – it is constantly circulating. From the first pit, sediments are periodically removed, usually with a shovel. If necessary, if the water becomes too dirty, it can be replaced. It is pumped out with the same pump, but not fed into the well, and drained somewhere on the site. Pouring a new batch of water can continue drilling.
After the well has reached the required depth, a casing pipe with a filter at the end is inserted into it. Recently, HDPE or PVC pipe is most often used. It is easier to work with HDPE – it bends well. The filter is a hole drilled at the end of the casing pipe. The length of such a filter is about a meter. Then you can wind a stainless steel wire on top, and a fine mesh of the same stainless steel on top.
Shock-channel method
One of the easiest in the realization of ways to make a well yourself – percussion-channel. But it is also the slowest, in the absence of mechanization requires considerable physical effort. On the other hand, it can be considered as a simulator. And very effective – almost all the muscles of the body work.
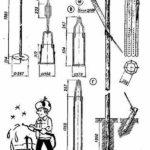
Shock-channel drilling of water wells with their own hands – a universal method that can be used on any type of soil. Only the projectile changes, and the technology and installation remains the same:
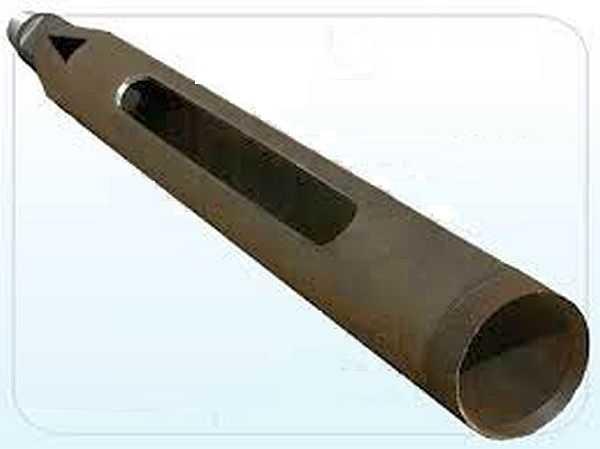
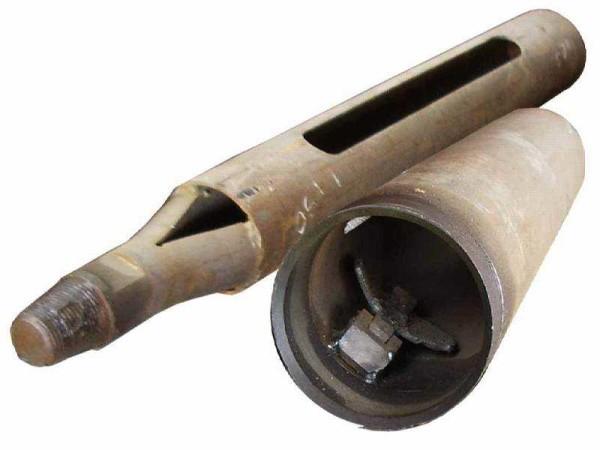
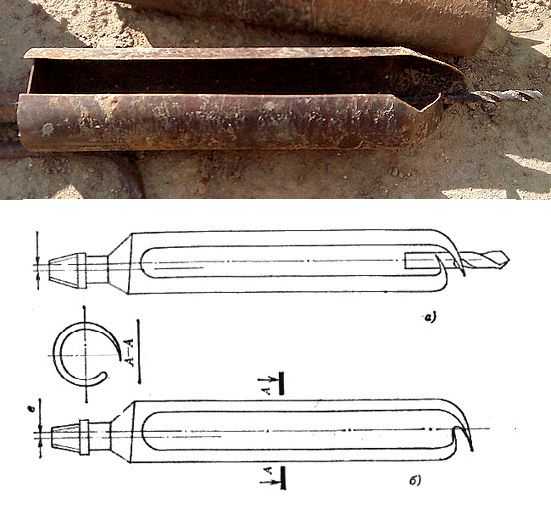
- On clay and other non-friable soils, a section of thick-walled metal pipe is used, at the end of which a cutting edge is made, beveled inward. It is also called a glass drill for its characteristic shape. It is not difficult to make it with your own hands. The main thing is to find a pipe with a thick wall (the thicker, the better). It remains to sharpen the lower cutting edge, make slits in the sides (for easy removal of soil), and in the upper part make “ears” for attaching the carabiner and cable.
- In the layer of loose rocks – crushed stone, sand – use chutes. This is a section of pipe to the bottom of which a spring-loaded valve is welded. Upon impact, the valve opens and the soil falls inside the pipe. When lifting under the action of gravity, the valve closes, preventing the rock from pouring out.
- In the same soils, it is sometimes more effective to use a drill spoon. It is so named for the specific shape of the lower part – two bent towards each other petals.
- A drill bit is used on rock. First the rock is crushed, then excavated with one of the above described shells – whichever is more convenient, it is used.
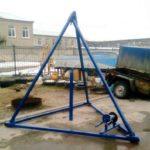
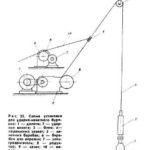
The rope drilling rig can be made in different ways. The most common type is a tripod, in the center of which a block is fixed. But the block can be attached to the L-shaped structure, also to facilitate labor, you can use an electric motor with a reducer.
- The design of the percussion-rope installation In the form of an L-shaped stand
- The tripod is the most common type of installation
- Method of mechanization
The very technology of percussion-channel drilling is very simple: the projectile is lifted, released in free fall. It is repeated many times. With each blow, the well becomes a little deeper. When a 50 cm section is passed, the projectile is taken out, freed from the soil. And everything is repeated again.
In order to drill faster, a heavy projectile is needed. If the pipe walls are thick, the weight can be considerable. If necessary, you can make it heavier by filling the upper part of the pipe with lead. Also, to speed up the passage, the lower edge can be sharpened, but it should be done so that the bevel is directed inward. One more thing: pay attention to the slots in the drilling shells. They facilitate the removal of rock. This is especially important when passing dense, viscous clay layers.
The rope for the percussion-rock drilling rig needs a diameter of 10-12 mm. If you will be working manually, gloves are required. When going through the upper layers, it is easier to use a hand drill, and for easier passage of the upper layers in dry times, you can pour water into the drilled hole.
Casing and filter
All the above-described technologies of independent drilling of wells for water have common features. After the well has reached the aquifer (water in large quantities will appear in the rock), for some time continue to drill, deepening into the depth of the aquifer by 1-2 meters. Then the whole drilling shell is disassembled, and a casing pipe is installed inside the well.
The casing pipe must be sorted out. Choose the diameter depending on what size you drilled the well and on the type of pump you plan to use. You have to be careful about the choice of material. For some time, asbestos pipes were used for casing. But they are very harmful – the strongest carcinogen. Do not use and galvanized pipes – zinc is not removed from the body, accumulates. And its poisoning has very bad consequences.
There is not such a large choice – pipes made of steel and stainless steel, as well as plastic – HDPE and PVC. Stainless steel is almost an ideal option, except for the price and complexity of welding. In order for the seam not to rust, welding in argon medium is necessary, and this is not easy. Although, to some extent can help special electrodes for welding stainless steel.
In recent years, increasingly popular pipes made of plastic. PVC and HDPE – cheap and surdyto, but for their installation the well must be perfectly level. Another point – plastic does not tolerate loads very well. Therefore, they can be used at a shallow depth – up to 15 meters. In any case, put for the well sewer pipes is not worth it, it is better still to find water pipes, although they are more expensive: the walls in them are of different thickness, so that the investment will be justified.
Steel pipes will definitely not doubt and will stand for a long time, but they also have a significant disadvantage: they rust. Nevertheless, of the above options, it is metal that is optimal, if there are no funds for stainless steel.
To get water inside the casing pipe, in its lower part, which is immersed in the aquifer, make a filter. In the pipe, holes are made. There are two options. The first – with a large-diameter drill, in four rows in a staggered pattern. The second – cut longitudinal slits (size 1,5-2,5 mm) with a bolgar.
On top of the pipe wind the wire (3-4 mm in diameter), and on top of it fix the mesh with a very fine mesh. It is best to use stainless steel. In this case, it will be possible to wash the filter from deposits using washing solutions, and the wire and mesh can be welded to the pipe.
If you use any other metal, the filter will fail after a while. Black metal rusts, the others deteriorate due to electrolytic corrosion.
Abyssinian well or needle well
This type of manual drilling of wells for water and drilling is not called drilling – a special rod with a cast cone-shaped tip is hammered into the ground, increasing as needed by pipes-bars (length of one 1-2 meters), which are connected by threads. Call this type of wells in different ways, hammered, Abyssinian, needle. All this is about one method.
The difference from all other methods is that these pipes remain in the ground, it is through them that water will flow. That is, it is a well without installing a casing. It is penetrated with the help of these pipes, they are then used. Therefore, as rods that are used to build up the needle, water pipes with a thick wall are used. Diameter from 25 -32 mm. Since the pipes are hammered permanently, their connection must be airtight. Traditionally, to increase reliability use winding (usually – linen), it can be covered with sealant.
The first element of the Abyssinian well is called a needle. But the tip-peak is far from the only difference between this part and others. Almost the entire length of the pipe is drilled holes in it. This is a filter for water. Through them, water will flow inside. To prevent them from clogging with rock, a wire is spiraled over the pipe, and a fine mesh is attached to it. In order for the well to serve for a long time, not clogged, it was possible to make washing, the wire and mesh should be made of stainless steel. Only in this variant will serve the filter for a long time and without problems. The use of other metals, even if stainless steel, much shortens the life of the well – metals are destroyed by electrolytic corrosion. Therefore, brass, copper or any other wire or mesh on the steel pipe is not suitable.
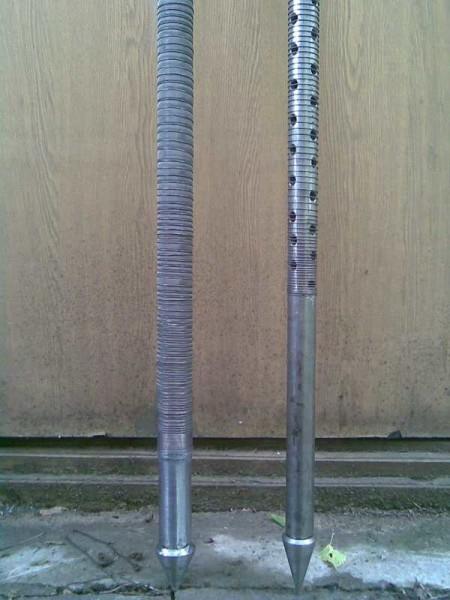
One more point. To ensure that when hammering the mesh and winding do not tear off, they are welded to the pipe. The next point: the diameter of the wide part of the cone should be wider than the diameter of the pipe. When hammering, the cone leaves a hole wider than the pipe with winding, so it will not be torn off.
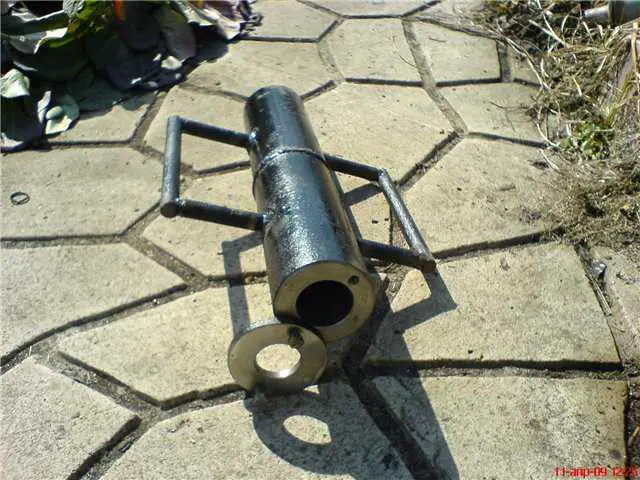
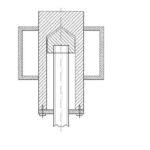
Technoprocess of hammering the needle-hole is extremely simple: hit the pipe, driving it into the ground. But if you bang something heavy on top of the pipe, it deforms. That is why they make a special device – a headstock and a cone, which is screwed onto the top of the pipe. Inside the headstock the striking surface is also cone-shaped. The cavities inside are filled with lead to increase the weight. The more the projectile weighs, the faster the pipe will be clogged, but note that you have to lift it with your hands and very many times.
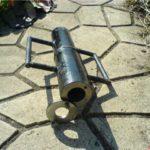
The sheep itself is much larger in diameter than the pipe that will be hammered. To ensure that there is no backlash in its movement, a washer of suitable diameter (slightly larger than the outer diameter of the pipe) is installed at the bottom. As a result, the headstock moves up/down freely, but without any backlash. The lifting height of the projectile is determined by its dimensions – it is necessary that it does not fly off the pipe to be hammered. The appearance of the headstock for hammering an Abyssinian well and its drawing are located below.
- The headstock for hammering the well-needle in section
- This is how the shell for hammering the well looks like
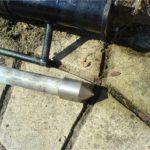
- This is a cone for centering the impact force
This is not the only device with which wells are hammered. A powerful clamp is made on the pipe, which is fixed on the principle of a clamping clamp. Instead of a headstock, a heavy metal ring with two handles is used. How to work with it – see the video.
As you can see, you can punch a well for water inside the house or even at the bottom of an old well. Not much space is needed.
How to equip a punched well
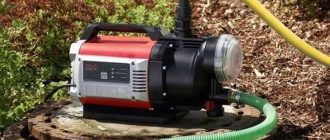
Punching/drilling a well is not enough. It is necessary to raise the water, and this is a different story. How to conduct water from the well to the house read here. If you want to make the water supply permanent, with normal pressure, so that you can connect household appliances, you need a pumping station.
For seasonal water supply in the dacha can do with a more modest set:
- vibrating pump;
- check valve, which is installed before the pump;
- water tank;
- irrigation hose;
- taps, etc.
Note that the check valve is installed before the pump, and not at the end of the hose immersed in the well. Just so this very hose will not burst at frosts. Another advantage of such a device – it is easier to dismantle for the winter.
Another tip: the well should be closed with something. In houses of permanent residence make a caisson – a concrete or plastic bunker, which is located below the depth of frost. All equipment is placed in it. When using water only periodically, the caisson is too expensive. But close the well with something you need. Firstly, it can fall into it some critter, which will not please you. Secondly, “kind” neighbors can drop something. A more budgetary way out is to build a house like a well house. Even cheaper option – dig a pit, cover it with a board, make a boarded cover. The key point: all this should be locked.



Building a water well by hand is such an awesome DIY project! I remember the thrill of drilling our first well. It felt rewarding to finally hit water after all that hard work. It’s way more than just saving money; it’s about the pride in doing it yourself!
Totally agree! I helped my buddy dig a well last summer, and when we finally struck water, it was pure magic! It took forever, but seeing that clear water was better than any paycheck. There’s something special about putting in the elbow grease and reaping the rewards yourself!