Modern trends in room design call for a minimum amount of furniture. Only what you can’t do without. That is why closets, closets and other cabinet furniture are disappearing, and all things are placed in special rooms – dressing rooms. And it is not necessary to have a large space for its equipment. You can even re-equip a pantry. How to arrange a dressing room in the pantry – in the article.
Зміст статті
Transforming the pantry: the order of actions
Turn the pantry into a closet is not very difficult – the walls, floor, ceiling are already there. Subject to replacement, usually only the doors. They are most often changed to sliding, but the usual swinging – also not bad. The rest of the room is simply repaired. Repair can be done using inexpensive materials, and the main sum is directed to the filling for the dressing room. This allocation of funds will be more reasonable, since it is the shelves-cabinets-drawers that provide convenience, not the walls finished with expensive materials.
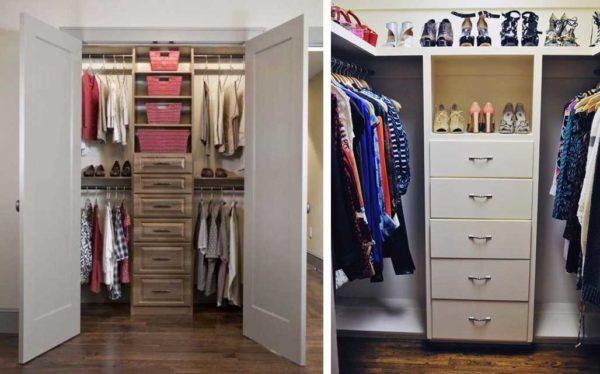
The order of work when turning a pantry into a dressing room is as follows:
- Remove everything in the pantry. All shelves, hooks, furniture, if there is any.
- Dismantle the doors and the door frame. At this stage you need to decide whether the doors will be the same width or need to expand the doorway, in addition, they will be swinging or sliding.
- Next, you need to decide how exactly you will repair the walls in the future dressing room.
- If the walls are very crooked, there may be problems when installing cabinets. In this case, it is better to knock down the old plaster, plaster everything on the beacons, finally leveled with putty.
- If the walls are relatively flat, without large drops (up to 1 cm) you can do only plaster, having previously removed finishing materials (whitewash, paint clean up to clean plaster).
- Another option – just refresh the finish: paste wallpaper, paint, and all the irregularities corrected when installing equipment (an option for those who can find a way out of any situation, as there will be a lot of mess).
- We tidy up the ceiling. Usually it is painted or bleached, so usually just refresh the finish.
- Install new doors.
- Next, tidy up the floor. Refresh the paint or lay linoleum, you can use vinyl tiles. There is no point in using more expensive materials.
The dressing room in the pantry is 50% done. Repair work is over, you can start filling the closet. This is where the nuances begin, as the “content” depends on the location of the dressing room and the things you plan to store in it.
Width of the dressing room and location of the doors
As already said, the doors to the dressing room can be swinging or sliding. Sliding doors are good because they take up little space when open. With sufficient width of the doorway, they can be double-leaf (or even three-leaf), when opening one part can “drive” on the second or all can be pushed to a free section of the wall next to it.
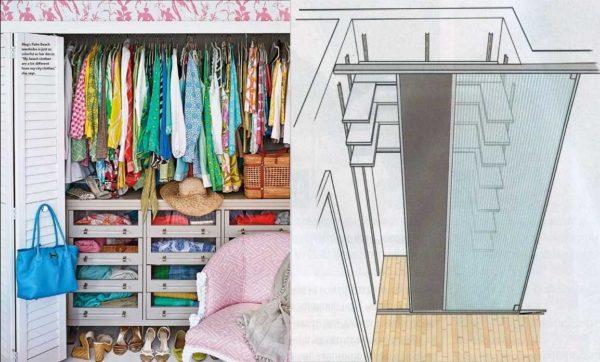
Checkroom in the pantry can also have swinging doors. They are not so convenient, but they cost less. If you decide to install swinging doors, you need to think about the place of their installation, take into account the convenience of use and safety.
In general, it is more convenient if the doors to the dressing room are sliding (like a compartment) and wide. If the storage system is built “from scratch”, the doors are most often made in the full width of the room and it is the sliding system. In pantries, the doors are often narrow – 60-70 cm. It is hardly worth making the swing doors much wider, as this “eats up” useful space.
In a narrow dressing room
A little about where the swing doors should be located if the dressing room in the pantry has a small width. If the room has a width of 135-145 cm, the best option for installing swing doors is 10 cm from the left wall, with opening inwards. Taking into account the installation of a 5 cm wide platband, there will be a gap of 5 cm to the wall. This looks normal and there is a 55 cm wide space on the right, in which the storage area is arranged – shelves/hangers. But it is realized in rooms with a width of at least 135 cm.

If the width of the pantry is even smaller – about 130-120 cm wide, you can push the doors close to the wall or remove the platband on the side of the dressing room. This is not technological and not very beautiful, but usability is much more important.
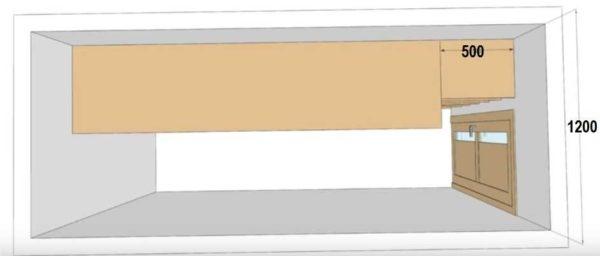
In order that in such a layout things do not interfere with closing/opening doors, at the entrance install a zone of shelves, the width of which is 30-40 cm. Here you can store shoes in boxes, place drawers for underwear and trifles, shelves for sweaters/jumpers, etc. Further on, you can already organize the storage area on hangers with a width of 60 cm.
With an average width
If the width of the dressing room in the pantry is 150 cm or more, you can arrange a double-sided storage system – to the right and left of the entrance. In this case, the doors are placed so that on one side there is a distance to the wall of 55 cm (including the installation of the door frame and platband will be 60 cm). Here you can place the area with hangers. On the other – in the entire wall to make shelves with a width of 30 cm.
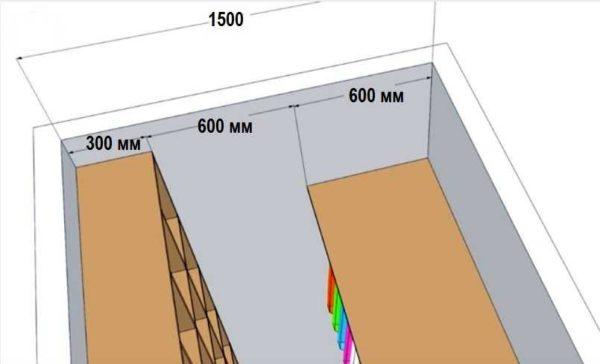
This layout is retained until the width of the room is 175 cm. Another arrangement in this case is simply not possible. So if your dressing room in the pantry has a width of 150-175 cm, just change the width of the shelves, leaving a passage of 60 cm wide. By the way, if the occupants are large, you can leave the width of the shelves the same, but increase the passage. In this case, a person of large size will be more comfortable.
For wider pantries
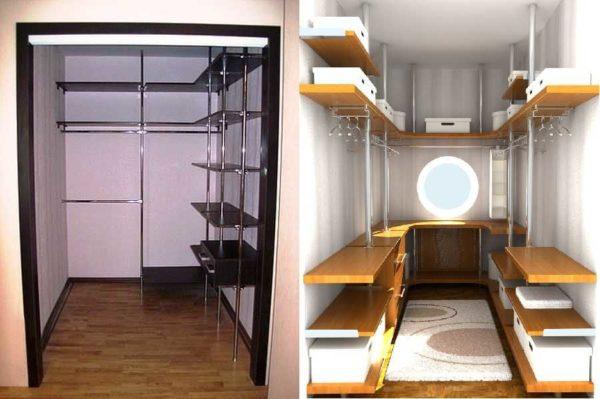
With a width of 175 cm or more, on both sides you can place hangers, allotting 60 cm for them on the right and left. In this case, the pipe for storing things on hangers is placed at a height of 200-210 cm, above it make a wide shelf for placing oversized and rarely used things (spare pillows/blankets, suitcases, non-seasonal clothes).
At a height of 50-60 cm, under the hangers install shelves or drawers for storing things, shoes. With this option, the doors usually open outward. Otherwise, in the open state, they close access to part of the clothes. But if the dressing room goes into a narrow or dark room (corridor, for example), the doors should open outward. Because there is a high probability that if you forget to close the doors, you can hit your forehead on the end of the ajar door. This is much worse than an inconvenience.
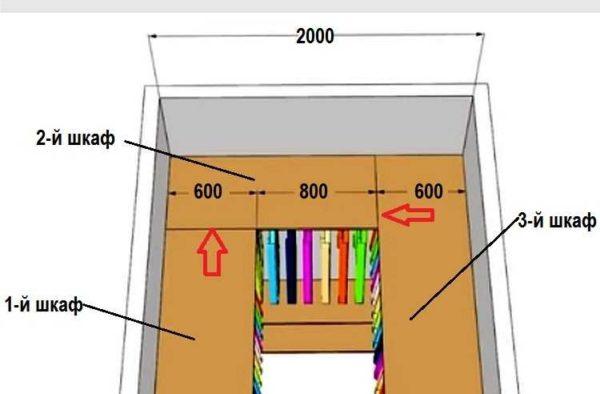
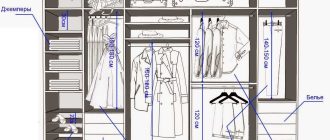
With the width of the dressing room from 2 meters and more, you can already do a three-sided placement of things. To do this, three closets are made with overlap – one closet overlaps the other. In this case, the zone to the left is made shorter, put the second closet, the length of which is 60 cm shorter than the width of the closet. And only the zone to the right of the entrance takes up space from one wall to the other (see the picture above).
Why do you have to do it this way? Because if you are right-handed, then to get to the things located in the zone of overlapping cabinets (in the corners) you will have to push things away and it is more convenient to do it with your right hand. With your left hand at this time you will remove the necessary hanger. The opposite is not convenient for right-handed people.
Location of the pantry/cloakroom and its filling
Filling for dressing rooms – shelves, pipes under hangers, drawers and some more special devices like hangers for pants, skirts, ties. These devices help to rationally use space, but are expensive. Therefore, with a limited budget, the dressing room in the pantry is perfectly fine with only a standard filling.
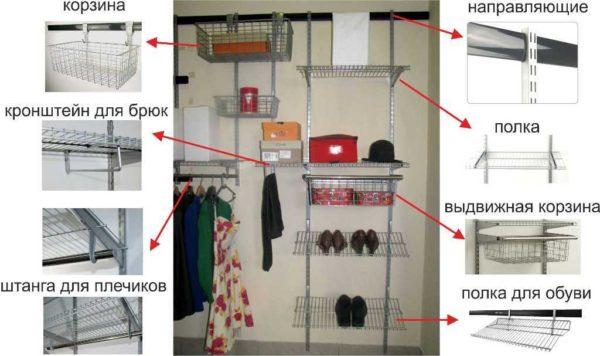
Near the front door
If your walk-in closet in the pantry is located near the front door, it is likely to store seasonal clothes and shoes, hats, gloves, etc. The filling is selected in this case accordingly. You will need a pipe to hang outerwear. The height of this compartment is 3/4 of the height of the owners. If space permits, you can allocate a place to store jackets, jackets and other similar clothes. The height of this compartment – 1/2 of the height of the “users”. In the lower part of the compartment is necessarily allocated a place for shoes. Here it is stored without boxes, so you need to think of some devices (do not forget about the section for boots with long shanks).
In the upper part of the small dressing room at the entrance make shelves for storing hats. Small bags can also be sent there. Still need a couple of drawers for change and haberdashery. If there is space, you can allocate a long narrow compartment for storing umbrellas.
In the bedroom
If one of the walls of the former pantry goes into the bedroom, in the dressing room from the pantry the filling is selected differently. Most of the time there will be all the seasonal closet – everything that is worn at the moment. That’s why more compartments are needed. Dresses, suits, skirts and pants need compartments with hangers. If the ceiling is high enough (2.5 – 2.7 meters), you can place two compartments for storing things on hangers: one above the other. In the lower part you can install an ordinary pipe, in the upper part it will be more convenient to use a pantograph. Pantograph is a pipe equipped with a mechanism that allows it to lower and raise.
Compartment with a lowering pipe is more convenient to do on the side wall, but only if the width of the former pantry allows the pantograph to lower. If not, move this compartment to the wall opposite the entrance.
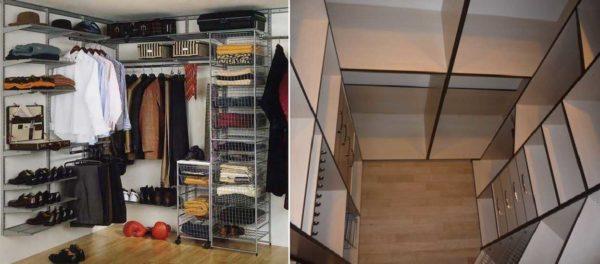
For a small dressing room in the pantry, the wall of which goes out into the bedroom, it is worth installing a few open shelves under folded things – sweaters, sweaters, T-shirts, etc. Less bulky and more convenient are wire drawers or shelves. They save space and you can see better what is in these drawers/shelves.
You will definitely still need drawers for underwear, socks and other such small things. They can also be wire, but convenience is not affected. Perhaps some people will even be uncomfortable with the fact that the laundry is visible even when the drawer is closed.
If you have a large number of shoes, they can’t all fit near the front door. Then more shelves for shoes are needed. But usually shoes are stored here, which are worn infrequently, so put it in boxes. For their placement is suitable for ordinary shelves with a width of 35-45 cm. In this case, all the boxes will be in plain sight and it will be convenient to get them. To reduce the cost of the project, you can instead of shelves to strengthen two pipes on which the boxes will be placed. This is convenient, inexpensive, and everything is clearly visible.

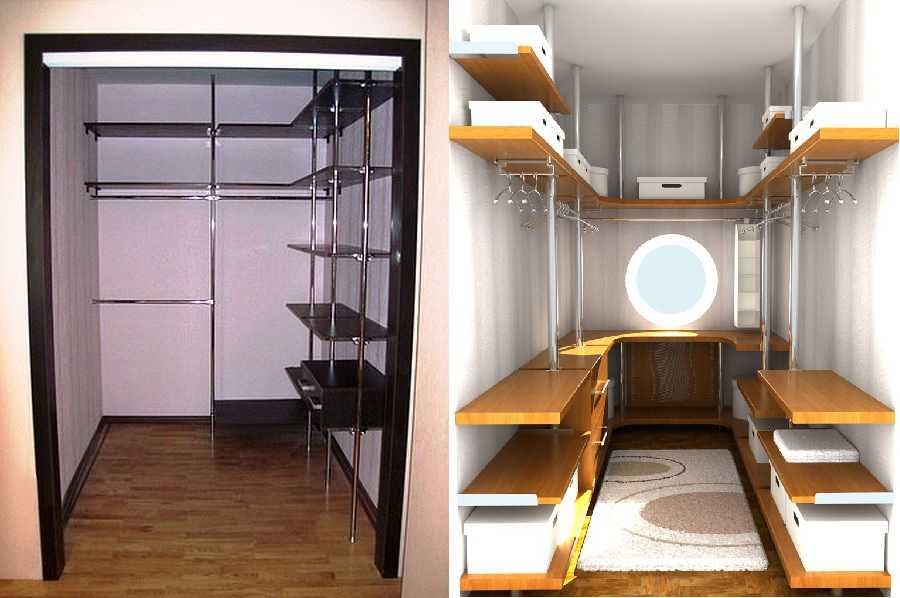


I recently converted my tiny pantry into a stunning walk-in closet! I cleared out the shelves, added some DIY hanging rods, and organized my shoes in cute bins. Now, I have a stylish space for all my clothes and accessories. It’s fab and super functional!
Turning my pantry into a walk-in closet was a game changer! I just cleared out the old stuff, added some shelves, and organized my shoes. Now I feel like I have my own mini boutique at home! Totally recommend it for anyone looking to up their storage game!
That sounds awesome! I did something similar with my garage. Cleared out all the junk and put up some shelves—now it’s like my personal workshop. Just feels good to have everything in its place, right? Definitely a game changer! Storage hacks for the win!
Totally agree! I did a major clean-up in my shed last summer. It was packed with tools and old stuff. Once I organized it all and added some hooks, I felt like a pro! Now I can find everything easily. Storage hacks are lifesavers for sure!
That sounds awesome! I did something similar with my closet last summer. Cleared out the clutter and got some shelves for my bags. Now it’s like my own little fashion corner! Seriously, organizing really boosts your vibe at home. Great tip!
That sounds awesome! I once converted my spare room into a mini gym, cleared out all the junk, and now I love working out at home. It really changes the vibe! I totally agree, organizing your space feels like leveling up in life. Great idea!
Thanks! Totally get it—cleaning up space gives such a fresh start. I did a similar thing with my garage; turned it into a little hangout spot. Now I feel more relaxed at home. It’s crazy how a tidy space can boost your mood and motivation!
I totally loved this idea! Turning a pantry into a walk-in closet is so clever. I did something similar when I transformed my old storage room. It felt like a mini makeover, and now I have this awesome space for all my clothes. Super inspiring tips here!