Having “straight” hands, most of the work around the house can be done by yourself. This category of work includes installation of a toilet bowl. Knowing the sequence of actions installation or replacement can be done with your own hands.
Зміст статті
Types of toilets
In this article we will consider not the features of the flush or the shape of the bowl, but those features of the design, which determine the list of installation works.
According to the method of installation
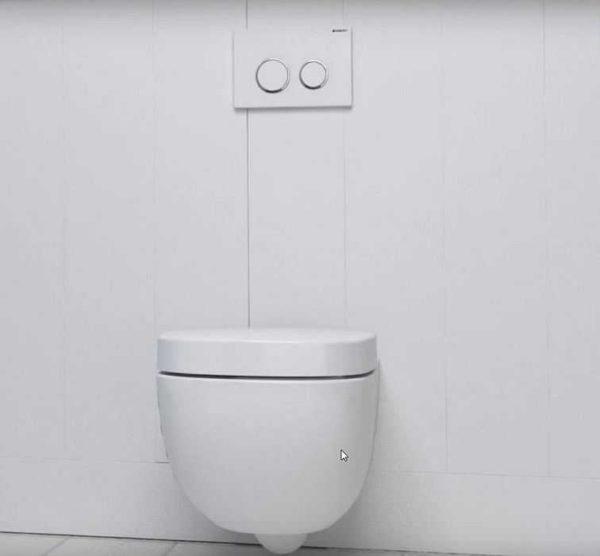
The toilet bowl itself consists of a sanitary bowl and a cistern. The bowl can be floor-mounted or suspended. If the bowl is suspended, then the cistern is hidden installation – built into the wall. In the case of a floor bowl there are three options for fixing the cistern: on a special shelf on the bowl (compact), separate, connected with a flexible hose, in the installation (hidden in the wall frame).
The advantage of a floor toilet bowl with a conventional cistern is the simplicity of installation. It can be put without starting the repair. The disadvantage – compared to a suspended one, it takes up more space and looks heavier. Accordingly, the installation of suspended models is complicated – it is necessary to fix the supporting structure – installation – in the wall. This is possible only during repair.
Sewer outlet
The choice of a toilet on the outlet into the sewer depends on the location of the sewer pipe. There are:
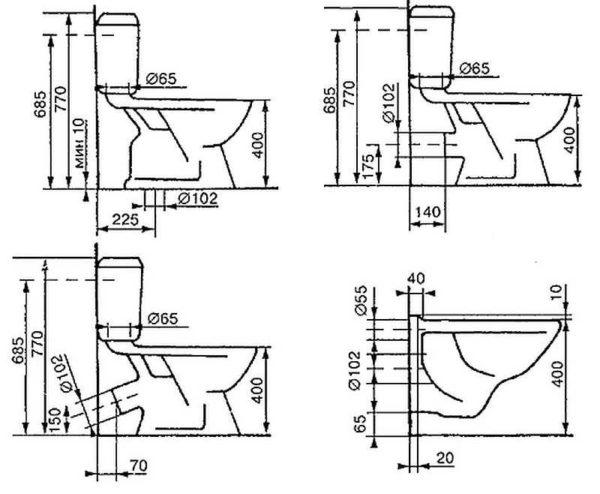
If the pipe is in the floor, the vertical outlet will be optimal. If the outlet is in the floor, but is close to the wall, an oblique toilet is most convenient. The horizontal option is universal. Using a corrugated spigot, it can be connected both in the wall and in the floor.
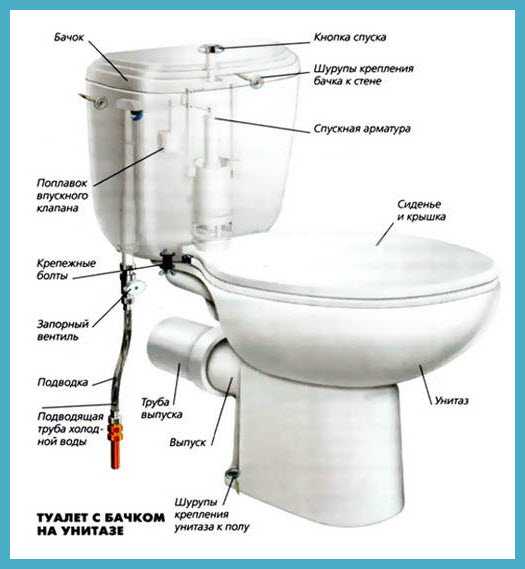
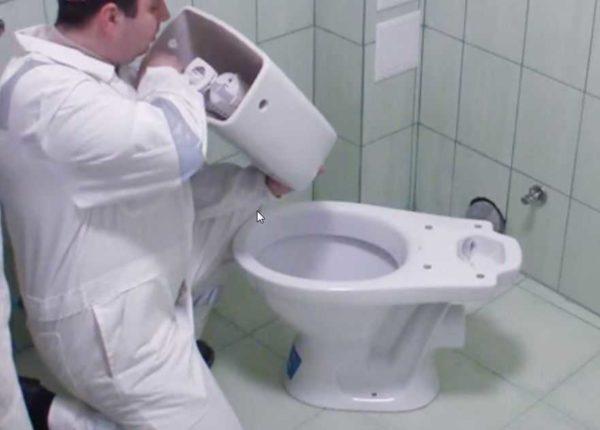
Installation of a toilet bowl with a cistern compact (floor version)
From the store usually bring separately the toilet bowl, cistern, flushing device and float. Before installing the toilet bowl, everything except the float must be assembled.
Assembly
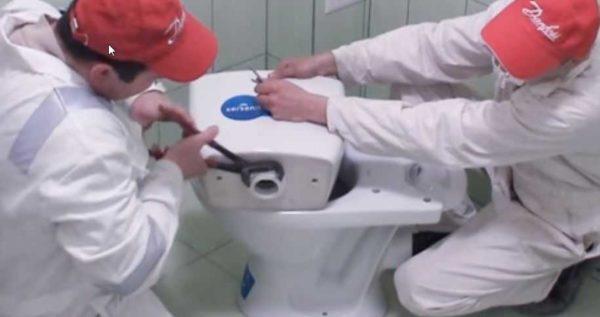
The process begins with the installation of the flushing device. It comes in assembled form, it is only required to install in the hole in the bottom of the cistern. A rubber gasket is placed between the drainage device and the cistern.
The plastic washer included in the set is screwed onto the spigot from the back side. It is tightened by hand, then – using a wrench, but very carefully, as it is easy to break the plastic. To prevent the drainage device from spinning, it must be held by hand.
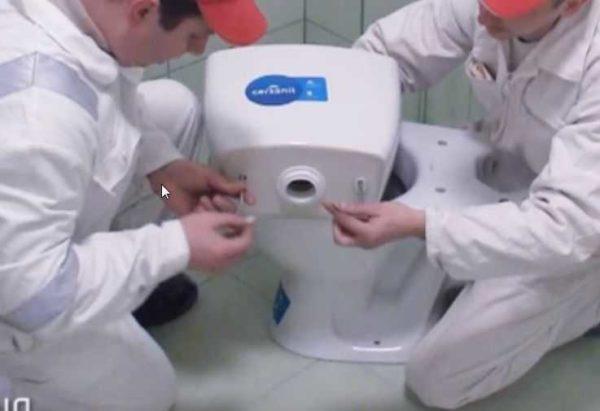
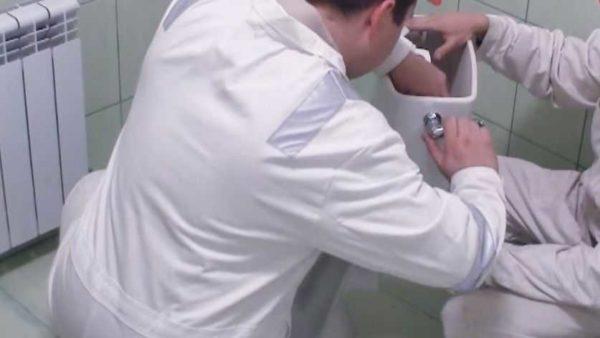
The next step is to install the fixing screws on the cistern. They are also included in the standard equipment. These are long thin screws made of galvanized or stainless steel. They are inserted into two small holes in the bottom of the tank, put on rubber gaskets, then washers and only then screw on the nuts.
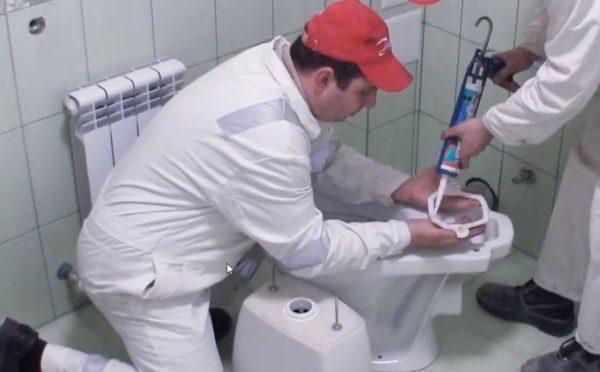
Before installing the cistern on the toilet bowl, a gasket (included in the kit) is placed under the cistern. To prevent odors from seeping out of the sewer, it should be “planted” on the sealant. We grease first on one side, put it on the toilet bowl, grease on the other side, put the cistern.
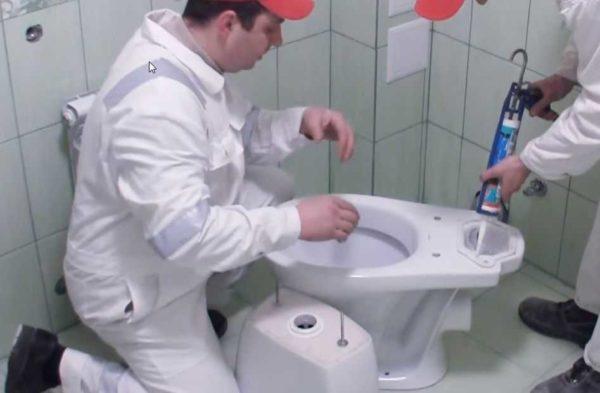
Install the cistern on the shelf of the bowl, passing the screws into the corresponding holes. Put washers and nuts on the screws from below and tighten them. Make sure that the cistern is level.

Next, put the float – a device for controlling the water level in the cistern. In the upper part of the cistern there are two holes. Here in one of them and insert the device. It is mounted on the side from which the water supply will be connected.
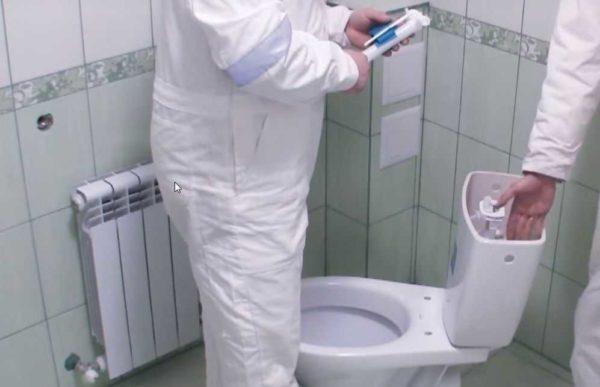
On the outlet spigot, wind a little linen, lubricate with sanitary paste, install the corner (brass or stainless steel). Do not tighten the connection strongly, do not hammer that the spigot is made of plastic.
Mounting on the floor
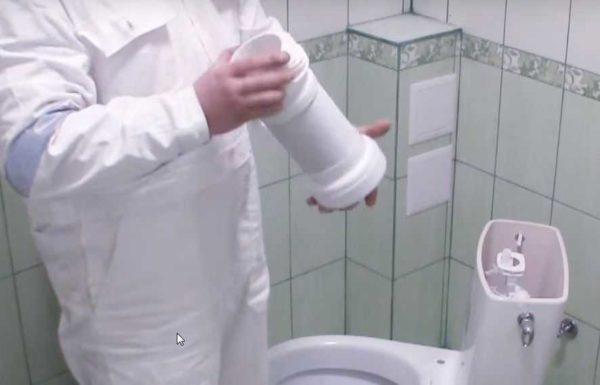
The toilet bowl is almost assembled, you can put it in place. To the sewerage system, the toilet bowl is connected using a corrugated adapter. At the ends it has rubber seals that fit tightly into the pipes and on the toilet bowl outlet.
If the sewer pipe is plastic, the corrugation is simply inserted up to the stop. If the riser is cast iron, and even not new, so that through microcracks did not leak odor, the pipe is cleaned to metal, washed and dried. On the dry clean metal around the circumference put a layer of sealant (at the bottom a little more), then insert the corrugation. For greater certainty, you can go sealant and the outside of the connection.
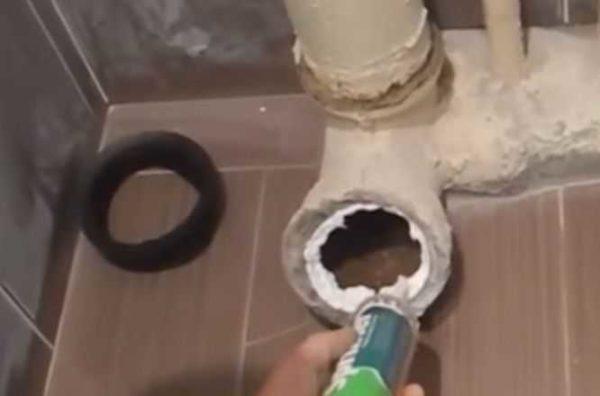
In any case, we insert the corrugation into the sewer pipe.
The second end of the corrugation is put on the toilet bowl outlet. This is the connection of the toilet bowl to the sewer. Everything is so simple. Only there is one nuance. To make it possible to remove it later, the outlet of the corrugation and the toilet bowl outlet are lubricated with soap moistened in water, only then put on the socket. If this is not done, it will be problematic to remove the toilet bowl without damaging the corrugation. After all, you will have to drill holes for fasteners. It will be much more convenient to remove, rather than trying to move the partially fixed device.
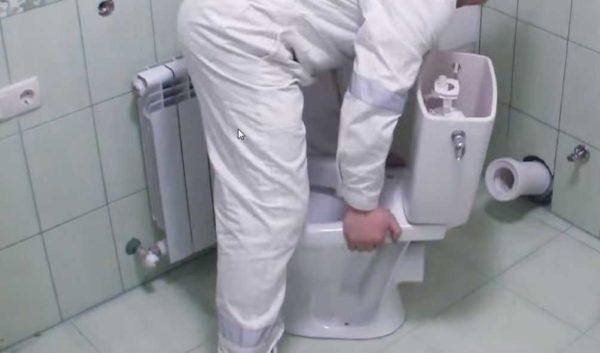
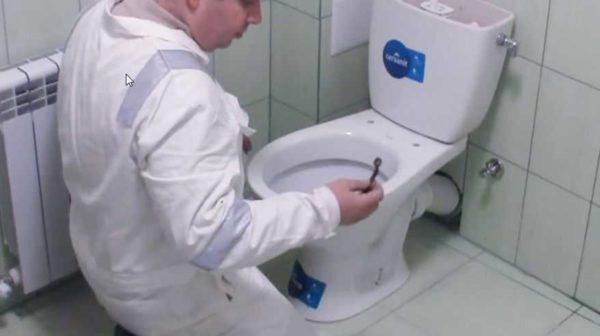
Putting the corrugation on the outlet, we put the toilet bowl as it will stand. Having installed the lid on the cistern, check that there is room for it. Then it is necessary to sit down, check the comfort of use, if necessary, correct the position. Then take a pencil or marker, inserting it into the holes in the sole, mark the places for the installation of fasteners.
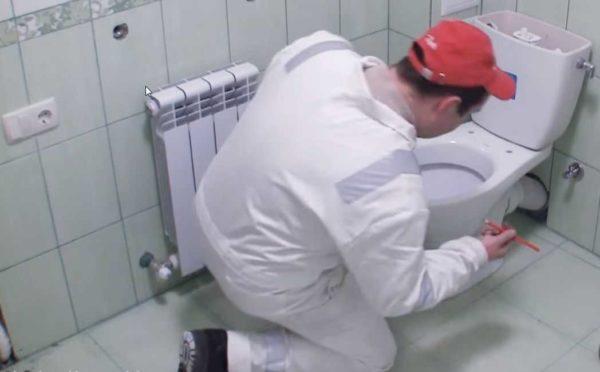
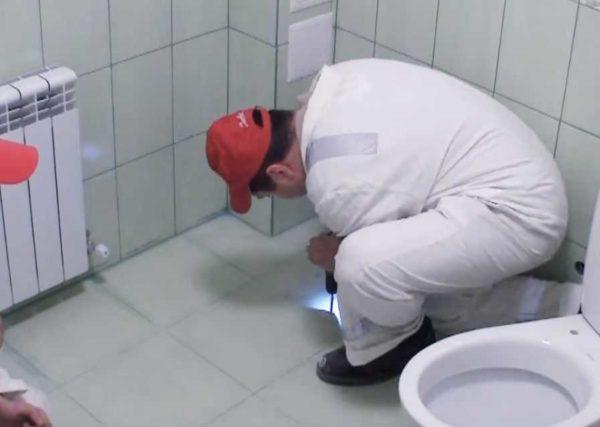
Having removed the toilet bowl, drill holes for dowels in the marked places. If the kit comes with plastic fasteners, do not use them – they will break in a few days. It is necessary to put powerful dowels at once.
If the toilet bowl is installed on a tile, so that it does not crack, the glazed surface is better to knurr. You take a self-tapping screw, put it in the mark, hit it several times with a hammer. This is called “nakernit”. Then take a drill or perforator and drill the tile, turning off the shock mode. After the tile is passed, you can turn on the perforation mode.
In the holes put plastic plugs from dowels. They should be in the same plane with the floor. If there is a thicker edge, cut it off with a sharp knife.
Sweep the floor, removing dust in the place of installation of the toilet bowl. Put it in place, insert dowels into the holes, screw them in with the appropriate wrench. It is necessary to tighten the bolts alternately from one side and from the other. Tighten until the toilet bowl is firmly in place, without play.
The final touch is the connection to the water supply. Connect the outlet of the water pipe with a faucet installed on it with the corner on the cistern, which was connected earlier. To do this, you need a flexible hose. At its ends there are cap nuts (american), so there will be no problems with fastening. Tighten well, but without fanaticism.

Then put the lid, install the flush button, do a test run of water. If a drop is found somewhere, tighten the connections. That’s all. Installation of the toilet bowl with your own hands is finished.
How to install a suspended toilet bowl with installation
To install a suspended toilet bowl, the outlet of the sewer pipe should be located near the wall. The specific distance from the wall is specified by the manufacturer, but it should be small – from the far edge of about 13-15 cm. If the exit is from the floor, there is a solution – a special overlay, with which the drain is moved closer to the wall.
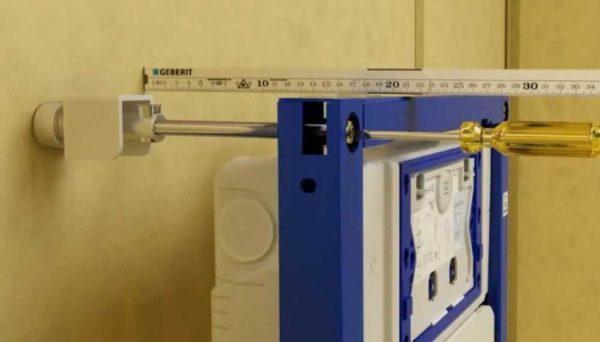
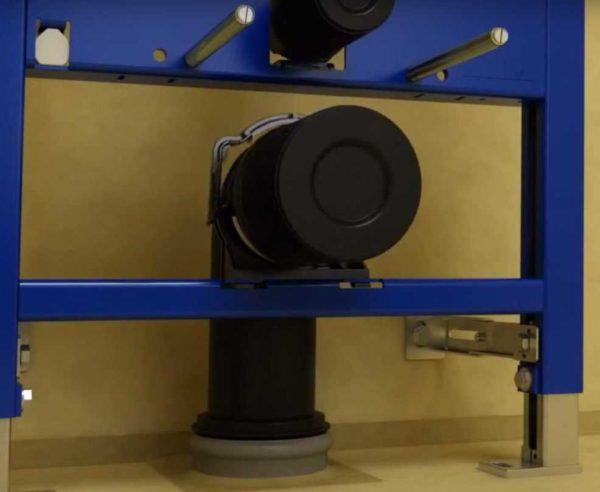
Installation of a suspended toilet bowl begins with the attachment to the frame of the installation of stops in the wall. They are attached two at the top and bottom. With their help, the distance to the wall is adjusted, the frame is raised and started.
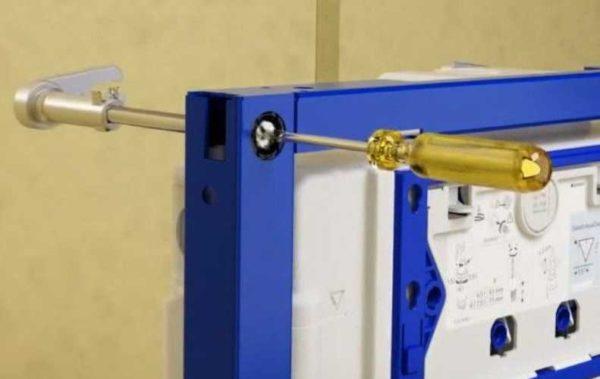
The upper stops look like rods and are adjusted with a socket wrench and a screwdriver. Lower stops are more like plates, they are also adjusted with a socket wrench, but with a side head.
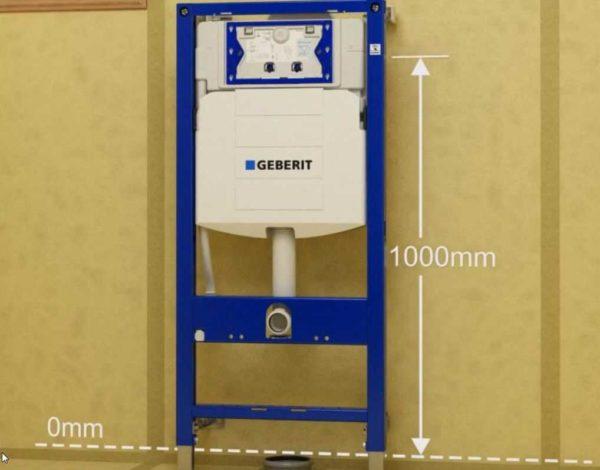
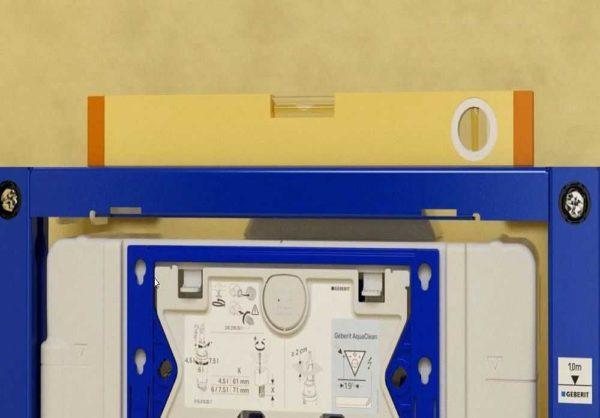
The assembled frame is placed against the wall, its center is set above the middle of the sewer outlet. The mark on the frame is raised or lowered to the height required by the manufacturer (there is a mark on the frame, also indicated in the passport, usually it is 1 meter).
With the help of a bubble level, the horizontality and verticality of the installation of the installation for a suspended toilet bowl is checked.
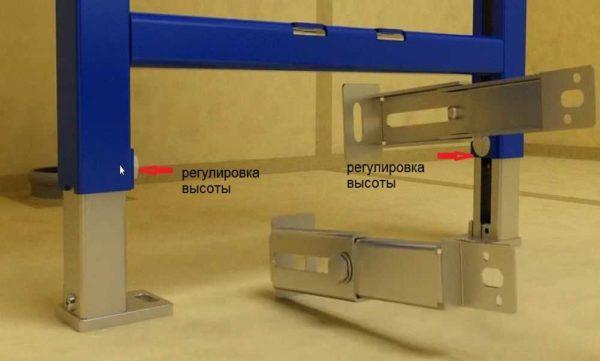
By adjusting the height of the stops, the equal distance from the wall set by the manufacturer is set. How it is convenient to do it, look at the photo.
The set frame should be fixed to the wall. In the appropriate places mark with a pencil or marker, drill holes. Plastic dowel bodies are installed in them. Most of the suspended toilet bowls are imported, and they recommend to put the dowel bodies on the sealant. Some sealant is squeezed into the drilled hole and the dowel is inserted. Then, before installing the fixture itself, the sealant is applied to the plastic housing.
In the fixed installation, you can put the connecting elements – spigots, couplings. All of them are included in the set, just fix them in their places.
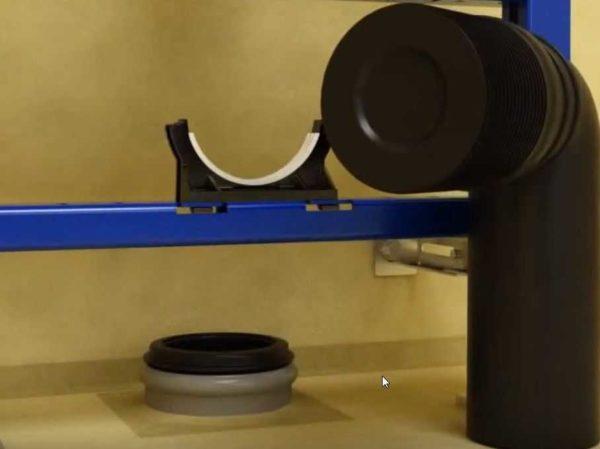
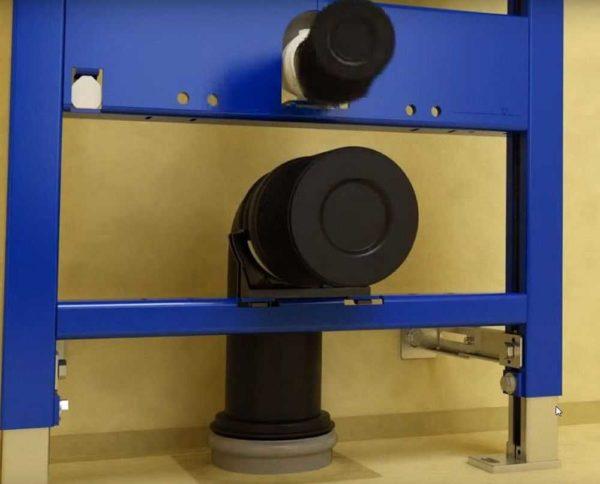
Next, metal rods are installed, on which the toilet bowl will be held. They are screwed into the corresponding sockets, silicone gaskets are put on top (on the bottom photo these are two rods above the sewer outlet).
The sewer pipe is extended to the required distance, fixed in the set position with the help of a bracket. It covers the spigot from above and is inserted into the groove until it clicks into place.
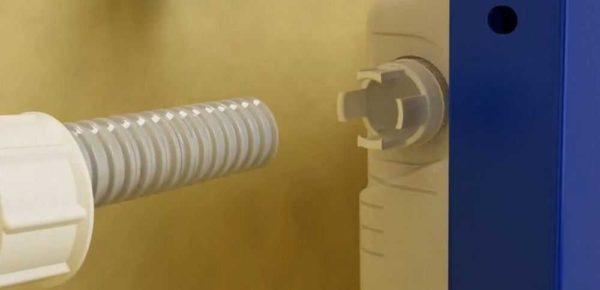
Next, water is connected to the cistern. Open the lid of the cistern (it is on the latches), remove the plug on the side surface. Right or left – depends on where the water is connected. A corrugated pipe is inserted into the opened hole, a mating part is inserted from the inside, everything is connected using a coupling nut. Tighten without applying excessive force – it is plastic.
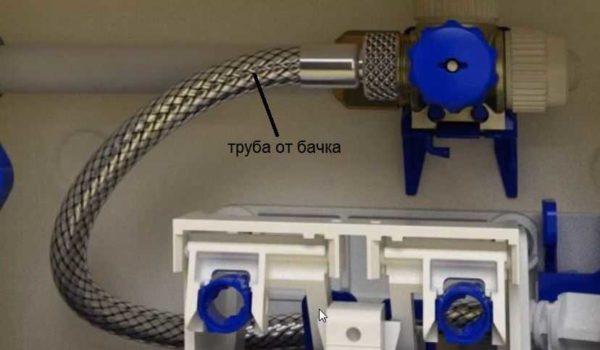
Inside the cistern, a tee is installed, a pipe (usually plastic) is connected to the desired outlet. This is done with the help of an adapter and an American pipe.

To the special input of the tee, the hose from the cistern is connected. It is flexible, in a metal braid. It is tightened with a coupling nut.
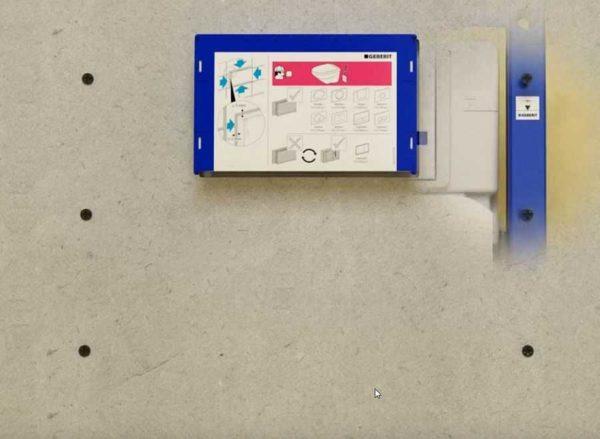
Put the lid in place. In principle, the installation for the toilet bowl is installed. Now it is necessary to close it. To do this, make a false wall of moisture-resistant plasterboard. It is recommended to put two sheets, but you can also put one. Plasterboard is fixed to the installation frame and to the mounted profiles.
Next, the wall is decorated, after which the toilet bowl is hanged and a decorative panel of the drainage device with buttons is installed.

The toilet bowl is put on the pins, its outlet goes into the plastic socket. The connection is airtight, no additional measures are required. This completes the installation of the toilet bowl with installation.