When buying new appliances, few people look at the power requirements, and they should. In old houses, the installation of powerful appliances can cause problems: it may be necessary to pull a separate line. So connecting the cooktop to maintain the warranty requires compliance with all the requirements of the PUE. This means that you need a dedicated line with an appropriate cross-section of wire, with a circuit breaker installed on the line. This line may end with a special socket or with a terminal box. If installed will be a socket, the cable from the cooking surface should end with a power plug, when installing a terminal box, the ends of the wires are terminated with clamps, you can tin them and roll them into a ring.
Зміст статті
Wiring diagrams for the cooktop
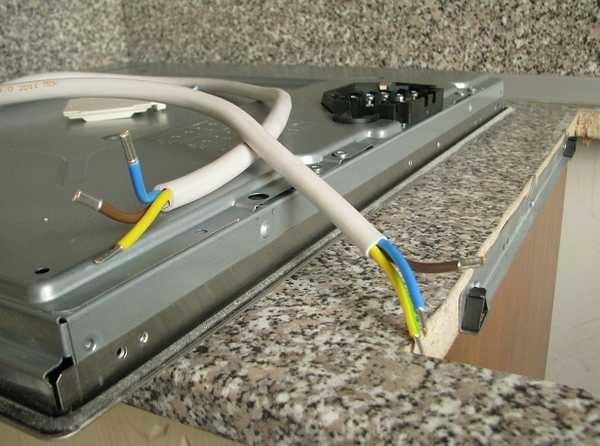
Almost all new models of cooktops of European production can be connected to networks with a different number of phases. In our country there are two standards: single-phase network 220 V and three-phase 380 V. In some houses 220 V goes with two phases. If we talk about the number and colors of wires, then this is what can be:
In order not to make a mistake, even if you see all the colors named, it is better to check everything (call), often during installation builders confuse. To avoid trouble, check and sign (hang tags).
The peculiarity of cooktops is that they often come without a power cord. This is not from the greed of manufacturers, but because they can be connected to several schemes, which use from three (we have two) to six wires. Therefore, in addition to the wire to connect to the electric meter, you need to buy a network cable. Its take the same cross-section as in the supplying, only it is more convenient to use multi-strand – they bend well.
How to connect the wires in the junction box read here.
Connection to a single-phase network
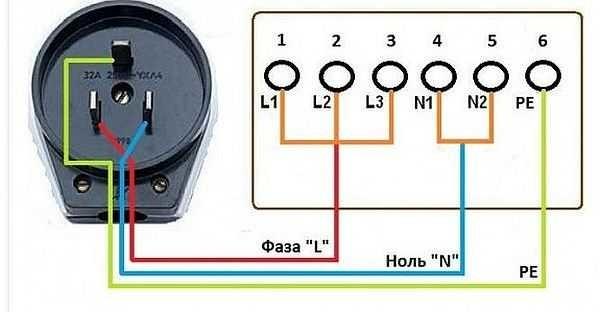
The most questions arise if you need to connect an electric cooktop to a 220V network. Most often the panel has 6 leads: three phase – L1, L2, L3, two neutrals (zero) N1 and N2 and ground PE, but in the apartment there are only three or two wires (in old houses). This is not terrible – it is necessary to install jumpers, but first we look for where on the hob are located terminals.
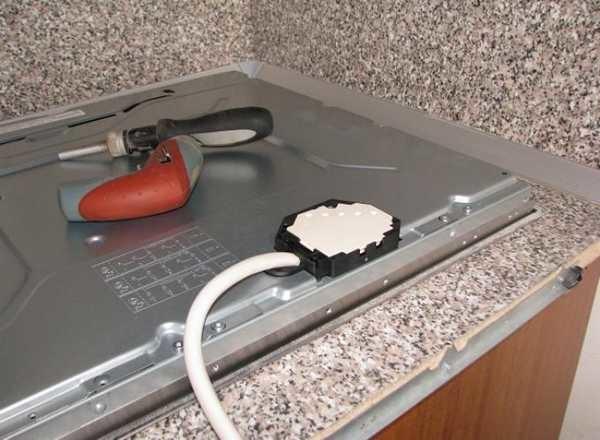
To get to the wires, we find a small cover on the back side. It can be metal or plastic, it is attached to the body with screws or snaps. Remove it. Inside there is a terminal block with six contacts. If there are three wires in the apartment, the contacts are combined on the cooktop:
- three phase wires together (L1, L2, L3);
- two neutrals N1 and N2;
- the earth (green) wire is connected to the ground.
If the equipment was bought in a store, it should come with installed jumpers, which unite all of the above wires. The wires of the power cord are connected in this case to each group of contacts: one to the phase, one – to the neutral, and yellow-green – to the ground.
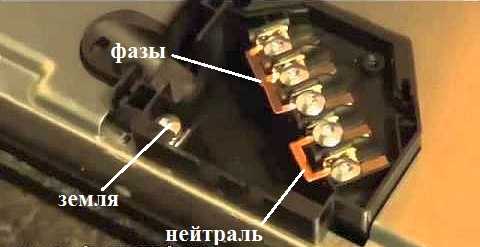
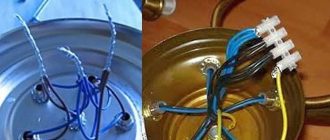
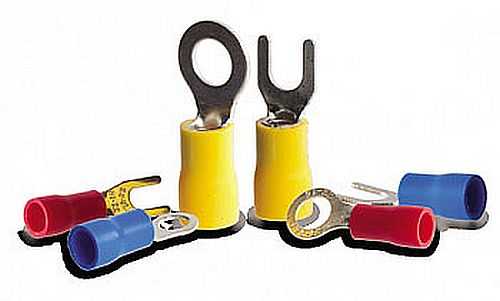
If the jumpers are lost somewhere, you can make them from copper wire with a cross section of 6 мм2. To connect it was more convenient, use lugs – forked or ring, whoever is more convenient. It is more convenient to clamp multicore wires in them, and it is easier to bend rings from a single core.
With three wires in the 220 V network, the connection of the cooktop will look like the photo below. Note: the “earth” wire is connected to the upper contact of the socket, the phase can be on the right or left – it is not so important, but exactly the same should be divorced wires in the socket. It is impossible to make a mistake.
If the wires from the meter come only two, you can do two things:
- make a separate grounding circuit
- Do not use the “earth” output at all.
Installation of the ground loop is necessary if you want to keep the warranty: when connected without grounding it is invalid and in case of any damage to the cooktop (even a clear factory defect) in the warranty repair or replacement of the equipment for a serviceable you will be denied.
How to connect the cooktop 4 wires
Many models of Electrolux (Electrolux) and Zanussi (Zanussi) come with a cord installed. It seems to be good, but it has four wires: zero, ground and two phase wires (black and brown). If the apartment has three of them – it is unclear which and where to go: connecting a four-wire wire from the cooktop has its own nuances.
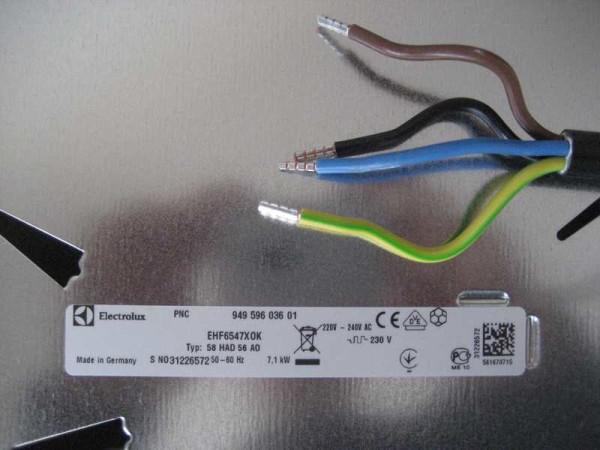
In this case, too, you get to the location of the terminals on the back of the case. The cover in such models is plastic, and not on bolts, but on clips. Simply pry it off with a screwdriver.
After opening the box, look for the “ground” output (yellow-green color). Near it there is a jumper for two inputs. Take it and unite two phase outputs – L1 and L2 (black and brown conductors are connected). Just loosen the contacts a little (by turning the screws with a screwdriver), slip the jumper in, then tighten the contacts. Everything else is unchanged. In the future, when connecting the plug, use only the brown wire, and the black wire is well insulated (better – heat-shrink tubing).
How to connect an RJ-45 Internet socket and crimp the connector read here.
Connecting the hob to a three-phase 380 V network
To connect the cooktop to a 3-phase network requires a cable of five copper conductors with a cross-section of 2.5 мм2. Single or multi-core – optional.
In this case, a jumper is required only on the two wires of the neutral – N1 and N2 (in some models there is only a digital designation, there combine 4 and 5 output). Nothing needs to be changed on the phase wires: one of the phase wires is connected to each phase.
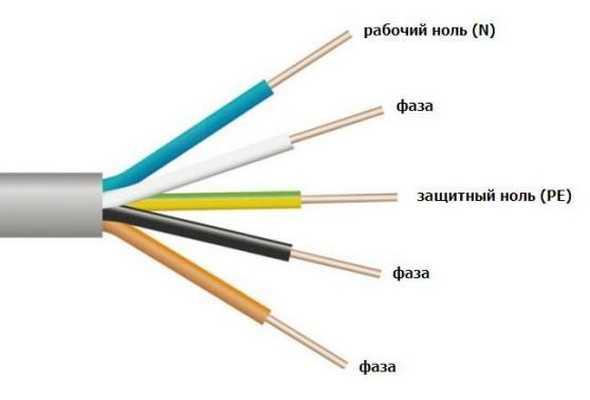
The cable can have such a coloring, as in the photo, or it can be different. According to the second standard, the phases have colors: red, yellow, green. This is not so important. It is much more important to correctly connect all the wires to the plug, and also not to mix them up at the socket.
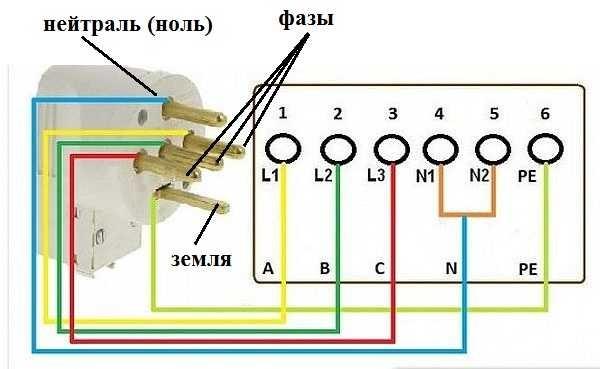
Note that in this case, the neutral is connected at the top, the ground – at the bottom, and the phase wires in the middle. The same order should be repeated on the outlet.
If there is a 4 conductor cord coming from the equipment, one of the phases on the plug is simply not used. Which one – it does not matter, just do not use the same lead in the outlet.
220V with two phases
If both in the apartment and from the panel comes four wires – everything is simple. Connect the corresponding colors. Differences usually do not occur: phases – black and brown, zero – blue, ground – yellow-green. Difficulties arise if the outputs are six or the cord comes with five wires.
As you may have guessed, two phases are combined. In force and the unification of two neutrals (if they are). Everything else is connected to the corresponding contacts of the plug.
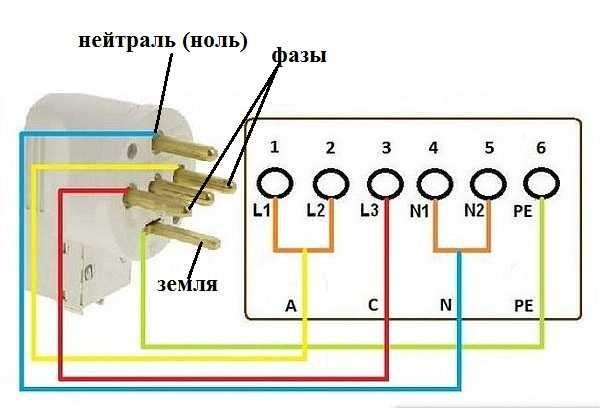
The arrangement is similar: at the top is the neutral, at the bottom is the ground, in the middle is the phase. Do not forget which of the phase outputs you have empty, so as not to redesign.
Selection of cable and circuit breakers
As you’ve already realized, you’ll have to run a separate line from the switchboard to the cooktop. Most likely you will lay it covertly, in a box, corrugated hose or grommet. Only copper cable may be used:
- for single-phase network at the power of electrical equipment from 5.5 kW to 7.7 kW cable with a core cross section of 6 мм2 (VVG 3*6 or PVS 3*6);
- for three-phase up to the power of 16.4 kW it is enough 5*2.5 mm2( KuVV 5*2.5 or KuGVV 5*2.5);
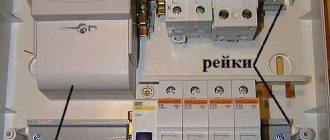
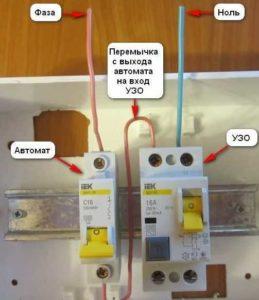
After the outlet from the meter it is necessary to install an automatic circuit breaker. This requirement is mandatory. There are more recommendations – to protect the equipment and ensure proper safety put RCD (protective disconnection device). Such a bundle allows you to disconnect the power supply not only in case of overload (automatic machine operates), but also in case of problems with insulation (RCD operates). RCD – thing is not the cheapest, but the cooktop is incomparably more expensive, so it is better not to save money.
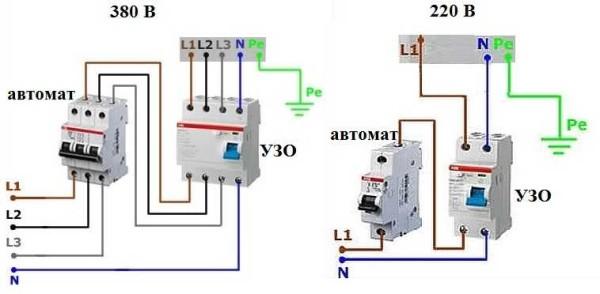
About the parameters of this equipment:
- for a single-phase network take an automatic machine for 32 A, RCD for 40 A with a differential tripping current of 30 mA.
- For three-phase – a 16 A circuit breaker and a 25 A RCD with a differential tripping current of 30 mA.
They are connected with each other by wire segments of the same cross-section (scheme on the photo above): in the network 220 V 6 мм2, in the network 380 V 2,5 мм2.
About the assembly of the electrical panel with your own hands, read here.
Socket and plug
Connection of the cooktop should be made with the help of power sockets and plugs or a terminal box. Power sockets and plugs are designed for currents greater than 10 A, made of special plastic, can have a cover. The selection rule is simple: their nominal current should not be less than the current of the automatic machine. That is, to connect an electrical appliance up to 7.7 kW to a single-phase network take 32 A, for three-phase – 16 A.
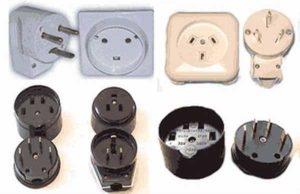
There is no single standard, so the shape and location of the pins can be different, it is important that there was the required number of contacts and electrical characteristics corresponded. Clearly, it is better to trust trust trusted brands rather than Chinese products.
It is possible to connect the cable from the device and the supply cable in a terminal box. This method is also called “direct” or “direct” connection. It is more reliable, but to disconnect the stove will have to go to the electrical panel and turn off the switch on the RCD or automatic circuit breaker.

For three-phase connection, it is better to use a box Schneider Electric 102x100x37 IP44 40A (KLK-5S). It is not cheap, but reliable and looks decent: you can not hide. It can also be used for a 220 V network – a wire with a cross-section of 6 mm2in the terminals will become and the extra phases will simply be empty. To connect the wires are inserted into the holes on the side, and they are tightened with bolts, the caps of which can be seen in the photo.
As you can see, at the top there are three pairs of contacts for connecting phases (1,2,3). At the bottom – for ground and neutral. On one side is the power cable, on the other – from the electrical appliance.
If desired, you can save money and buy a simple block, but with good quality contacts and a separate mounting box with a cover.
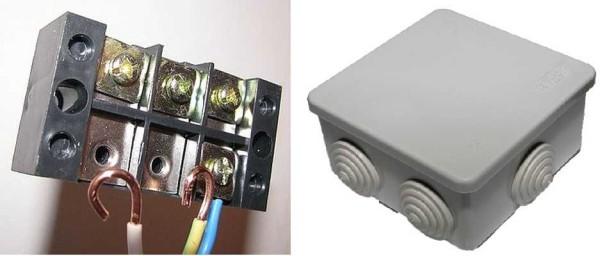
The wires in such terminal blocks are connected simply: the stripped end of the copper wire is used to form rings (as in the photo above), in which small screws with plates put on them are inserted. The wire is inserted into the socket and the contact is tightened with a screwdriver.
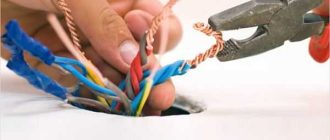
If the wire is stranded, it is problematic to make a ring out of it. Then you can use lugs (photo at the beginning of the article). They are crimped with the help of pliers (can be replaced with pliers).
These are all the main points. Now the independent connection of the cooktop will not be a problem. The same rules apply when connecting other appliances of the same power. For less powerful ones, it will only be necessary to take a smaller cross-section of conductors and a smaller nominal value of automatic machines.

