

Some time ago, this is how wiring was done – insulators were nailed to the wall and twisted wires were attached to them. Then came the fashion for hidden wiring. Everyone tried to hide the wires as much as possible, leaving outside only the frames of sockets and switches, and make them also as less noticeable as possible. But the latest fashion trends again revive the open type of wiring. It fits perfectly into the loft style, looks great in wooden log houses. In log houses retro-wiring certainly looks better than the use of plastic cable channels. And internal wiring in wooden walls is a very difficult, almost impossible undertaking.
Makalenin içeriği
Reasons for choosing outdoor wiring
The first reason is clear – aesthetic considerations. The second – technical difficulties in performing hidden wiring in log houses. According to the requirements of the PUE in combustible structures (wooden walls) wiring can be carried out only in blind (without perforation) metal boxes. The second option – in non-combustible plaster. And surrounding the conductor should be a layer of 1 cm. To put it mildly, it is difficult to fulfill.

The problem in laying cable wiring in metal boxes is not only that you have to make deep grooves. The main difficulty is that the wooden house is always changing its height. Even after the main shrinkage has passed, there are changes and they are seasonal in nature – in wet periods the wall becomes higher, in dry periods settles. The difference in height can be up to 5-7 cm per floor. Since metal boxes do not stretch, this becomes a serious problem. In general, it turns out that the open wiring is easier to do. Well, since the wires will stretch over the top, then they can be used to make a decoration, which is what you get if you competently make retro-wiring.
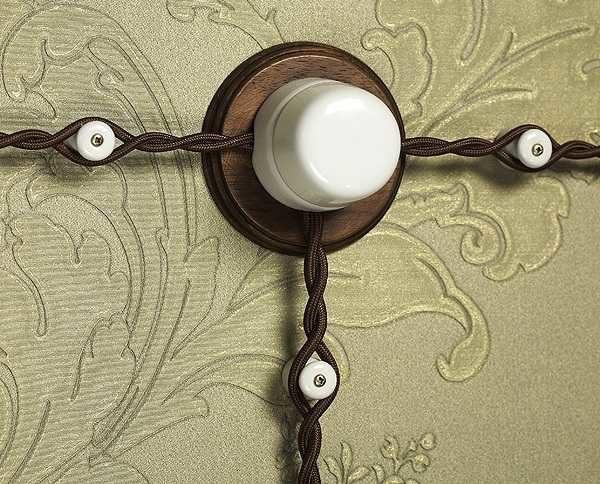
From the point of view of fire safety, it quite meets the requirements: mounted at a distance of 12-18 mm from combustible walls, supported by ceramic or metal (non-combustible) insulators. The wires used for laying are twisted, with reduced combustibility. So there are no problems on this side either.
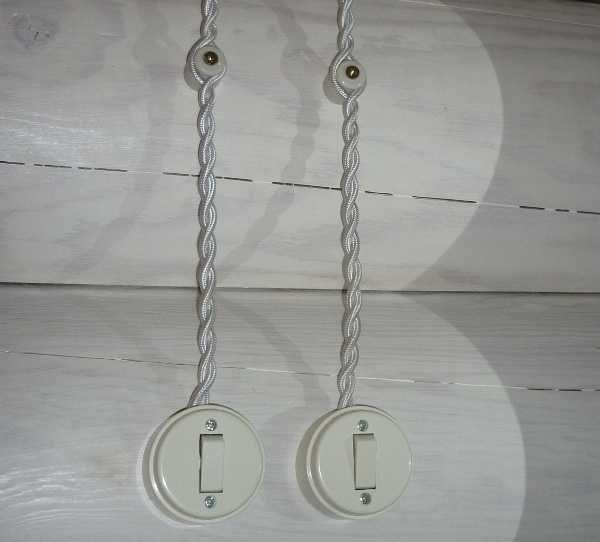
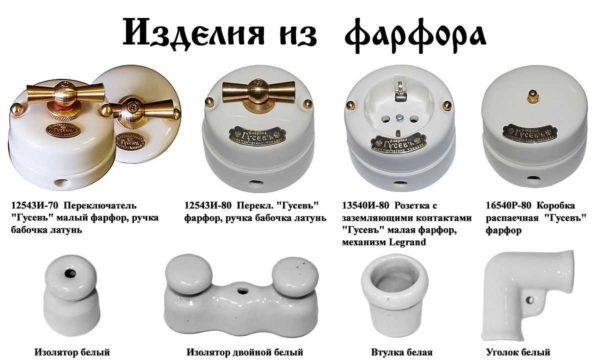
Sockets, switches, junction (wiring) boxes can be used ordinary – plastic. But to make everything look organic, it makes sense to put porcelain or metal and also in the style of “retro”. They also meet safety requirements, as they are made of non-combustible material.
Materials for retro wiring
For the device of retro-wiring requires a special twisted cord and insulators (rollers). The rest of the components – junction boxes, switches and sockets to save money can be taken ordinary plastic. It is important that they meet the requirements: they must have back walls of non-combustible materials. That is, you can take those that are allowed to mount on combustible walls.
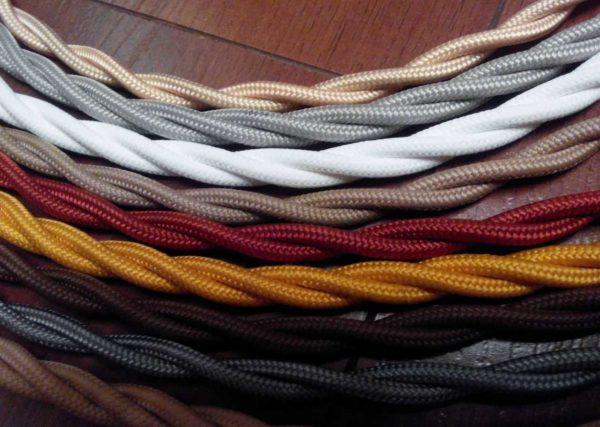
Twisted cable
Twisted cord for retro wiring is made on the basis of a stranded copper conductor, which is packed in PVC insulation. There are two such sheaths. On top of the second one, a textile sheath is applied. Usually it is a technical silk, which is impregnated with antifoam compositions (reduce flammability). There may be a braid of cotton.
Types of cables
Cables come in 2, 3 or 4 conductors. To perform retro wiring according to all the rules will need a twisted cable of three wires: one conductor will be phase, the second – zero (neutral), the third – protective (“ground”).
Twisted cables are produced with cross section of conductors 1.5 mm2 and 2.5 mm2. There are no larger cross-sections. When developing the scheme should take this into account and design wiring on the type of ray wiring. On the outlets take a cable with a cross section of 2.5 mm2, on each line can “hang” 2-4 pieces. But the total power of connected devices should not exceed 3 kW, and the value of the current consumption should not be more than 16 A. Here you have to twist, especially in the kitchen, where many powerful appliances are included. But for the kitchen is often chosen as a finishing tile, and it is put on the wall leveled with plaster. On the tiles twisted cord will not look exactly, so it makes sense to do hidden wiring.
On the lighting take twisted cable with a cross section of 1.5 mm2, on one line maximum load of 2 kW or 10 A of current consumption. For lighting it is usually more than enough even for two rooms – you can include 20 pieces of hundred-watt lamps, and economics or LED and more.

Üreticiler
Manufacturers of twisted cable for retro wiring offer a fairly wide palette of braid colors to choose from. There are no problems with this. On sale today there is a cable of European and Russian production. European is more expensive by about 20-30%. The most famous Italian firms Gambarelli, Cordon Dor, Fontini Garby. Of these three manufacturers, the best wire is Gambarelli. It is the most rigid, it lies well on insulators. But these cables cost a lot: a meter of 3*1,5 costs about 2-4$, and 3*2,5 will cost 3-5$ per meter. There is also a German manufacturer Replikata, and many others, but they have no representative offices in Russia, you need to order on the “native” site. However, the order together with delivery costs almost 2 times cheaper than buying similar goods “on the spot”. So it’s worth the effort.
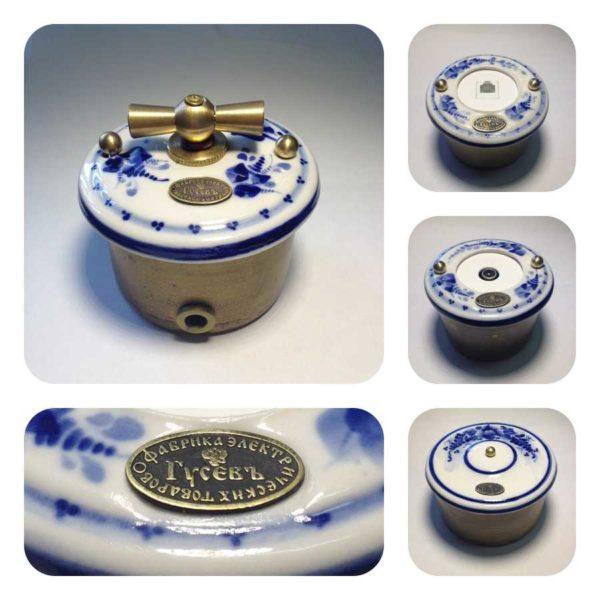
There are also Russian manufacturers: the factory of electrical goods “Gusev”, VILLARIS (Russian-Spanish), Gemini Electro, Bironi. Here the prices are much more modest: the price per meter of three-core twisted cable 3*1,5 – from 87 rubles (that’s about $1.3), with a thicker core – 2.5 mm2 – 121 rubles/m (about $1.8).
How to save money
Even if you take relatively inexpensive wires for retro-wiring of Russian production, the amount in the end runs up a lot. Lines get a lot, because outlet groups need to pull each separately from the panel. It turns out a solid meterage. To save money, you can weave the cable yourself from a cord suitable for the characteristics. There are two options:
In addition to saving money, this option is good because, if necessary, you can weave a cord of a larger diameter. These wires are available for 4 and 6 mm2. So you can dare. The second plus – you can not just twist and twist the cord, and weave something, even a simple braid. True, the consumption of the cord will be more, but the look will definitely turn out vintage.
Weave better on the spot – cut off a piece of the desired length adding 20-30% goes to twist (1 meter of finished cable is 1.2-1.3 meters of cord). Fastened at the top, further twist to the place of installation of the first insulator clockwise. Bypassed the insulator, and then twist in the opposite direction – counterclockwise and so on. What is good about this variant? You don’t have to suffer with braided ends, they are untwisted “automatically”, and when the wooden house shrinks, you can remove the wiring from the insulator, making a few turns to eliminate the cable sagging.
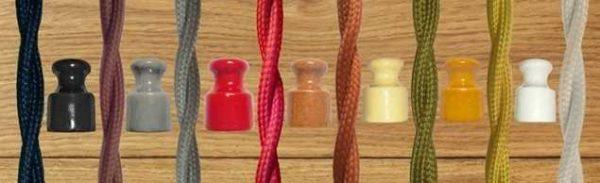
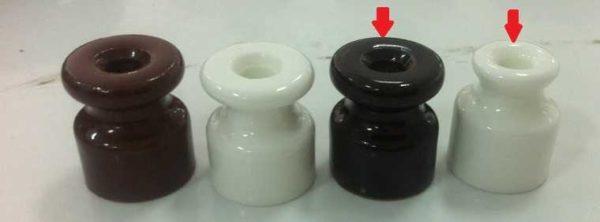
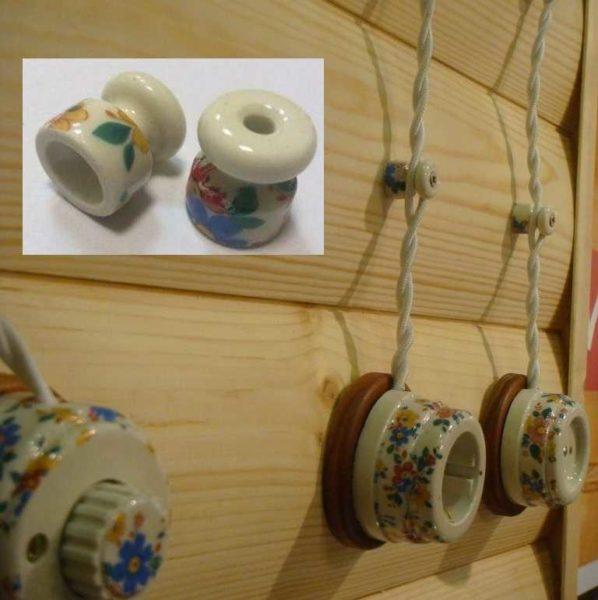
Insulators
Under the fixation of twisted cable, insulators or rollers are needed. They are made of ceramic, they can be painted in different colors. The diameter of the base can have 18-22 mm, height – from 18 to 24 mm. The top part is of two sizes: narrow and wide.
If the cable will be used from two wires, you can take those with a narrow top, if the wires will be three – it is more convenient with a wide. Otherwise, there are no requirements and restrictions.
To install the fasteners, there is a through hole through the entire insulator. Depending on the size of the insulator, it is necessary to choose a self-tapping screw for wood or a dowel for stone or concrete walls. The color of the fastener you choose depending on the color of the ceramic, and in terms of length – it must go into the wall at least 2/3. So you will have to look for long and thin. Some manufacturers sell fasteners in a set. Very convenient and greatly saves time.
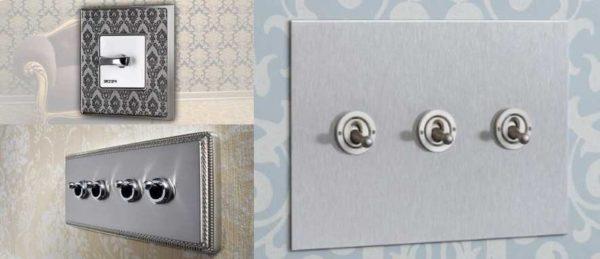
Sockets, switches and junction boxes
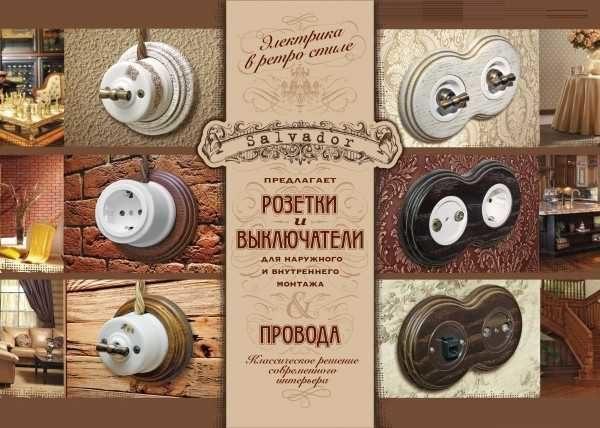
As already mentioned, you can use ordinary sockets/switches, but the retro wiring itself in this case looks a little strange. The main chic is just in these strange and unusual things, which just give the whole thing the charm.
On the market again, there are retro-electrics born in Europe, there is Russian production. If the design of domestic manufacturers are not much inferior, then the quality of the electrical part is better still European products. You can also find similar products made in China. Here again, the appearance may be all good, but the quality of contacts – as luck would have it (actually, as usual).
Nevertheless, usually buy ceramic outlets and switches made in Russia. The price difference is too high. One ceramic unit of sockets/switches originating from Europe costs from 20-30 € (there are much more expensive). Switches made in Russia cost from 1000 rubles (about 14€).
When installing, you can, as in the photo, use frames or pads. They are also available in a fairly wide range. You can pick them up in the tone of the walls, you can buy unpainted and on the spot decorate as you want. In principle, you can do without them, but only in a log house.
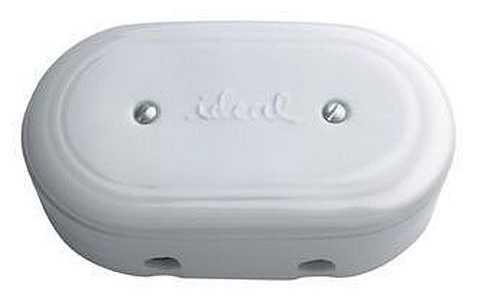
There are also made of ceramics, socket boxes. Usually they are round, but have relatively small dimensions. Only the Spanish company Llinas have long porcelain junction boxes. By the way, they have lower prices for other products by about 30% (if you compare with the average European), and the quality is quite decent.
Rules of the device
In general, in general, it is necessary to observe the general rules of wiring:
- each branch is made in the mounting (soldering) box;
- from the box the line goes vertically downwards;
- the minimum distance of the socket/switch from the door jamb or window jambs – 10 cm;
- distance from communications (water supply, gas supply, heating) – at least 50 cm;
According to modern norms, the height of installation of sockets and switches is not normalized, and also the wiring from the automatic circuit breaker can go under the ceiling or in the floor. Many people do not like a large number of wires, which will have to pull in plain sight. In each room, at least under the ceiling should be two separate routes – for lighting and for electrical outlets. Already such an abundance of wires is difficult to make attractive. Therefore, some owners prefer to hide the supply line behind the finishing ceiling. There, the usual cable of suitable cross-section, lead the power supply from the automatic circuit breaker installed on the house switchboard. Junction box installed immediately under the ceiling (not a violation, but it is inconvenient to work), from it down the twisted wire to the switch or socket.
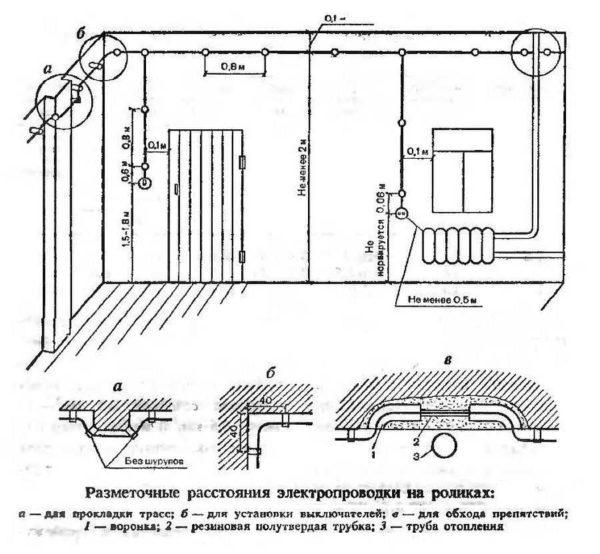
But these were general rules. Now actually about how to mount twisted electric cable. First, the insulators are installed. The maximum distance between them is 80 cm, the optimal distance is about 50-60 cm, in some cases it is necessary to make 30 cm. If we talk about a house made of logs, install insulators for retro wiring in every second wreath. This is the best option.
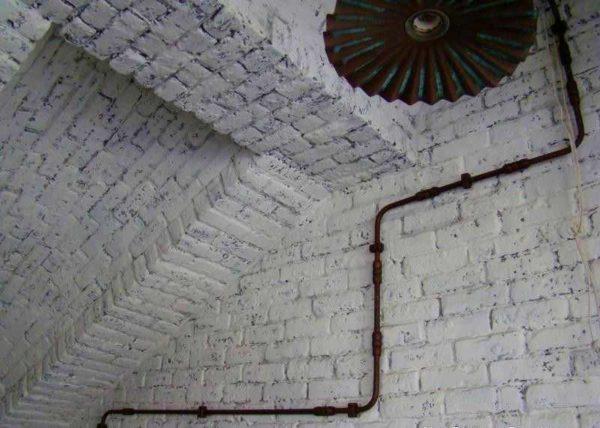
As shown in the picture above, the socket or switch is put at a distance of about 50 cm from the last insulator. This distance can be made a little smaller, but it is better not to increase – the wire can sag. It can, of course, be cut and reconnected, but you do not always want to mess around.
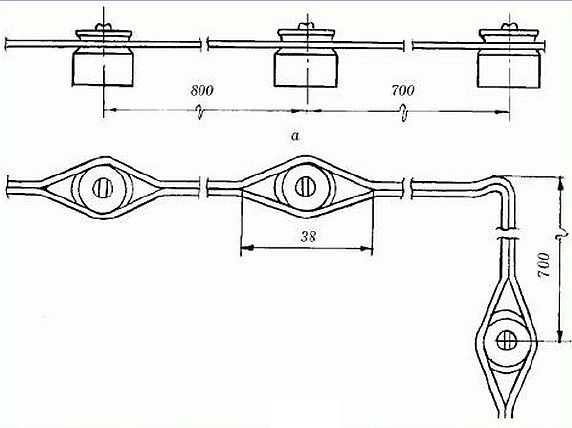
The photo above shows at what distance from each other to install insulators when turning the wiring. These are the norms from an old textbook, but they are probably still relevant today.
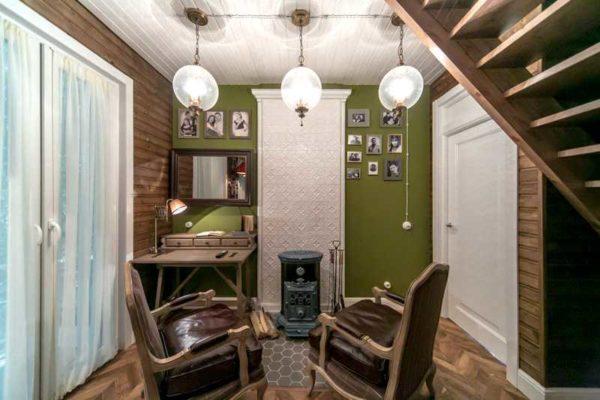
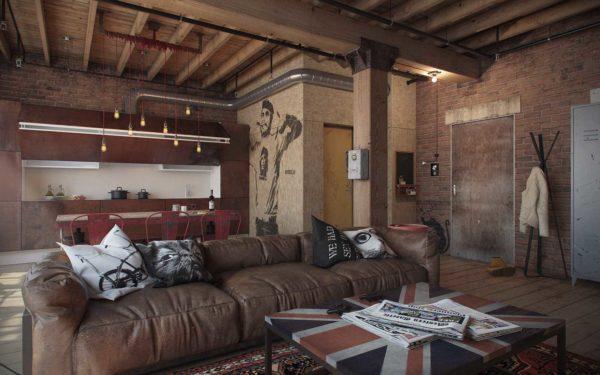
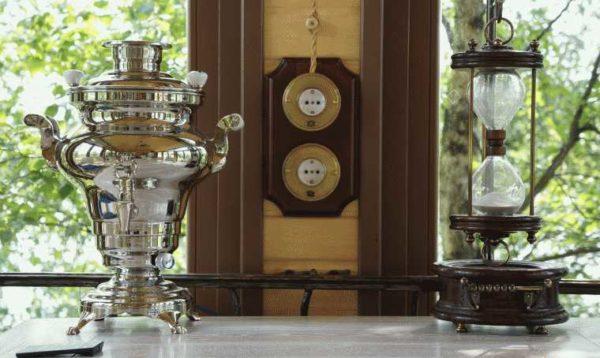
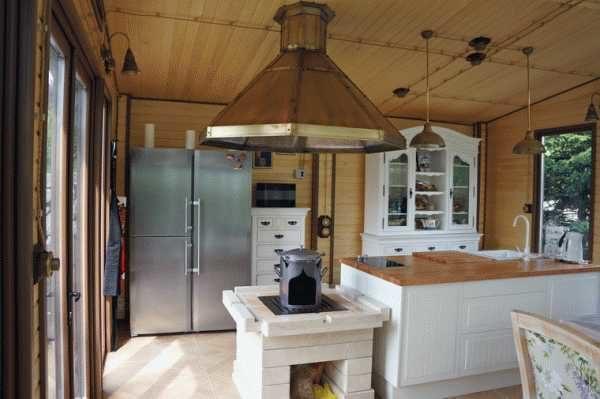
Retro wiring in the interior
In general, so that the open wiring looked good, you should try very hard. After all, everything is in plain sight, all the faults catch the eye. If retro-wiring is done in a wooden house, then from each incorrectly screwed screw remains a trace, which is difficult to disguise. Therefore, before starting work, draw everything on the plan, transfer all the markings on the walls and only then start. If you are not sure whether you have placed the outlets/switches correctly, do not know whether they will look good in this place, try to fix the cord under the ceiling (at least on painter’s tape, or very thin nails). This way you will be more likely to visualize how everything will look together.
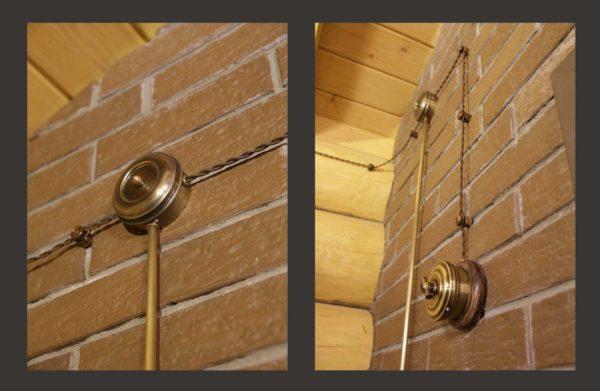
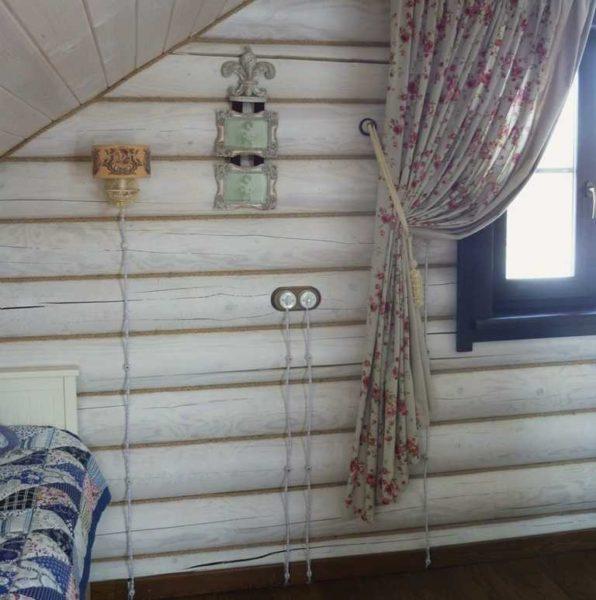
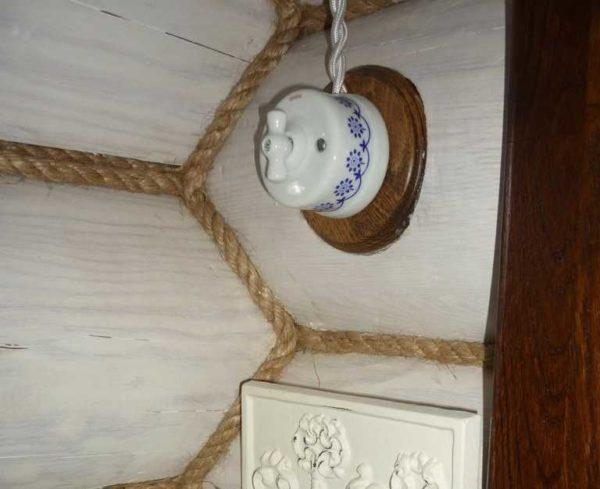
Another moment. If the wooden house is still “sady”, you pull the wires. If the log house has already settled down or is made of glued laminated timber and shrinkage should not be expected, it is better not to pull the wires. They should not sag, but also too taut can not be. In general, good luck! And for inspiration, a few photos of how you can make retro wiring.
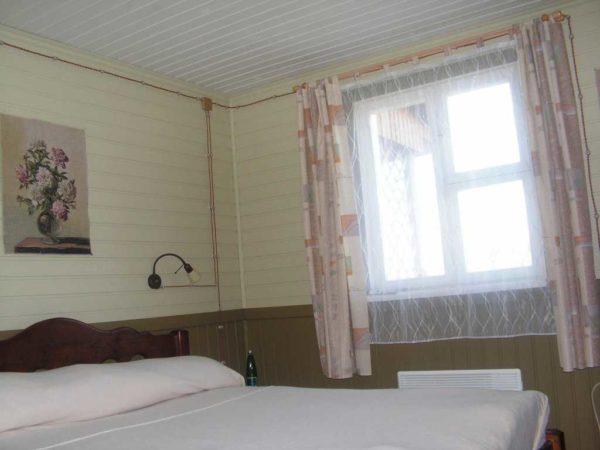
Photos of interiors
It is always better to look at a few already “ready” rooms. So it is easier to understand what exactly you like and what not, to make a preliminary idea of how everything can look like.
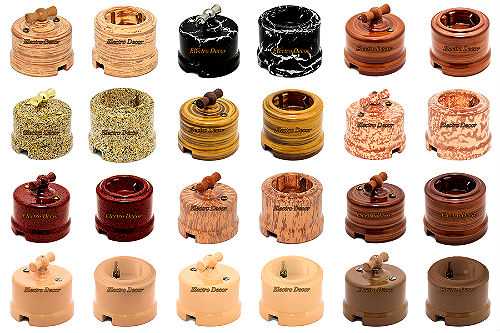
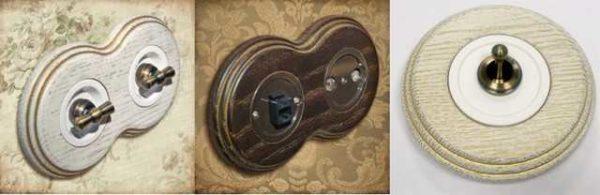
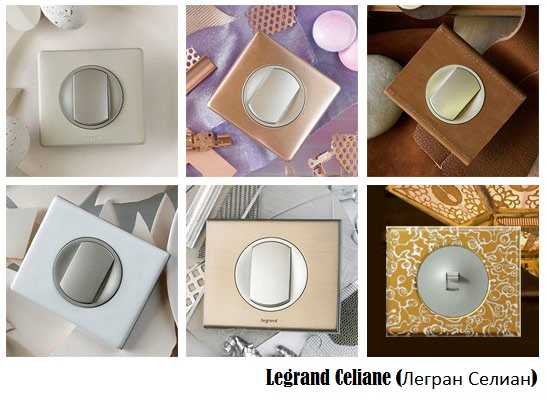
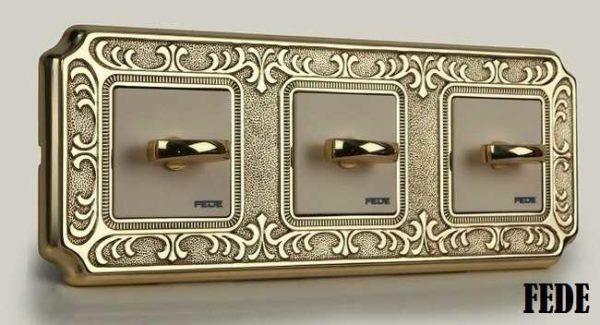
Collections of sockets/switches in retro style
Often the idea of decorating the whole room can be inspired by a specific thing. If we are talking about special electrical installation products in the retro style, then such a thing can be even a socket or switch. Some collections and interesting models from different manufacturers are laid out below. They are different in design, perhaps something you will like.


")


