One of the ways of open wiring in apartments and houses is cable ducts. They are used in cases where hidden laying for some reason is impossible or undesirable.
Innehåll i artikeln
Definition, structure, purpose
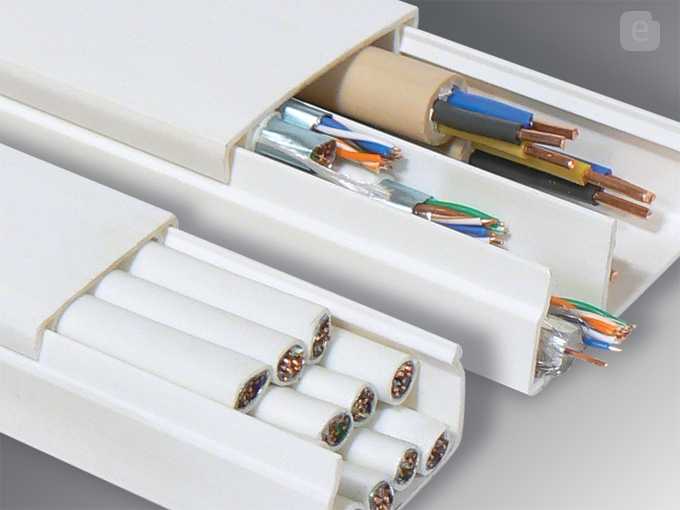
Cable channels are plastic or metal boxes for hidden or open laying of wires and cables. Can be used both outdoors and indoors. They are also called cable trays and boxes, sometimes adding the word “electro-technical”
They consist of a body and a cover. The cross-section is mostly rectangular and square, but there are other, more specific (about them will also be discussed further). The housing can be solid, or perforated. Perforated enclosures are rarely needed, for better ventilation and faster cooling.
The lid and the body of the cable channel are connected by means of a lock – snap. These cable trays and convenient – you can at any time open, check, lay a new or remove unnecessary wire. When buying, pay attention to the structure and quality of the locks – they determine the convenience of use. The best, at this stage, is considered a double lock. It provides sufficient fixation and allows you to repeatedly open/close the lid.
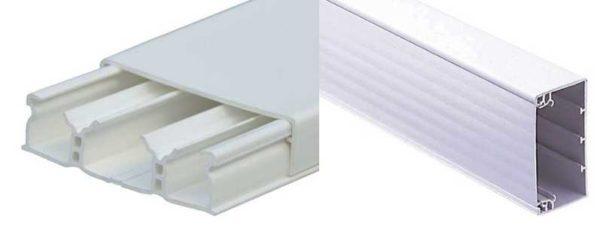
The inner space of the cable channel can be divided by partitions. This is done in order to be able to separate power (wiring) and low-current (television, Internet, telephone, etc.) cables. It is desirable to lay them separately so that they do not interfere with each other. Some companies have developed a design so that partitions can be installed independently. They are sold separately and put on protrusions on the inner wall of the enclosure (an example of such protrusions is shown in the photo on the right).
The material is metal or plastic. If you choose plastic cable channels, pay attention to the fact that it must be non-combustible or not supporting combustion (read the description). Ideally, if he will also give out little smoke – just in case.
Types and sizes
Types of cable channels differ from each other mainly in shape, only some use special materials – for example, transparent plastic or aluminum and its alloys.
Baseboard cable ducts
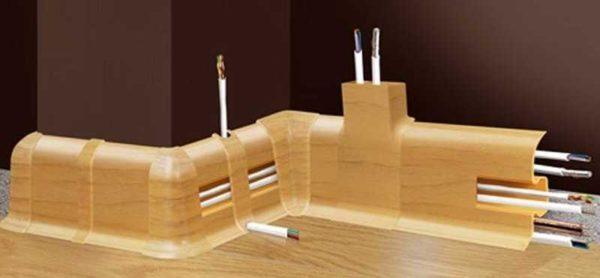
If you want to secretly lay cables and do not chisel the walls – look at the skirting cable channels. These are a kind of plastic plinths, in the inner cavities of which the wires are laid. They are in different colors, suitable for decoration in different styles.
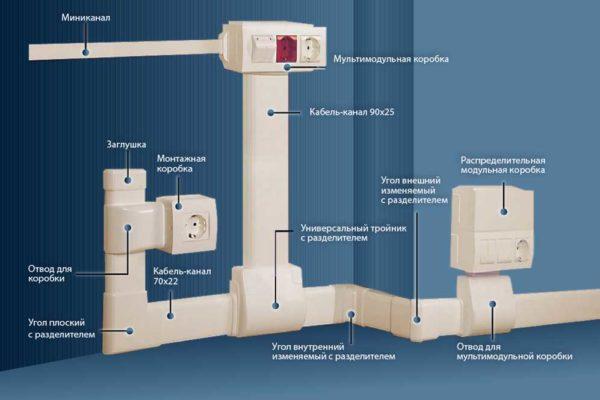
Manufacturers of whole systems of plinth cable channels in addition to long trays produce a number of additional devices that allow you to assemble a design of any shape. These are external and internal corners, different shapes of bends, plugs, mounting and multimodular boxes on which you can install switches and sockets.
There is also a variant with the installation of outlets directly at the level of the baseboard. For the elderly, this option is not the best, but for young people low slopes are not a problem. But it does not attract so much attention.
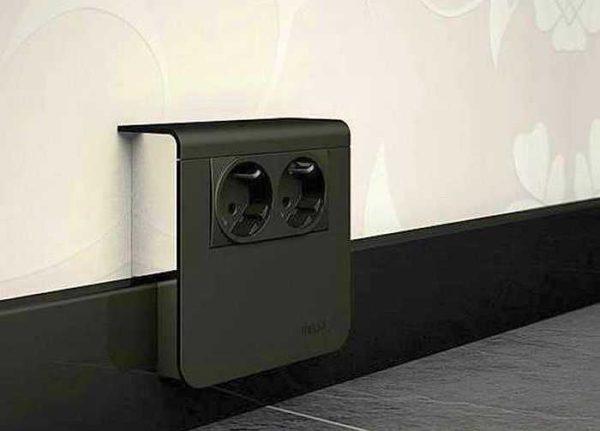
This type of cable channels is available in different color variations – from white, gray and black to coloring imitating wood and metal surface. The disadvantage is a rather high price, although it is not comparable to the payment for wall drilling.
Available sizes of SL Hager products are 20*50 mm, 20*70 mm, 15*100 mm, 25*100 mm. The firm Legrand (Legrand) has two series: mini with sizes – 20*12,5 mm, 32*12,5 mm, 40*12,5 mm, 32*16 mm, 40*16 mm, 60*60 mm, 60*20 mm, 75*20 mm. The second series – DPL has the following sizes: 35*80 mm, 35*105 mm, 50*80 mm, 50*105 mm, 50*150 mm, 65*150 mm.

More video about another skirting cable duct system.

Floor
This type of cable boxes differs and shape with the method of installation. It is installed on the floor, so on one side has a rounded shape, so it does not interfere with movement. Produced from impact-resistant plastic or aluminum. The shape is the same.
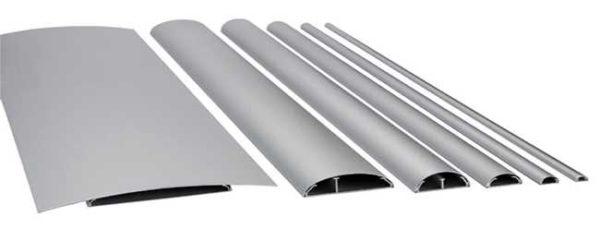
Floor cable trays are used as part of the system – when it is necessary to bring the wiring to the table or lighting fixture, which is far from the walls. It successfully replaces carriers and extension cords.
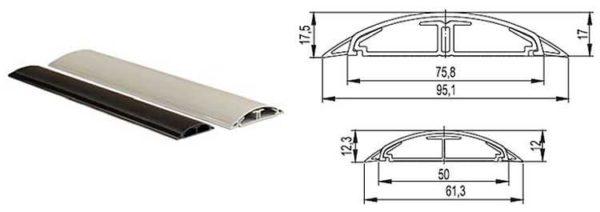
You can find the following sizes on sale:
- 50*12 mm;
- 75*17 mm;
- 92*20 mm;
- 160*65 mm;
The color range is not diverse: there is usually gray, white and black. Joints of two strips, corners and turns can be formalized with the help of shaped products of the appropriate size. First, the bottom part is mounted, conductors are laid, and then the cover is snapped on.
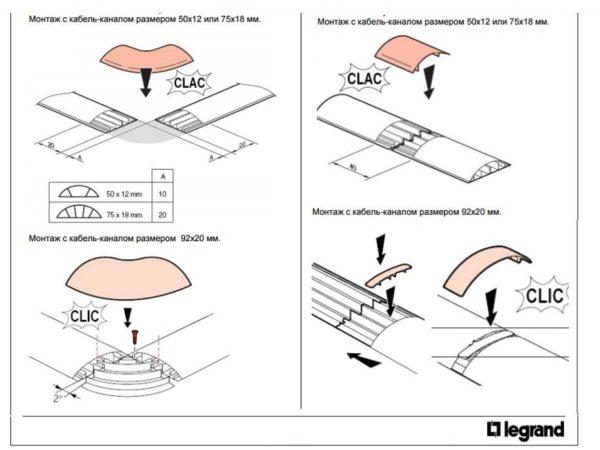
Then in the right places accessories are installed – corners, joints. They are made in such a way that they simply snap, providing reliable fixation. This even preserves the degree of protection (usually IP40).
Parapet
Parapet cable channels (also called trunk) are similar in structure to the skirting boards. Slightly different in shape, but mainly because they are mounted above the floor level. Also consist of various elements that allow you to assemble any configuration.
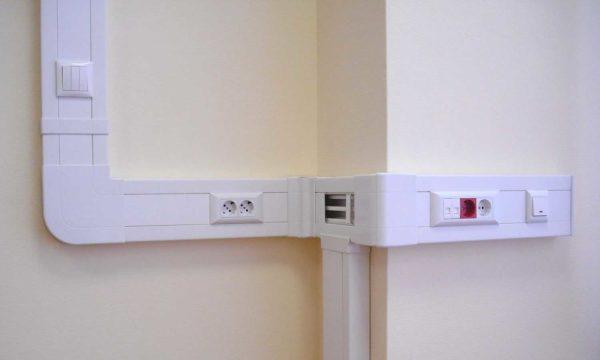
They are used mainly in offices or enterprises. If you mount such structures in private homes or apartments, then try to pick up the color of the wall finish. They usually cover the routes connecting outdoor and indoor units of air conditioners.
Dimensions can be as follows:
- width 80 mm, 100 mm, 120 mm, 150 mm;
- height 40 mm, 55 mm, 60 mm.
To each type of section there is a set of shaped elements – external and internal corners, plugs, splitters, etc. There can be several colors, but the main ones are white and milk. The others are quite hard to find.

Mini
A smaller version of parapet cable channels, in which you can lay a certain number of conductors – television, telephone, for the Internet.
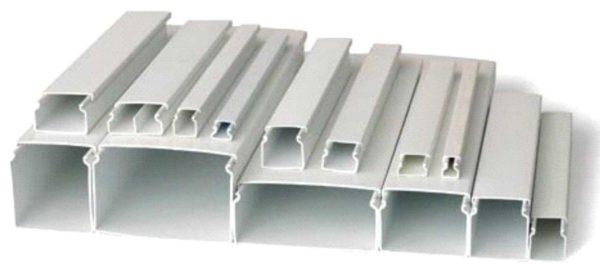
When using these products, the corners are decorated not with special fittings, but by sawing the box at the desired angle (usually 45 ° only taking into account whether it is internal or external).
The dimensions can be as follows:
- width 10 mm, 12 mm, 16 mm, 16 mm, 20 mm, 25 mm, 40 mm, 60 mm, 80 mm, 100 mm.
- The height is 10 mm, 12 mm, 16 mm, 20 mm, 25 mm, 40 mm, 60 mm.
Combinations of these sizes give a large number of variations. There are wide and low, there are narrow and high, so there is a choice to pick and choose from.
Corner
Corner cable channels due to their design can be installed at the junction of the wall and ceiling or instead of the skirting board. When the corners are neatly executed (they should also be cut with a hacksaw at the desired angle), they look like a decorative element.
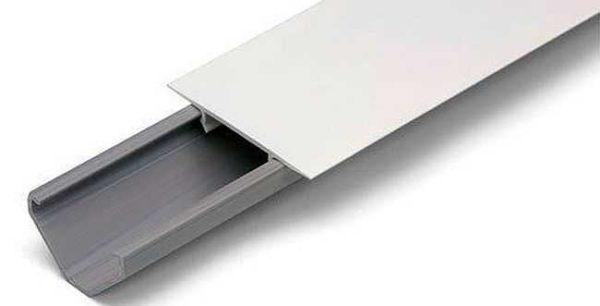
Disadvantage – they do not have as much space as skirting boards, and the walls are thinner, so there is a high probability of damage when laying below. The most common sizes – 40 * 40 mm, so that a lot of cables in them do not lay.
For LED strips
This is a variation of the corner version of cable trays. They differ in that the cover is made of transparent or translucent plastic.

Mounted under the ceiling in the corners, on the bottom panel of kitchen cabinets or in the cabinets and lockers themselves. Wiring in them do not lay, because the organization of the interior space is quite different – make a platform on which it is convenient to attach the tape of LEDs. Its position is chosen based on the necessary direction of light flow.
Metal trays for cable routing
This type of product in private homes is used mainly for wiring in combustible walls – in the construction of frame houses or panel houses. Inside the wall and ceiling ceiling ceiling trays are located, in them pull cables, in the right places lead through the wall or ceiling lining.
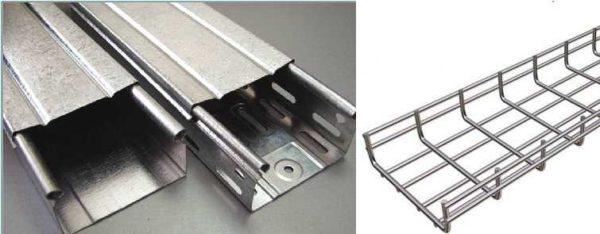
Also, some types (wire cable channels) are used in the device lighting tension or suspended ceiling. With their use, the installation time is sharply reduced, because instead of installing a large number of small fasteners to attach a few hangers for trays, and then lay all the cables in them.
Dimensions of metal cable trays:
- width from 50 mm, 80 mm, 100 mm, 150 mm, 200 mm and further up to 600 mm with a step of 100 mm;
- height – 50 mm, 80 mm, 100 mm;
- length of one piece – 3m.
So it will be possible to pick up under any quantity of conductors.
Rules of installation
The order of installation depends on whether shaped products will be used – corners, branches and plugs or not. If they are, the manufacturer gives clear recommendations on how much distance should be left for proper installation. They should be followed to the nearest millimeter. Then everything looks neat. About the basic rules of installation of cable channels of the usual type, we will talk below in more detail.
How to choose the size
If you decide to divide the wires in the cable channels, first you need to determine what size they need. Select the size based on the number and size of conductors that will need to be laid and add some reserve for the future – so that if necessary, you can lay one or two more wires.
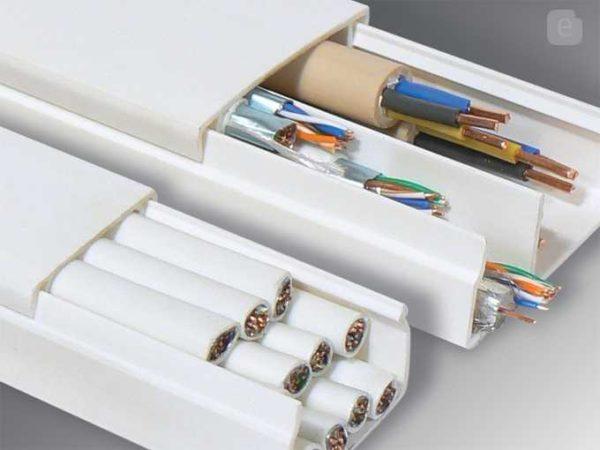
The number of conductors in the cable channel is not normalized. The main thing is to be able to close the lid without problems. A limitation may be the need for separate placement of power and low-current cables. In this case, select the cross-section so that there is at least a small distance between the groups of cables.
Procedure and features of installation
According to the rules of wiring is laid horizontally and vertically, inclined installation is allowed only on stairs. In other cases, the rules do not deviate from the rules and open wiring. To obtain an even cut when installing plastic cable channels with thin stacks use metal scissors or other, but the cutting edge must be sharp. Aluminum and metal trays are cut with a metal hacksaw. Thick plastic can also be cut with the same tool – there will be an even edge and the profile will not buckle.
If you need a piece of a certain length – for the outlet to the socket, for example, cut it in this order: snap the lid, align the edge, make marks on the lid and the body at the same time. After that, you can cut them separately. In this order, the length of both products will be the same.
Note, when passing the corner, the lid is not cut into two parts, but only trim the side walls – so that it can be bent. Do not forget that when bypassing the outer corner of the lid should be longer than the tray in this case it is better to mark on it the places of cuts after the body of the cable channel is fixed.

The cable channel is not attached to the wooden surface by nails with a wide head (self-tapping screws can be used), to plaster or plasterboard walls – by self-tapping screws. Installation on brick or concrete walls requires installation on dowels. The step of fixing the fasteners – about 60-70 cm, at the end of the profile and at the joints, the fasteners are installed at a distance of 3-5 cm from the edge.
If two pieces of cable ducts are joined, the cover should be placed in such a way that the joints of the body and the cover do not coincide. Otherwise, the joint will be too noticeable and an unevenness may form, which will emphasize the joint even more.
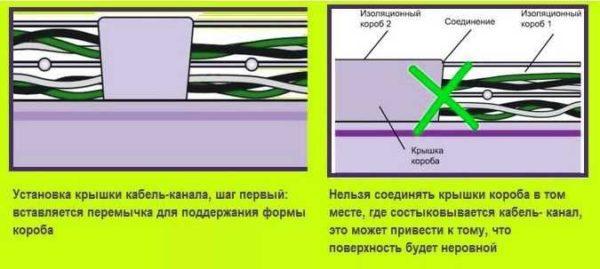
Lay the conductors in the mounted enclosures. To the walls of the cable channels do not sag, with a certain step install the supporting jumpers, and then snap the lids. This is the end of wiring in cable ducts.






Man, cable ducts are super handy! I remember setting up my new gaming rig and using trays to keep everything tidy. It made such a difference! No more tangled cables, just a clean setup that looks pro. Definitely worth it for anyone looking to organize their space!
Hey everyone! I recently upgraded my workspace with some cable trays, and it’s a game changer! They keep everything tidy and safe from tangles. Seriously, if you’re dealing with messy wires, check out the different styles available. You won’t regret it – it makes a huge difference!