

The table is not so difficult to make. However, as in any business there are nuances. Choose the material, decide on the size, shape and style, everything matters. Since the most common material is wood, let’s discuss options on how to make a kitchen table from wood with your own hands.
Innehåll i artikeln
What to make a table top from
The main components of the table are the upper part, called the table top, and the lower part, in the form of legs. The main thing is the table top, it sets the overall look and depending on the material determines the durability of the table.
The easiest option is to use a ready-made table top, and it is much more difficult to make it yourself. The choice of material for making tables is wide. It can be:
- wood;
- LDF;
- MDF;
- plastic;
- natural stone;
- artificial stone;
- glass;
- metal.
Of all the presented, wood is the most affordable and easy to process material. For the manufacture of the table suitable boards or bars left after construction, suitable in length and thickness. You can buy a quality board.
Before you start work, you need to decide on the wood. The fact is that it is different in hardness. A tabletop made of soft varieties of wood is impractical, because over time it will be covered with dents. It is better to use hard wood. If you do not care or you are not going to cook on the table, but only to eat, then you can safely use soft varieties. The table shows the types of wood used and their hardness.
| Soft grades | Hard varieties |
|---|---|
| cedar | walnut |
| pine and spruce | oak |
| fir | birch |
| chestnut | maple |
| alder | ash |
| juniper | plum |
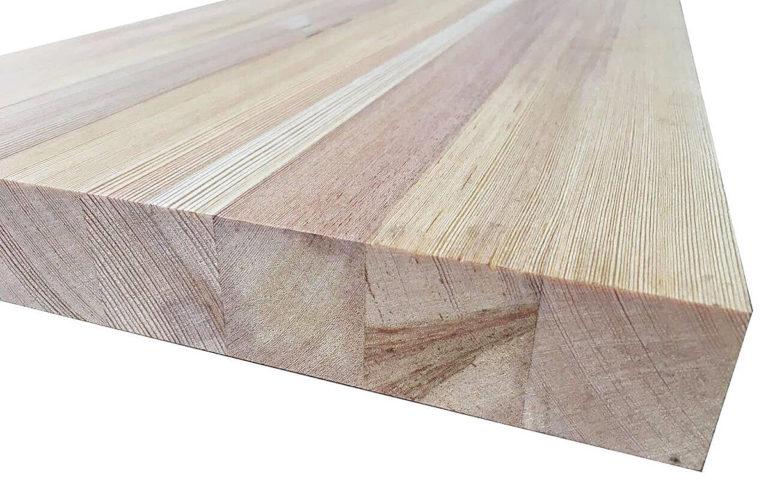
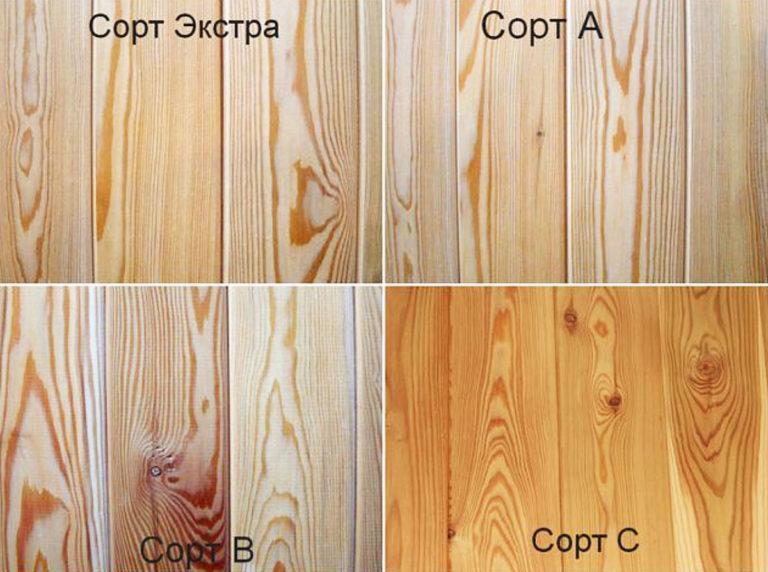
The material should be dry, ideally chamber dried, and the grade is of your choice. Some people like knots, color changes, as they give individuality to the product. This will be grade B or C. Someone prefers wood without a single flaw, it is grade A or AA. The thickness of the bar or board is preferably from 40 mm, but this is your choice. With the width of lumber there are no restrictions, it can even be laths. If the tabletop is assembled from laths of different types of wood, we will get a decorative panel.
A table with a length of three meters is rare. For this reason, it does not make sense to buy three meters of expensive boards or timber and then cut. The length of the table is less than two meters, and this is not a standard for lumber and usually goes in markdown. The price in this case is reduced not at the expense of quality, but because of the non-dimensional length.
For the manufacture of the table cover, it is acceptable to use chipboard, fiberboard or plywood. They are cheap, easy to work with, but they have in their composition harmful chemical components and are less durable. The surface can be painted or covered with self-adhesive film for furniture, and the edges are laminated with vinyl film.
Hardwood is more difficult to work with, but the result will last for many years. Plus, modern woodworking tools can handle any material.
Tools for working with wood
To properly make a table, all boards should have the same dimensions and even edges. To do this, they need to be calibrated and processed. The best option will be to run through a raismusov machine, then the whole board will be of the same thickness. But to have such a machine at home is an expensive pleasure. However, it can be replaced with cheaper tools. For work you will need:
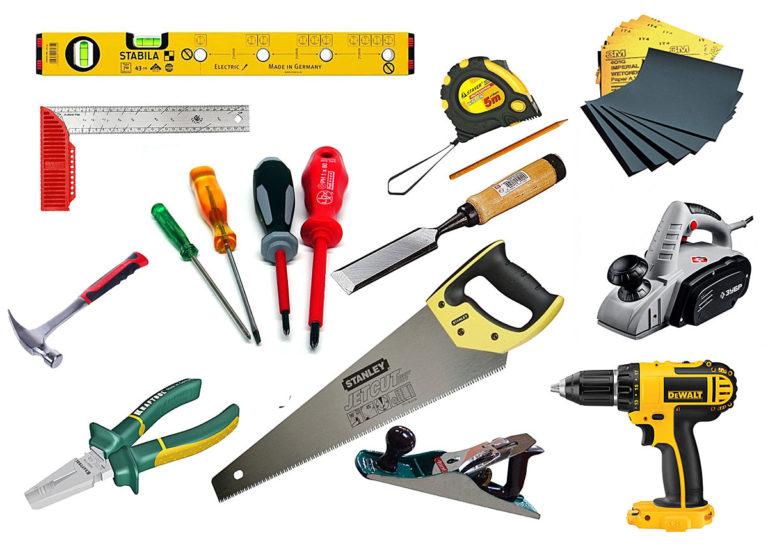
Having set the required depth on the planer, adjust, if necessary, all the boards in thickness. If the material is roughly processed, it will help to remove roughness. Side edges of boards or beams should be even, as they will be glued. Otherwise, with large imperfections, after gluing will remain gaps, and the strength will be reduced.
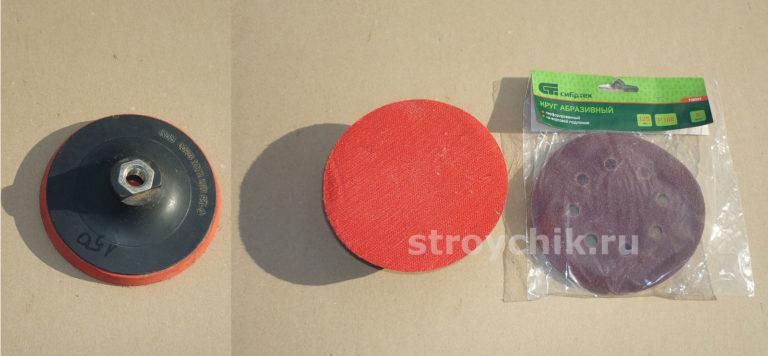
Grinder or “bolgarka”, with a special attachment for working with sandpaper will be needed to process the workpiece after gluing. Drill and screwdriver will be needed for assembling the table top, as well as for fastening the legs.
However, the work should begin only after you have completely determined the size and shape of the table.
Size and shape
The size of the kitchen table depends on several factors. The main thing is the size of the kitchen. It is clear that in a small kitchen, a large table will create inconvenience. In the second place is your needs, that is, you need to take into account the number of people in the family. It is believed that 1 person on average is about 60-65 cm and when calculating the size of the tabletop, it should be taken into account.
Once you have determined the size, we move on to the shape. Classic, rectangular table is convenient and practical. Closely moved to the wall or in the corner, which saves space.
An oval or round table can seat more people. They are safer for children, because there are no corners. But they take up a lot of space and are not suitable for a small kitchen.
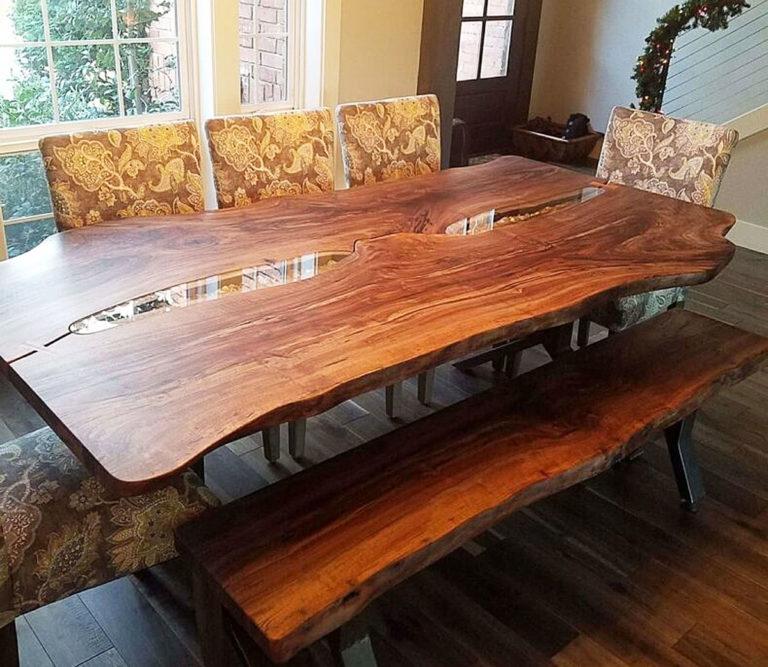
Tables of a non-standard, original shape are suitable for a spacious kitchen in any style.
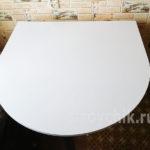
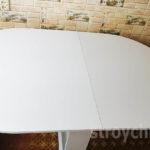
Well fit into a small kitchen semi-circular folding table. It moves closely to the wall, saving space, safe for children, and if necessary, folds out into a full table.
-

- Semicircular table in folded form
-
- Semicircular table unfolded
-
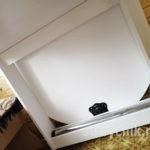
- The unscrewed leg can be tucked inside
-
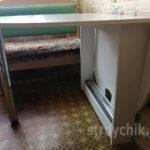
- Folded view of the table
Folding or sliding tables are more convenient. They take up a little space, and if necessary unfold, with an increase in tabletop area up to two times. In addition, they can be of different shapes: square, rectangular, round or oval.
Drawing and scheme
Before you start work, make a sketch of the table. It will help to visualize the necessary amount of materials. After that, make a drawing with the necessary dimensions.
Making a drawing of the table, take into account a few recommendations:
- measure the place in the kitchen where the dining table will be installed;
- the standard height to the top of the table top is considered to be in the range of 74-85 cm;
- legs should be fixed at a distance from the edge of 8-12 cm;
- a comfortable width for a dining table is at least 80 cm;
- the bar between the legs should be no more than 5 cm thick.
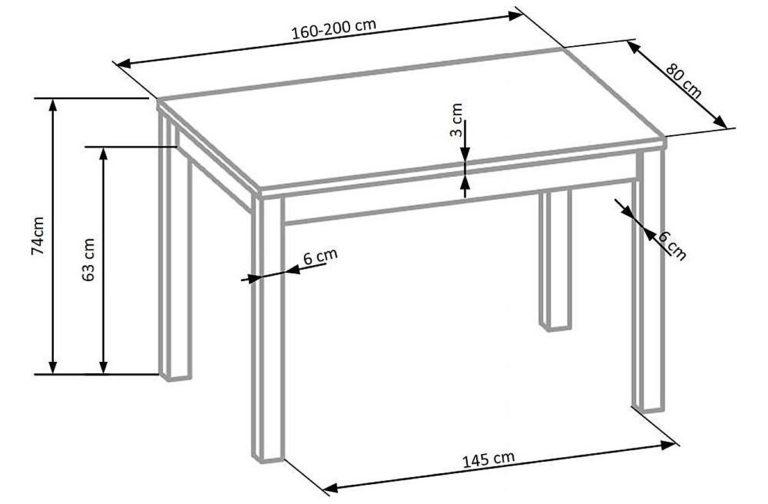
Table top
Since the table top is the main element of the table, it should be made as good as possible. Prepared according to the dimensions of the wood will make the subsequent processing much easier. The best result will be after processing the materials with a planer. As already noted, it is difficult to achieve even edges with the help of planers. However, most of the flaws will go away after sanding with coarse sandpaper.
Treat the wood with a protective agent against moisture and insects, for example, antiseptic for interior work.
It is not necessary to carry out the finishing work all at once. Fasten the legs or pedestal and only then proceed to finishing.
Gluing the table top
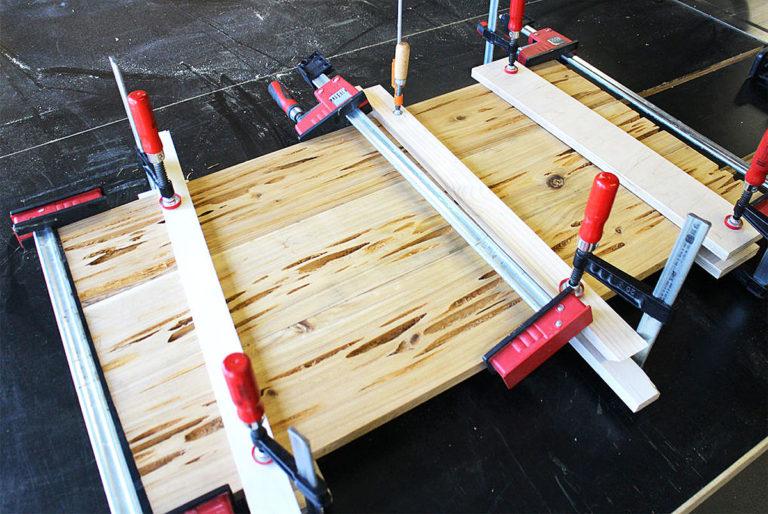
To make a wide tabletop, the treated boards or bars need to be glued. The best option is carpenter’s glue, but you can also use universal glue, if it glues wood. Will need carpentry clamps (vaima) to press the boards one to the other for the time of drying glue.
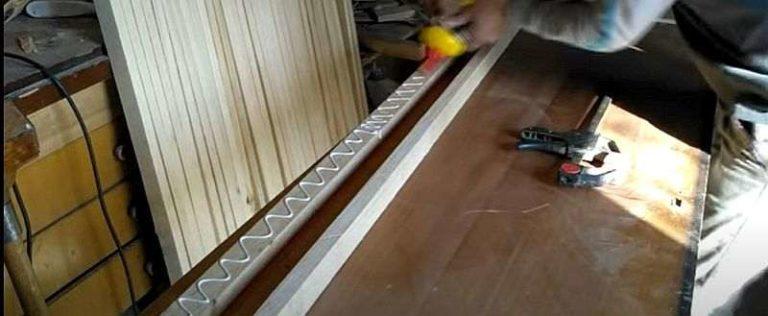
The glue is applied according to the instructions to the sides of the boards or bar in a frequent serpentine pattern. The workpiece is laid out on a flat, clean surface and tightened with clamps. To prevent dents from forming from the pressure, even wooden blocks are placed under the clamps. After the glue has dried according to the instructions, the clamps are removed.
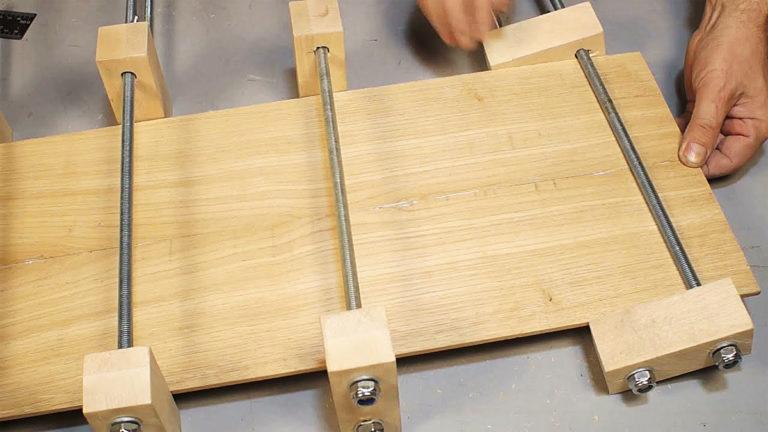
Large-sized clamps are very expensive and it is not profitable to buy them for one use. You can get out of the situation by making them yourself. You need to buy several long threaded rods, nuts and washers. Drilling the required diameter holes in the cut bars, tighten the workpiece.
After gluing the surface is treated with coarse sandpaper to smooth out irregularities and protruding glue. This will remove irregularities from the planer. Then follows sanding with paper with a fine abrasive. The final finish – coating with varnish or wood oil, do after the table is fully assembled.
How to glue without joinery clamps
If buying carpenter’s clamps is not in your plans, you can do without them. It’s not a classic technique, but it works. There is one limitation – so you can assemble a tabletop from bars or boards of small width, about 10-15 cm.
You will need a vise or small clamps, self-tapping wood screws, and a screwdriver. The length of the self-tapping screws depends on the size of the bar. It should be 1,7-1,8 of the width of the bar, that is, for a thickness of 40 * 40 mm, the length should be 68-72 mm. Take with a flat head, it will sink into the wood without boring. Vise or clamps will be needed to connect the first pair to be joined, but you can do without them.
Choose the two most even bars, apply glue to the side edges. Next, stack them and tighten them against each other with a vise or small clamps. Tightening is only necessary for the “starter” pair. Make sure that the bars are stacked evenly, and start twisting with self-tapping screws with a spacing of 20 cm. After screwing the last screw, remove the vise. Next, assemble the table top, screwing to the starting pair one bar at a time. To do this:
- Lubricate the side edge of the next joist on one side.
- Apply the bar, align the edges and screw along the edges, then – in the center with a spacing of 15-20 cm. Before screwing in each self-tapping screw, check and correct the position of the bar relative to the front surface of the table top. The bar can be pressed or bent to make it flush.
Continue the process until the table top is the desired width. Once the board is assembled, leave it on a flat surface until the glue dries, the time is indicated on the package.
The glued bars or boards can be compressed with a jack.
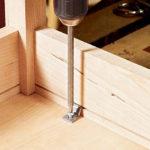
With a wider board, for its connection will additionally need: a long bit; a drill bit Ø4 mm in diameter with a length greater than the width of the board; and the so-called “feather” – a special wood drill bit with a diameter of 10-12 mm. Since it is difficult enough to screw a self-tapping screw into a wide board, it is possible to make the task easier by drilling. First, we drill the board width through the drill bit, then expand the hole with a “feather”. This is necessary for easy passage of the head of the screw and bit.
After drying, dried glue will protrude on the surface of the workpiece both below and above. To remove it, we use a coarse-grained sandpaper, thus leveling the surface and removing small irregularities. Then we sand with fine sandpaper and then cover with varnish or oil. Read more about the marking of sandpaper in the article on the site.
The best tool for sanding will be an orbital grinder, but can cope and “bolgarka” with a special attachment.
Assembly with ties
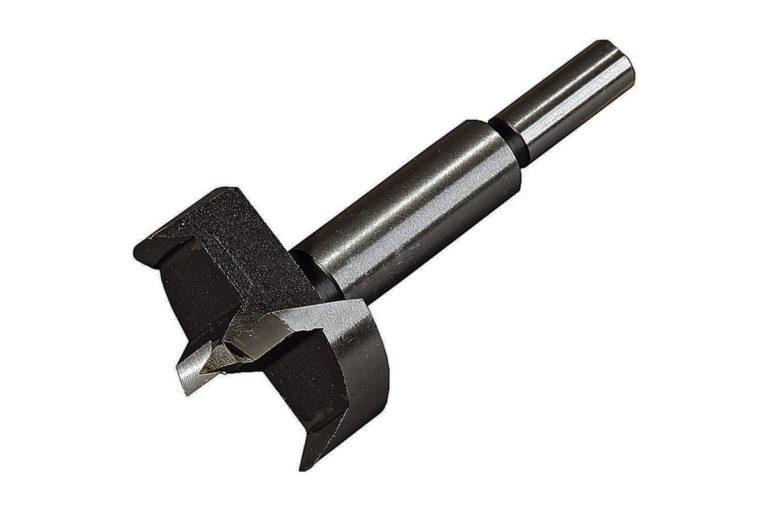
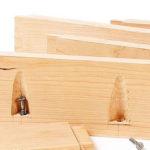
Boards are wider than the bar and it will not be possible to connect them with screws. In this case, special ties will help. To do this, you need to buy a Forstner drill bit for wood to drill recesses in which the ties will be installed.
This method implies that the side edges of the material are absolutely even. You can achieve this only by processing in a flightmuscle machine, otherwise when assembling you will get a curved surface.
You can make a notch with a wood crown, the remaining wood inside is easily removed.
Be careful – the alignment drill can make a through hole.
Fixing the supports to the table top
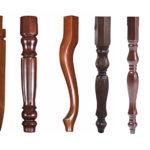
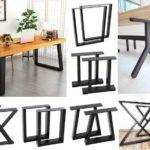
The table top is only part of the table, you need to attach the legs to it. You can make them yourself from a bar, boards or metal, but you can also buy ready-made ones. This will save time, and the price for them is much lower than for the table top.
-
- Wooden legs
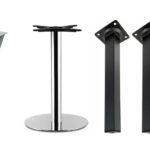
-
- Pedestal and legs made of metal for the table
There are two ways to attach the legs to the tabletop: removable and non-removable. In the first case, additional fittings are needed, in the second case, fastening is carried out directly to the table top.
In the classic version, four legs are installed at the corners of the tabletop, a little less often attached to the pedestal. There are other variants, for example, the table top is mounted on small boards along the short sides of the table. It is possible to use three legs, but the stability of the table will decrease.
If you want to make a dining table on wheels, for ease of movement, then from the standard height subtract the height of the wheels. Also take into account the area of the wheel attachment, it should be equal to or less than the area of the leg.
Classic table
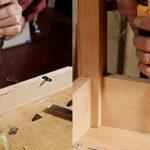
In this case, the legs are pre-fixed to a frame consisting of several boards mounted on the rib. Another name for the planks is tsargs and, accordingly, a table with a tsargovoy belt. The supports are fixed at the corners of the frame in the grooves, and special ties are used to increase the strength.
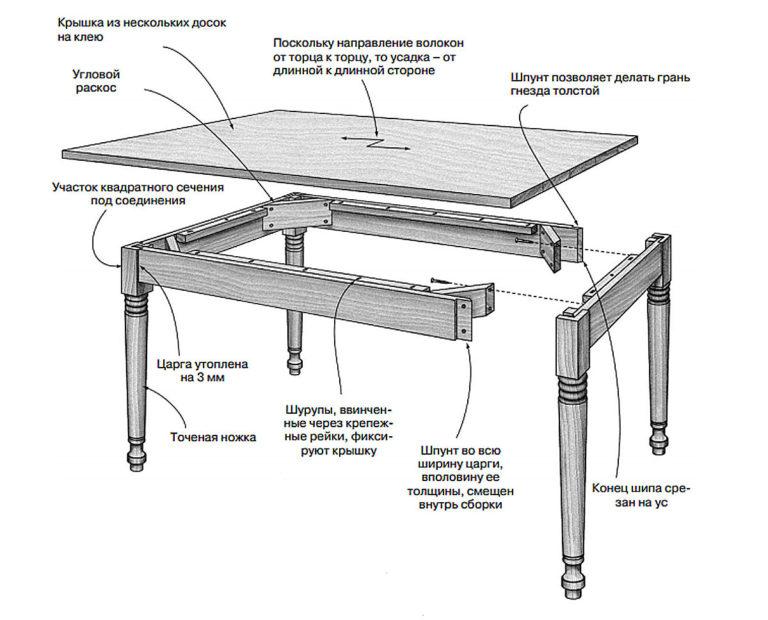
The frame is screwed or glued to the back of the table top. Fixation can be realized by various means:
- screws;
- Z-shaped holders;
- figure-eight fasteners;
- angles.
-
- Fixing with Z-holders
-
- Fastening with screws
-
- Fixing with angles

-
- Eight-point fastener
In reality, there are many more ways of fastening, only the most popular ones are given. For reliable fixation, double fastening is allowed: self-tapping screws and carpenter’s glue.
Detachable fixing
For individual legs, a detachable version is possible. A metal base with internal thread is screwed to the lid, into which the legs are screwed. The advantage of this method is the simplicity of the solution and the possibility of disassembly for transportation, for example, for a trip to the countryside.

This option is suitable both for those who decided to install ready-made legs, and those who make them themselves. It is enough to purchase a kit for fixing the legs. However, it should be noted that although the fastening will be quite reliable, but still, if you strongly catch the leg with your foot, it can be broken off. In this case, it is preferable to install the table top on the frame.
Pedestal
Instead of the usual legs, you can install the tabletop on a pedestal. There are many variants of making a pedestal – on one leg, two legs, etc.
-
- Variants of pedestals for the table
-
- Pedestal on two legs
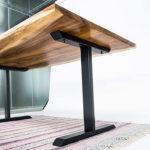
To make a dining table in a modern style, a wooden table top is installed on a metal frame. If the table top is thick enough, the legs are screwed directly to the back side.
Metal pedestal is easiest to make from a profile pipe with a wall thickness of at least 1 mm. The height is standard – from 75 cm or according to your requirements. The length and width depends on the size of the table top. The pipes should be 7-12 cm from the edge. As for the shape of the pedestal specifically, there are many of them, to suit every taste.
Steel pipes or steel strip have high strength. This makes it possible to realize any shape.
Fixing on pins
The cheapest way and not very reliable. This option can be suitable if you want to make with your own hands a small table made of wood. Fixing the legs is carried out on wooden or metal pins. In both cases, under the installation of the pin, a hole is drilled in the parts to be connected. Diameter – 1-2 millimeters less than the diameter of the pin, and the depth of the hole should be:
- when using a wooden pin (dowel) – 1/2 of its length in the lid and foot;
- for a metal pin – 1/3 of its length in the lid and 2/3 in the stem.

During installation, the fastener is smeared with carpenter’s glue and hammered in. The second part is smeared with glue and pressed to the table top – this is a non-separable method of fastening. The metal pins are also glued.
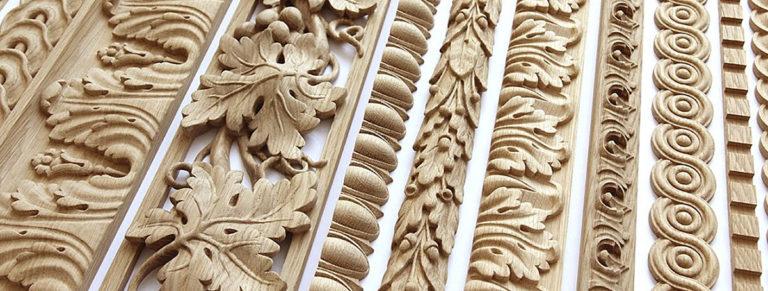
Decorating
After the installation work is completed, the decoration is started. The sides can be closed with decorative strips, decorate them with carvings. Milling will help to remove sharp edges.
Before painting, all parts of the table should be sanded. Identified small defects are putty and leveled.
If you prefer to see the structure of the wood, then choose a stain and varnish.
Deciding to paint the table, pre-treat it with a primer. For the best effect, paint and varnish in several layers. After painting, the layer should dry completely. Then the layer is sanded and a new layer is applied.
Choose paint without a pungent, unpleasant odor, it is best to fast-drying water-based. The main colors for the dining table are white, gray, brown, but can be any. The main thing is that it harmoniously complemented the interior.
How to make a round dining table with your own hands
Conclusions
- Self-made table for the kitchen is a rather troublesome matter. Requires some skills and tools. However, using a ready-made tabletop and legs, the process is greatly simplified and is within the power of anyone.
- Steel pipes or steel strip has high strength – this makes it possible to realize any shape.
")


I tried making a kitchen table once. Picking the right wood was trickier than I thought. Assembling the top was satisfying, but getting the legs even was a whole adventure! Ended up with a wobbly table for a bit until I fixed it. Totally worth it, though!
Building your own kitchen table is such a game changer! I remember picking out the perfect wood—really made it feel personal. Assembling the top and attaching the legs was a bit tricky, but totally worth it. Trust me, nothing beats a homemade table for family dinners!