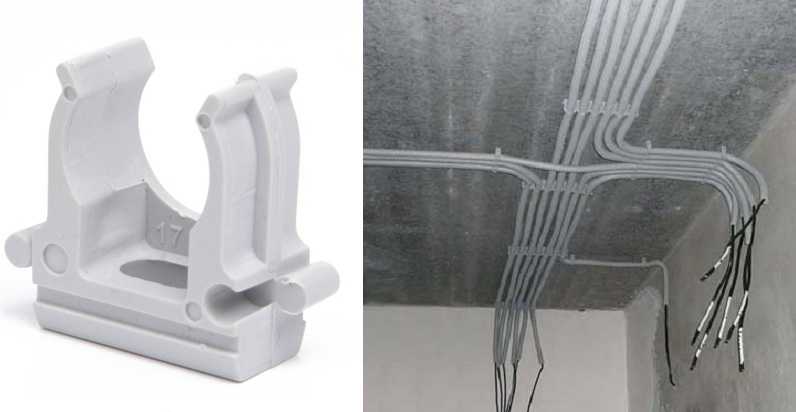
Vid installation eller reparation av ledningar måste ledningar och kablar installeras. Om en ny kraftfull apparat ska installeras måste ibland en separat ledning från elpanelen installeras. I vilket fall som helst måste du montera ledningarna på väggarna eller i taket på något sätt. Vad kan vara ett kabelfäste för vart och ett av dessa fall och kommer att förstå ytterligare.
Innehåll i artikeln
Allmänna regler
Vid dold eller synlig kabelinstallation, inomhus eller utomhus, finns det några allmänna regler:
I princip är rekommendationerna alla. De är universella och okomplicerade. Avståndet kan vid behov minskas. Till exempel, vid böjningarna av rutten installeras fästelement på ett litet avstånd från böjningsplatsen - 5-10 cm. Uppgiften är att säkerställa tillförlitlig fixering och förhindra sagging.
Metoder för fastsättning på olika ytor
Väggar och tak är tillverkade av olika material med olika struktur och densitet. Beroende på denna egenskap ändras fästmetoden:
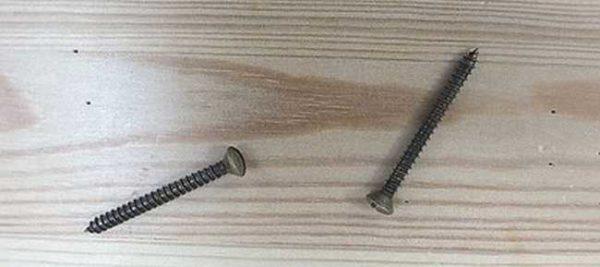
- Tät - trä i alla former, gips och mjuka gipsbruk (inklusive gips). I alla dessa material passar spik eller självgängande skruv perfekt. I vissa - spånskivor, OSB och vissa andra - är det bättre att förborra ett hål med en något mindre diameter än en självgängande skruv och sedan skruva fast den. Spikar slås oftare i direkt utan förborrning.
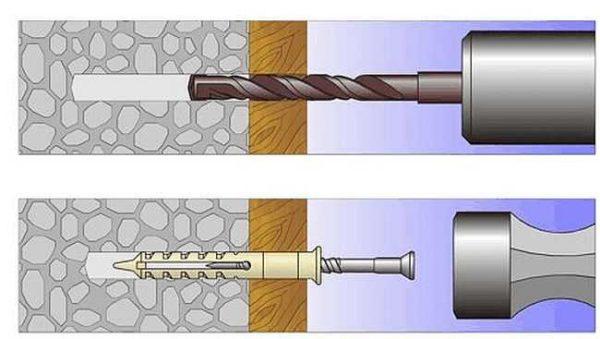
- Fasta material. Denna kategori av material inkluderar tegel, betong, avdragare, cement. I dem, även med ett förborrat hål, kan du inte skruva in en självgängande skruv. För sådana material använder du dowel spikar (de kallas också dowels). Detta är ett fästelement som består av två delar - en plastplugg och en metallskruv (ibland plast). I sådana fall borras ett hål i materialet med en borrdiameter som är lika med eller något mindre än dymlingsdiametern. Ett plastlock sätts in i hålet. Dess övre kant ska vara i nivå med ytan (om det behövs kan du knacka på den ett par gånger med en hammare för att jämna till den eller skära bort överflödet med en vass kniv). Därefter appliceras fästelementet (platta, klämma etc.), som fästs på den insatta pluggen med en skruv.
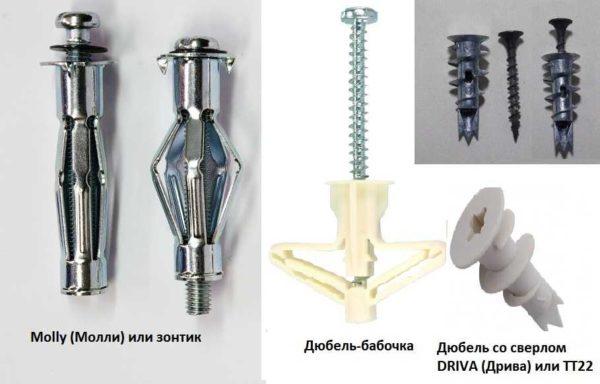
- Tunn eller mjuk. Detta är plast, gips, fiberboard, luftbetong, skumbetong etc. I dem håller inte vanliga fästelement, du behöver en speciell som har en förlängd "bakre" del. Den har ett större stödområde, på grund av vilket fästelementet kan hållas. Några exempel på sådana fästelement (paraply, fjärilsplugg och borrplugg) visas på bilden.
Egentligen är det alla de ytor som finns inne i huset när man lägger ledningar. Men kabeln måste ibland fästas vid stolpen, till exempel när elingången från stolpen till huset sträcker sig eller till röret - när kabeln går upp i den brandfarliga väggen.
Till en betongstolpe
Kabeln är fäst vid en armerad betongstolpe med långa svarta plastband. Dessa håller i cirka 5 år.
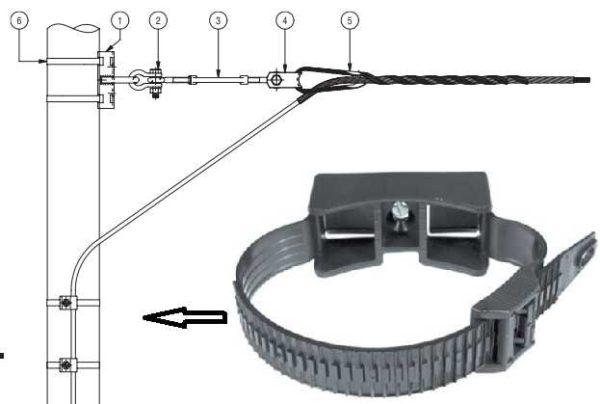
Du kan använda klämmor för att installera avloppsrör, men under dem måste du borra hål, vilket är mycket svårt. Ett annat alternativ - om det finns en jordledning på stolpen - en rund tråd med en diameter på 5-6 mm, kan du fästa band på den. Ett annat alternativ - att fixa på stolpremsorna av metall - för att göra något som klämmor och till dem för att fixa kabeln.
I ett metallrör
Om kabeln går upp längs husväggen i ett metallrör dras den helt enkelt inuti. Eftersom man för utomhusledningar använder ganska solida kablar är dess styvhet vanligtvis tillräcklig för att mer eller mindre hålla sig inne i röret.
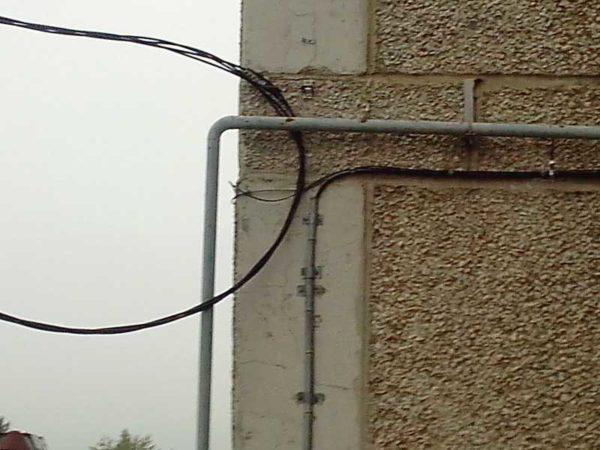
Ovanifrån och under röret är röret stängt med någon form av kork (du kan klippa ut den ur skumplast och sedan måla den tillsammans med röret). Denna kork kommer dessutom att fixera kabelns position (inte pressad mot kanten), och för att förhindra att den rör sig inuti röret är den fäst vid väggen vid utgången från den.
Till kabeln
För att fästa kabeln på kabeln används speciella metall- och plasthängare. De består av två delar - det finns ett hål för kabeln och ett större för att lägga kablar.

Vilka är bäst - metall eller plast? Metall är mer hållbara, men längre att installera - du måste skruva in en skruv. De i plast håller i cirka 5 år, men de installeras snabbt - "svansen" dras genom lämpligt hål och dras åt. Det är allt.
Fästelement för kablar och ledningar: typer och sorter
Med samma typ av installation av ledningar och kablar kan samma typer av fästelement användas. Det väljs utifrån de tillgängliga förhållandena, möjligheterna och smakerna hos ägarna. Huvuduppgiften - att säkerställa kvalitetsfixering och inte bryta isoleringen under installationen eller under vidare arbete och drift. Och den typ av fastställande du väljer från de möjliga alternativen. Det finns en hel del av dem - det finns speciella som produceras speciellt för kablar, det finns lånade från andra områden, det finns - hemlagad.
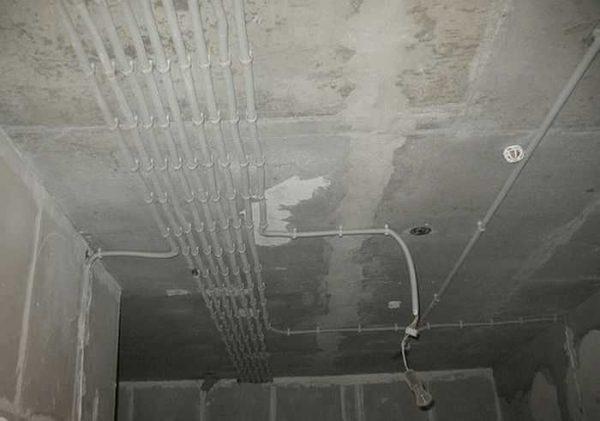
Clips för kabelinfästning
Med hjälp av clips kan du fästa kabeln på väggen, i taket eller på golvet. Du måste bara välja rätt design, och det finns många av dem. Att fästa kabeln med clips är en mycket populär metod - det kan vara mycket snyggt och nästan osynligt. Detta är om det är tänkt att vara öppna ledningar.
Klämmor för kabelinstallation finns i metall och plast och i olika former. De enklaste har formen av en schackel, som på ena och andra sidan har hål för självgängande skruvar eller pluggar. Alla är bra, men för installation krävs det att borra två hål, och det tar mycket tid.
Det finns ett alternativ som gör att du kan bibehålla ett brandavstånd när du installerar strömkabel på brännbara ytor (bilden till vänster). Detta fästelement fixeras med en enda självgängande skruv på ytan. Det är bra eftersom gängor kan läggas till i samma fästelement om det behövs. För att göra detta behöver du inte ta bort det, du måste skruva loss skruvarna som håller den övre delen av klämman.

Det tredje alternativet är en slags slinga från en metallremsa. För att installera den måste du först leda kablarna inuti, sedan kombinera hålen och fixera den på ytan.
Alla dessa clips kan användas både på väggen och i taket. Men när du lägger ett stort antal trådar i taket är de obekväma - för många hål krävs för installation. De är gjorda av metall, en del sedan målade - så att fästelementen sticker ut mindre när de läggs externt.
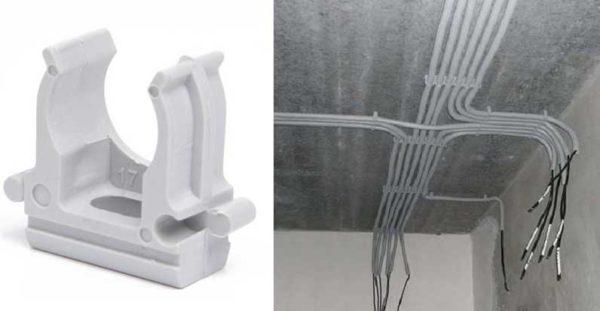
Plastklämmor används främst för att fästa kablar i korrugerade slangar. Det finns olika storlekar för olika korrugeringsdiametrar. De kan installeras både enskilt och monteras i rader - för mer exakt installation av stora buntar av ledningar. Denna typ av klämmor används främst för dolda ledningar, men om korrugeringen läggs utanför är det bekvämare att fixa den med deras hjälp.
Pluggklämma
Mer iögonfallande under installationen är en dowel clip. Detta är en böjd plastremsa med karakteristiska grenar i ändarna, som på grund av elasticitetskraften håller fast fästelementet i väggens eller takets material. Formen på dessa produkter är för runda och platta kablar i olika storlekar. Men seriösa kablar kommer inte att fixeras med dem - de är för små. Men de ser väldigt snygga ut på ledare med små tvärsnitt, inklusive TV, telefon och Internet.
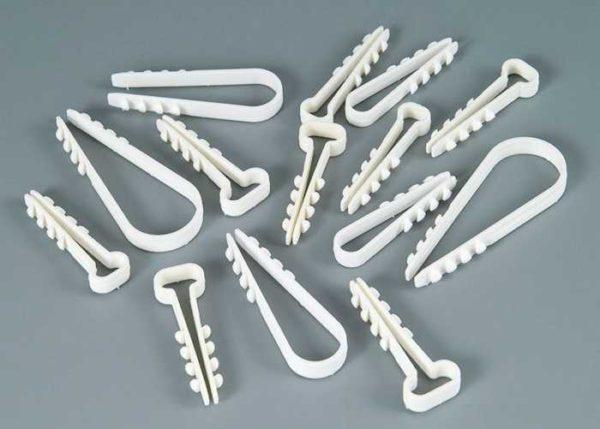
They are installed simply: a hole of suitable diameter is drilled, a conductor is inserted into the clip, the ends are tucked into the hole and forcefully inserted there. Really good option – quickly mounted, you look neat. It is used mainly for open wiring.
Pluggband
Another option for fast cable fastening is a dowel tie. It is made of non-combustible self-extinguishing plasticizers, allows you to quickly mount cable lines. It can be used for both open and concealed installation.
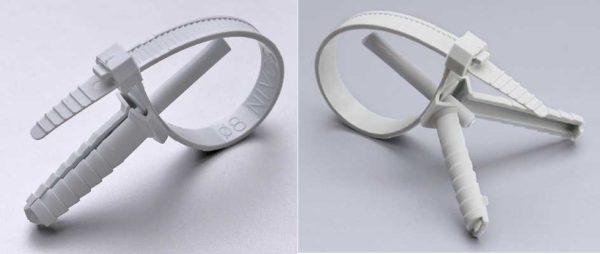
There is a coupler with a split and non-split lock. The split lock allows you to change the number of wires if necessary. The method of installation is the same as a regular dowel. The difference is that the dowel is also plastic.
Kabelbuntar med dymling (CSP)
Another option for quick installation. It consists of a dowel with a thread and a pad with a cable tie attached to it. First, the dowel is installed, and the pad with a tie is screwed onto it. The wires are attached to the finished route.
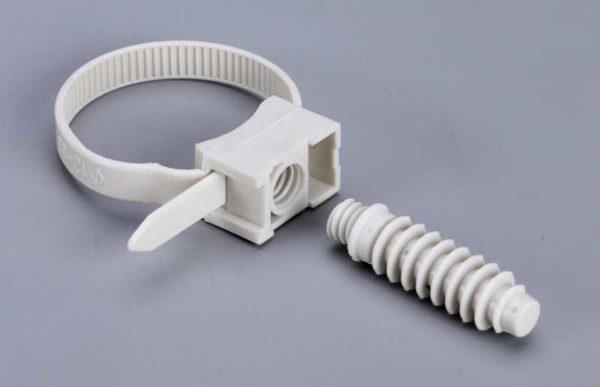
Material – non-combustible plastic, color – gray, temperature of use – from -45°C to +85°C. Can be attached to concrete, brick and wooden surfaces.
Clips (häftklamrar) med spik
An excellent option for fixing cables to dense surfaces – wood and its derivatives, plaster. On the side of the plastic staple there is a hole in which a nail is inserted. In terms of shape, there are round rectangular staples – under different shapes of conductors.
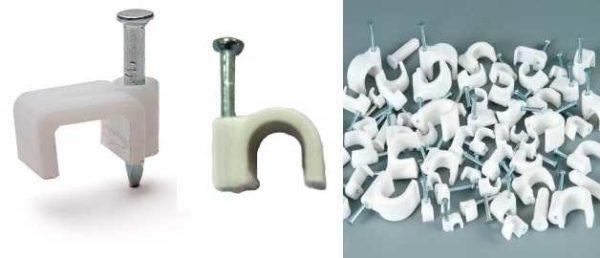
Cable fastening with such staples is fast and does not catch the eye. Most often small-sized wires are attached too – TV, telephone, Internet.
U-formade häftklamrar från en häftapparat
Even the smallest staples and clips are still quite noticeable. There is a way to make fasteners almost invisible, at least in some cases. If you have a construction stapler, you can attach wires and telephone cables to wooden surfaces or plaster with special staples. They have long legs and a rounded back. There are special staples for stapler designed for cable installation with plastic stoppers (middle picture). They do not allow you to crush the wire, which happens when working with ordinary staples, if you set too much force on the trigger mechanism.

This method is good for high speed – just one press on the stapler lever and the staple is already installed. In an hour you can fix a decent meterage. Another positive moment – the fasteners are not visible, when dismantling in the wood there are very small holes, which are also almost invisible. With plaster and chipboard, OSB is somewhat more difficult – the damage may be greater, however, they are still less noticeable than from nails, even the smallest.
The disadvantage of fixing cables with a stapler is significant size limitations. Such staples are not large. The maximum size of the width of the staple is 12.5 mm, and even then not in all types. It is more than enough for installation of telephone “noodles”, Internet cable or other similar conductors, but it is not always possible to fix VVG or NYM in this way. In addition, these cables have a more rigid insulation, which requires more frequent installation of staples.
Fästelement för att organisera ledningsbunten
Not always wires need to be fixed permanently. In some cases, you just need to organize the bundles so they don’t get tangled. For example, there are usually a lot of wires that go to your desk. Fix them rigidly to nothing – after some time may require remodeling, and from the nails are holes, which on the table is nothing to disguise. For these purposes there are various devices. They are more often called wire or cable holders.
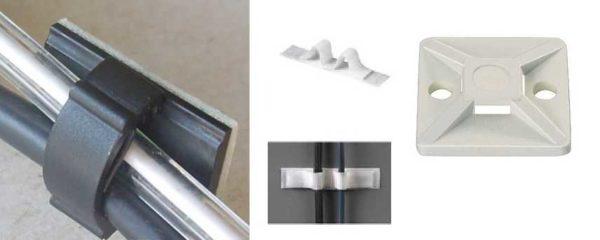
For example, the same staples, but of a different structure. On the right side of the photo above, you see a cable clip, to the back of which a double-sided adhesive tape is attached. For attaching to furniture or plastic panels, this is very convenient – the glue can then be washed off, and the surface remains undamaged. In the center – the second variant with the same idea, and on the left is the so-called mounting pad for attaching cable ties. First, these pads are attached to the surface – they also have Velcro on the back side. Then the wire bundle is attached to the holes with a regular plastic tie. Not so convenient and neat (the tails of the ties will stick out), but it can be used too.
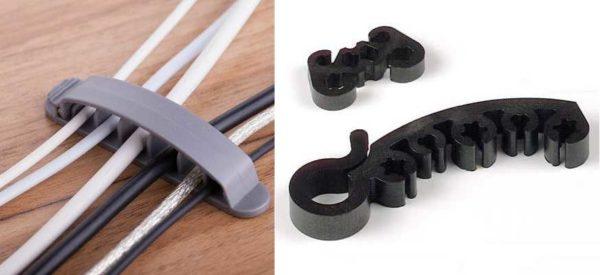
A few more options for fixing the harness of electrical wires you see in the photo above. The essence is the same, the methodology is different.
Kabelrännor - för dold förläggning av stora buntar
When arranging ceiling lighting from spotlights, you have to lay a large number of wires, and they have to be fixed to the ceiling slab. If we are talking about apartments, the ceiling is most often a concrete slab. It is hard and long to drill a lot of holes in it, it is not much easier to fix wires individually or in small groups. For such cases use suspended cable trays. They are usually made of galvanized wire or perforated metal.
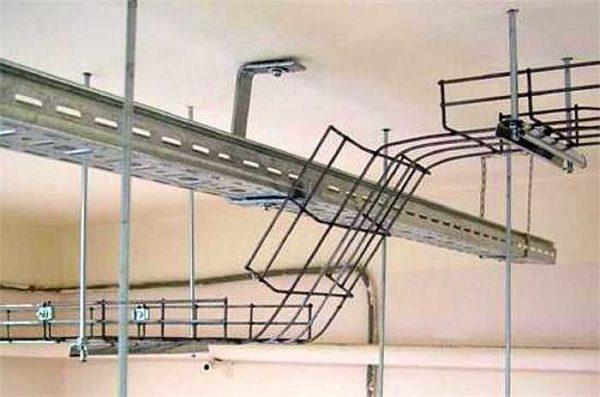
There are different sizes, there are several different types of fastening – on the studs attached to the ceiling, on hangers “T” or “G”-shaped.
The installation procedure is as follows: first, the structure is assembled and mounted on the ceiling, then the cables are thrown into it. If desired, they can be fixed with ties to the grids, but usually this is not necessary.
In addition, there are metal trays made of perforated and non-perforated metal. The latter are necessary when laying cables inside combustible walls – in frame houses, for example.
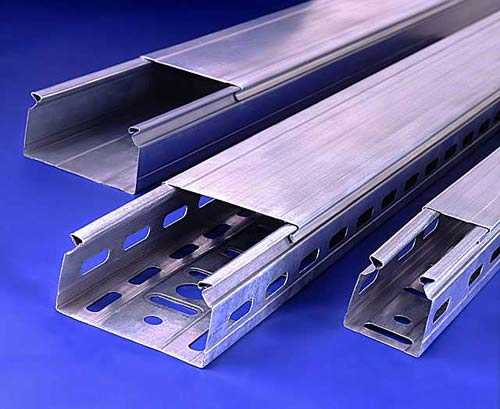
The same trays can be used when laying cables in the underground space. But then you can apply a perforated version. It will also wonderfully protect from rodents and accidental damage.
Hemmagjorda anordningar för fixering av kabeln
Many factory-made devices have a relatively low price, but when hundreds of them are required, the sum runs up a lot. And if the wiring is hidden – it is required, for example, to fix the cable in the groove, why brick up extra money, if you can do with improvised means. This is what they make a homemade cable fastening:
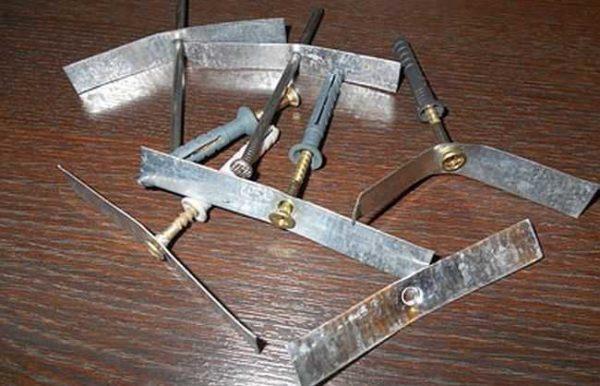
- Strips of tin + nails or dowels – depending on the material of the wall. Tin is preferably galvanized, and it can be “extracted” from beer cans. It is cut into strips 7-10 mm thick, a hole is made in the center, in which a nail is inserted. First, along the route with a step of 60-100 cm nail the fastener, then tin strips clamp the cable or wire. To fix the cable was reliable, it is desirable to clamp the ends in a lock.
- From galvanized metal, cut into strips about 1 cm thick you can make a simple U-shaped bracket. At the ends of the nails, use as conventional staples – tacking the conductor every 50-80 cm. Can be used to attach wires to walls and ceilings.
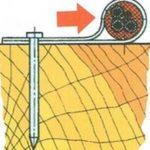
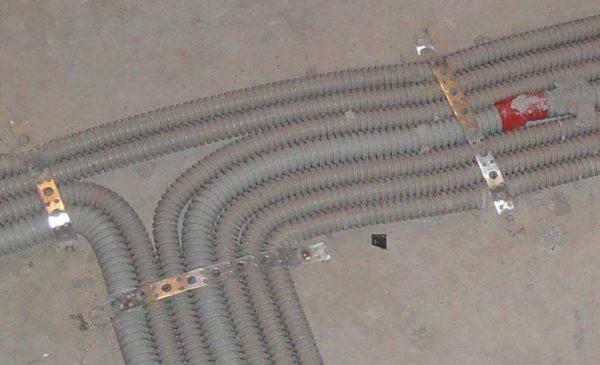
- Also, a strip of tin can be used to fasten the cable in a loop. The strip covers the cable then the strip is attached to the wall (see photo on the right). This option can also be used to fix conductors in the groove. From the usual external fixing it will differ only the step of installation of fixers – they can be put less often, as their task – to hold the cables until the moment does not harden the mortar, which is used to fill the groove. In the same way you can fix the wires in a protective sheath – corrugation, pipe, etc. Only the strips will need a longer length and, possibly, width – for a more reliable fixation. A nail or self-tapping screw is suitable for wood, a dowel is required for brick and concrete.
- Bundles of wires can also be secured using improvised means. A longer strip of tin can be used to fix several conductors located near each other. It is more convenient to use perforated metal for this purpose (for example, mounting hangers for suspended ceilings), but you can do with ordinary tin strips.
These are the main types of fasteners for cables, which you can make with your own hands. There are probably other options – the imagination of craftsmen is inexhaustible, but these are the most common.
Fästelement för dold läggning
If the cables are laid at the stage of repair, increasingly resort to laying inside the walls, floor or ceiling. Since the result of the work is not visible, the aesthetics is given a minimum of attention. But a lot of attention is paid to reliability and safety – access for remodeling is very, very difficult. Therefore, and fasteners for the cable when laying inside the wall, ceiling, under the floor is chosen reliable. It can be:
- Ties of any type – with dowels, mounting pads, etc.
- You can pick up a suitable size of the clip type.
- Make homemade fasteners.
For laying large bundles of wires on the ceiling, it is more convenient and faster to use trays, but you can still use the same fasteners. The only bad thing is that you have to drill a lot of holes for installing fasteners in concrete or brick. This is especially inconvenient when working on the ceiling. About how to better optimize the work in this case below.
If it is not supposed to have false walls or a clean floor, under the wires are made recesses – gutters. In them lay the wires, then smear with mortar and then already make the finish. From the point of view of aesthetics, the option is ideal. From the point of view of operation – problematic, as it is almost impossible to replace or repair the wiring without breaking the walls. Nevertheless, the wiring is done in this way, just trying to lay quality cables, and even with at least some reserve in power or number of pairs.
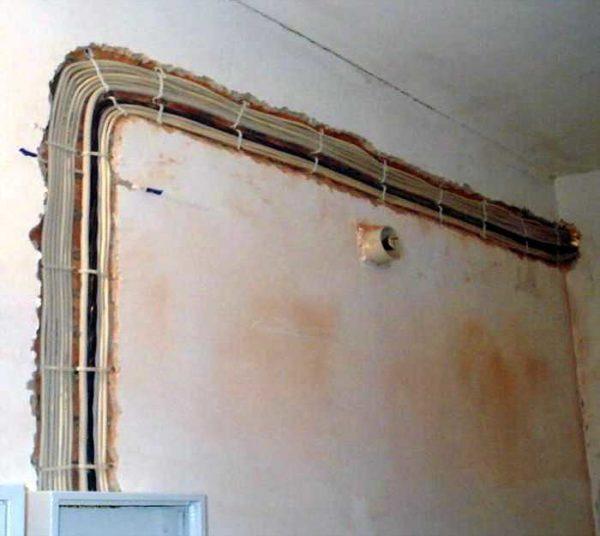
According to safety rules in combustible walls (wooden, panel and frame) laid cable in a non-combustible sheath or in an all-metal tray. If it is a non-combustible sheath, it is usually a corrugated tube made of non-combustible plastic. In this case, the sheath itself, inside which the cable is located, is attached. This does not affect the choice of type of fastening, but it affects the selection of the size of the fasteners – it is simply necessary that the clamps could cover the sheath.
Laying cables inside combustible walls is difficult: the requirements are very strict. They can be performed in frame or panel houses, but in log or log houses is very difficult. It is necessary to lay all-metal trays in the walls. In this case, you have to remove a large amount of wood, which does not improve the thermal performance and appearance to make ideal is not possible. Therefore, in wooden houses more often resort to the open method of installation – over the walls.
Fästdon för kabelinstallation utomhus
In the case of outdoor cable installation about the appearance of the fasteners are more stringent requirements. Since everything is in plain sight it is necessary to select the most inconspicuous variants or on the contrary, the most decorative for example retro-wiring. This is an extensive topic and is described in detail here. Other options:
There is a choice, but all methods are not ideal, so everyone decides for himself how and how to fix the cable.
Fästa kablar i taket
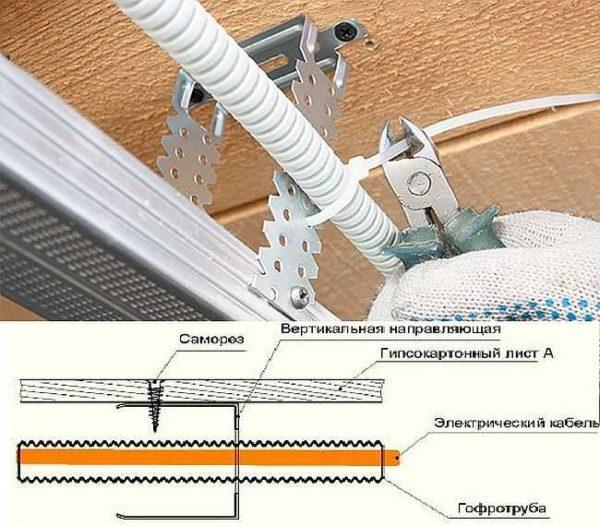
Fixing cables to the ceiling is necessary mainly when installing stretch ceilings or ceilings made of plastic panels and plasterboard. In the case of gypsokrtonom everything is somewhat simpler: there is a system of hangers, which can be plastic ties to fix the wiring harnesses. In other cases, everything is a little more complicated: you have to drill a large number of holes for fasteners, because they use all the same clips and staples, and under each you need to install a dowel (if the ceiling is made of concrete slab).
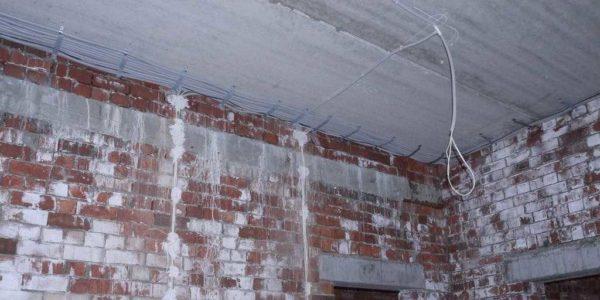
You can speed up the installation in several ways:
- Genom att använda kabelstegar (beskrivs ovan).
- Efter att ha fäst ett visst antal linor i taket, häng små buntar av ledningar från dem med hjälp av plastband.
- Använd en lång perforerad metallremsa för infästning.

