

The old tradition is to store things on the balcony and loggia that have no place in the apartment. And to prevent these small-sized rooms from turning into a dumping ground, a good storage system is needed. The most practical option – built-in closet on the balcony or loggia. Often, all that is required is to make structures on which the shelves will be held and put doors. With such a task is easy to cope with your own hands even with a minimum of skills.
Conținutul articolului
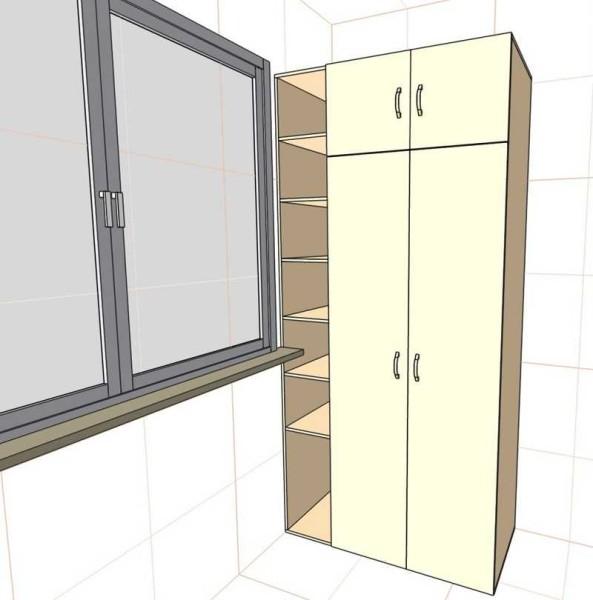
Materials and designs
The design of the built-in closet can be divided into two parts: it is a frame and doors. Sometimes, if a side rack is needed, there is also a paneling.
From what the frame is made
Racks for the closet are most often made of a bar. The cross-section is approximately 40*40 mm or 50*50 mm. The option is not bad, but on an unheated balcony there can be high humidity. And wood is such a material that changes size depending on humidity. There is one more point: not in all regions the timber is cheap.
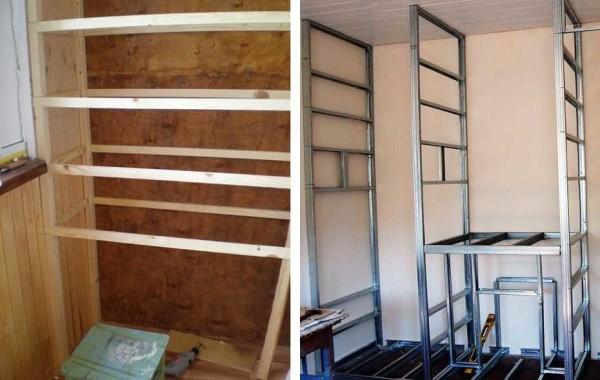
There is another option – to assemble the frame on the profile for drywall. On it perfectly fastens any sheet material such as LDFP, plywood, etc. If you take galvanized, then no problems with humidity are not terrible.
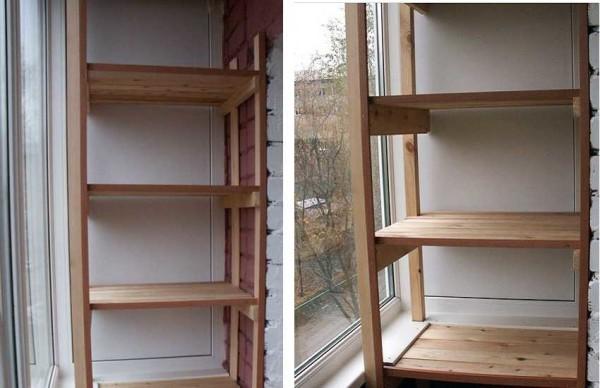
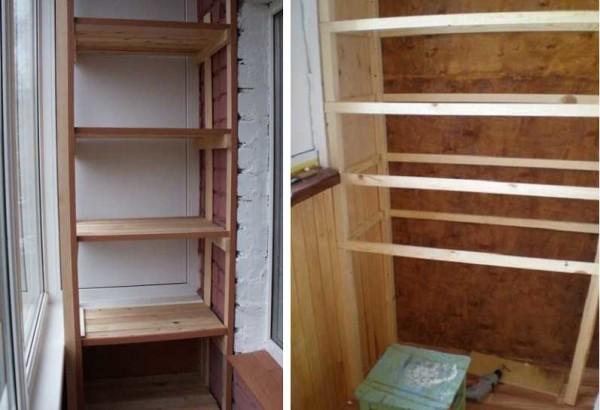
What to make shelves from
The easiest way to cut shelves to size from sheet material. This is all the same chipboard – ordinary or laminated, thick plywood, sometimes you can use OSB, but shelves for heavy things should be desired on a wooden frame.
You can fix them to the prepared places on the frame – installed bars or self-tapping screws. There is a variant – angles directly to the wall. But it is good if the walls can be drilled with self-drilling screws at once, otherwise to put each shelf on dowels is too long. Then it’s easier to build a frame and attach to it.
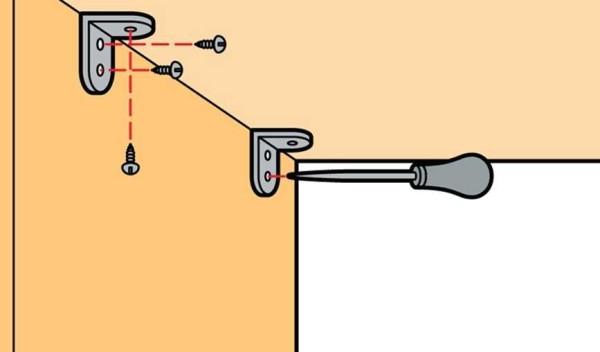
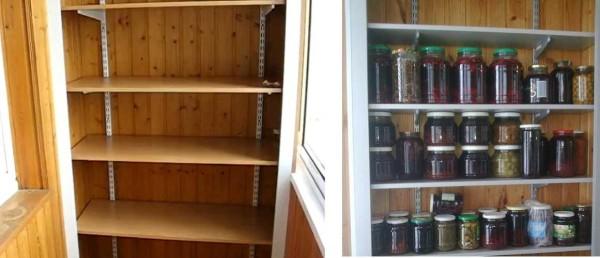
There is an even simpler way to make shelves on the balcony or loggia: use metal guides and brackets to them. These systems are used in stores, but for this case they are more than convenient: the height changes easily with a fairly small step. The brackets are simply re-hung on other holes.
With this organization, all that is needed is to put the doors. Here and ready is the closet on the loggia or balcony.
You can, by the way, make something similar and from wooden bars: notches for shelves with a certain pitch. You can make cuts with a saw, and then remove with a chisel.
Often shelves are made from cut pieces of boards. Since the width of the balcony is usually small, all sorts of scraps go into the case. Just so that they do not lose their appearance for a long time and easily wiped, they need to be covered with something. And although the glazed balcony and loggia are more related to the interior, paint products take for outdoor work, as well as protective impregnations. They contain substances that protect against the effects of ultraviolet light. Without them, after a couple of years, the wood will have a miserable appearance.
To work in the apartment is not too “smelly” you can take a water-based varnish. It does not create a film, but dirt is not absorbed into the surface.
What are the doors
In the closet on the loggia or balcony, the doors are made of three types:
- conventional hinged;
- sliding – like a closet-coupe;
- roller shutters.
All these doors can be the entire height of the closet, but it is more convenient to divide it into two or three parts, and on each hang their own doors.
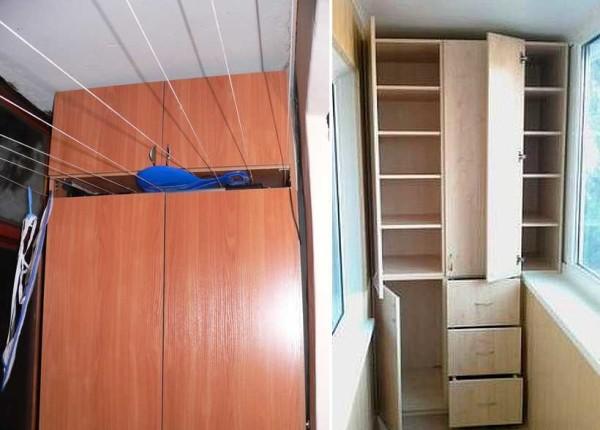
The most inexpensive – hinged doors. You need the doors themselves and hinges, and it is easy to “put” them in place yourself. More expensive are sliding systems. You need guides – upper, lower and side, as well as a system of rollers, which is installed on the door leaf. But this option is attractive because it saves space.
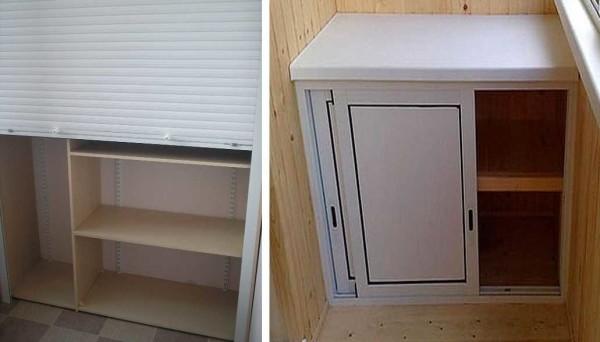
The most expensive are roller shutters. But they are attractive because they go ready-made set, and the installation is basically “attached” to the purchase.
On how to assemble sliding doors for a balcony closet, watch the video. Much will become clearer.
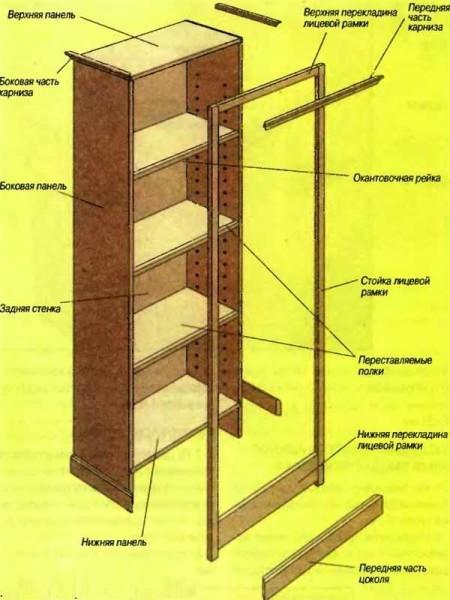
How to make a balcony cabinet on a wooden frame
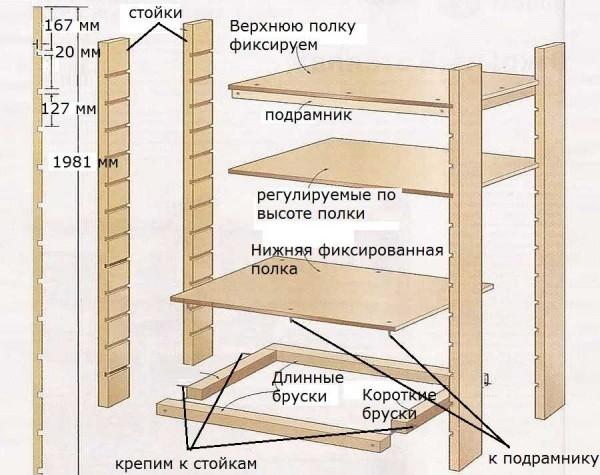
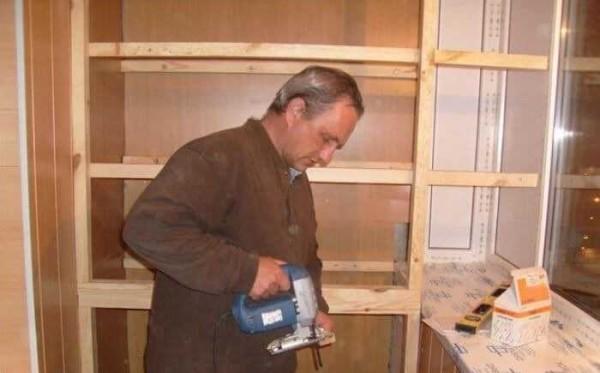
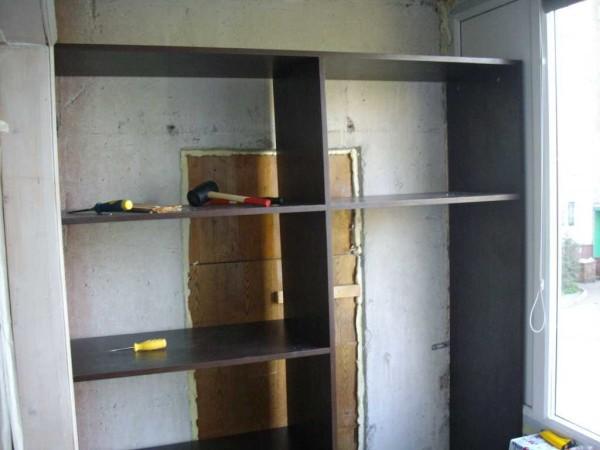
First cut 4 posts to the required height of the cabinet. If you plan to make it all the way to the ceiling, measure each separately, not cut the same. The height is often decently different. Cut racks are fastened. The distance between them determines the depth of the closet, but most often depends on the available space. As much as there is, so much and use.
If there are three blank walls there are no problems. The bars are attached to the dowels. Set the bar to the wall, verify its verticality, drill holes for fasteners in the right places. Remove the bar, insert plastic plugs from the wall plugs into the holes in the wall. Having put the bar in place, screw it to the wall.
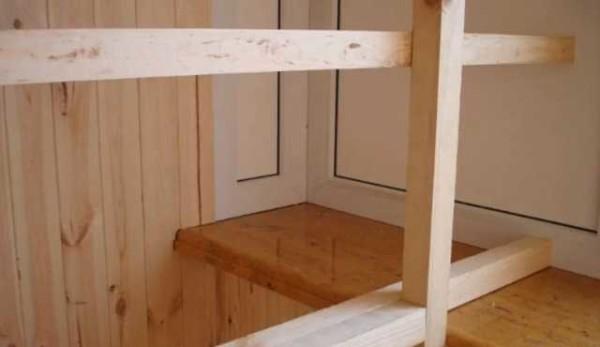
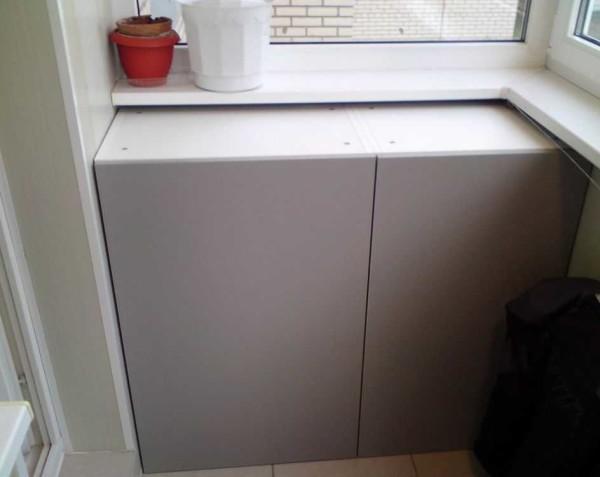
If you make a cabinet on the balcony, one side is attached to the wall, and the second – to the elements of the frame or only at the top and bottom – to the ceiling and floor (we use reinforced metal corners).
Another option for a similar case – if you need to close something window glass – near the window to put a wall (for example, made of chipboard), fix it at the bottom and top of the corners to the floor and ceiling, and then attach to the wall (and to the ceiling and floor) bars frame.
Then to the posts nail the cross bars. They give the whole system a high degree of rigidity and the shelves will rest on them.
In order not to “walk” the place near the glass, this part is also occupied by shelves. Since the width of the furniture turns out to be different, often make two separate small cabinets: on the lower and upper halves. They often differ in depth: the lower one can be made wider and hide there heavier and oversized things. The upper closet in this case can be made less deep. In this case, the top of the lower cabinet can be used as a table top.
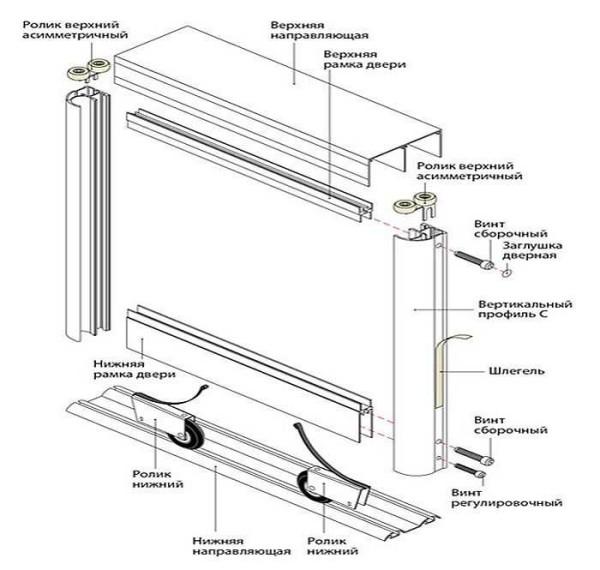
Then it’s just a matter of what and how to make the doors. The best option is to make sliding. Their scheme is in the picture. There are a lot of parts, but you can figure it out.
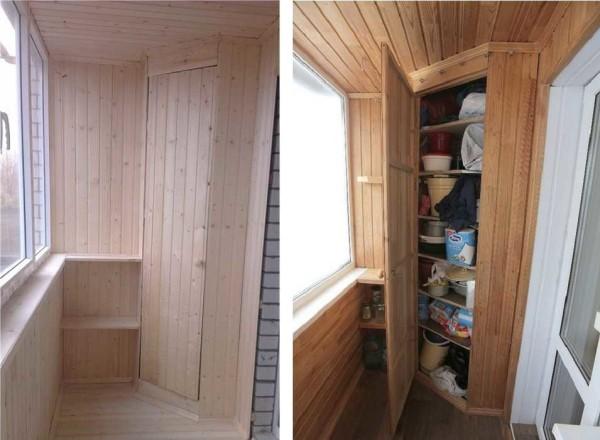
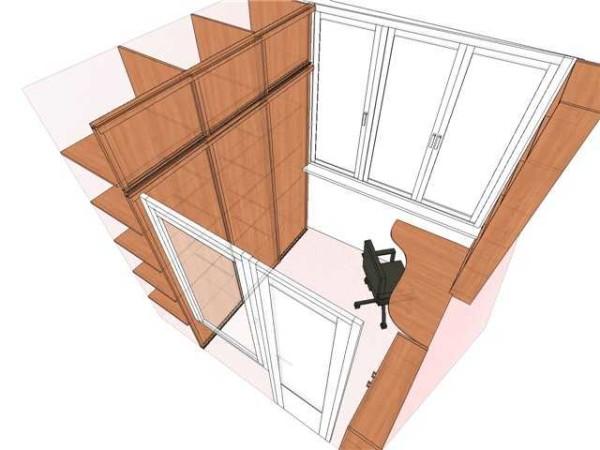
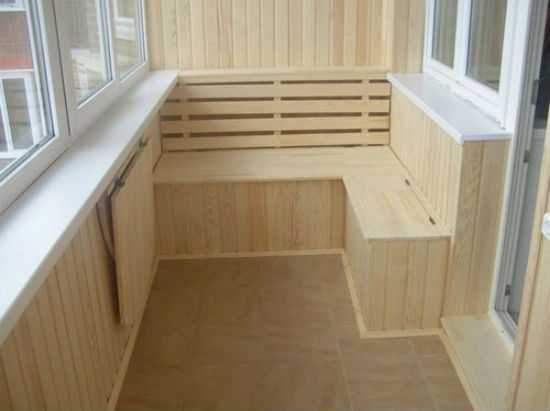
Corner closet on the loggia: photo report
First, the loggia was sheathed with wagon. Immediately after that, from the same wagon began to make a closet. It was decided to want a corner, so as not to close so much of the window. On the opposite side, the closet occupies almost the entire width, slightly short of the balcony door.
The racks were not attached. Nailed bars on the ceiling and to the floor, to them the walls. They turned out to be short – three boards. To the wagon walls nailed planks, on which laid the same wagon, cut to the resulting shape of the closet.
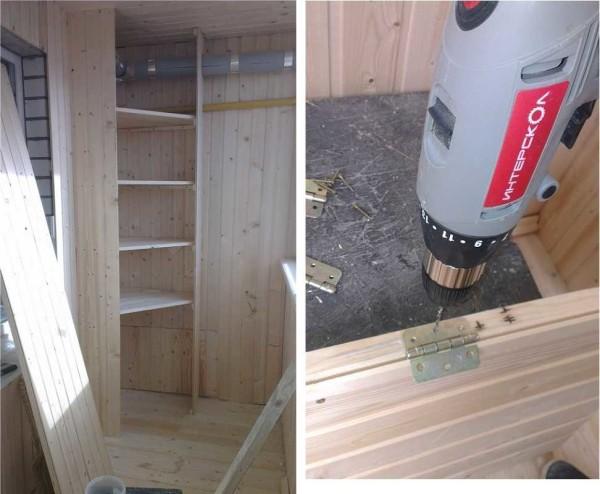
At the top and bottom of the doorway nabilize the wagon across the opening. Measured the remaining distance, subtracted 1.5 centimeters for inaccuracies and such a length cut the wagon on the door. They required six pieces. Knocked down with the help of four cross slats knocked into the doors. Hinged using the usual hinges.
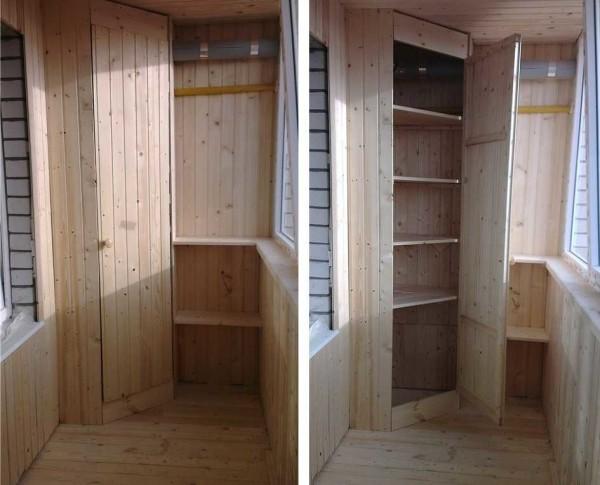
In the free space between the closet wall and the balcony cladding, two shelves were nailed. A little later added a few higher with rounded edges. The last step nailed under the ceiling and on the floor skirting boards (to close the gaps), then sanded the wagons with sandpaper and painted with stain.
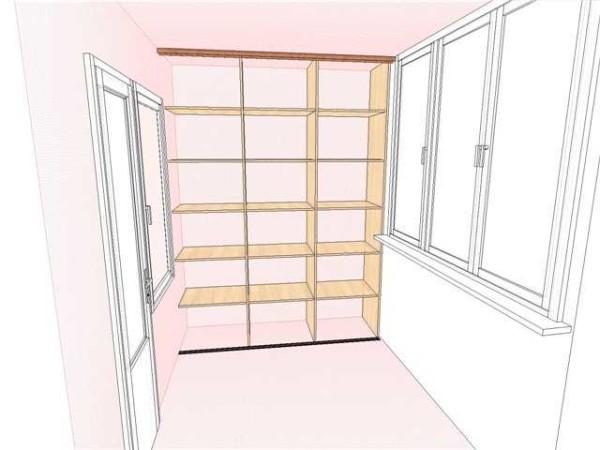
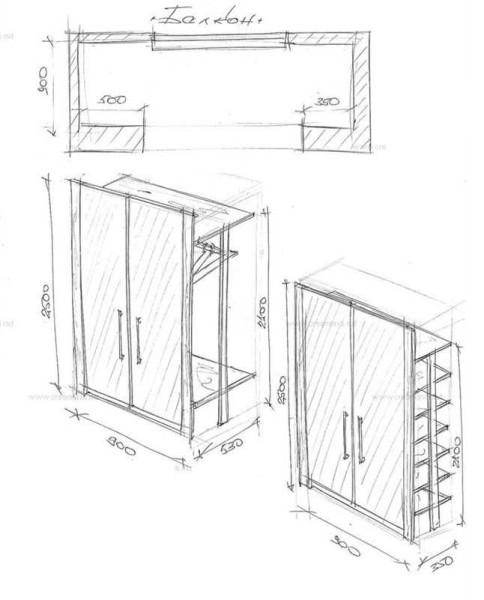
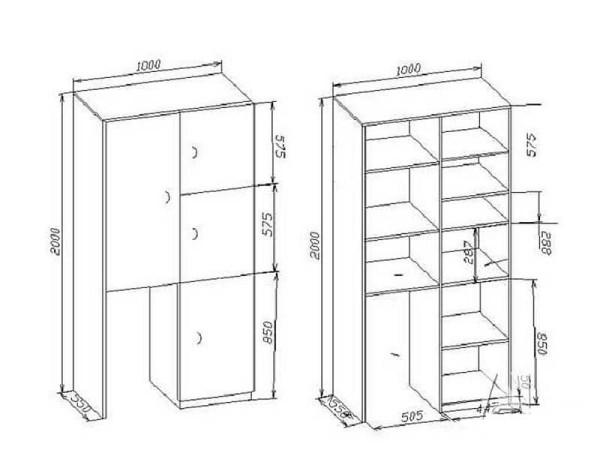
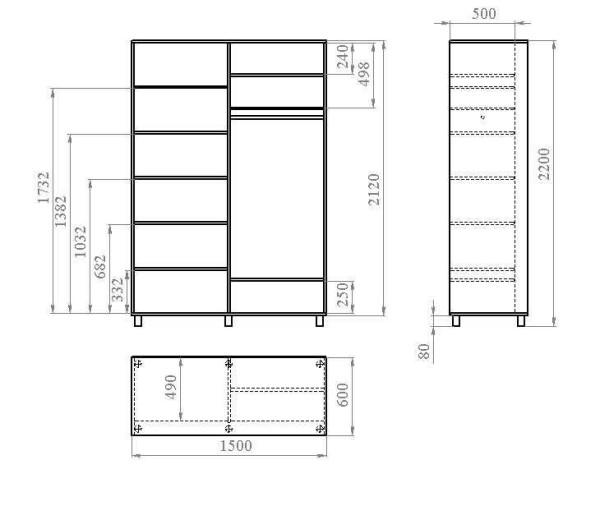
Desene și scheme
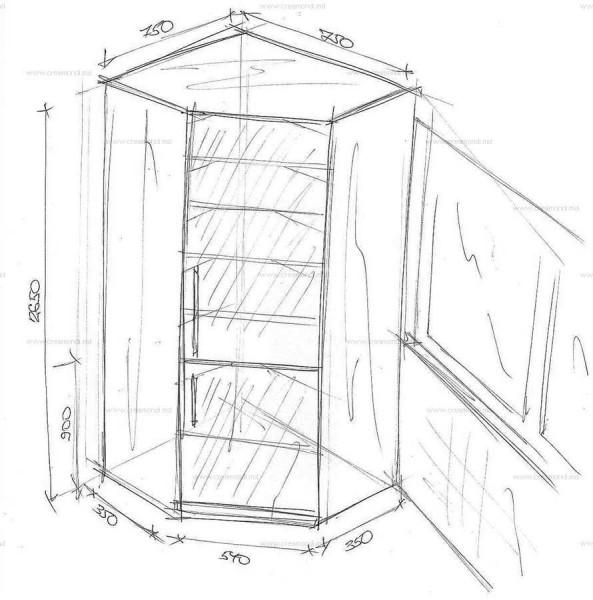
Talk about some standards regarding cabinets for balconies can not be. And the size and configuration, and glazing is different. Therefore, even with the size of the shelves have to be determined “on the spot”. But a few examples that you can change as you need to give.

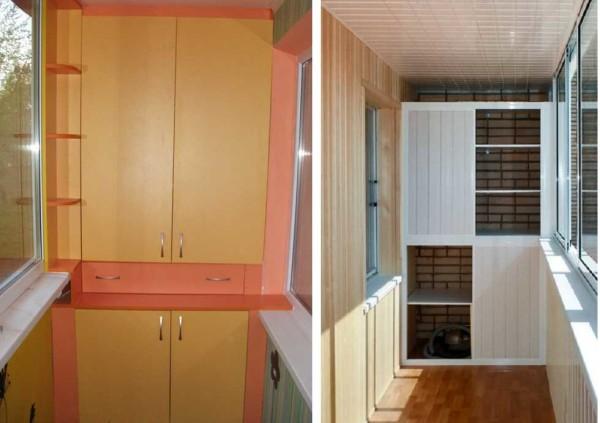
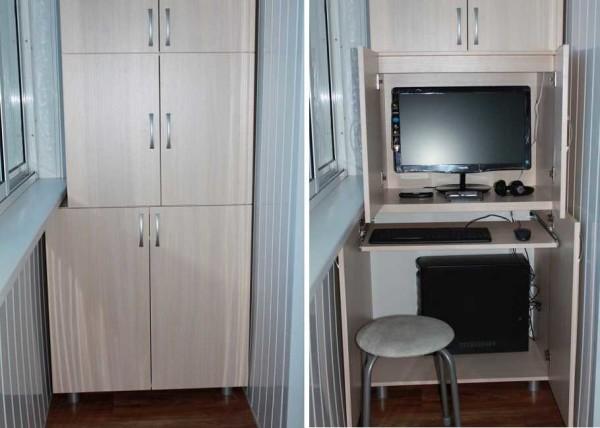
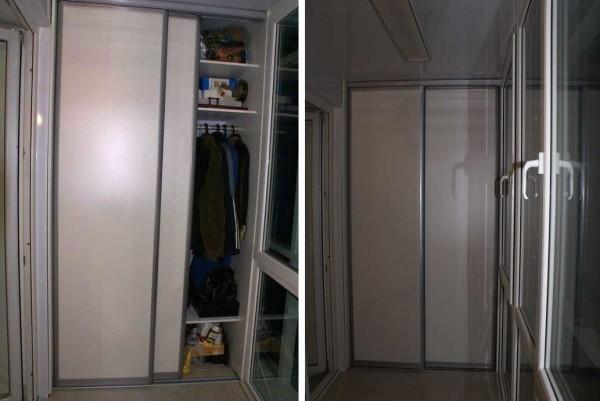
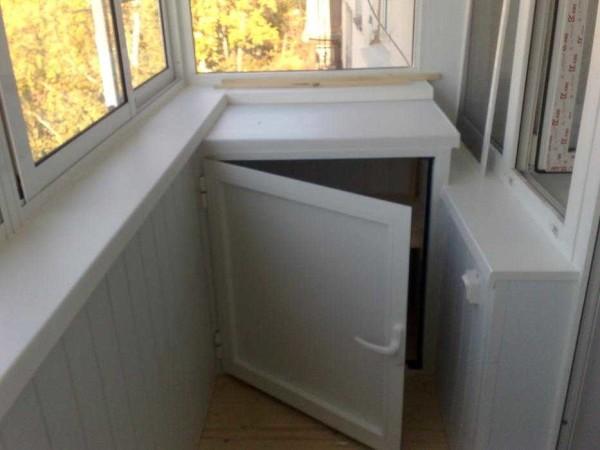
Photos of finished cabinets on the loggia and balcony


 cu bucătăria, camera")


I love the idea of turning a balcony into a closet! I did something similar last summer. I added shelves and used storage boxes for shoes. It keeps everything organized and free up space inside. Plus, it’s super easy to grab stuff when I need it!
Last summer, I turned my balcony into a cozy closet. Got some shelving and bins from IKEA, made it super neat! Now it’s perfect for my seasonal clothes and shoes. It saves space inside and keeps everything organized. Totally worth it for the extra storage!
Wow, I just built a closet on my balcony last weekend! It was so easy! I just grabbed some shelves and bins, and now I’ve got extra storage for all my stuff. Can’t believe I didn’t do this sooner. My space feels so much bigger now!