

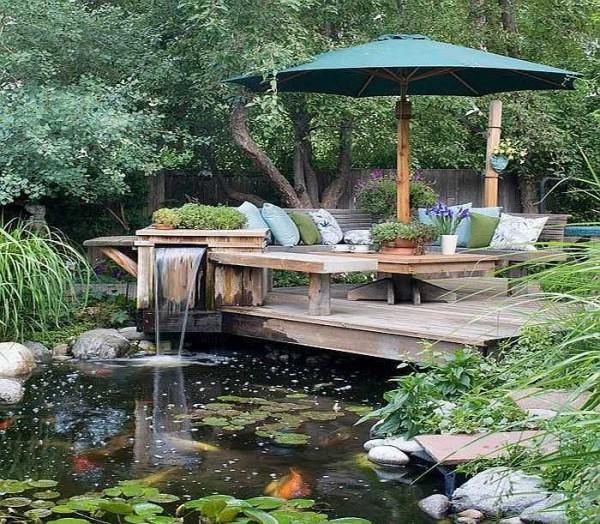
The design of the site is rarely without the device of a water body. Water soothes, brings coolness on a hot day. It is also good that you can make a waterfall with your own hands, without involving specialists. It is important to have a pump and a place where it can be included. Everything else can be done by yourself.
Conteúdo do artigo
Bowl
Building even a small waterfall with your own hands, you will have to throw over a lot of land: everything starts with land works. It is necessary to dig an excavation for a bowl, in which water will be collected. Then the container must be sealed. There are two simple methods:
When using a ready-made bowl, you are limited in the choice of shape and depth: only those that are available. In the economy version – for a waterfall in the countryside – you can use any available container in the household: an old bathtub or tub. You can adapt even sawed in half barrel, etc.
Using the film, the shape, as well as the depth, you choose arbitrarily. But when working with the film must be careful: although it is dense, it can be torn.
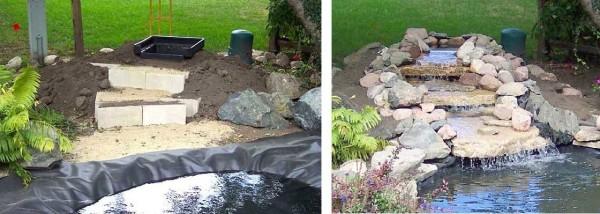
How to make a waterfall from the film: photo report
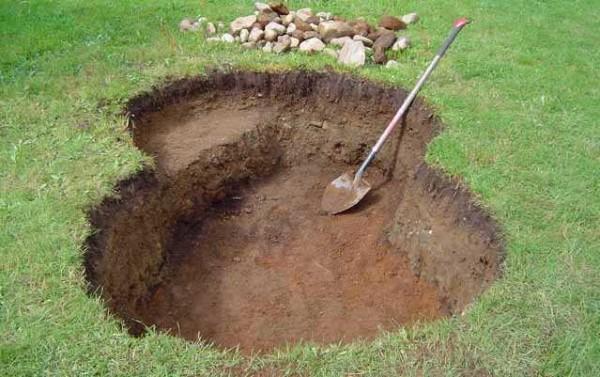
First, mark the desired shape of the bowl of your waterfall on the ground. The shape depends on the style of design of your site. Strict geometric proportions are characteristic of the art nouveau style, can be in art deco. In the rest try to give more natural, non-linear outlines. Most often it turns out a water body in the form of a bean.
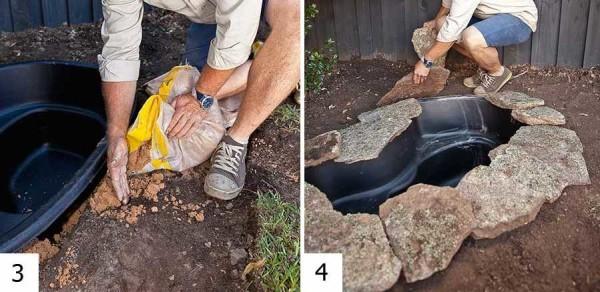
The easiest way to make markings is to use sand. It is poured into a bag, the corner is cut off. Spilled sand outlines the contours. So it is easier to assess how correct the shape you have chosen. If necessary, it can be corrected immediately.
Along the contour, the sod is removed, and then the pit is dug. Immediately, in the process of work, you form ledges. The optimal depth of the reservoir is about a meter. How many sites you will make, and what shape they will be – depends only on your desire.
In the excavated pit immediately remove all objects that can tear the film: pebbles, pieces of roots, etc. The bottom, ledges are leveled. The leveled ground is compacted. A tamping machine is used for this purpose. In the simplest variant it is a piece of tree trunk with a nailed bar. The bar is used to raise the deck, then sharply lower it down. So compact the soil. Then pour a layer of sand – 5-10 cm. It is leveled with a rake, watered. Take medium-grained sand. It is well compacted with water. Otherwise, the sand will have to be tamped.
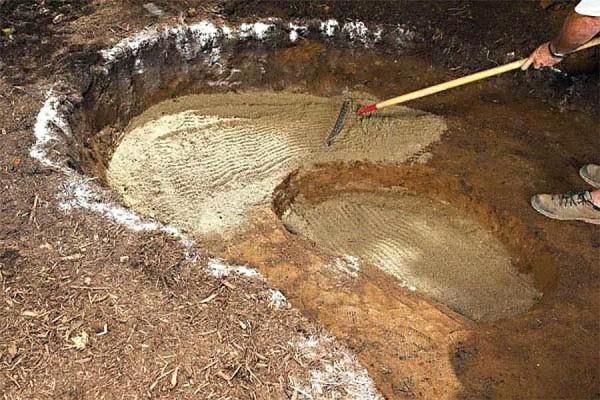
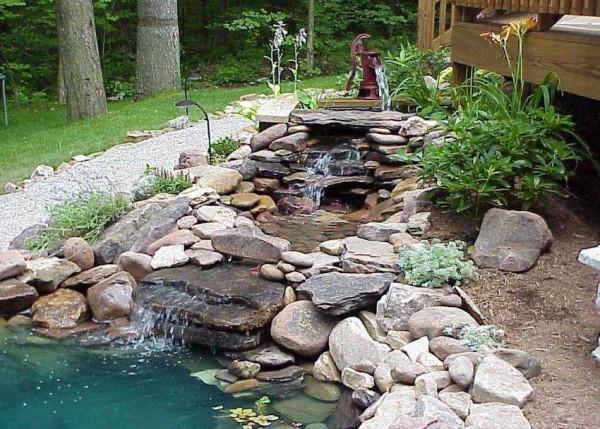
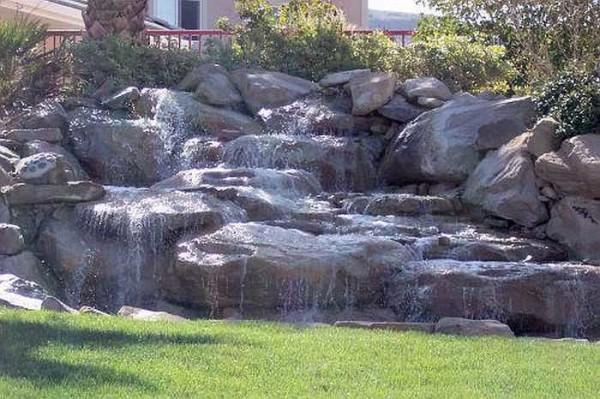
You can immediately form a slide, if your waterfall has one. For example, such as on the photo below.
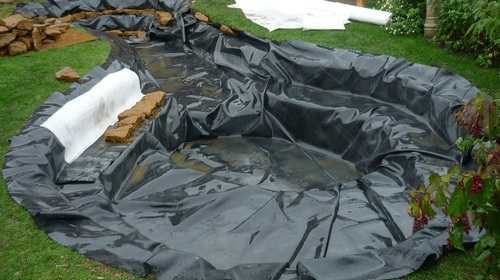
Next, the film is spread in the pit. Under it it is desirable to spread geotextile (the cheapest – 600-700 rubles roll). This nonwoven material will prevent the sprouting of roots, as well as more evenly redistribute the load. It is laid and on the edges of the pit, cover the sides and bottom. On top of the film.
As we have already said, it is better to use a butyl rubber membrane. It can be ordered in any format and you will get your fountain without seams. Calculate the size of the film is simple: the largest width+double depth+60-80 cm for the reserve on the edges. If your waterfall will be the size of 2*3 m (at the most extreme points) and depth of 1,2 m, then the film will need:
- 2 m width + 2*1,2 m + 80 cm + 80 cm = 5,2 m
- length 3 m + 2*1,2 m =0,8 m = 6,2 m.
Spread it first on the bottom, spread it out, forming folds. Having leveled it, press it with stones around the perimeter. Then you can proceed to leveling on the ledges.
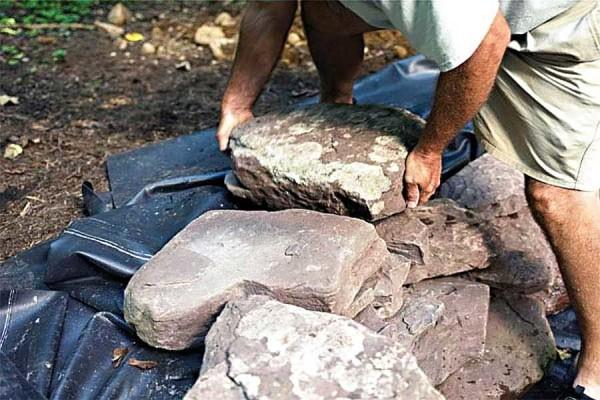
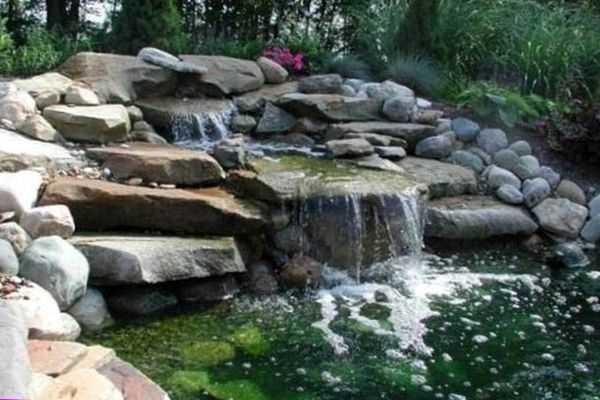
It is better to lay the ledges completely with stones. The bottom is desirable too, but you can use pebbles and small boulders. And the ledges are best decorated with layered stones. They are in the water, but they are clearly visible. We make a waterfall though artificial, but we want it to look harmonious.
Stacking boulders one on one, they can and should be fastened with mortar. You can use both large and medium or small stones. It all depends on the configuration and height of the steps. As a result, the slopes will be uneven, but also with ledges. This looks much better than a peeping film. Such a homemade waterfall brings satisfaction to the owners.
The entire order of construction of the bowl, all technological and nuances are completely the same as the erection of a pond. About how and from what you can make it, read here.
How to install a bowl made of plastic
When building a waterfall with your own hands using a ready-made container, first, turning it upside down, outline the contours. According to them, dig an excavation.
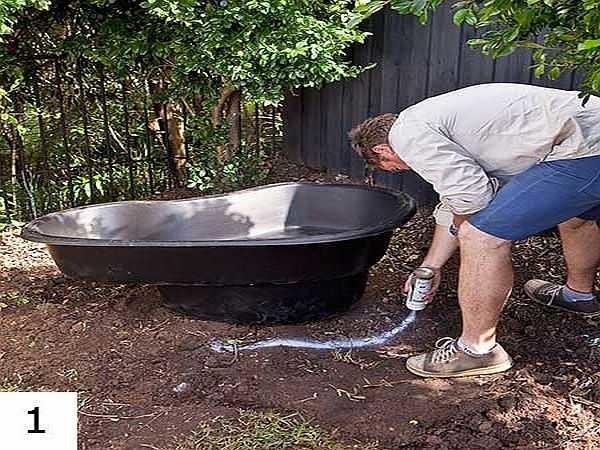
It should be slightly larger than the size of the bowl. When working guided by the existing shape, measuring ledges and forming similar contours. It is desirable to repeat the shaped protrusions with a sufficiently high accuracy: so that they find a normal support.
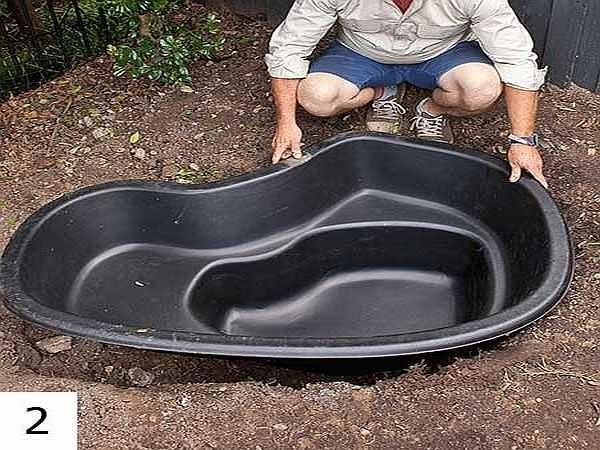
The ledges and the bottom are leveled, tamped, a layer of sand of 5-10 cm is poured, its layer is leveled, but it is not poured and not tamped: under the weight of the bowl it will compact itself. Having installed the bowl, we notice that there is a gap between its wall and the wall of the pit. We fill it with sand too. But here, it is desirable to compact it. We will have to do it with a pole or something similar. If the soil drains water well, you can spill the poured sand.
If the container is plastic, with thin walls, and the volume is large, fill the gap with sand is better by filling it with water. This way you will not be able to deform the walls, overzealously tamping the sand.
After that, it remains only to decorate the side and the device of the slide, from which the water will actually fall.
About the construction of fountains, read here.
How to make a slide for a waterfall
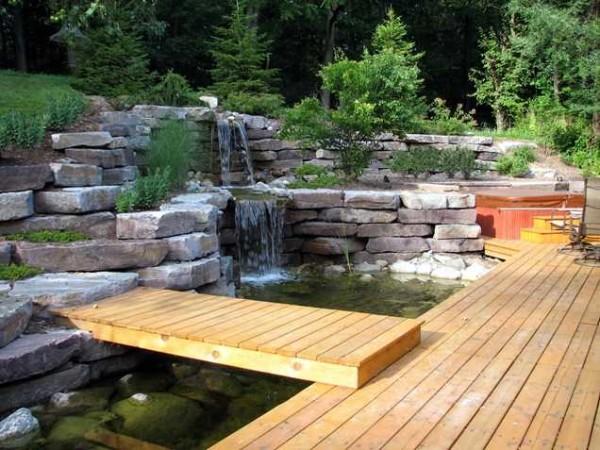
If you plan to decorate the edges of the waterfall with stones, and you want a high and large slide, on which the water flows, you need a solid base – a reinforced platform. Without it, the stones will slide into the bowl. Next to the excavation for the bowl, cleared and reinforced platform for the slide.
A standard monolithic slab is made. First, an excavation is dug. Its dimensions should exceed the slide by 40-50 cm in all directions. The pit is dug to a depth of 20-25 cm. Then the following order of works:
After the concrete sets (after a couple of weeks), you can start laying out the slide. This procedure is necessary if the height of the slide above ground level is about a meter.
If the waterfall is planned to be small, you can simply remove the soil and pour crushed stone (geotextile can be placed under it so that the crushed stone does not wash out into the ground). Tamp the crushed stone well, pour some sand on top, lay a metal mesh of thick wire. On it lay boulders, decorate with smaller stones, pebbles, sand, plant plants. This will turn out a kind of flower slide with a waterfall.
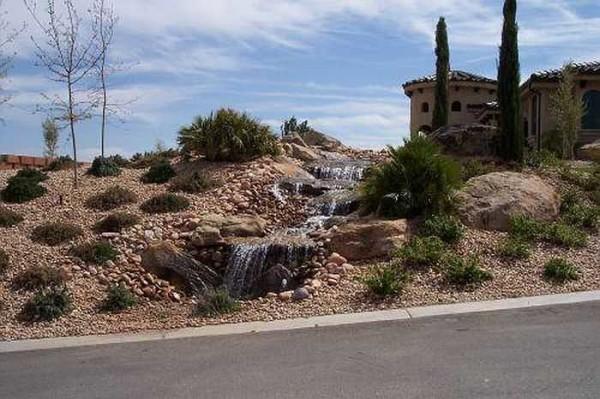
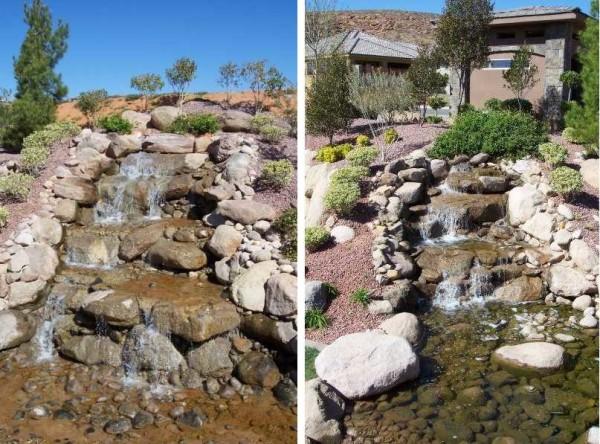
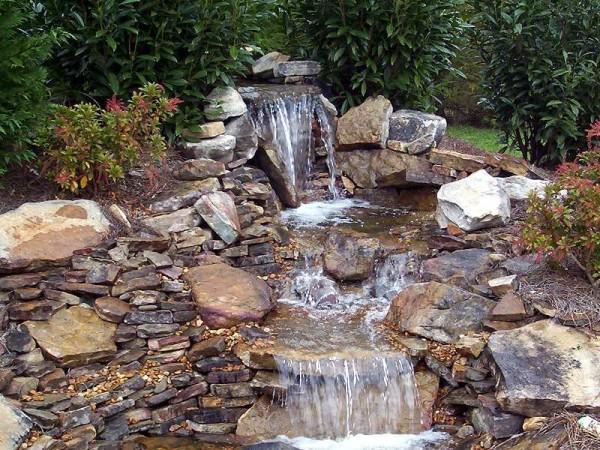
There is a second option – to make a waterfall of cascade type, using the height difference on the site. Even a small, a few degrees, slope will make the task much easier: on the slope form steps, laying stones in the form of slabs. If there is no slope, you will have to pour an earth hill, carefully compacting each layer, not forgetting to form ledges. To reinforce slopes, you can use a polymer mesh. It is spread out, covered with earth. It will keep the soil from sliding.
On the formed ledges, a film is spread, which is pressed against the bed with stones. They should be placed so that the water from one stone falls into the other, and not on the film. And then – it’s a matter of decoration
When forming a slide for a waterfall, the stones between each other, at least large, central, it is desirable to bind cement-sand mortar (1 part Portland cement, 3 parts of sand and 0,5-0,7 water).
Planning and arrangement of the site is described in this article.
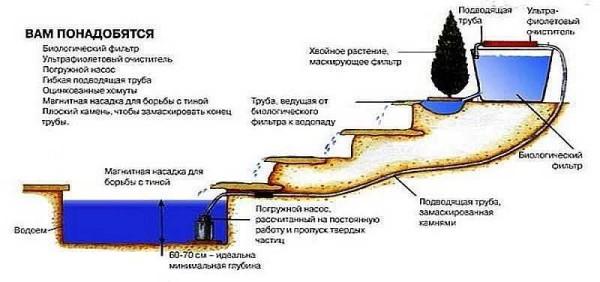
Installation of the pump
The pump for a waterfall at the dacha or on the plot near the house is selected according to two parameters: the height to which it can raise water, and its performance.
With the height is more or less clear: it should not be less than the height difference in your homemade waterfall. The difference is measured from the lowest point of the container (where the pump will stand) and to the point where it should lift it. In small home waterfalls, it is rarely more than 1.5-2 meters. But still keep track of this figure.
The pump capacity shows how much water it can pump per minute. The power of the flow depends on this indicator.
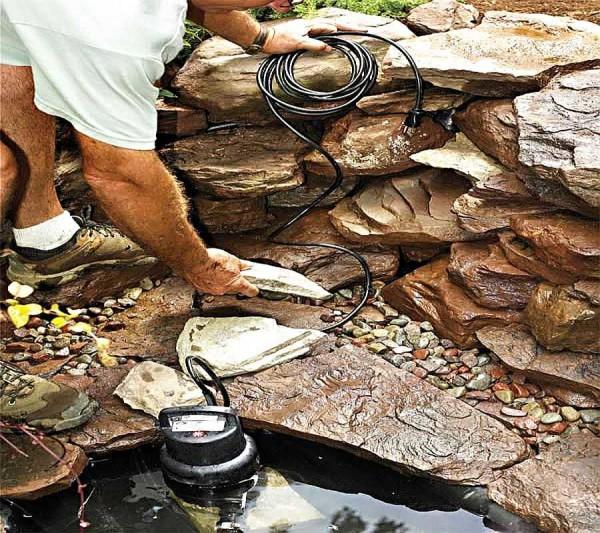
In such reservoirs, submersible pumps are used. They are placed on the bottom, installing them in a basket with stones, or simply pressing the body with several boulders. It takes water from the container, feeding it into a hose that is attached to the outlet pipe. This hose is where the water will run from.
To be able to pull out the hose, a plastic pipe of a decent diameter is built into the slide. So that a rubber hose can be lowered into it without problems.
It is better to put the pump in the basket. It works well with clean water, and in your waterfall can be leaves, all sorts of gnats, there inevitably gets dust and other contaminants. And the basket, or rather, the box can be covered with several layers of filters of different density. First – a fine mesh, and under it something more dense, at least the same geotextile. This filter will trap the main contaminants.
After installing this equipment, filling with water and starting, you can consider the waterfall with your own hands built. There remains such a “trifle” as the decoration of the banks.
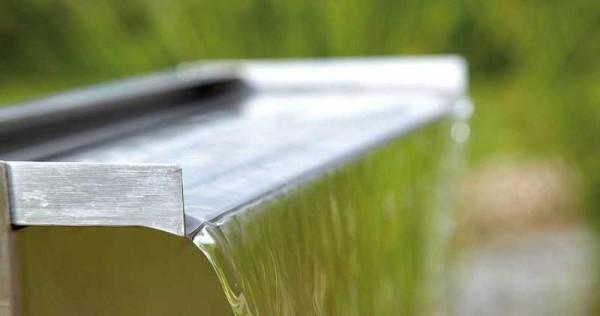
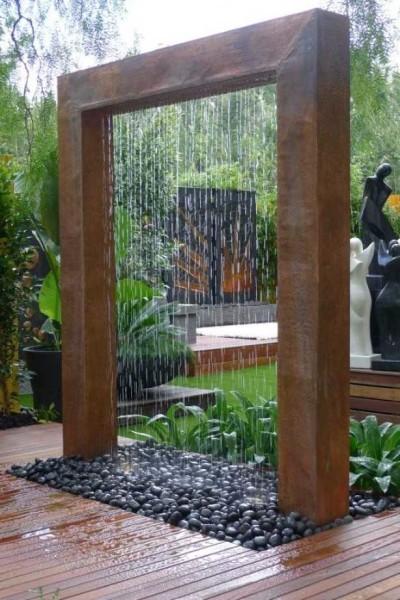
How to make a flat stream
If you want there to be not a jet, but a wide stream of water, you will have to install another container at the top of the slide, but already rectangular. One of its edges should be lower than the other.
There are such containers special, but you can make from any, cutting the edge, and making a flat tray, from which the water and will pour with a wall.
Dry waterfall
You have probably already seen mysterious waterfalls without a bowl into which it falls. As it flows down the ledges, it goes somewhere. This is not a waterfall pond. No reservoir in sight.
There’s certainly a reservoir to collect the water. It’s just camouflaged. It turns out to be a kind of “dry” waterfall. To make it, perhaps, no more difficult than the usual.
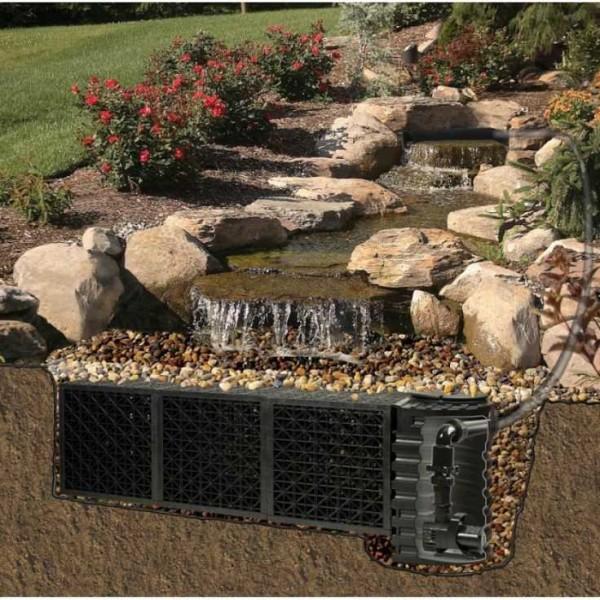
The tank is dug in the same way: into the pit. Only from above it is covered with a metal mesh with a fine mesh (preferably made of stainless steel). If the dimensions of the container are large, on the sides can be as a basis to put bars of rebar or wooden blocks (do not forget to impregnate, so that they do not rot).
On the metal mesh spread a finer mesh, suitable and polymer. It will retain more or less large contaminants. On top are laid stones of small size, decorating this device. Here it turns out that the water falls under the ground …
Decorative waterfalls
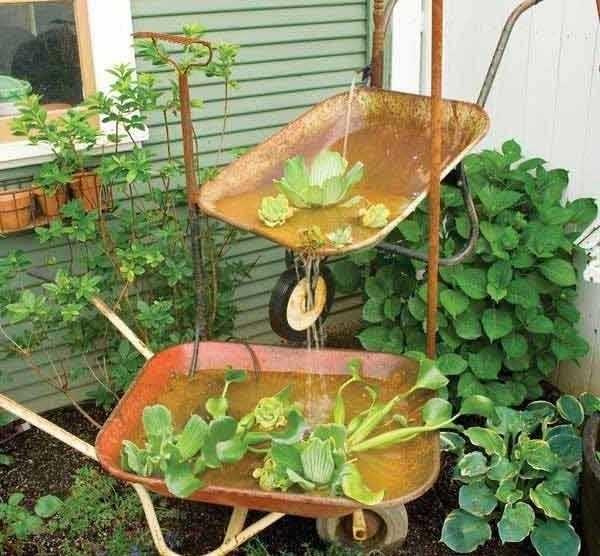
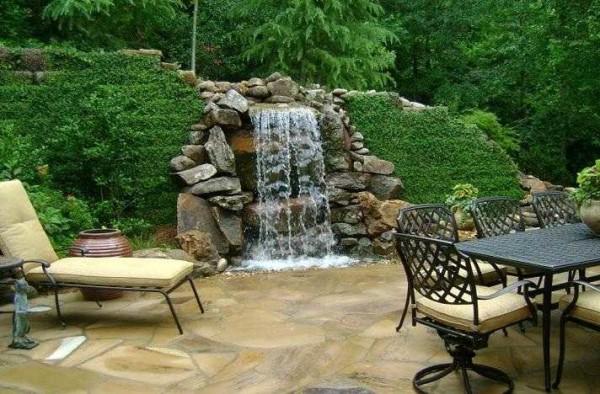
There is not always a place for such a massive structure, the size of several meters. A small waterfall can be placed near a bench, pergola, in a favorite corner of the garden. Takie decorative devices require very low-power pumps, such as aquarium pumps.
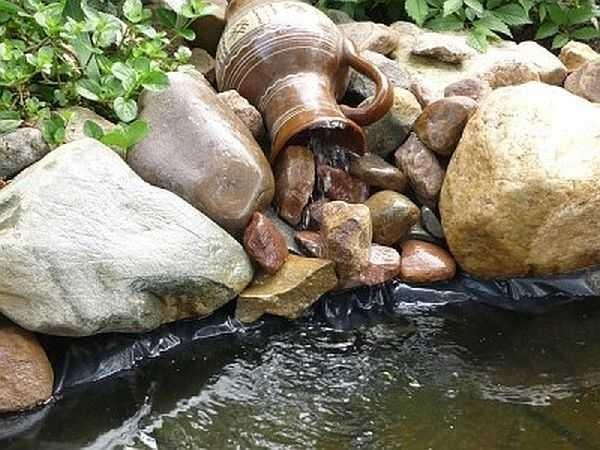
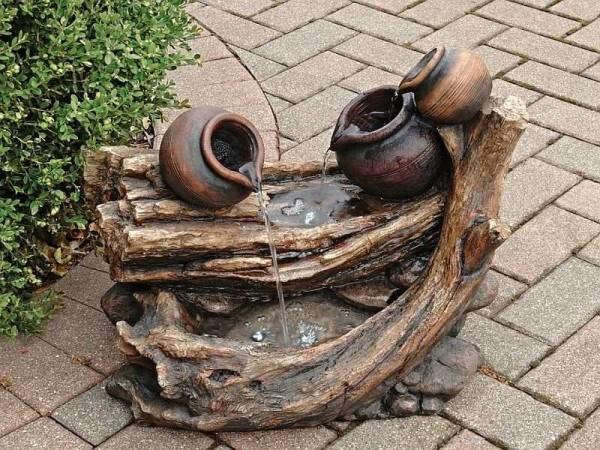
As the body can be used any suitable container. Up to ceramic or even plastic pots. They are made one on top of the other. The lower must necessarily be airtight, but the upper – depends on the design.
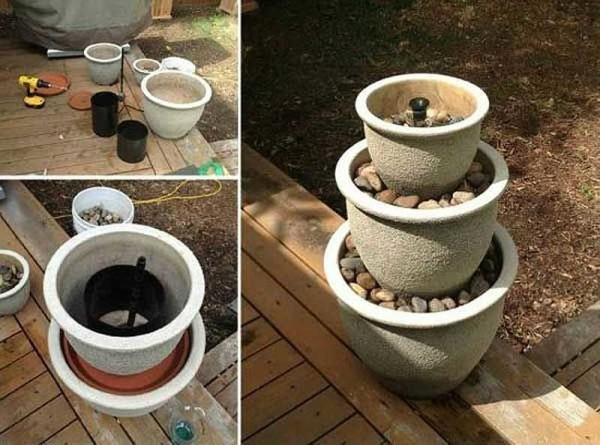
In the variant in the photo above, a small pump is put in the lower, largest vessel. It is blocked with a plastic lid. The diameter is selected so that the plastic becomes 3-5 cm below the edge and it can be closed with small pebbles. In this lid, numerous holes are made (with a drill). Also make a hole in the middle for the tube that will go from the pump.
Make a similar hole in the center of the other two containers. They are assembled on the type of a children’s pyramid, and its center is the tube that comes from the pump. To make the design is not very heavy, in each of the pots insert a plastic insert. it is covered with small pebbles. In the resulting pyramid pour water, turn on the pump. A small soda fountain is ready.
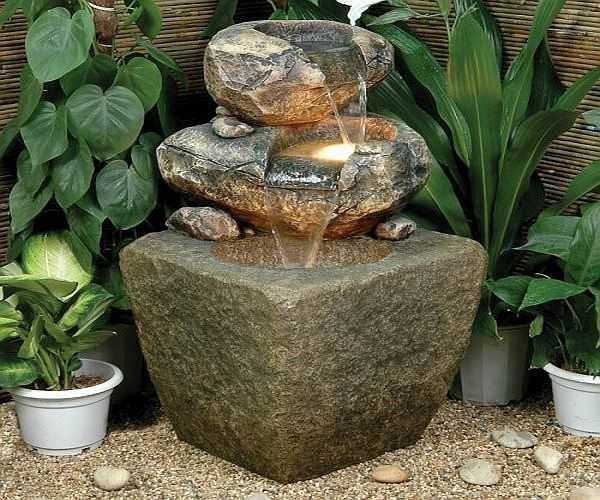
And by this technology can be done and small home waterfalls. For example, this one will look great on the balcony.

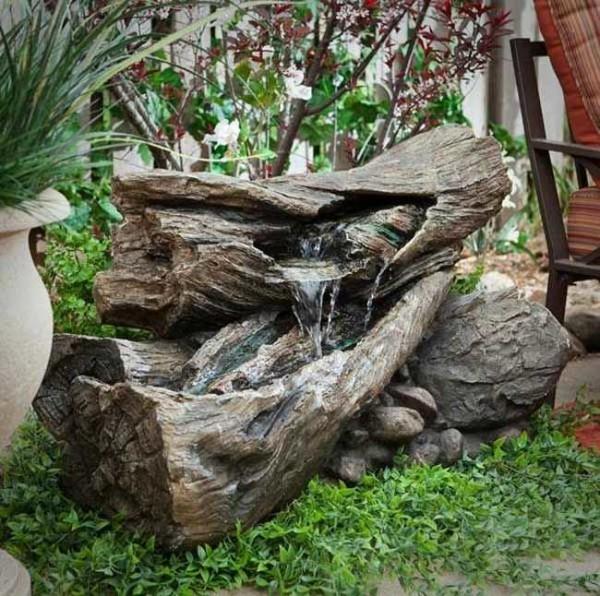
On the same principle, you can make waterfalls in a different key. The principle is the same: the same. In the largest container, we mask the pump. The tube or hose is fed upward.
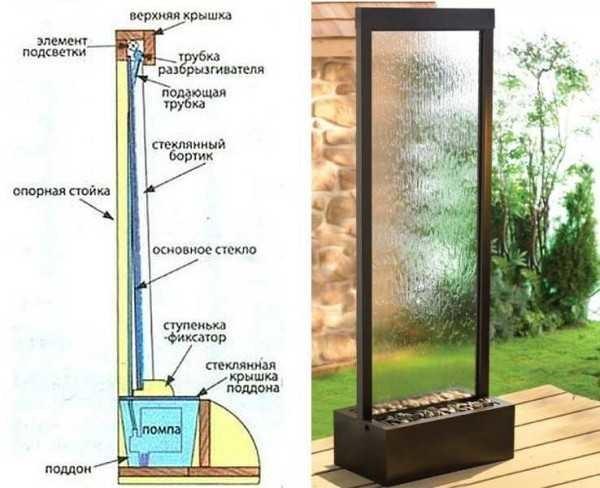
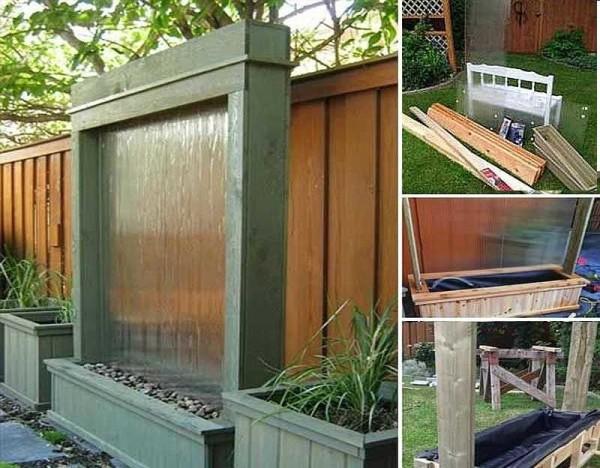
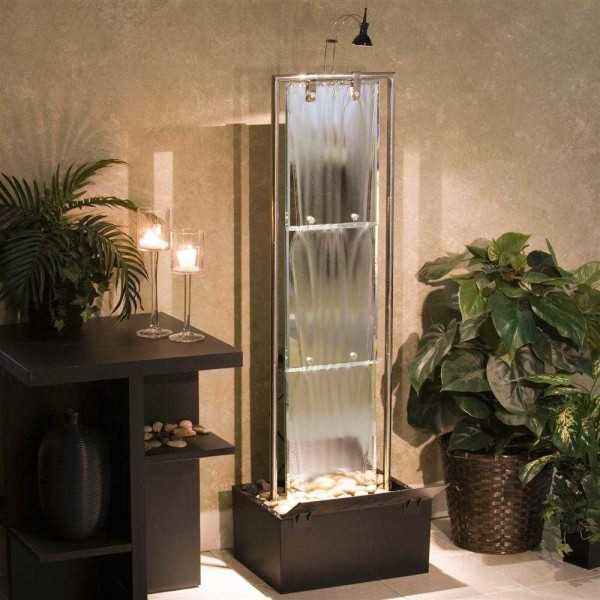
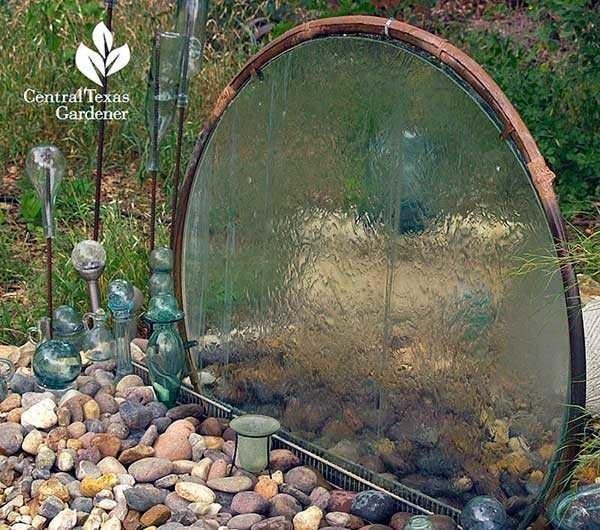
Home floor waterfall on the glass
Excellent in the interior looks water flowing down the glass. In modern apartments, the problem of dry air is relevant. And such a device is a great way to increase humidity without using moisturizers. Such a waterfall with your own hands is not difficult to make. The design is simple, looks great. You need a sealed tray. You can find some plastic container. According to the dimensions, make a frame, inside which on one side to pass the tube from the pump. In the upper part of the tube is attached to the frame, in it make numerous holes.
Impregnate the wooden elements with tinted wood oil. It perfectly protects against dampness and gives a great look.
It is possible to make such an installation hermetically sealed. The work is a little more complicated, but also doable. It is necessary to make the frame wider, with the possibility of fixing the second glass. First, one glass panel is mounted, hoses are laid, and after a test run, the second glass can be installed. Airtightness is achieved with the help of sealant. Only take a neutral silicone (acrylic quickly turns yellow).
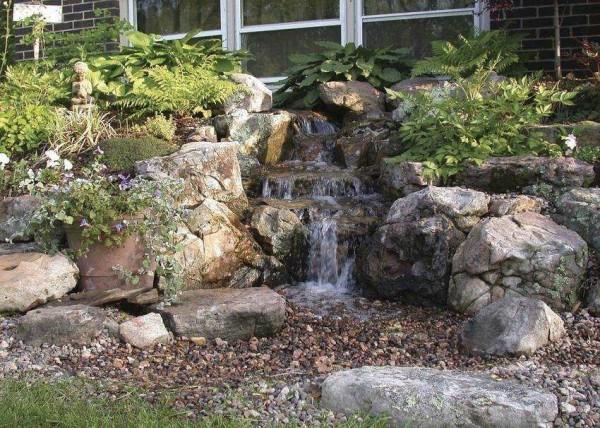
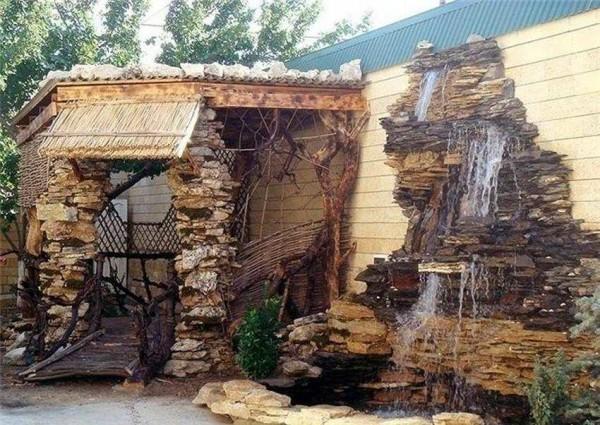
Waterfall with your own hands: photo-ideas of design


Building a waterfall for my backyard was a game changer! I grabbed some stones and a pump, and boom—instant vibe! Watching that water flow is super relaxing. It really brings the whole space together, like nature’s own soundtrack. Can’t wait to sit outside with a cold drink!
Building a waterfall is super fun! Last summer, I made one in my backyard. Just grabbed some rocks, a pump, and a bit of creativity. The sound of running water really chill vibes the whole place. Perfect spot for summer hangouts with friends and family!