One of the most tedious operations in cultivating the land is plowing and preparing it for sowing. If you have machinery – a motorized block or mini-tractor – everything can be transferred to them, but plowing requires a plow. Buying a ready-made one is too costly. Prices for ready-made products are considerable. To save money, you can make a plow with your own hands. And there are two ways. The first: do it yourself completely. This is a difficult way – the shape of the parts of the plow is non-linear, with bends of a certain radius, and bend thick metal at home is very difficult. The second way is to buy ready-made bodies, and assemble the frame and all other auxiliary parts yourself. This is already a simpler option, with which it is not difficult to cope.
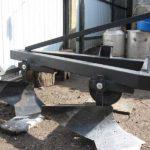
- Homemade frame for a plow on a mini-tractor
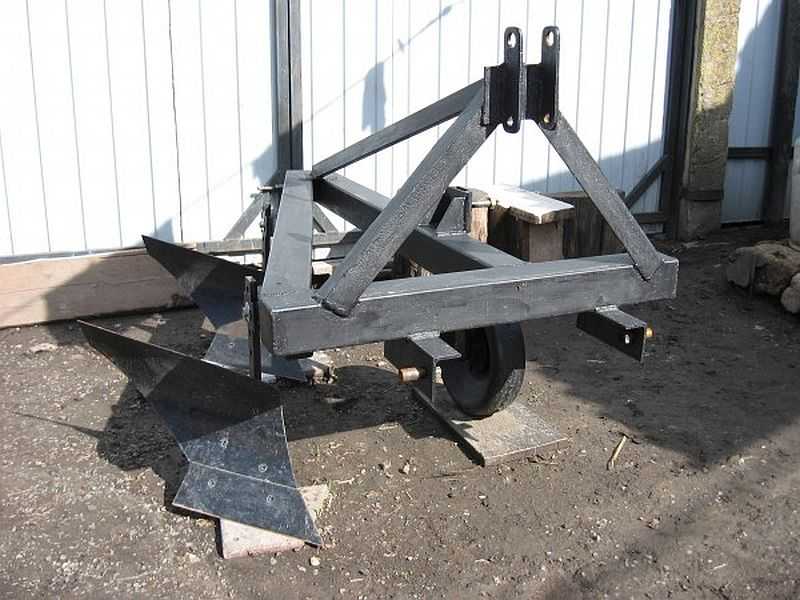
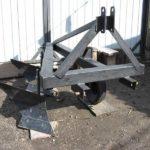
- Two-hulled homemade plow on a mini-tractor
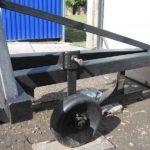
- Installation of the support wheel
Article content
Types and classification of plows
There are several designs of plows:
- plowshare;
- disk;
- rotary;
- combined;
- chisel plows.
The most common are plowshares. They were used even by our ancestors and to this day they work on most fields. For plowing heavy lands, areas with high or insufficient moisture, disk plows are used. Combined and rotary – more complex in the device, suitable for the cultivation of virgin lands. Chisel plows are special devices that do not provide for layer turnover. They are referred to plows conditionally and are rarely used, especially in private farming.
According to the type of traction, plows are divided into several categories:
And this is not all. There is also a classification by purpose: general and special. General purpose plows work on most developed lands. Among the special purpose plows are:
These are not all varieties, but the most popular and used. They differ structurally, and sometimes seriously.
Construction and types of plows
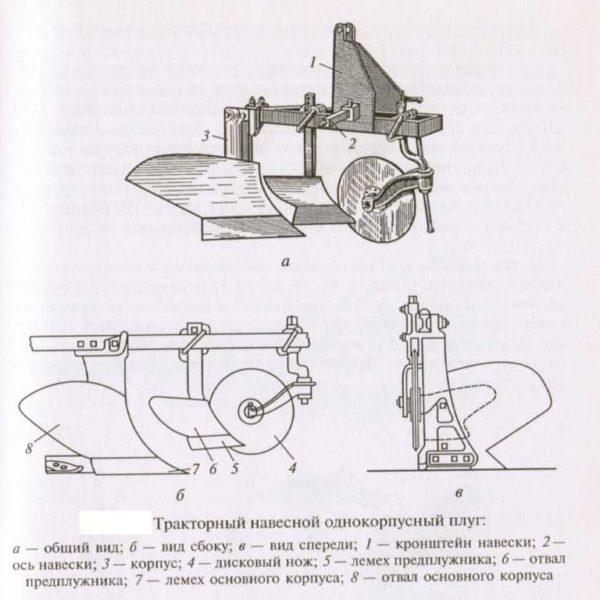
To make a plow with your own hands, you need to have information about its structure and the purpose of the parts. Most often plowing implements of general purpose are used. It consists of several parts, which can be conditionally divided into working and auxiliary:
- working:
- auxiliary:
- frame – the base on which everything is mounted, consists of longitudinal bars, stiffening beams and spacers;
- height-adjustable support wheel;
- linkage – a system of attachment to a tractor or other moving vehicle.
How does this plow work? The skimmer removes the top layer of earth with plants growing on it, turns it over and puts it at the bottom of the furrow, which is the result of the work of the body. The hull with the equipment cuts off a part of the soil on the furrow side, loosens it, turns it to a certain angle (depends on the design), and lays it on top of the overturned layer of turf (laid by the skimmer). To level the furrow wall, a knife is placed in front of the last plow body.
General purpose plows can provide plowing depths from 20 cm to 30 cm, plowshares from 16 cm (they also lack a knife and skimmer).

Hulls
According to the number of hulls, ploughs are single-hulled, double-hulled and multi-hulled. The hull consists of several parts:
The moldboard and moldboard is the working surface – this part is responsible for the quality and type of plowing. The soil layer is cut with the plowshare, and then it rises to the moldboard. Here the soil is crumbled and turned. The degree of turning depends on the shape of the moldboard. A field board is attached to the bottom of the body. Its task is to prevent the plow from shifting towards the already plowed area.
If you are going to make a plow with your own hands, you need to choose a design taking into account the type of soil that you are going to process. Plow bodies are:
Planning to make a plow with their own hands, the design of the plow body is chosen based on the type of soil and the goals set. Sometimes the choice depends on the type of plantings being grown. For example, under root crops require enhanced loosening, which none of the above plow bodies does not give. Then a special combined plow body is used. It has a shortened moldboard and plowshare, as well as a rotor. When plowing, the rotor additionally crushes the earth, which comes from the plowshare.
The moldboard
The plow moldboard is one of the working parts of the plow (a component of the body). Its job is to cut off a layer of soil from the wall, crumble it and turn it over (turn it around). That is, the quality of the moldboard largely determines how well the soil will be prepared. When independently making a plow, it is worth remembering this.
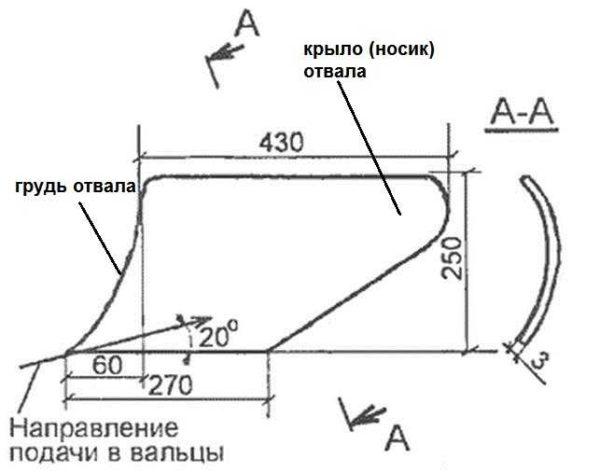
The moldboard is made of carbon steel sheet or special three-layer steel. It has a complex curved shape, from which depends on the degree of soil crushing and its turnover. Structurally, the plow moldboard is distinguished between a breast and a wing (spout).
Breast of the moldboard cuts off a layer of soil from the furrow wall, crushes it and starts wrapping the cut layer. The wing of the moldboard finishes the turnover. As you can see, the main part of work is done by the chest, that is why it wears out twice as fast on average. That is why the moldboard is made of two parts. In this case, in case of heavy wear, the blade breast can be replaced. Another nuance: at the factory to reduce the friction of the layer on the surface, it is polished.
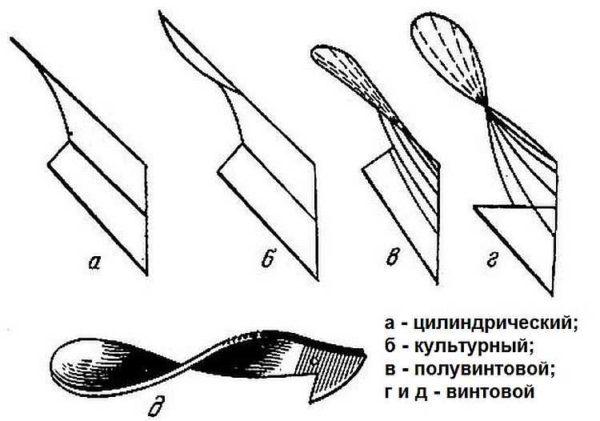
There are four basic forms of moldboard, each of which gives certain characteristics to plowing:
- Cultural moldboard. Crumbles the stratum well and wraps it fairly completely. It is used for plowing large areas of long-developed land.
- Cylindrical. Crumbles the soil well, but does not wrap it well. As a result, plant residues in this case are evenly mixed with the soil. Use such a moldboard on light soils.
- Semi-screw and screw. Wraps the layer completely (crop residues are placed with roots upwards), but crumbles very poorly. After plowing with a plow with such a moldboard, the field has pronounced “waves”. Before sowing, it should be additionally processed – leveled (harrows, cutters, etc.).
When selecting materials, note that both moldboard and share must have almost the same thickness: the permissible value of the “step” is 1 mm. Also, the gap at the joint between the share and moldboard can be very small – no more than 0.5 mm.
Plowshare
To make a plow with your own hands it is necessary to determine the shape of the plowshare. The plowshare is a part that undercuts the layer of earth, on it also the cut layer of soil rises and falls on the moldboard. High-strength hardened steel is used for its manufacture.
The coulter is positioned as follows:
- to the bottom of the furrow at an angle of 22-30°;
- the choice of the angle of inclination in relation to the furrow plane depends on the type of moldboard:
- 40° for a cultural moldboard;
- cylindrical – 45°;
- screw and semispiral – 35°.
Such an arrangement gives the least resistance when advancing, and the blade cuts roots well, breaks up clods of earth that slide on its surface.
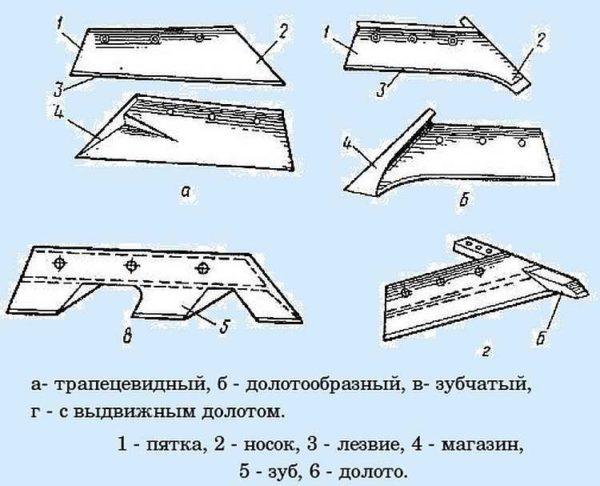
Plowshares come in different shapes (on the photo above). Making a plow with their own hands, they are chosen depending on the type of soil and the complexity of manufacturing:
- Trapezoidal. The simplest in manufacturing, good in that when it is used, the bottom of the furrow turns out even. The disadvantage is quick wear and difficulty in deepening. For this reason, trapezoidal shares are most often used on land that has been cultivated for a long time. In order to compensate for rapid wear and tear, a store is made on the back side of the plowshares. When the plowshares are pulled out again, part of the reserve is gone.
- Toothed and with a retractable chisel. These types of plowshares are used on heavy soils (clay, loam) and where there are many stones.
- Chisel-shaped. It is distinguished by the presence of a sharp, forward protrusion – spike. This protrusion extends to the side of the field by 5 mm and downwards by 10 mm. Such a bend helps the plow with such a plowshare to plunge better and faster and to plow more evenly. To compensate for wear, a “store” – a length reserve – is also made. Ploughs with chisel-shaped shares are used on heavy soils.
Of all these types, chisel-shaped plowshares are the most common. They are more stable in operation, and there are no problems with them when ploughing: the plow is easily lowered to the desired depth.
As the plowshares wear, they are pulled back – sharpen the cutting edge. Do it regularly, because with a blunt blade (width of more than 3 mm), the resistance of the plow increases by 50%. Therefore, it is more profitable to inspect and maintain the equipment in time.
Drawings
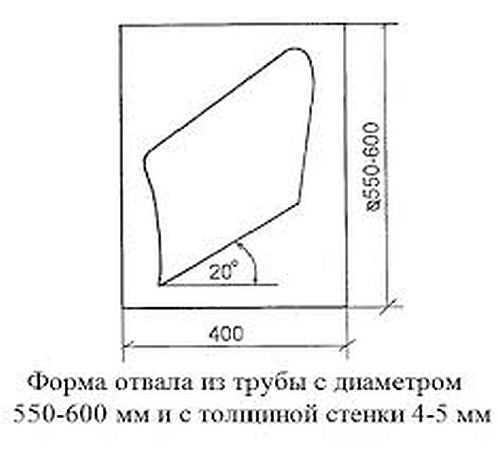
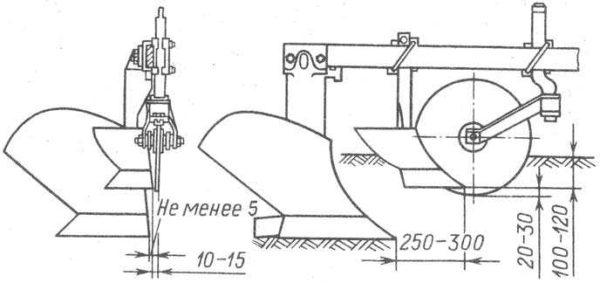
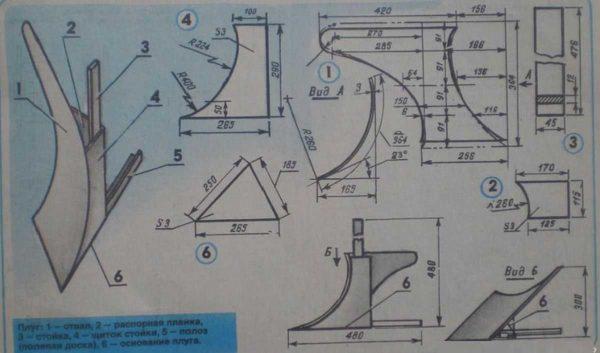
Going to make a plow with your own hands, it is necessary to have some sample for imitation. If there is an old plow, you can make new ones in his likeness. And if there is no such thing, drawings will be useful. Only take into account the parameters of your technique, on which you will attach it.
Detailing of some dimensions.
Video tutorials on plow making







Dude, making a plow sounds like a blast! I remember when my buddy and I tried DIY farming tools for fun, and it was a total game changer. Just grabbed some scrap metal and went to town! Can’t wait to give this a go!
Back when I was helping my grandpa on the farm, we whipped up a makeshift plow using scrap metal and an old tire. It was super satisfying seeing it work in the field. Nothing beats that hands-on experience in farming, right? Who knew DIY could be so fun?