

Kitchen taps need to be replaced from time to time. They are operated in a harsh mode, they are exposed to a large amount of cleaning agents, which causes them to deteriorate or simply lose their appearance. Therefore, many people come to the need to change the kitchen faucet. But to call for this plumber is not necessary. Replacing the mixer in the kitchen – the work is simple, it can be handled with your own hands, and ask for it a decent amount of money. Save money and do everything yourself.

Conteúdo do artigo
What you need for the work
Replacing the mixer in the kitchen consists of two stages – first remove the old one, then mount and connect the new one. In addition to a new mixer, you will need keys of the right size and some auxiliary materials. Most often you need keys for 10 and 11, 22 and 24. In order to remove the mixer from the countertop or sink, you will need two adjustable wrenches.
One more thing. You will most likely need new hoses. Although most kitchen faucets are equipped with flexible hoses, but their length is 30 cm. This is not always enough. Before you start work, make sure that the length of the standard hoses is enough.
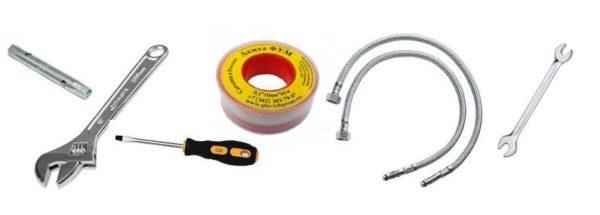
It depends on how far the cold and hot water pipes are from the mixer. Hoses should be slightly sagging, because when turning on/off the faucet there is a sudden change in pressure, from which the hoses twitch. If they are stretched, the connection will loosen very quickly and leak. So, if from the pipes to the inlet of the mixer 25 cm or less, the standard hoses are enough. If more – buy longer ones. And a tip: buy quality hoses, not the cheapest ones. They quickly fall into disrepair and can flood both you and the neighbors below, if there are any. Therefore, take flexible hoses in stainless steel braid or corrugated stainless steel pipe. They will serve for a long time and without complaints.
To buy hoses for the kitchen faucet, you will need the size of the “needle” – the tip that is screwed into the faucet, as well as the diameter of the pipe and the type of its endings (dad-mom) – to pick the right fittings.
To seal the joint, you will need linseed wax with sealant paste or fumed tape. Various gaskets and O-rings will be needed (should come in a kit, but find all you have just in case).
How to remove the old one
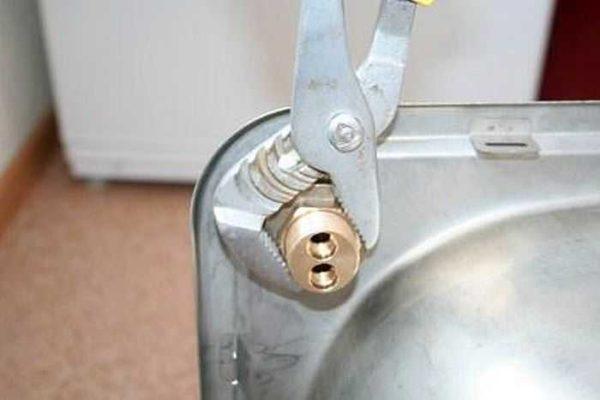
Before starting work, we turn off the water supply to the faucet, drain the residue that is in the pipes. Now you can start replacing the faucet in the kitchen. To remove the old faucet from the sink you need to unscrew the nut that is screwed onto its body from the bottom of the sink. If the sink is installed in the kitchen cabinet, it is very inconvenient to work. It is better to remove the sink. To do this, you will have to:
Now you can lift and turn the sink. Here you will see a nut that needs to be unscrewed. For this work, you will need two adjustable wrenches. One holds the body from the “front” side of the sink, the second unscrews the nut.
Sometimes it is very difficult to remove the old faucet in the kitchen: it is “stuck”. In this case, kerosene or universal grease in cans WD-40 will be suitable. Both substances have a low density and are able to seep into microscopic cracks. The composition or kerosene is applied to the connection that needs to be disassembled, wait for about 10-15 minutes, try to unscrew.
If all the tricks did not help, there is a simple method that is suitable if the old mixer is not going to be used anywhere else: you can cut the body together with the nut. The method is tough, but after suffering an hour in attempts to remove the nut, resort to it.
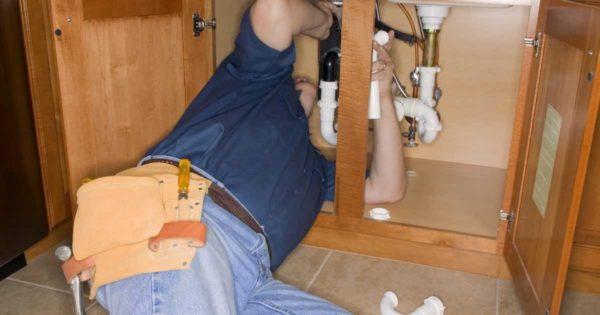
If the faucet is installed on the countertop, you will have to work “from the inside” – crawl into the cabinet with a flashlight, and so unscrew the nut.
Repair in the kitchen 9 square meters. m. with photos, see here.
Installation of the kitchen faucet
The replacement of the faucet in the kitchen is nearing the end. Now we collect the faucet and install it in place. It is much more convenient if the work can be carried out on the removed sink. If this is impossible, you will have to carry out all manipulations half-lying in the cabinet. Approximately as in the photo.
Assembly
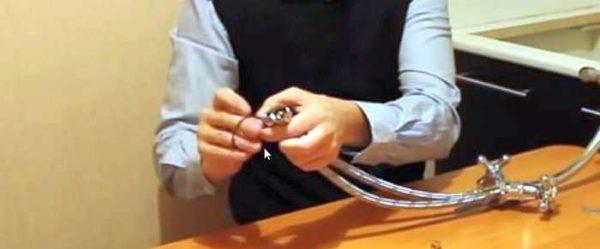
First, screw the flexible liners to the mixer. They are screwed in by hand, then slightly tightened with a wrench – no more than 2 turns.
Now it is necessary to put a rubber gasket on the body, which seals the place of connection between the mixer and the surface of the sink. This is a rubber ring with a decent diameter – it comes in a set. It is pulled through the installed supply hoses, placed on the body.
In modern mixers for kitchens, there are two different forms of attachment to the sink. The first – with the help of a nut – you saw in the part where we talked about dismantling the mixer. It’s just an “older” system. The second one involves rods and gaskets, which are horseshoe shaped locking gaskets. The rod is usually one, but there may be two. If there are such rods, they are screwed into the appropriate socket. If there is a nut on it, it is removed.

Installation on the sink
Now the kitchen mixer can be installed on the sink. First, lead the flexible hoses into the hole, then place the body in the center of the hole. Further actions depend on the type of fastener. If it is an ordinary nut – it is simply screwed on, trying not to overtighten.
If this is a model with rods, the appearance is different, although the meaning is the same. First put on the gasket (it is also in the shape of a horseshoe), then the pressure plate. Then the nuts are screwed onto the rods. The nuts are tightened a little with a wrench. Nothing complicated.
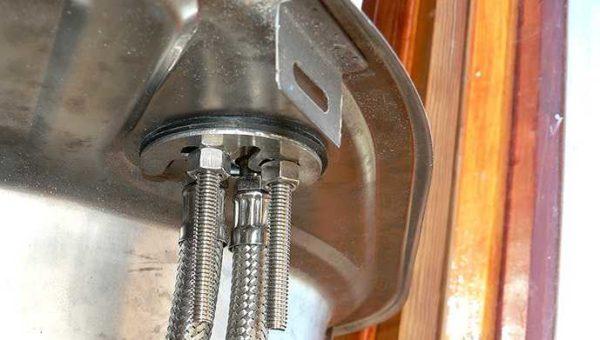
Having turned the sink upside down, twitch the faucet. It should stand “dead”. There should be no play. If there is movement, tighten the fixture.
Planning the kitchen set is described here.
Installing the sink
Now the sink with the faucet installed on it is put in the prepared place. First, from the back side of the sink around the perimeter apply silicone sealant (not acrylic – it quickly turns yellow). Then the sink is put in place, tighten the fixing bolts.
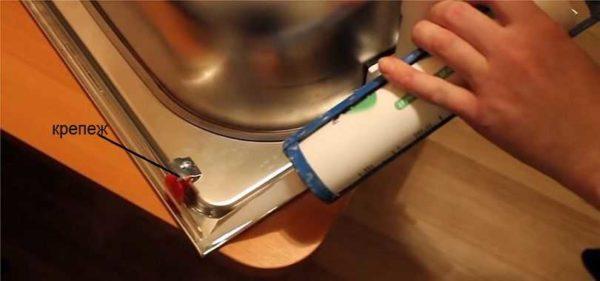
Then everything is simple: put it in place, align it relative to the edges of the table, tighten the fasteners. It is made in the form of petals that pull the sink to the countertop when you tighten the nuts. The sink should stand firmly, without shifting.
Connecting the hoses and trap
With the siphon, everything is simple – pull the corrugated hose to the spigot, tighten the nut with your hands until it stops. That’s it. Do not use keys – everything is made of plastic.
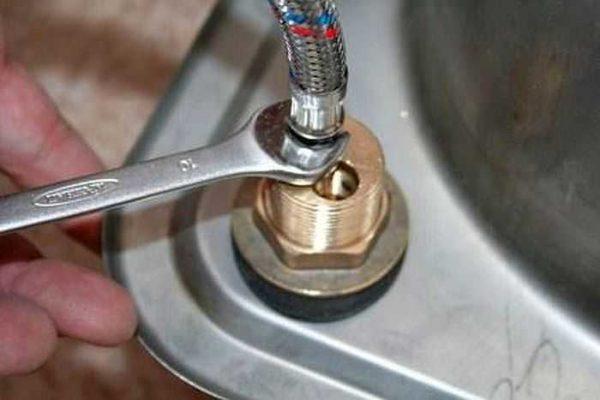
With the connection of the water pipe is not much more complicated. It is just necessary not to confuse the place of connection of cold water. Its entrance is on the right. Making sure that there is a rubber gasket in the coupling nut of the flexible liner, bring it to the pipe, screw the nut, as much as possible, with fingers. Then take a wrench and tighten it by one or two turns. Do not pull too hard – you can cut through the gasket and then the connection will leak.
And what about soap, winding and paste? When using normal quality hoses, they are not necessary. The connection is reliable and tight without them. It will be possible to rewind if, after a test run, drops of water appear from under the nuts. But it should not be. There is no reason to just wrap soap or fum-tape. Unnecessary time and unnecessary pressure on the coupling nut.
After connecting to the hot pipeline, you can consider that the independent replacement of the mixer in the kitchen is finished. It remains to turn on the water and check whether everything works normally and whether the joints do not leak. To do this, the joints are wiped with a dry cloth, and then run a few times by hand.
")


