A fireplace in the house or at the cottage is a place of attraction for the whole family. It is understandable that you want it to be beautiful, but it also needs to be practical – soot and grime, dirt or tar from firewood often end up on the walls of the portal. For this reason, the surface should be easy to clean. In addition, the finish of the fireplace should be heat-resistant – although the sides of the fireplace are not heated to the same temperature as the furnace, you should not neglect this requirement. Meet these requirements are not so many materials. These are heat-resistant plaster, special types of ceramic tiles and stone – natural or decorative.
Treść artykułu
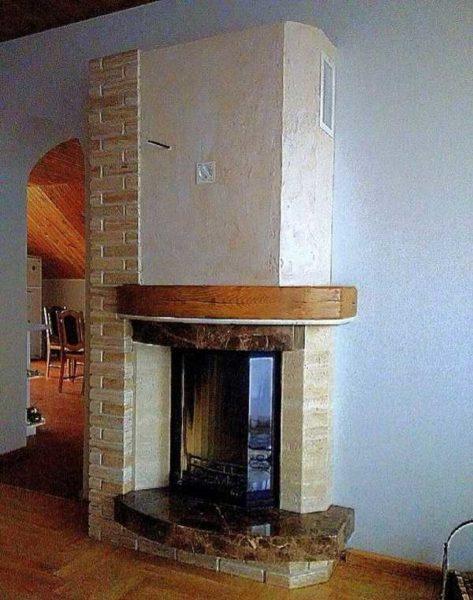
Plastering the fireplace
Plastering is one of the simple and practical options for decorating a brick fireplace. A few years ago, plastered surfaces were whitewashed or painted. Today it is possible over the usual plaster, to apply a layer of decorative with different textures.
Types of plaster for fireplaces
Finishing the fireplace with plaster is popular for the reason that the design can be developed any. The second plus – if everything is done correctly, to achieve a smooth surface, the finish is beautiful and durable. For plastering fireplaces, the same compositions are used as for brick stoves. Although the heating temperatures of the surfaces are different, plastering mixtures make the same. There are two options: to make plaster composition yourself or buy ready-made. If there is no experience of working with clay and determining its fatness, it is better to buy. Store plasters for fireplaces and stoves include additives and additives that make the surface more durable, cracks appear in it less often.
As a rule, each manufacturer has two compositions with different properties. The first is the basic, for rough finishing. It can be applied in a fairly thick layer – up to 10 mm. After drying, the second layer is laid – the finishing layer. It contains more finely ground substances, applied in a thin layer – usually up to 3 mm, the surface is smooth. Such a surface can be painted if plastered evenly) or apply decorative plaster.
If you want to finish the fireplace cost a minimum amount, you can make plaster compositions of clay, sand and lime yourself. But, once again, without experience working with clay to achieve that homemade plaster does not crack – difficult. Compositions for plastering the fireplace to make them with their own hands come in different ways, here are a few proven ones:
- Clay-lime:
- 1 part each of clay and slaked lime + 2 parts of sand;
- on the basis of slaked lime – on 2 parts of lime one part of gypsum and sand.
- Cement-clay: one part of clay and cement (M 500) + 2 parts of sand;
In order that the mortar plaster for the fireplace was more durable, reinforcing fibers are added to it. Earlier it was finely chopped straw, later – asbestos fibers, and today mostly add glass or fibro-fiber. The fractional part of this additive is small – 0,1-0,2 parts. It is added to the dry components (cement and sand), everything is mixed. Dry mixture is added to the clay and / or lime dough, again thoroughly mixed, if necessary, add water.
Lime is better to take already quenched, in the form of lime dough. If you quench it at home, there are always unreacted particles, which during the operation of the fireplace then quenched, destroying the plastered surface. Regarding the sand – its amount is precisely selected depending on the fat content of the clay. The mortar should be plastic enough. The degree of fatness of the mortar is checked with a piece of wood. Dip it into the mortar and pull it out. If an even layer of 2-3 mm thick is left on the surface, the mortar is normal. If the layer is thick and lumpy – you need to add sand, if the stick is almost clean – add clay.
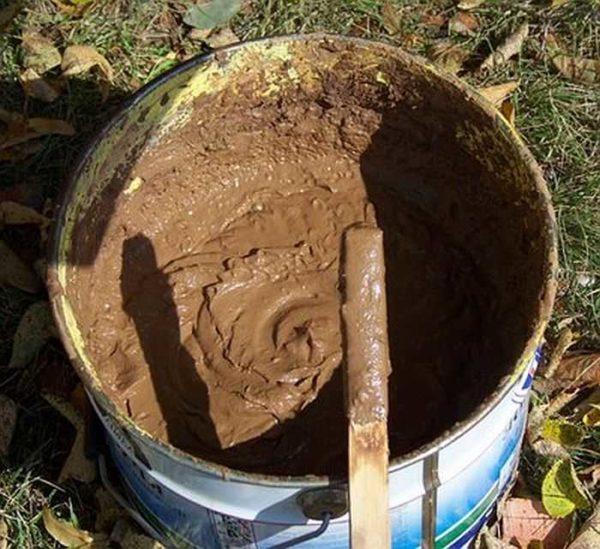
The clay is pre-soaked (2 days or until all the lumps loosen), then rubbed through a metal sieve with a mesh of 2 cm. The grated clay dough is once again pressed through a sieve, but already with a fine mesh – 0,5-0,7 mm.
Sand is needed quarry sand, it must be clean and dry. Before use, it is also sifted.
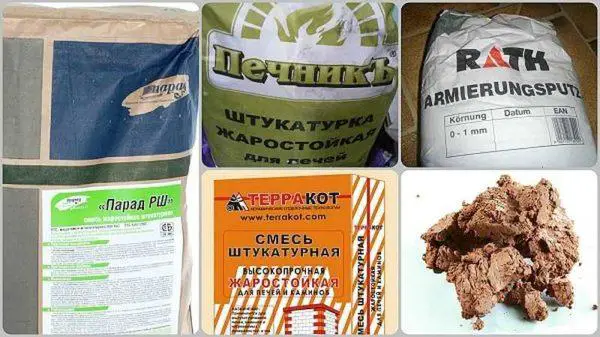
For those who do not want to get involved with homemade compositions are several companies that produce plaster for fireplaces and stoves. Normal showed themselves the following compositions:
- Plitonit superkamin refractory;
- Petromix KU;
- heat-resistant plaster Terrakot;
- Bossnab;
- Parade RSH;
- rtner;
- HEFNERPUTZ stove plaster.
The list includes both domestic manufacturers and European manufacturers. It can not be said that Russian compositions are worse, but it is easier to work with imported ones.
Features of plastering stoves and fireplaces
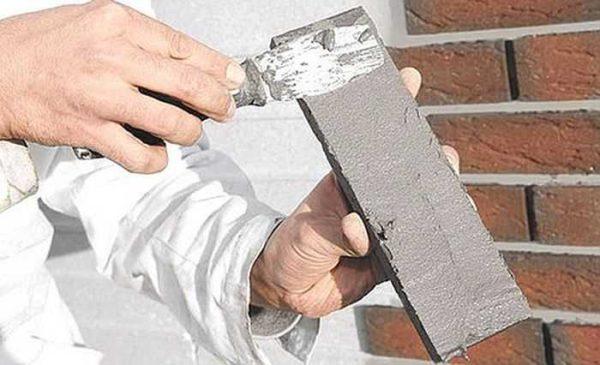
The very technique of applying the solution is no different: a trowel or a special bucket is applied (sprayed) a certain layer, then leveled (you can use beacons). The main points consist in the preparation of the surface of the fireplace to plaster:
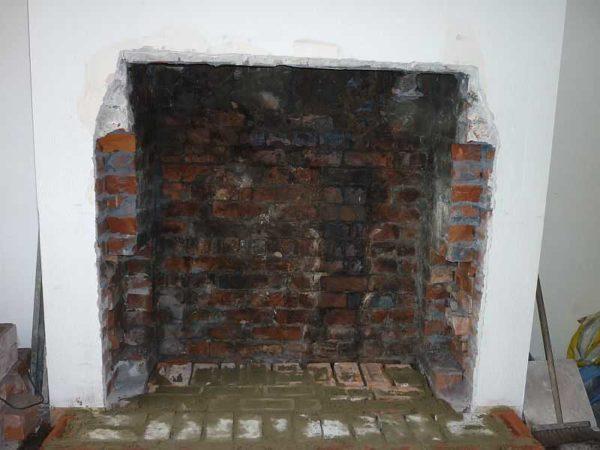
- First, from the walls is removed all the old finish, if there is any – paint, lime, remnants of plaster, mortar, etc. Only clean brick should remain.
- For better adhesion of plaster mortar with the surface, the joints are deepened by about 1-1.5 cm. Take a reamer, chisel or screwdriver and scrape out the mortar in the joints.
- All the gaps that exist are sealed with repair compound or heat-resistant sealant (which can withstand heating up to 800°C).
- When everything is prepared, take a brush with long bristles and clean the surface well. It should be clean.
- Next come the options:
- If the surface of the fireplace is relatively flat (the difference is less than 5 mm), you can wet the walls and start applying plaster.
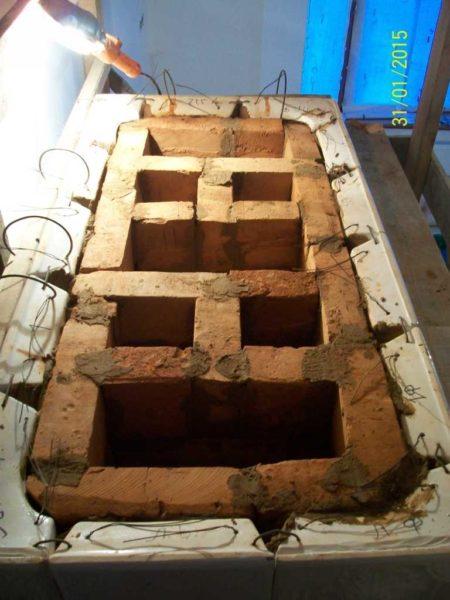
- If because of the curvature of the surface layer will have to do more than 5 mm, reinforcement is necessary. On the walls of the fireplace nail a metal mesh with a fine mesh. It is fastened with nails, which are hammered into the seams (the seams can not expand, or expand, but not so deep). In order for the caps to hold the mesh, put on metal washers larger than the size of the mesh. Plaster is applied on top of this stack. In this case, you can be sure that the plaster will not fall off.
Before you start plastering the fireplace, carefully read the instructions on the packet. There it usually describes under what conditions and how to apply plaster. But masters advise to melt the fireplace, heat the walls to 60°C, then wet the surface and start plastering. The walls are heated so that the brick takes its “working” size. In this case it is less likely that the plaster will tear when heated. Wetting with water is necessary so that the mortar is not too dry: bricks are hygroscopic. If it is dry, it quickly draws water out of the plaster mortar and it becomes too dry, does not harden to a normal state. The result – cracks on the surface.
A few more points regarding drying. When plastering a fireplace, at least two layers are applied. The second one can be applied only after the first one has dried completely. To speed up drying, you can organize a draught, but do not sink the fireplace. The same applies to the second – the finishing – layer.
The technology of plastering stoves and fireplaces, see the following video.
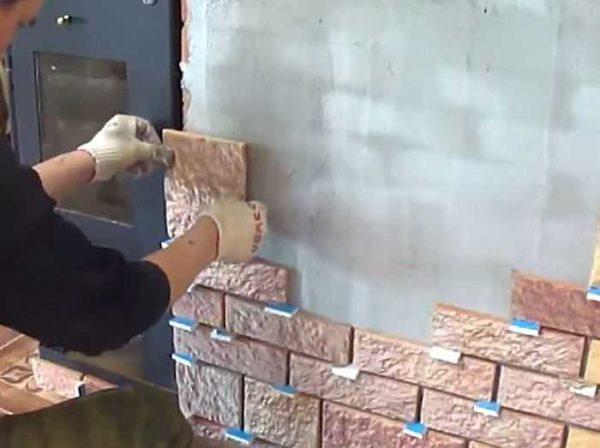
Facing the fireplace with tiles and porcelain stoneware
Finishing the fireplace with tiles or porcelain stoneware is carried out on a special heat-resistant glue. Tiles for such work is not suitable for all. It must be well tolerated heat, be strong, dense (with small pores), plus it should be easy to clean.
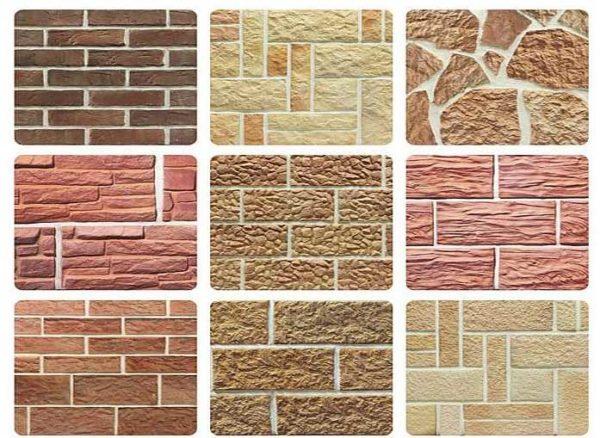
Finishing the fireplace with ordinary ceramic tiles – it’s a lottery. If you are lucky, will stand normally, if not – after some time the layer of glaze will be covered with a network of fine cracks. The view will be “not very”, it will be difficult to wash. If possible, it is better to use special materials:
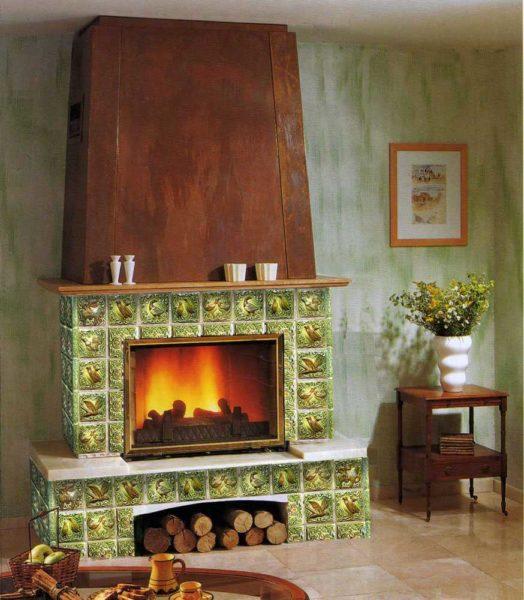
- Terracotta. Tiles with an unglazed surface, is characterized by a distinctive color, due to which it received its name. It has a similar coefficient of thermal expansion to brick, so it does not crack.

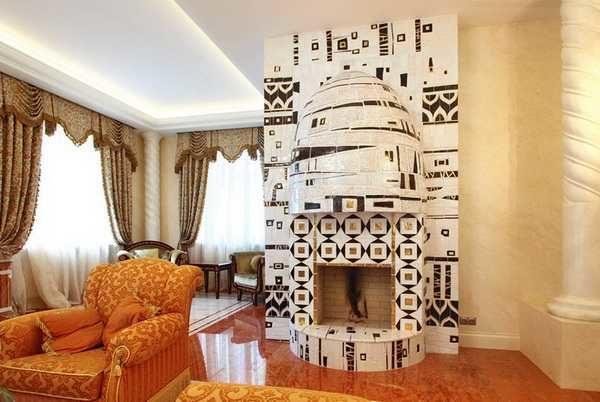
- Majolica. This is the same terracotta tile only with a glaze applied to the front side. The technology is more complex, the price is higher. Fireplace finish majolica requires careful design sketch – such a tile cut will not be. It also requires high qualification of the master – the slightest deviations are conspicuous. Apparently, for this reason, and also because of the very high price you can more often see fireplaces and stoves with fragments of majolica. It should be said that these fragments are very decorative and enliven the interior.

- Heat-resistant clinker tiles. It is made of a mixture of several varieties of clay, with the addition of chamotte. It is molded, pressed, then fired. The result is a thin – 9-12 mm thick – and durable tile. Colors range from whitish-gray to brown.

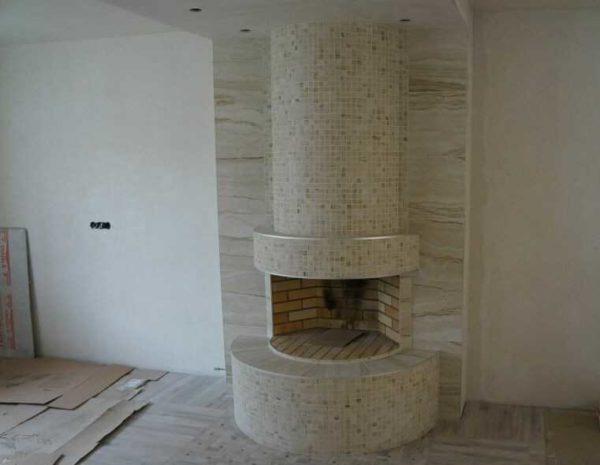
- Porcelain stoneware. The production technology is similar – first the composition is pressed, then fired. Components differ: in addition to several varieties of clay is added quartz sand, fine crumbs of granite or marble, dyes, oxides and metal salts. The structure of porcelain stoneware is low-porous, it well tolerates both high and low temperatures. Technology allows you to get a material that imitates marble, other natural stones, terracotta, clinker and majolica. The disadvantage of porcelain stoneware is that it is difficult to cut and has a heavy weight. For facing fireplaces use plates of small thickness, so the weight is not terrible, and cut can be given to the company (just need to know the exact size of the required fragments).

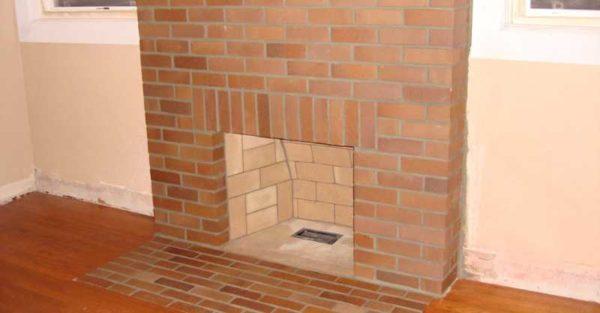
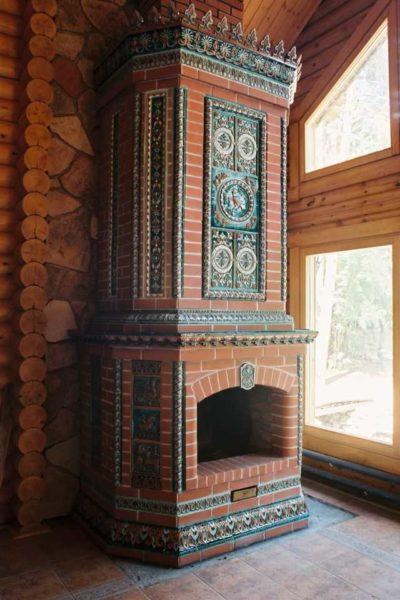
- Tiles. Production technology is not much different – clay is molded, fired in a kiln. The main difference is the shape and method of installation. Tiles are installed during the laying of the stove or fireplace – fragments with the help of wires are fixed in the seams. So, finishing a finished fireplace with tiles is impossible.


Special tiles for facing fireplaces and stoves are made in small or medium format, and the same porcelain stoneware is available in large slabs. Seamless laying, of course, is attractive, but it can not be guaranteed that such a finish will not fall. The coefficient of thermal expansion is quite different, because of this, and because of this, incidents are possible.
Technology for installing tiles on the walls of the fireplace and exhaust pipe
All of the above types of tiles, except for tiles, are mounted on fireplaces according to the same technology. Fireplace tile finishing begins with the preparatory stage, and it is the same as described above: clean the surface, expand the joints, heat to 60 ° C, moisten and you can start finishing the fireplace tiles.
In case of large irregularities it is necessary to plaster the fireplace. Mortars – any mortars containing clay and cement, but not containing lime. Preparation – standard, as well as the process of plastering. The difference is that the second – leveling layer should not be applied.
Tiles should be laid on the walls of the fireplace after complete drying. The technology of laying – standard, the difference is in the thickness of the joints. For the fireplace is better to make them more (to compensate for the different magnitude of thermal expansion), so instead of crosses use pieces of drywall thickness of 9.5 mm.
The glue is applied to the wall or to the tiles, leveled with a toothed trowel. Tile is pressed to the surface, rocking it from side to side, set in the desired position. Set the distance between the fragments with the help of spacers from plasterboard. Removed from 3-4 hours after installation.
The tiles on the fireplace are left to dry. The exact time depends on the glue used and the weather, usually indicated on the package with glue. The last stage is filling the seams. Grout for the seams is also used special, it is better to buy together with the glue – one company, so that there were no problems with compatibility. The process is also standard – the composition is diluted with water according to the instructions, the seams are filled with a rubber trowel or from a syringe. Freshly applied solution is leveled, forming a beautiful seam. Excess is wiped off with a soft rag.
There are tips from the masters:
- To ensure that the tiles are guaranteed not to fall, attach a metal mesh with a fine mesh to the wall. Even better, stuff nails into the joints and intertwine them with soft steel wire, creating a wire frame. This option is better because in difficult places the mesh can be made thicker. This step is necessary if you are going to mount heavy porcelain tiles or large format tiles.
- In order not to put a thick layer of glue, apply it to the wall and on the tiles, and there and there remove the excess with a toothed trowel.
- Before laying tiles, lay them out on the floor so you can really assess how attractive the finish will be.
- After laying each tile, remove excess mortar from the joints. They will then be filled with a special paste. The surface of the tile immediately wipe clean – if the glue hardens, clean it is almost unrealistic.
The main thing in this work – to ensure that under the trim did not form air cavities. Air has a large coefficient of expansion and, when heated, it will someday tear off the tiles from the wall.
Video tutorials on how to finish a fireplace with tiles
No matter how much you read about how to do things, it’s much more useful to watch – more details you can grasp.
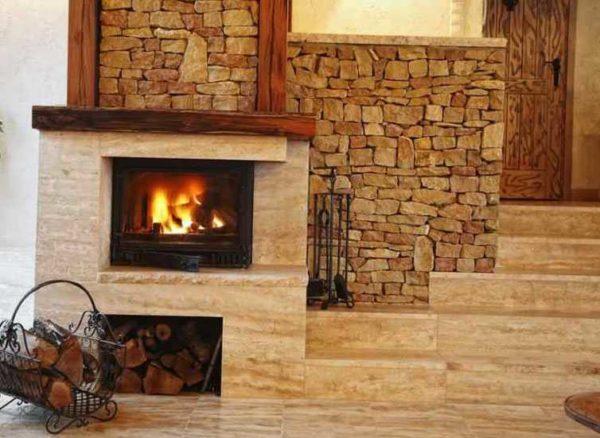
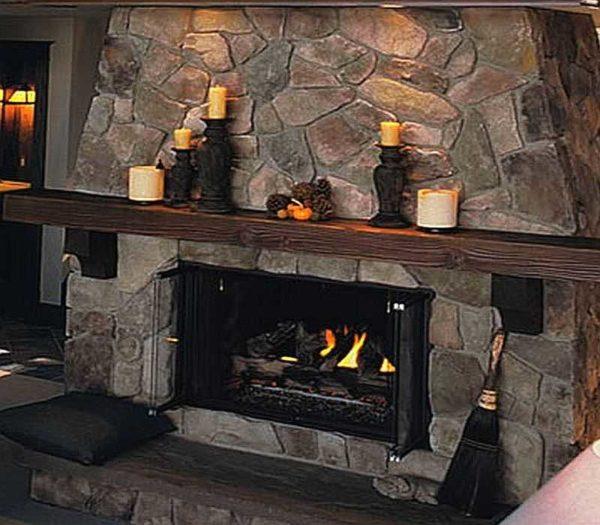
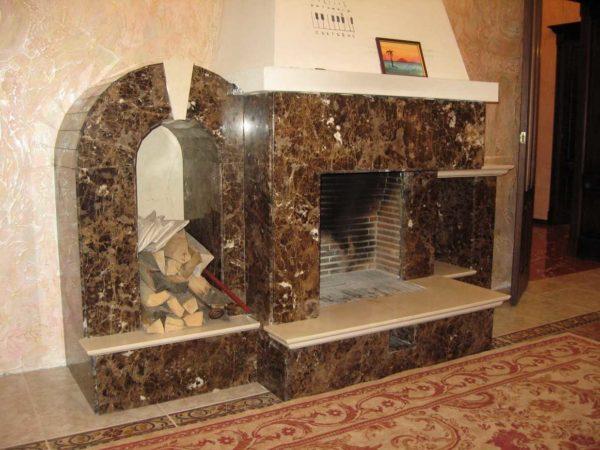
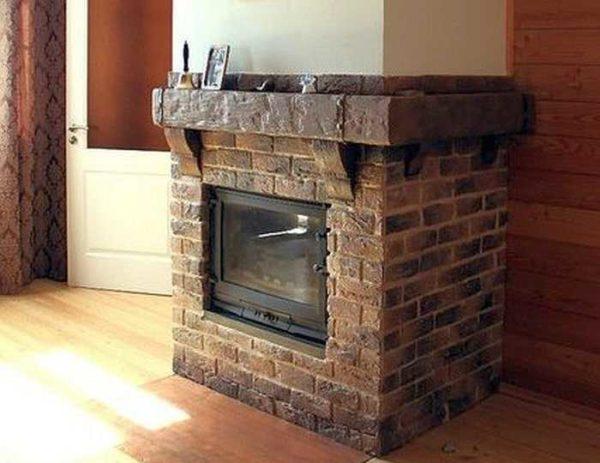
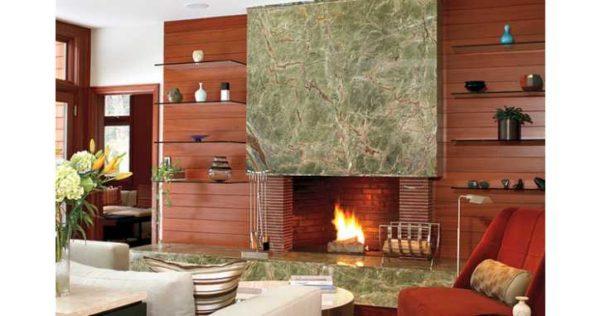
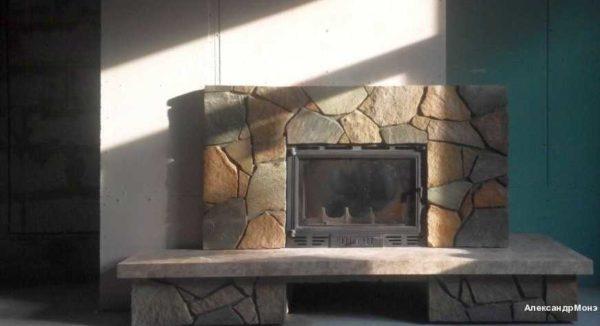
How to tile a fireplace with stone
Finishing the fireplace with stone technologically does not differ much from laying tiles. The difference is in the work with the material itself, and technically there are almost no features. The only thing – when using natural flagstone must be sure to cover the fireplace with a mesh. Without it will fall off.
Features of working with artificial gypsum stone
This type of decorative stone is inexpensive and easy, you can decorate fireplaces, especially without overloading the slabs. There are only some nuances, without which a good result you will not achieve.
The technology of production of gypsum stone is such that each element has some irregularities, influxes, protrusions. They are ground with a knife, good gypsum is cut without problems. Each element of the facing is ground so that the back, along the perimeter, formed a frame with an angle of 45 ° (or so).
Not only that, often the corner elements of gypsum decorative stone a few millimeters higher than the ordinary from the same collection. To cladding looked monolithic, it is necessary to remove this difference too – to grind. When all elements of the facing are adjusted, they can be glued in place. Use for facing fireplaces heat-resistant glue, although with the right design it almost does not heat.
Work with natural stone
Most often, fireplaces are faced with natural stone, sawn on plates. It is also called flagstone or stone tiles. The shape of all fragments is different, you have to adjust, so that everything looks beautiful. In this case, it is definitely better to first lay out the whole picture on some plane, pick up and process the elements. Only after the mosaic is folded, you can glue. The entire technology of installation on the walls of the fireplace is described above and practically does not differ in any way. The whole process can be seen in the video.
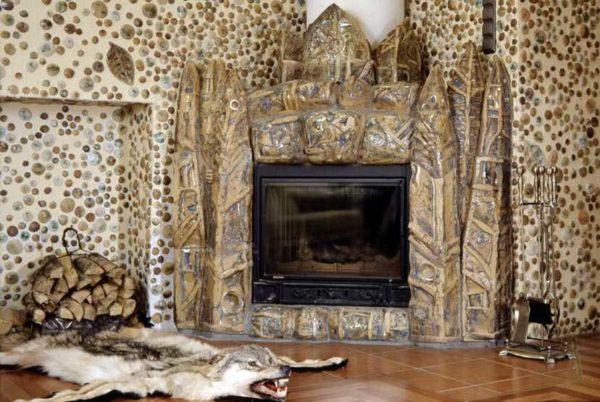
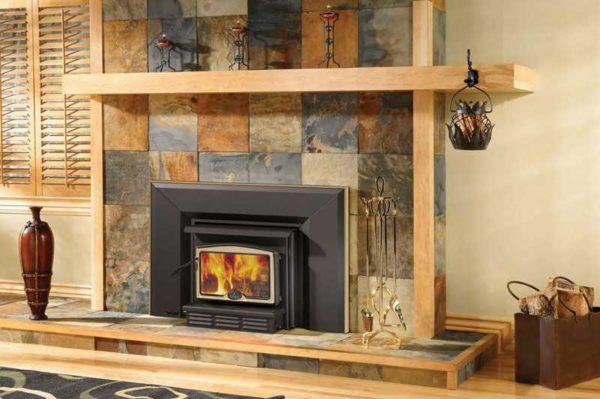
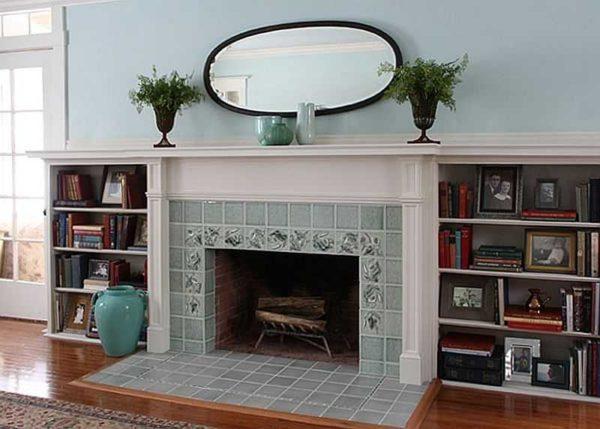
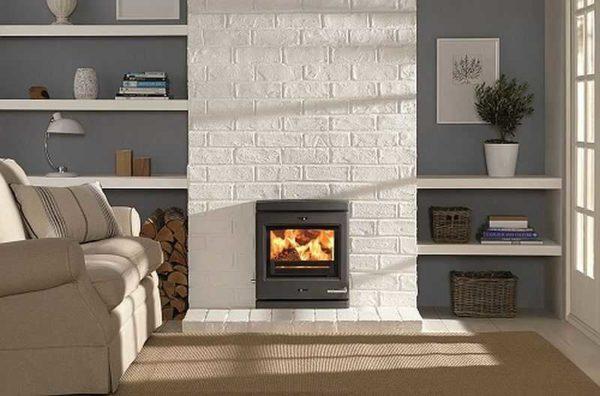
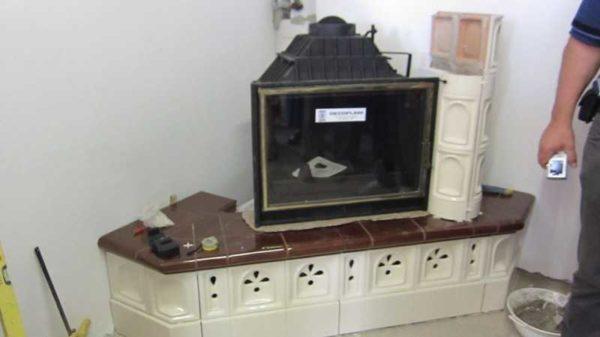
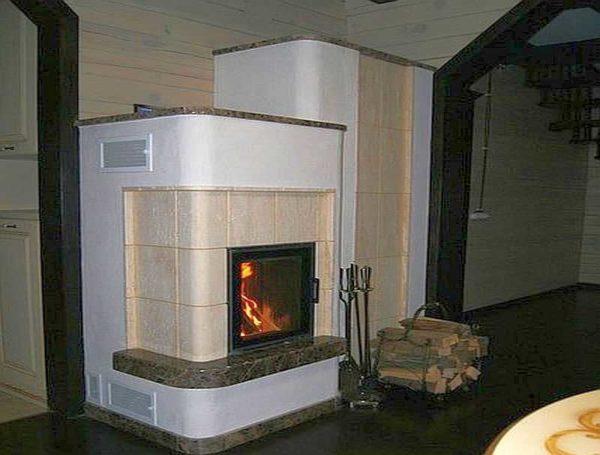
Interesting options for finishing fireplaces (photo)
All the methods described above can be combined, creating a finish in different styles. Sometimes it turns out very beautiful. Some already realized ideas are laid out below.