

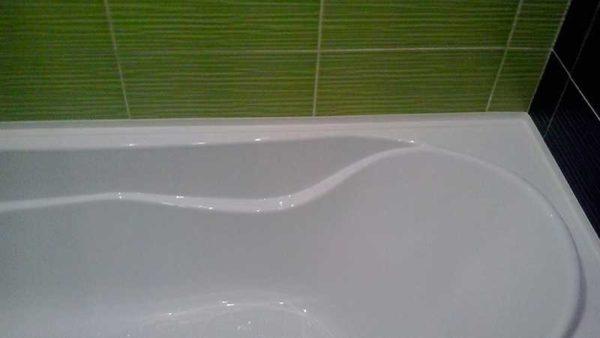
After installing a bathtub, shower tray, sink or washbasin, there is a gap between the edge of the appliance and the wall. Sometimes it is only a few millimeters, but water still gets there, flows down the wall to the floor and if the degree of sealing is insufficient, it can “please” the neighbors below with a dark stain on the ceiling. Even if you live on the first floor or in a private house dampness under the bathtub will not bring anything good – mold and fungus, musty smell. That’s why these gaps try to close. There are numerous and various borders for the bathtub, which close this gap. Put them not only on the bathtub, but also on the trays in the shower or near the sinks. Choose just a different profile and its dimensions. And the principles of installation remain the same.
Artikkelinnhold
The gap between the wall and the bathtub and the choice of curb
If the bathtub was installed after finishing the walls, there is inevitably a gap between its edge and the wall. Big or not so big – depends on how level the walls are and whether the bathtub itself is level. In any case, it is better to seal this gap. Firstly, there will be no dampness under the bathtub, and secondly, the appearance is better.
To choose a border for the bathtub should be based on the width of the gap. Depending on the distance to the wall changes the sequence of installation:
- If the distance between the bathtub and the wall is up to 3 cm, you can immediately install the curb. Only its lower shelf should be wide – it should be 3 times wider than the gap. And more – in this case, only hard corners are suitable – ceramic or plastic. Curb tape is better to glue with a small gap of a few millimeters or pre-fill it with a cement-sand mixture.
- If the distance from the curb to the bathtub is more than 3 cm, it must first be sealed. There are three options:
- Attach formwork from below, pour concrete, after setting (three or four days at least) you can continue working.
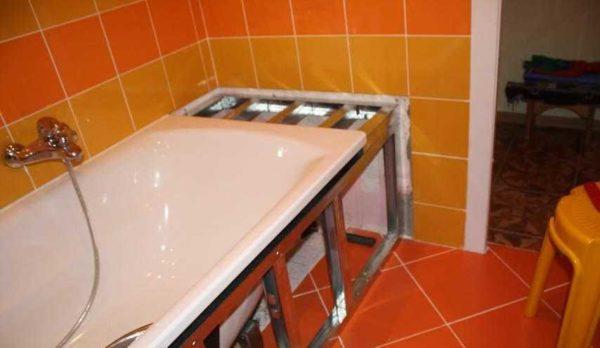
- Close the gap with moisture-resistant plasterboard in two layers. The frame is assembled, which is fixed to the wall with dowels, and to the bathtub – with mounting foam or liquid nails. If the shelf turns out to be large, put vertical supports. In general, collect a complete framework. On the fixed drywall can be mounted corner or ceramic tiles, if the gap is very large and the width of the corner is not enough to close it.
- Make a border of the same tile that is laid out the walls. Option familiar from previous years, but today is already unpopular.

Assemble a frame of metal profile and cover it with moisture-resistant gypsum board. It can be combined with a frame for the screen under the bathtub
Having determined the technology of sealing the gap, you can choose a border for the bathtub. It is not as easy as it seems – a lot of different options, so you can get lost.
How to restore the coating of an old bathtub read here.
Types of bathtub borders and their installation
All bathtub borders can be divided into two large categories, each of which has several subspecies:
- polymeric and PVC:
- mineral:
- ceramic:
- marble:
- granite.
More affordable products from the first group, they are easier to install. More expensive and difficult to install ceramic, marble or granite borders, but they also look much more colorful. True, the design of the bathroom should also be appropriate.

Installation of plastic borders and corners
If we talk about plastic borders for the bathtub, they can be installed under the tiles and on the tiles (or any other wall finish). The curb on the bathtub floor tile is installed in the process of finishing the walls – its upper edge is set under the tile. This option is good, but it is impossible to move/replace the bathtub without destroying the finish.

The second type of curb is mounted after finishing works. In this case, the bathtub is simply attached to the wall, and the existing gap is closed with one of the plastic or polymer corners.
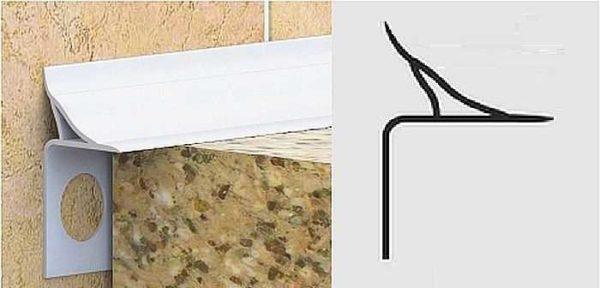
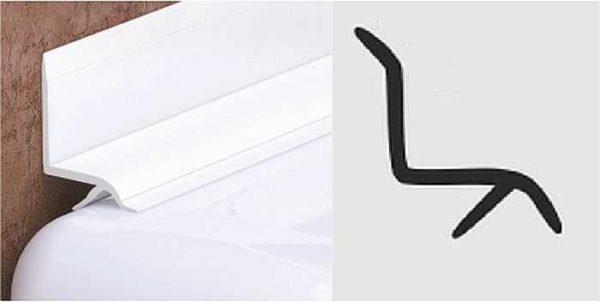
Plastic borders, installed on the tiles, there are different profiles, with different sizes of shelves. The very edges of these products are elastic and they fit tightly to the wall and the sanitary device. The usual finishing plastic corner is more rigid. It can be installed hermetically only on a smooth wall – not on tiles and, especially, not on relief tiles. For such cases, there is a skirting board on the PVC bathroom with rubber edges. The rubber edges of this border tightly fit even in the joints between the tiles and in the relief. Where the fit is not tight enough, the adhesive or sealant “works”.
What kind of adhesive sealant to use
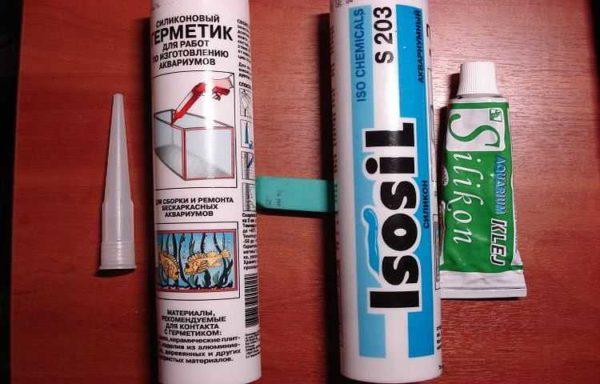
In most cases, install the curb for the bathtub on the silicone sealant. But after problems arise: after some time, the seam becomes dark – mold develops. You have to remove everything, disinfect, degrease and put in place. The interval between the normal state and the appearance of mold is different for everyone – from a year to several months. It depends on the intensity of use, but more – on the presence of sufficient ventilation in the bathroom. If ventilation is poor, it can bloom in a few months.
There is a way out. And not even one:
- You can use a sealant for aquariums. He does not bloom under any conditions (perhaps there are antibacterial components in the composition). Like the usual plumbing, aquarium sealant is white, there is transparent. Only the packaging is usually small and the price is higher. But it is worth it.
- Water-resistant glue. Any, but good and reliable. If you need an example – Moment Crystal. Inexpensive, reliable. But one thing: it must be used strictly according to the instructions. Then it holds for a long time, and fungi and mold on it do not breed.
- Good (read expensive, branded) sealant based on MS-polymers. It is really hydrophobic and continues to repel water even after years, while the usual acrylic begins to leak after 4-6 months. There are among the MS polymer sealants compositions with antibacterial components that prevent the development of fungi and mold. After drying, they remain elastic, so minor movements of cast iron or metal bathtubs they tolerate without problems.
How to glue so that it does not fall off
Many people have already used the curb for the bathtub more than once, but every time there are problems – after a while the corner or skirting falls off the wall. This happens because when using a bathtub, shower cabin – they move at least a little, but move. You step into the container, it moves a little, go out – again minimal, but the movement, leaned on the edge of the bath – again moved. And so every time. Naturally, if you attach the curb to the bathtub rigidly, sooner or later it will fall off. Large amplitude of movement in acrylic bathtubs and shower trays, less – in steel and cast iron. Accordingly, from acrylic vessels the skirting falls off faster, on the others it holds on longer.
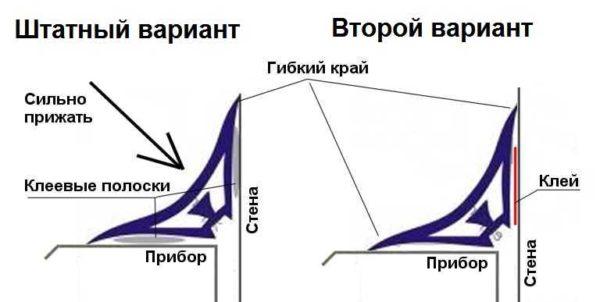
To avoid this problem, PVC border for a bathtub or shower tray glue only to the wall. This is especially true for acrylic containers. With this method of installation, a layer of glue on top prevents water from leaking into the gap between the bathtub and the wall. The lower part of the corner is tightly pressed against the curb (when installing it should be well pressed), excluding water from the side. In this case, all the movements are calmly compensated by the elasticity of the material and the skirting board is held on the wall.
If you are not satisfied with this option, look for a sealant, which after drying remains airtight (in particular, these are the same sealants based on MS-polymers). For cast iron and steel bathtubs it will be suitable, the bathtub border will hold. For acrylic, unfortunately, it is not an option – too much movement.
Why from under the skirting board stinks
There is another unpleasant moment that often appears after the installation of PVC curb for the bath – an unpleasant odor from under the plastic. It is not possible to make the connection 100% airtight, although microscopic gaps remain. Water seeps into them, and there it remains. After a while, the water rots, begins to emit the same odor. This happens because of the accepted technology of installation of bathroom skirting boards – it is recommended to first fill the gap between the bathtub and the wall sealant, and then install the skirting board. The idea is clear – so that the water that got under the skirting board does not seep under the bathtub. And so it happens – the water remains in the remaining gap, from where it “smells”.

To avoid such a nuisance, it is better to install the curb for the bathtub immediately on the wall, without pre-filling the gap with anything. Yes, with such installation, a few drops of water may seep under the bathtub. But this amount will not cause any harm, with sufficient ventilation after a while the moisture will dry up.
The order of installation of plastic borders for the bathroom
With all the differences in the method of mounting profiles of different types, there is a certain sequence of actions that is observed and leads to a good result. In general, it is necessary to act in this way:
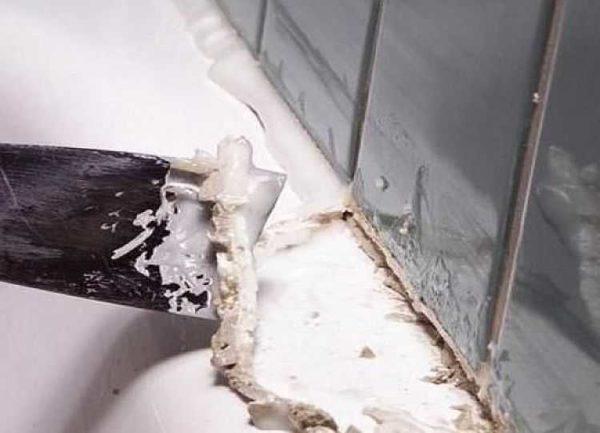
- If there is an old skirting board or curb, it is removed. From the walls and curb remove the remains of sealant or glue. To do this, usually use a knife, you can wallpaper.

Remove the old skirting board and glue residue - Under the curb is often observed mold, it is removed with a rag soaked in any detergent, then everything is lubricated with antibacterial impregnation. There are a lot of them in stores, you choose the one that best meets your needs. Act according to the instructions – observe the exposure time, the number of layers, etc.
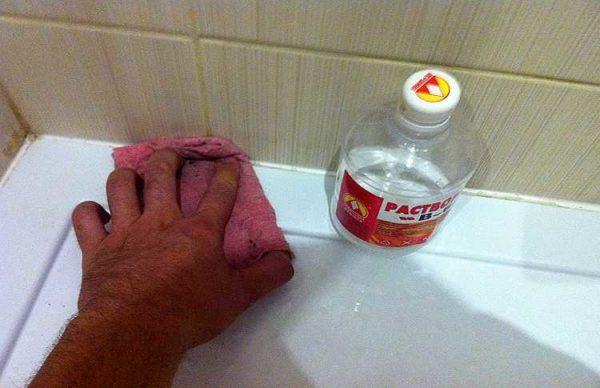
- After the antibacterial impregnation dries, the wall and the edge must be degreased. To do this, take a rag soaked in solvent or alcohol and wipe everything thoroughly. Wait until everything dries. You can speed up the process with a hair dryer, you do not need to wipe.

Degreasing – one of the stages - The selected curb is tried on, cut to size. In the joints of the two sections use the standard corners (if there are such) or the corners are cut at an angle of 45 °. Plastic can be cut with metal scissors or cut with a hacksaw, which is fixed blade with a fine tooth (can be special for plastic, but will work for metal). The edge in any case ideal is not obtained. It to a perfect match to bring a file or sandpaper with different grain size, fixed on the bar (cutting off pieces leave a few millimeters to fit). When the result of joining the two pieces you are satisfied with, go to the next point.
- The subsequent actions depend on the type of the selected curb. They can be on a self-adhesive basis. Then it is necessary to remove the protective tape, put in place the curb for the bath and press well. If it is just a PVC skirting board, beforehand on the wall and / or on the shelves of the skirting board is applied glue-sealant, after which it is installed, well pressed.
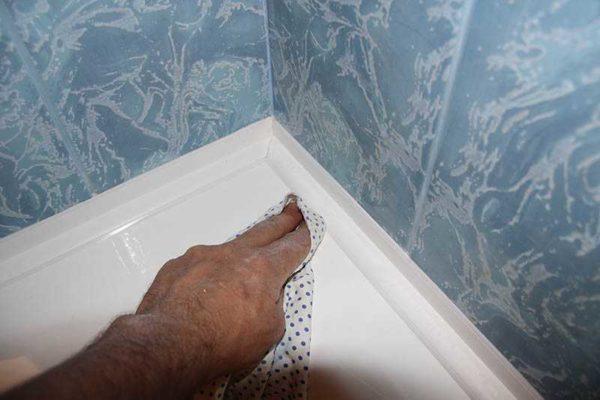
- Sealant protruding from under the baseboard is immediately wiped with a soft cloth. Do it without hesitation – if it hardens it will be difficult to clean.

Wipe off the excess with a soft cloth
That’s all. The border for the bathtub is installed. Now you need to wait for some time until the composition hardens and sets. The exact period depends on the type of glue/sealant used and can take from a few hours to a few days.
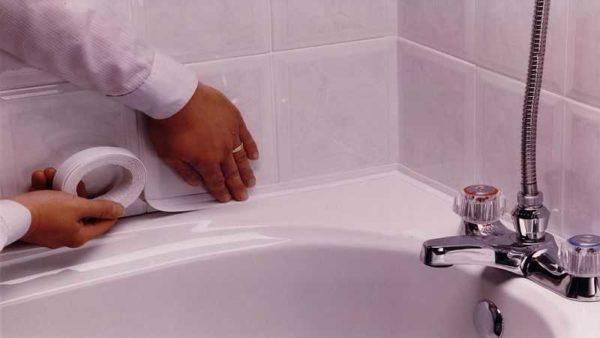
According to this method is mounted and self-adhesive (border) tape for finishing the joint of the bathroom and the wall. This is an inexpensive and quick way to seal a small-sized gap. Lasts such a finish may be only slightly less than plastic, but there is less fiddling with it, although all stages of preparatory work remain in force.
There is one thing to remember if you install the curb on an acrylic bathtub. Before gluing the bathtub more than not half filled with water and in this form leave until the sealant polymerizes.
Methods of gluing the curb with adhesive tape and flexible (rubber) edge
It only seems that it is easy to install a strip of plastic with an adhesive layer. Not at all: you must immediately put it in place, since it is unrealistic to move the skirting board. To peel off at a failed attempt is also not the best solution – part of the glue remains on the tiles and the side of the bath / shower tray. In general, you should practice without removing the protective tape first.
Even if you immediately managed to plant the curb in place, not everything is so rosy with skirting boards of this type. The fact is that the tape, on which they are attached, is quite thick and even tightly pressed against the wall and the edges of the edges do not fit so tightly. It is quite possible to leak in some places, especially at the seams.
If you like this kind of skirting board for the bath very much, you can stick it on the glue/sealant. To do this, peel off the adhesive tape, apply adhesive to the underside, put it in place and press down very well. The layer of adhesive is thin, the skirting board is very tightly pressed, leaks are almost impossible.
And another point – to avoid tearing off the curb, on the side that is attached to the bathtub do not apply glue (described above).
Technology of installation of ceramic curb for the bathtub
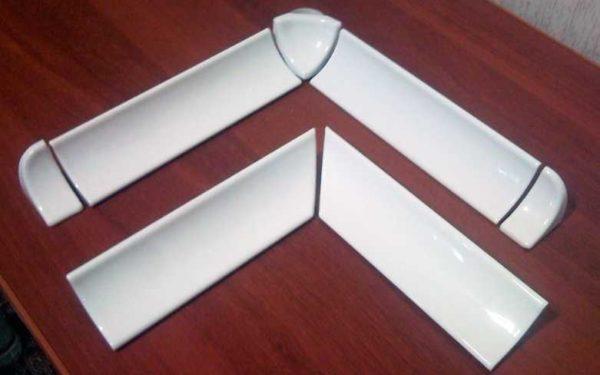
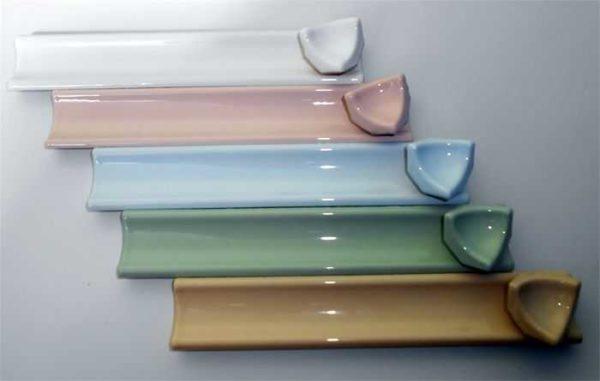
Ceramic borders consist of straight, corner and end elements. The number of straight elements is based on the size of the bathtub / shower tray, corners and ends in the standard placement for a bathtub requires two, for a shower tray corner can be one. The number of straight elements should be taken with a small reserve – for trimming.
It is desirable to inspect all elements before laying. If there is a need (joints are inaccurate, there are differences in thickness, etc.), the back side can be worked a little file. It is better not to use a bolgarka – too great a chance to do more damage than to correct.
Metoder for installasjon
The method of installation of the ceramic curb depends on the wall finish and the size of the gap. If it is a tile, you can use a waterproof adhesive. If the tile is embossed or the wall is simply plastered, installation on the glue does not give the required level of tightness. In this case, mount the ceramic border for the bathtub on a special adhesive for tiles for wet areas. It is sold in bags in dry form, before use, some of it is mixed with water to a homogeneous state.
Sequence of actions
The whole process consists of a sequence of steps:
The process of installing a ceramic border for the bathroom is not much different from laying tiles. The actions are the same. Align the elements should be aligned in two planes – so that both the edges and the plane went evenly and without drops.


When I installed a border for my bathtub, I used some simple tiles. Just measure the sides, cut them right, and stick them on with adhesive. Works like a charm! It really ties the whole look together and keeps water from spilling. Easy DIY project!