What to do if you are bored with the room decoration, and you don’t have the money or energy to renovate it? The fastest and not very costly way is to change textiles and decor elements. And not all the decor needs to be bought. For example, to bring an element of lightness will help butterflies for decor. They make panels, wall compositions. Larger and brighter “live” on curtains or flowers.
Artikkelens innhold
What they are made of
Butterflies on the walls are made of different materials, sometimes even exotic. From this choice depends on the veshny appearance of the resulting decor. While there is no experience and you do not really imagine the end result, you can make several different decorative butterflies to try. They can be applied to the location of the planned decor. So it will be easier to assess the effect and choose the most suitable option.
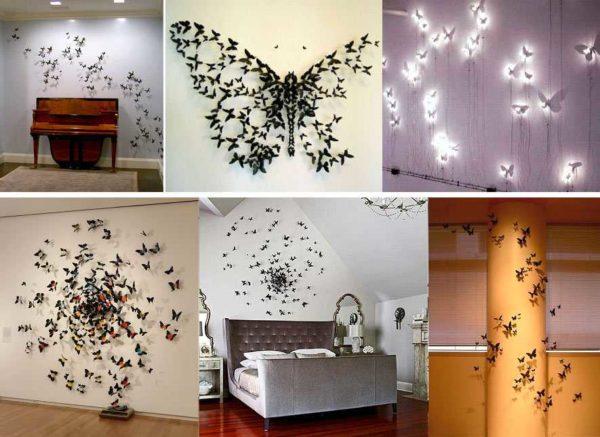
Paper
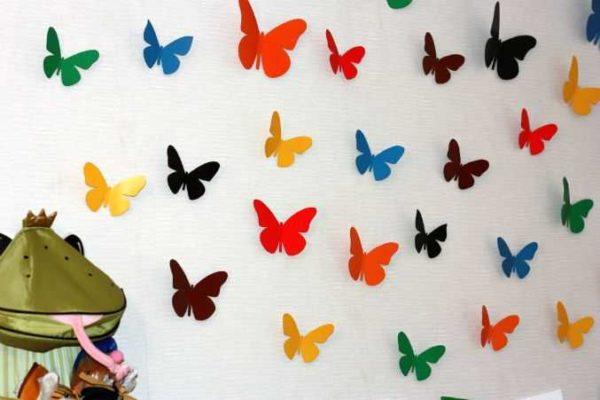
Butterflies for decor from paper to make the easiest and cheapest of all. There are several different techniques. If the product will be flat and it is glued on the wall/panel as a whole, only the front surface is important. If it is supposed to be a volumetric composition, the paper should be double-sided – both sides should be colored, because white often “underside” spoils the impression.
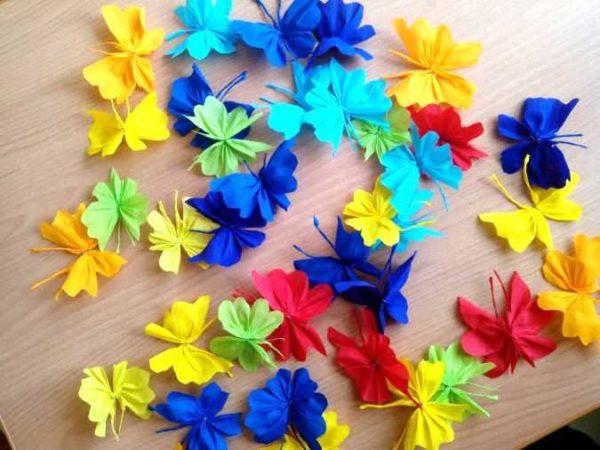
Instead of ordinary colored paper, you can take corrugated paper. The effect will be different – it is lighter, airy, translucent, with its help it is easy to make the decor with butterflies volumetric.
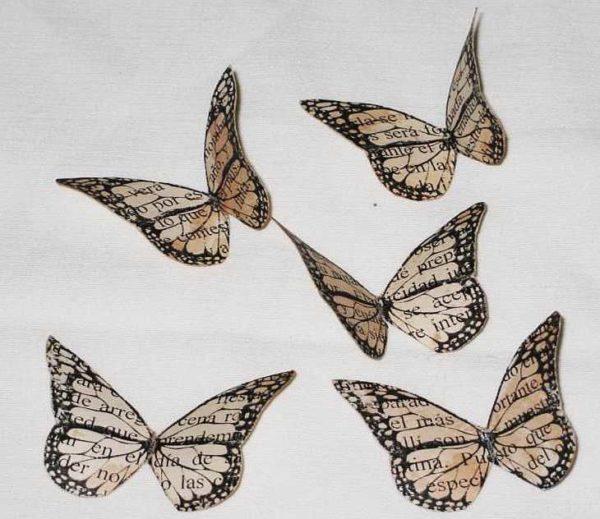
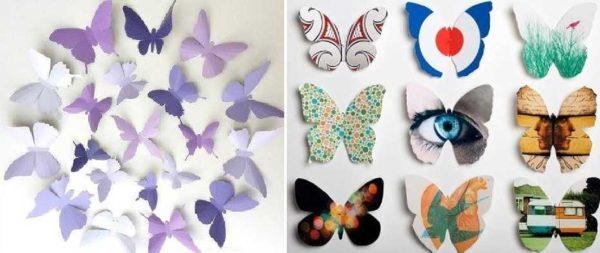
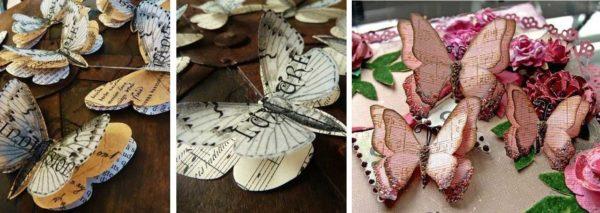
You can make butterflies from an old magazine, newspaper, postcards, colored napkins, wallpaper of suitable colors, any other printed matter.
As you can see, only from paper options a lot. If you take into account that they can still be slightly tinted, combined, make multi-layered, it is clear that the scope for imagination is huge….
Cardboard
Cardboard is not very dense. It’s more like a very thick paper. It is also colored and double-sided. With its help it is more often made volumetric decor – it is easy to bend the wings relative to the body. This material even holds its shape better. Only it is worth remembering that corrugated wings are no longer made – too stiff material to be able to make a small fold.
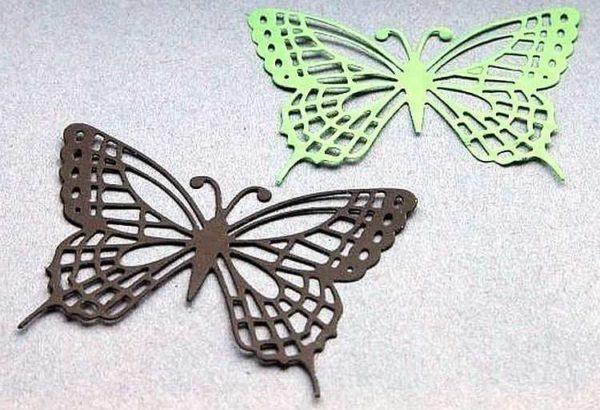
It is also easier to make openwork butterflies from cardboard. Having a sharp enough knife cut out the “excess” leaving only the partitions. Such decorations require perseverance, great patience and accuracy.
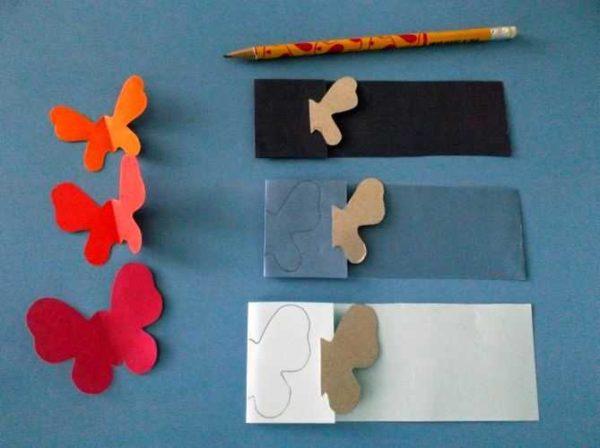
More cardboard is used to make templates for “mass” production of identical butterflies. With the help of such stencils, you can make identical in appearance and size insects and spend a minimum of time on this.
Fabric
Having a template, you can make butterflies for decoration on the wall or chandelier lampshade from fabric. The fabric will need to give additional rigidity, but otherwise the process is not much different: the contour is applied, cut out, if necessary, decorated and attached to the wall.
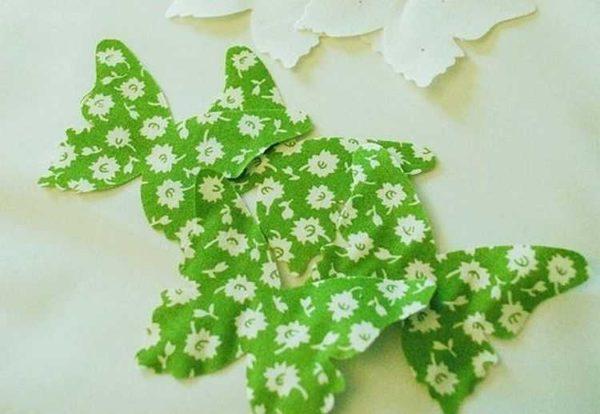
With fabric is more difficult to work with, although it turns out very interesting decorative crafts. This option for more advanced decorators and skills with a needle or sewing machine. With their help you can recreate the veins on the wings.
Exotic materials
Old vinyl records will also be great raw materials for making butterfly decor. Since vinyl is hard, to cut out a butterfly from it, you will have to heat it in the oven. And in order not to spoil the tray, it should be covered with foil.
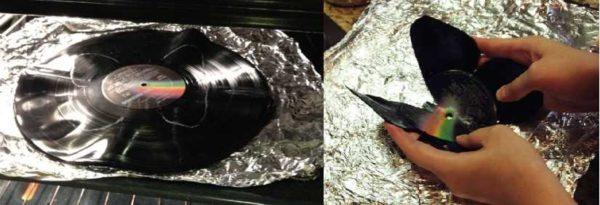
On the vinyl with the help of chalk, the contour is applied, the plate is put in a heated oven, as soon as it begins to soften, it is taken out, scissors quickly cut out along the contour. Often heated “blank” have to several times. After cutting out, heat the last time and give the desired shape.
Beer cans or any other relatively soft tin can also make excellent flying beauties. First you need to cut off the bottom and lid and level the piece of tin. Then, using an awl, transfer the contours from the template to the tin, connect them with a marker and cut along the resulting contour.
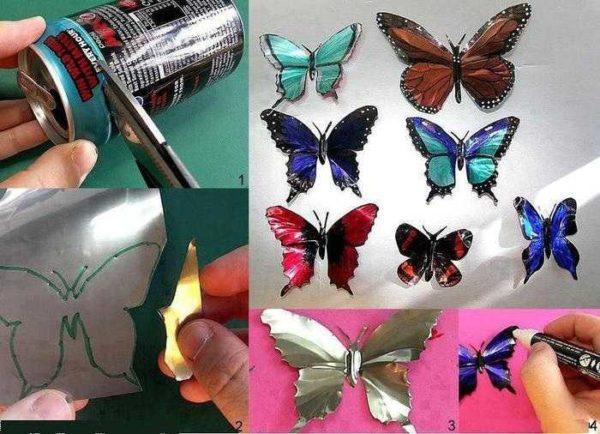
You can decorate the back – the shiny part. This will require markers or felt-tip pens, you can try to decorate with nail polish. Painted beauties are given the desired shape. One nuance: the edges are very sharp, you need to work carefully, otherwise cuts can not be avoided.
How to make contoured butterflies from paper
We start with the simplest, but spectacular – contour butterflies. You will need colored paper or magazine pages, contour cards, etc. You can use old postcards or colored cardboard. You will also need regular cardboard – to cut out the template.
Preparing the template
Take a piece of cardboard – any, you can even pack some kind of (tea, breakfast cereal, cereal, etc.) the main thing that the cardboard was dense and not cellular. Find a silhouette of a butterfly, which you like, transfer it to the cardboard and cut out. There are several silhouettes in the photo gallery. You can print them out, then cut them out and transfer them to cardboard.
A few tips on working with templates. Many contours of butterflies are given with two wings, but it is better to cut off one wing – it will definitely turn out symmetrically.
Decorations of winged insects of different sizes look good. Therefore, the same contour can be increased, reduced using the simplest functions of graphic editors – the same Paint, which is in any computer. Since in this case only the contour is important, the quality of the drawing is not so important, so experiment with the sizes boldly. Printed template cut out, apply to the cardboard and outline. Cut out get a rigid working template, with which you can make dozens of identical elements.
Cut and attach
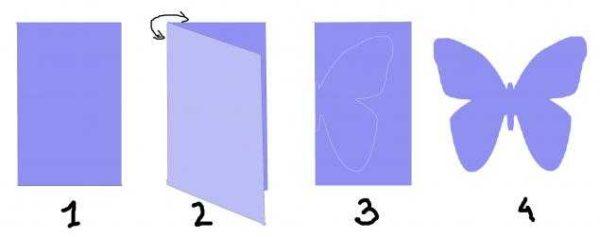
Take a sheet of paper, fold it in half, attach the template, outline. On the applied line cut out. Next, bend the wings from the “body”, we get a working blank. Having cut out a certain number of butterflies, attach to the chosen place – on the wall, a piece of cardboard, etc.
Attach can be attached to the usual glue (PVA is usually the best option), small strips of double-sided glue. You can use wallpaper glue, etc. If there are doubts about the result, stock up on sewing pins. They can be attached to the wall several times without much risk of damaging the surface. When all the butterflies are placed and you are satisfied with the result, you can glue or use scotch tape.
Openwork
A little more difficult is the case with openwork butterflies. They are made of paper or cardboard. It is important to have a good sharp knife and a template with lines drawn on it, according to which it will be necessary to cut out the excess paper. Immediately it is worth saying that this is painstaking labor.
The process is the same as described above: prepare a template, then on it cut out the required number of elements. The peculiarity is that first cut out and remove small fragments, and then already cut out the contour from a piece of paper. With such a sequence of actions, there is less chance of tearing thin lintels, and it is easier to work this way.
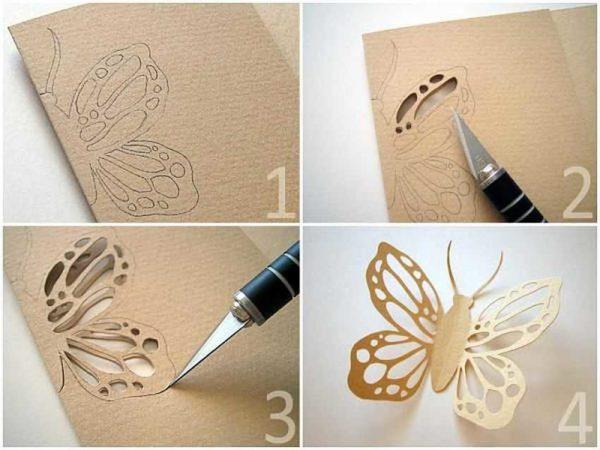
Work with a knife with a thin and sharp blade. It is better not on the table, and putting something hard enough – you can a piece of plywood, chipboard, plastic, etc. But it should be understood that the surface will remain grooves and cuts, so that this piece to use for some other purposes will be problematic.
Multilayer volumetric
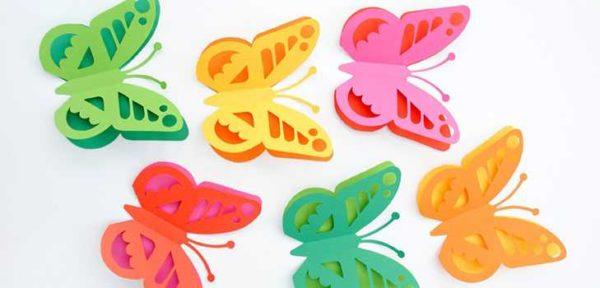
When making multilayer volumetric butterflies, several pieces of the same shape are cut out (size and color may vary). They are stacked one on top of the other, glue the “bodies”, and bend the wings at different angles. This is how such butterflies turn out to be more voluminous.
You can make a combination of openwork and contour butterflies. Take paper of contrasting colors or find the same color, but different shades. Make butterflies of the same shape from them. Only some will be with ajour, others – without. Combine them by putting down a fragment without a pattern. You get an interesting effect.
There is a technique that allows you to immediately cut out volumetric butterflies from paper. You will need two rectangles of paper – larger (for large wings) and smaller. We fold them diagonally once, then the second. We got two triangles of different sizes. Now from two opposite sides bend the paper inside so that you get such a triangle as in the third photo (with newspaper).
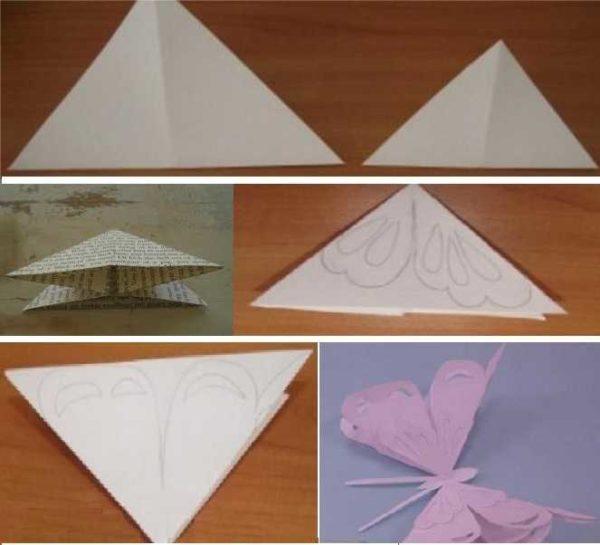
On the resulting triangles we draw wings. In larger ones, the openwork can be located only along the edge, in smaller ones – over the entire area. Cut out the blanks and put one into the other, glue. Glue the separately cut “body” with antennae on top. Due to the fact that the paper is folded and the wings are double, the products have more volume.
Corrugated paper
With corrugated paper is easier to work and butterflies for decoration are more airy and light, because the paper is translucent. We select the appropriate colors, take threads, scissors, glue. Nothing else is required. From the paper we cut out rectangles of about 7*10 cm.
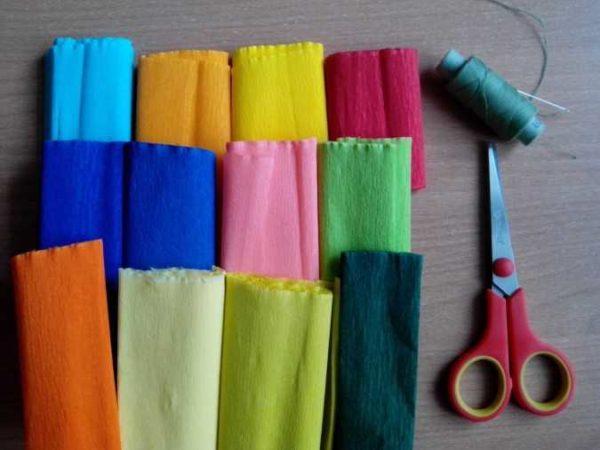
The resulting rectangles in the middle stitch with a needle and thread, tighten, make a couple of turns of the thread. You get something resembling a bow. We fold it in half, straighten the paper with our fingers, trying to leave as few folds as possible – we form the wings.
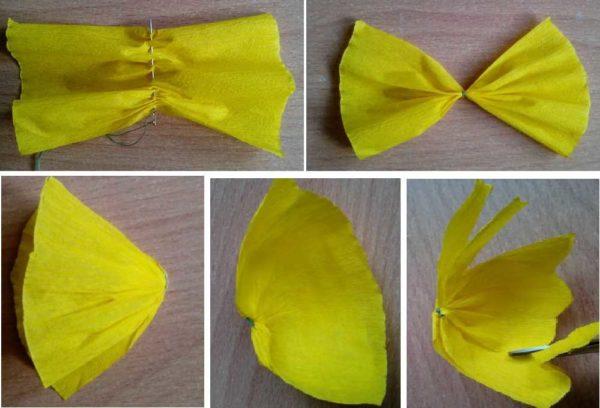
When you are satisfied with the result, take scissors, cut off a strip of a few millimeters from the edge – on the antennae. On the rest of the part we form a patterned edge, reminiscent of the wing of a butterfly.
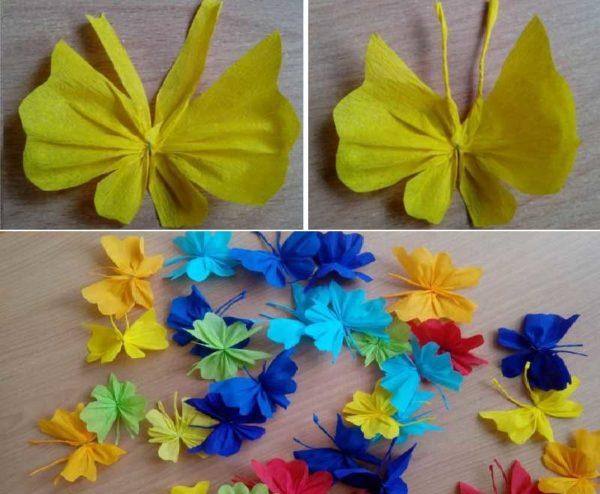
Twist the tendril strips into thin tubes with your fingers. Now they exactly resemble antennae. Wings unfold and finally spread. We have light butterflies.
From folded paper
From double-sided colored paper or old magazines, you can make paper butterflies for decoration by folding them into a small accordion. Cut out two squares or rhombuses of paper (one slightly larger, the other slightly smaller), fold them into a small “accordion”, starting from one of the corners. The shallower the fold, the more interesting the product will turn out.
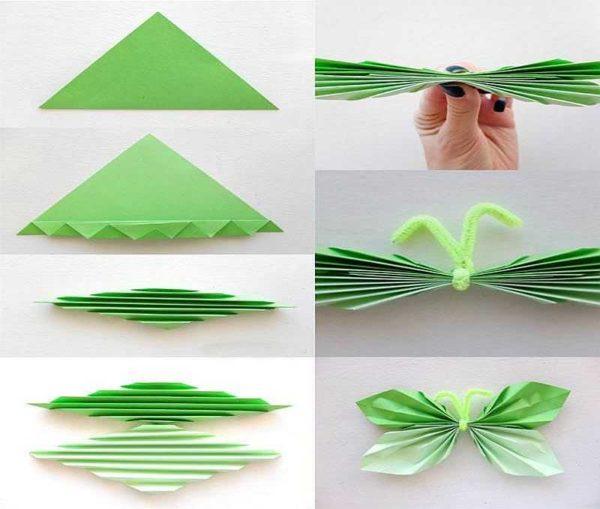
Two folded rhombuses fold one with the other, tie in the middle with thread or flexible wire in a sheath of a suitable color. From the remnants of the wire make tendrils, wings straighten, if desired, adjust the shape.
Foto til inspirasjon
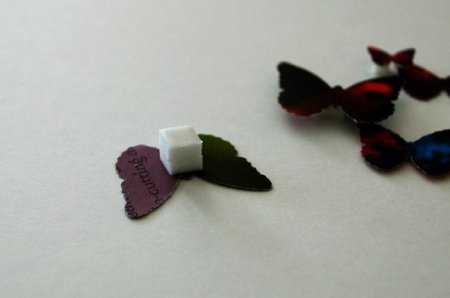
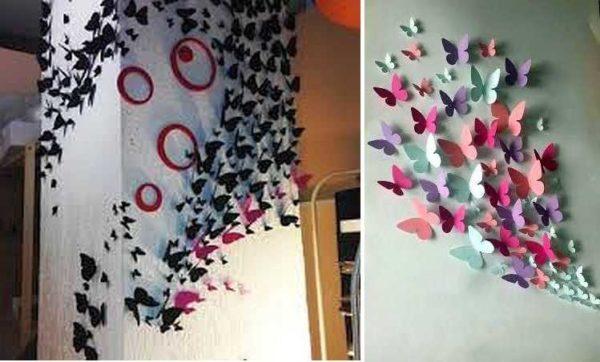
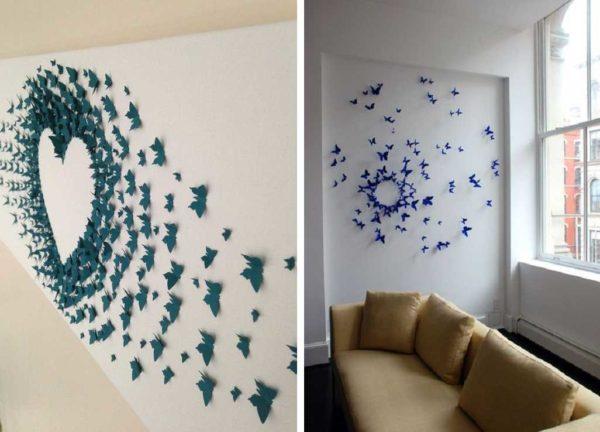
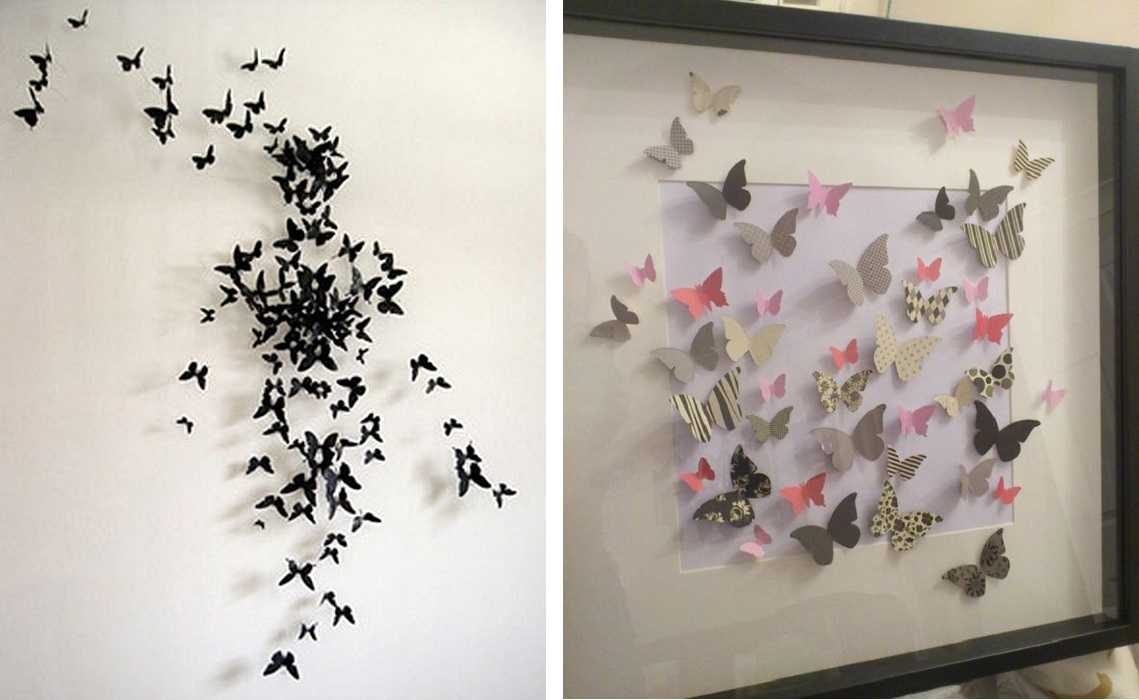
To begin with a little about how and on what you can attach already made butterflies for paper. The easiest way – on the walls or panels using glue. The second no less simple way – on double-sided tape. But to decorate was more voluminous, it is best to glue not directly to the wall, but on a small piece of foam rubber. You will get a more airy composition, with clear shadows.
Use paper butterflies to create voluminous decorative compositions on small hoops with a fishing line tied to them. On the fishing line are fixed cut paper insects. They will not hang on the wall, but they look very original, although it is more difficult to create such a composition than on the wall.
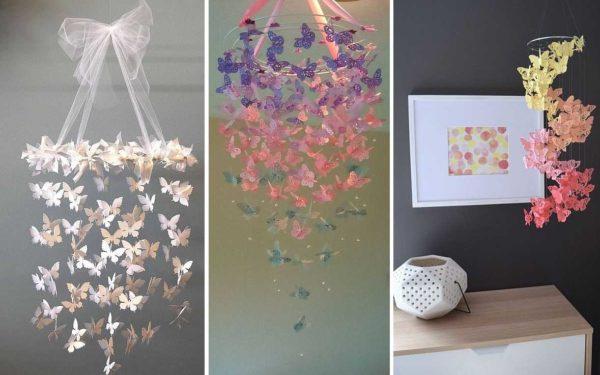
And a few wall compositions that use butterflies for decoration, made from different types of paper.
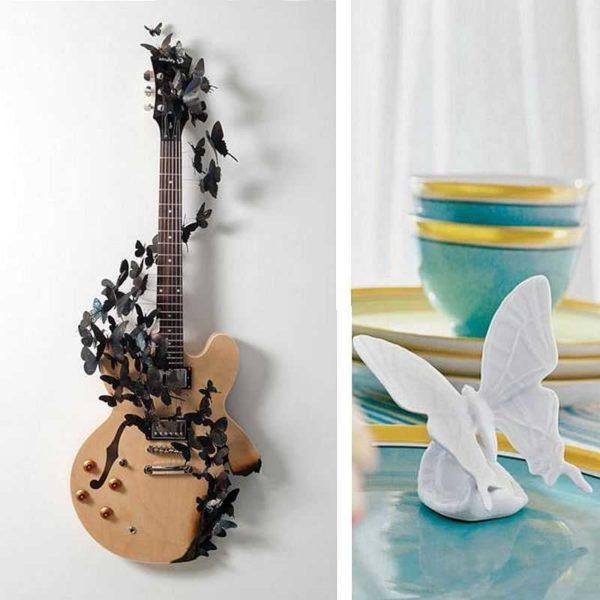
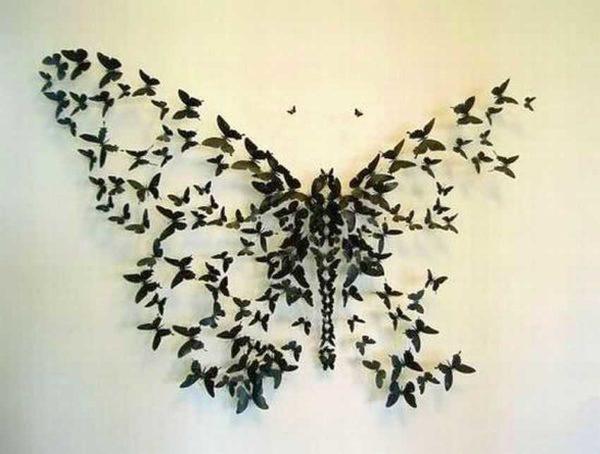
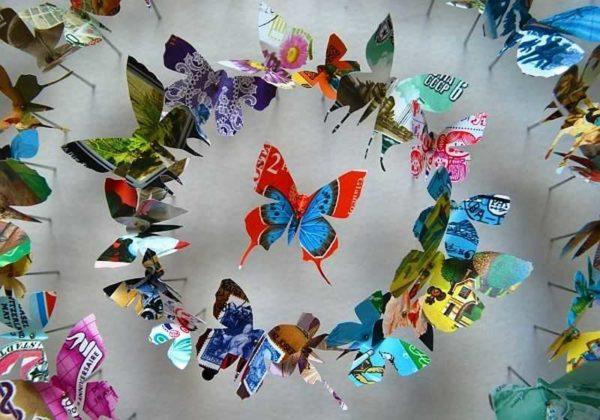
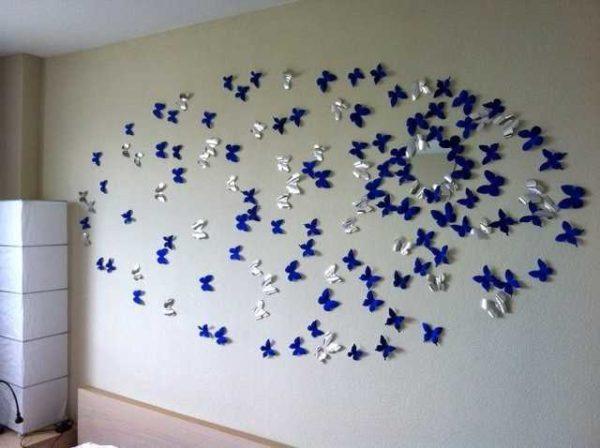
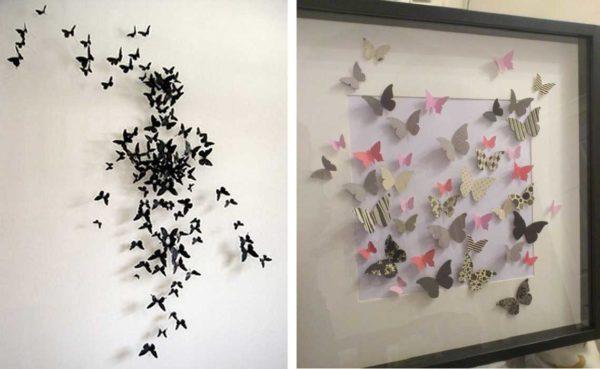
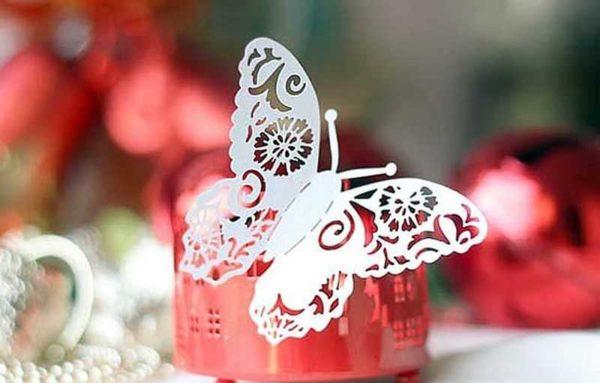
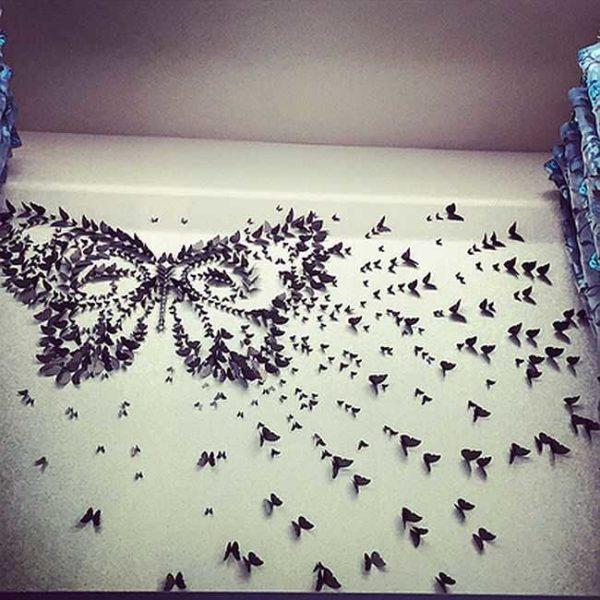




I absolutely love using butterfly stencils for decorating! A few months ago, I decorated my kid’s room with them. It turned out so colorful and cheerful! They’re super easy to use and make any space feel special. It’s a fun way to unleash some creativity!
I tried those butterfly stencils for my room makeover, and they turned out awesome! Just sprayed some paint, and boom! My walls went from dull to fab in no time. They really add a nice touch, like a little magic in the air! Totally recommend giving it a shot!