

The beauty of the mountains so mesmerizes us that we want to have a small part of it even on a small plot near the house. That is why, probably, alpinariums and rockeries are becoming more and more widespread. These are plantings in which stones are combined with plants, and they differ from each other by the ratio of these components. In a rockery, stones prevail – their absolute majority. Plants are present in them only in very small quantities. In alpine slides – alpinaria – plants can be a significant number. They imitate alpine meadows with characteristic vegetation. And to make an alpine slide with your own hands is not so difficult: you need to know its characteristic features and rules of construction, which then apply in practice. About all the subtleties of arranging an alpinarium and we will talk further.
Artikkelens innhold
What are they like
Since alpine slides copy real mountains, they can differ greatly in shape, number, size and type of stones, the way they are laid, and in relief, too. For example, there are layered stone slides, which are also called “Czech rocks”. They are distinguished by the vertical arrangement of layered rocks.
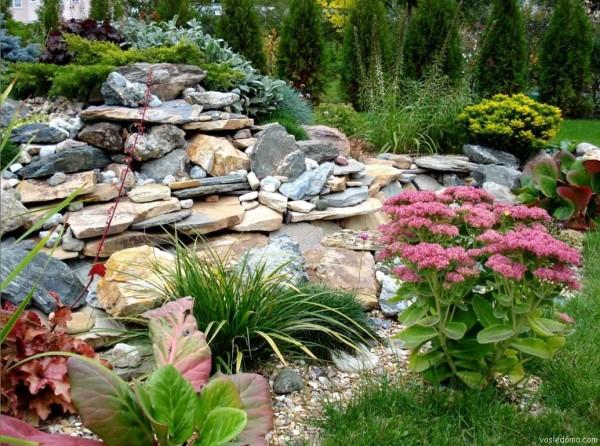
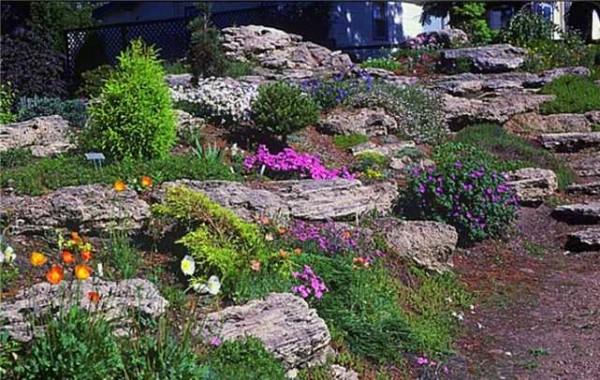
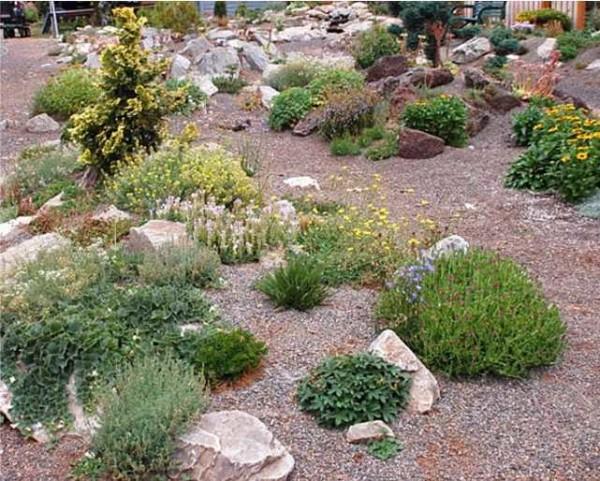
Stony slides are the most common type of alpinarium in our area. It is a small earthen embankment on which stones are spread. The stones are layered or boulders, the space between them is filled with crushed stone, pellets, pebbles or smaller boulders. This is what a stony slide will be.
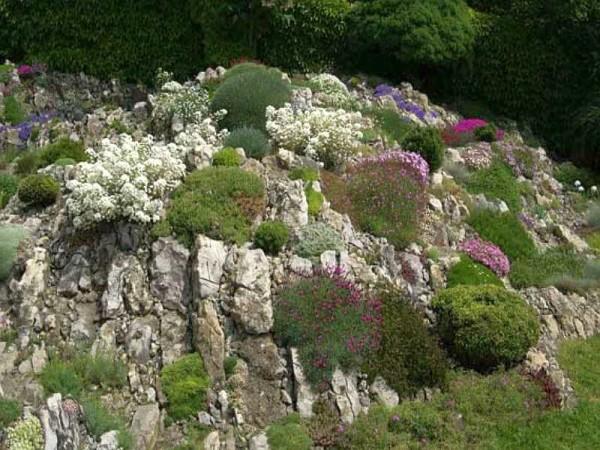
But there are those in which the fertile layer occupies a significant area. In this case, single stone blocks stick out of the green of the lawn, flowers and small conifers stand out as bright spots. Such plantings imitate alpine lawns.
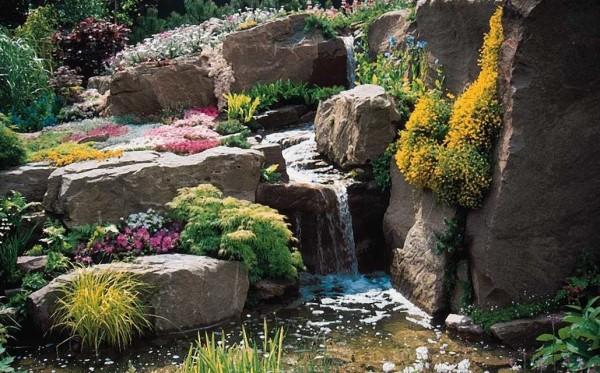
There are alpine ravines. If the site has a similar relief, you can equip it by making an artificial stream. To do this, lay out the bottom and edges with stones, make a small pond at the bottom, from which water is pumped to the top of your “cliff”.
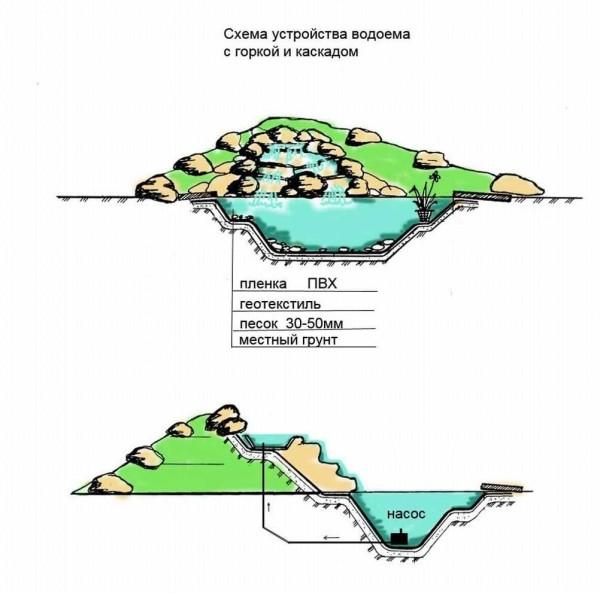
Along the bank of the stream and pond to plant moisture-loving plants, on the stones – suitable their alpine grasses, flowers and perennials. Such a construction, of course, is more technically complex, more it requires and costs – a pond, a stream, a slide – all require investment. Such complex systems are considered already landscape slides, as they partially change the appearance of the entire site.
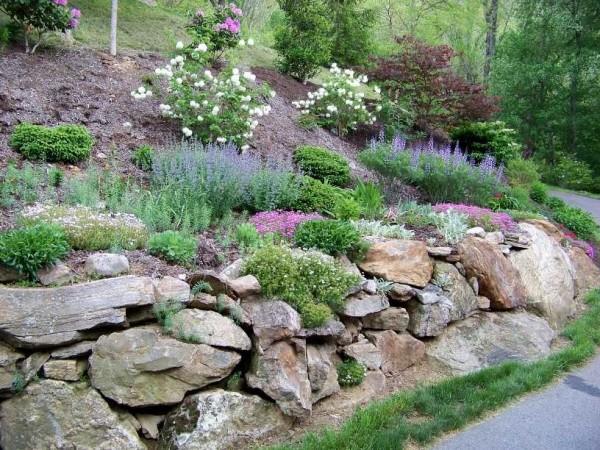
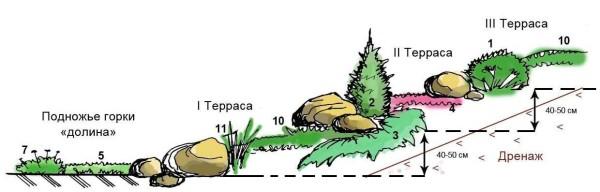
And another type of alpinariums – terraces. The division of the site into terraces is necessary if it is on a slope. Then a multilevel device is the best way out. To level the ground, retaining walls are laid. They are more often made of reinforced concrete, and then decorated with boulders. On these retaining walls, ground cover plants also feel great.
The same principle – the organization of terraces – is used on flat areas, but with a different purpose: to make it more picturesque. In this case, the height difference is created artificially, and this is a large amount of land work.
Stones: what and where to get them
The basis of any type of slide – stones and will need a lot of them – several tons, and different sizes. Choose from those rocks that are more common in your region. The best look best chopped blocks, but already laid, with dark edges. You can also use pellets with smooth sides, but it is not easy to create a natural composition from them. You will need about one fourth of the large size, about the same amount of medium – the rest – small stones.
Granite looks great. But it is hard and “cold” on it can rarely grow even the most tenacious stonelomka, and the soil near it quickly acidifies. This should also be borne in mind and periodically correct the acidity (or plant plants that like acidic soil).
It is best to use tuff. It drains water well, water flows through it perfectly, and more importantly, plants grow well on it. More importantly, it neutralizes acidity, which “alpines” like.
Lime slabs are also good, but they come in slabs, they are good for alpine plains or very low and gentle slides.
How to make an alpine slide
To begin with, choose the site where the alpinarium will be laid out. Depending on the conditions on it, and choose the type of slide and plants that can be planted on it.
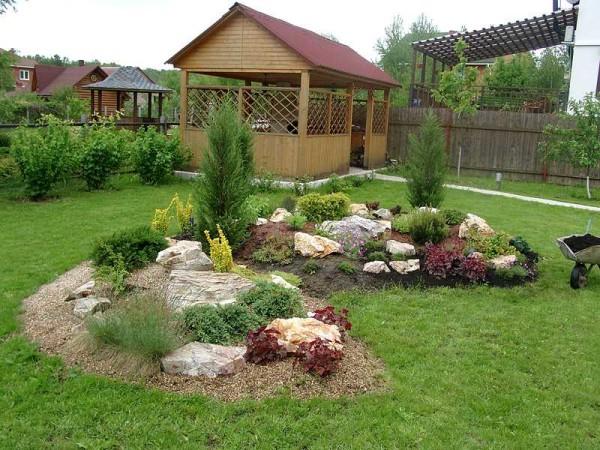
Experts recommend not to make a “grave” – a mound in the middle of a flat area looks just like that. If there is even a small natural or artificial “base” it is better to start the slide from it. It can be a well, a large old tree, even the wall of some construction, from which the alpinarium descends by steps. On a flat surface is more appropriate rockery – a flat construction of stones and plants.
How to choose the type of alpinarium
If the site is allotted waterlogged and is located in a lowland, you can arrange a small pond or swamp, the edges of which are decorated with stones. But even on the stones in this case plant moisture-loving plants – they will successfully drain the adjacent area. If you plant drought-resistant species in such a place, they will wither until they die – they need different conditions.
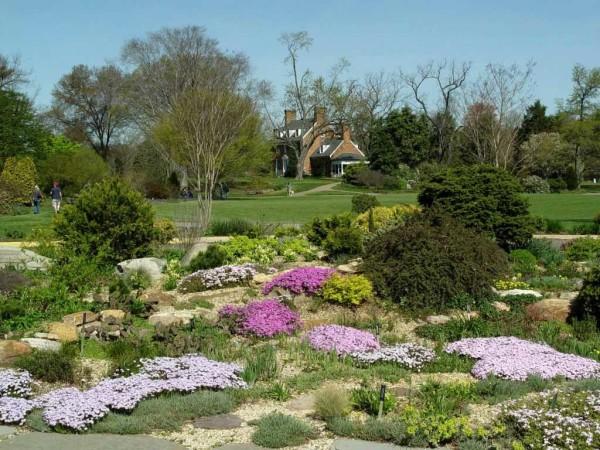
For a sunny or shady but dry plot, any type of slide can be organized. On a flat plot it is difficult to create a large height difference – here it is more appropriate and easier to make something like a mountain valley, an alpine meadow or a low slide. If there is a difference in height, you can make it in the form of a rockery or increase the available height difference by arranging a slide on one side, from which terraces or a covered slope will “run away” alpinarium.
When to start
Unless you will not play with the relief, which is, you will have to shift and pour over the soil and stones, sometimes in the base of the slide piss broken bricks and other similar construction debris. All this is covered with soil and tamped, then the top is poured earth, which is interspersed with stones. And so from the foot to the top – stones with earth. It is clear that the whole construction will give shrinkage. And a decent – up to 1/4 of the height. For this reason, alpine hill with their own hands is often created in two stages: the first – ground work – carried out in the fall, the second – planting plants – in the spring.
In order that during wintering with plants or without plants, rains and snow melt did not wash out the ground, the most problematic areas are fixed with mesh, burlap. Where the most water descends will see after the first rain. You can speed up the process by watering your slide with water. In those places where water descends most of all, lay a net, sprinkle with small stones. In the following winters, the ground will gradually bind the roots of plants, but finally they will grow only in a few years, so that the stones will need to cover the ground and the following winters, only carefully.
Alpine hill with your own hands: sequence of actions
Regardless of the type of selected planting, the sequence of actions in the arrangement will be almost the same. Everything starts with simple, but voluminous land works, then follow exercises with weights, and only then – planting.
STEP 1. Mark the contours. On the allocated place outline the contours of the future slide. They should not be symmetrical – they should look natural. In any case, this is worth striving for. Therefore, it is better if the shape consists of different broken and rounded lines. First you can develop it on a sheet of paper, then with the help of colored rope or cord transferred to the ground (you can outline the contours with a path of sand, for example, etc.).
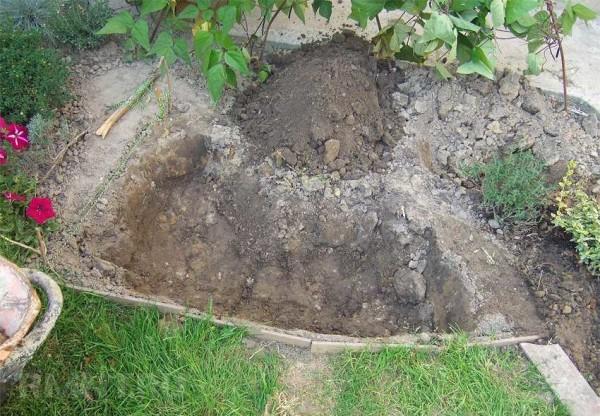
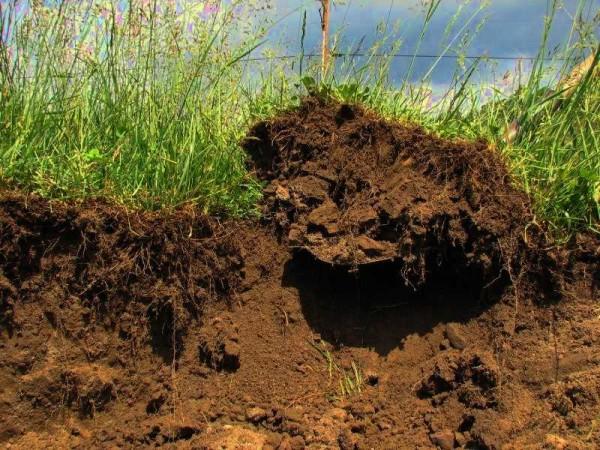
STEP 2. Remove the fertile layer, organize drainage. On the outlined area remove the soil, remove the roots of plants. If the soils are not very well drain water, pile crushed stone and rammed. This is a drainage to divert water and maintain normal humidity. Plants growing on stones do not tolerate stagnant water and overwatering. They are used to a minimum of moisture. And it is necessary to create similar conditions for them. On top of the rubble pile more sand, a layer of 10-15 cm, and on top of the fertile layer or special substrate for selected plants.
If the soils normally drain water, crushed stone is not necessary to pour, but the plant soil must be removed: plants will break through the stones and it is difficult to fight with them. Therefore, clean everything qualitatively.
There may be another problem with sandy soil: it may be too loose (dusty sands). Then the stones will always “float away” on it. The problem can be solved by pouring crushed stone and hammering it well into the ground, if this is impossible – spread geotextile in the pit (used in road construction and landscape design) and fix it along the edges of the pit. In this case, it is desirable to take a dense, so that it could withstand the weight of soil and stones. He will not let the stones change their location and will hold the entire structure. In especially severe cases, it may be necessary to pour a concrete base – a reinforced slab.
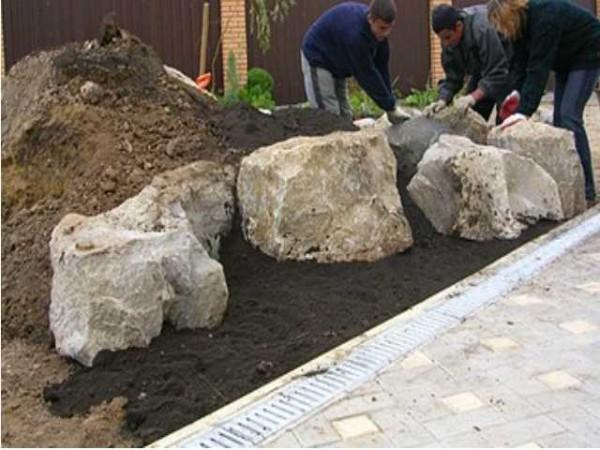
Step 3: Shaping the relief. A layer of soil about 20 cm thick is poured on the sand. The first, largest stones are placed. They should be partially “sunk”. So they will look more natural. For a traditional slide, the stones are stacked rather than placed in a jutting position. When organizing a Czech rock slide, on the contrary – all the slabs are stacked. But these are fundamentally different formations and we will tell you about the making of a skalk a little bit below – there is a different principle of formation.
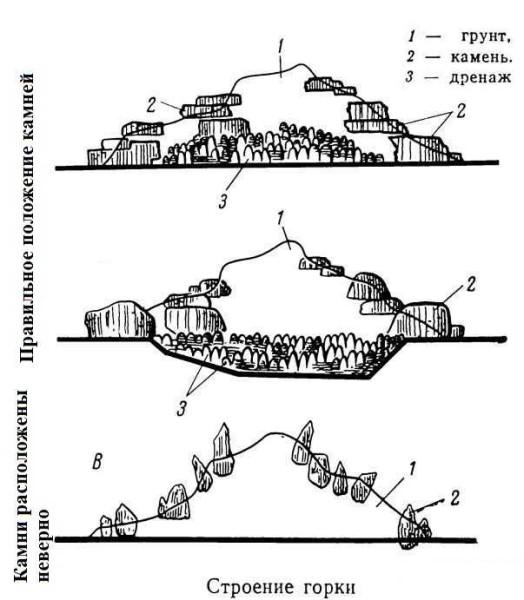
The heaviest stones are laid in the first row. The gaps between them are filled with soil, which can be interspersed with smaller “informal” stones that will look bad in the open. Having laid the stones, check their stability: you need to jump on them. If it stands, does not move, you can continue to work. Lay out the second tier – boulders slightly smaller. And just the same fill the distance between them with smaller stones and soil.
The third tier is formed according to the same principle – small stones are laid here, which can be interspersed with very small ones.
Step 4: Planting plants. As already mentioned, this stage can begin six months after the formation of relief. Since everyone has different conditions, plants are selected based on them. But if we talk about an alpine slide, then on it, in theory, only those plantings that grow in the Alps should live. Basically, they are not very bright, and do not feel well in our latitudes. They are planted by true connoisseurs of mountains. And the vast majority of dachas and homestead plots plant plants that they personally like more. Strictly speaking, this is already a flower bed or a composition with stones … But, no matter what the name of the structure, it has the right to exist, if it brings pleasure to the owner.
What is the difference in the device of the Czech rolling stone
As we have already said, the Czech skalka is formed of vertically placed plates. Such slabs on our market can be bought from sandstone or limestone. Find more or less the same color, but different shapes and thicknesses – from one centimeter to dozens. And look for those with at least one edge dark – weathered. They are put outside. Some more will be needed with two “tanned” edges. When making a slide, they are put outward – so it is more beautiful and “natural”.
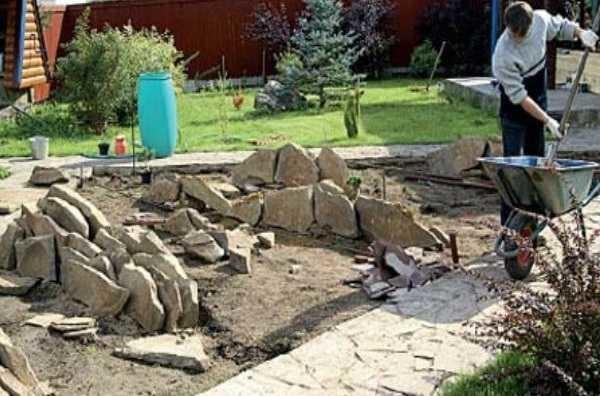
Everything starts the same way: marking the site and excavation, backfilling the drainage layer. Then the differences begin. Large slabs are used to form “ridges” and they are placed on a rib with a slight slope of about 5°.
Between the dominant ridges spread smaller layers, the gaps between them fill with substrate or soil. If you are going to plant alpine plants, they do not need too nutritious environment. They can even die in it. Nudnanaetsya them in creating conditions close to natural, so you will have to adjust to them and make for each species of its soil mixture. The basis can be considered as follows: in equal parts mix light meadow land, river sand with coarse grains and stone chips. To make the soil better hold water brick crumbs: summer temperatures in our country are higher than in the Alps and dries everything faster. Fill the gaps between the slabs with this soil mixture.
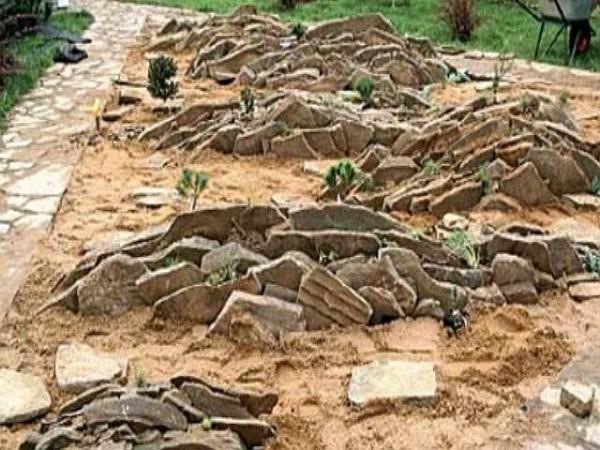
In these “rocky outcrops” plants are planted. Then the remaining gaps are filled with about 2-3 cm with a layer of fine stone chips of the same color. This will firstly, add naturalness, and secondly, protect from drying out. The problem with the outflow of water is solved automatically – it perfectly goes into the vertical crevices. And since the soil mixture is loose, no stagnation is formed.
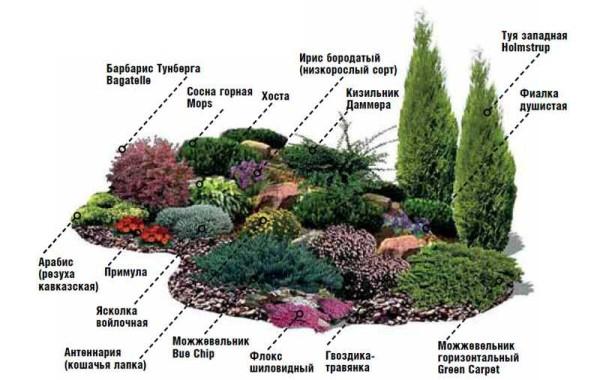
Plants for the alpine hill: planting rules, names and photos
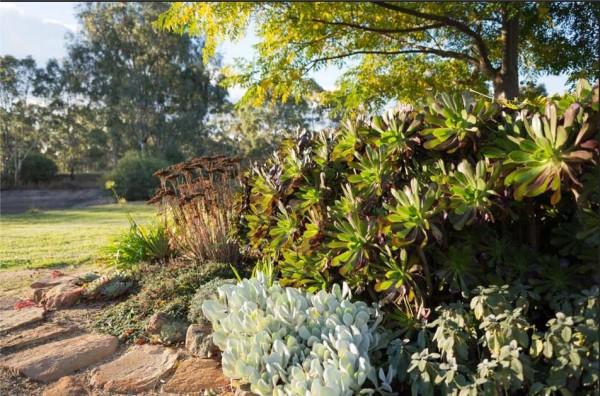
To obtain a decorative effect is more important not only and not so much flowering plants, but those that have beautiful and lush foliage, which retains decorativeness throughout the period: from spring to late fall.
Shrubs and trees should be planted very carefully: they grow, after all, decent in height, attempts to cut them off only harm their appearance. If you want, look for dwarf varieties, but check their height. You can recommend horizontal junipers – they grow sideways, but almost never grow upwards. You can use mountain pine or nesting spruce. But this is only if the terrain is high enough. Trees and shrubs are planted in any case in the “lowland”, and so that it does not block the view.
Plants are planted in groups, but so that between them there is a solid free space filled with stones or small crumbs. A continuous carpet is not for an alpinarium. Here each plant is a soloist and for each plant there should be a separate stage. Therefore, in the foreground – the most stunted, behind them – medium height and the tallest – in the background.
Some plants that are often planted on rockeries at the dacha or near the house with photos are presented in the photo gallery. Keep in mind that mostly one or two varieties are depicted, and they can number more than a dozen (so it usually is).


