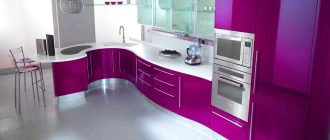
Kitchen furniture from the workshop or factory comes disassembled. You can entrust the assembly to specialists, but there are few who can do better than the owner. Only those who work “as for themselves”, and such are very rare. Therefore, many people prefer to assemble the kitchen set on their own. This will take a decent amount of time, but the quality will be on top.
Raksta saturs
Instrumenti
Before you assemble a kitchen set, you need to collect tools for work. Simple tools are required, but they greatly speed up and simplify the work.
It is not bad to have a plane builder or laser level. With it, the alignment of cabinets in one plane is much easier.
Assembling the cabinets of the kitchen set
Kitchen set in the disassembled state is a set of boards of different sizes, some hardware and a set of fasteners. From all of this, you need to assemble the cabinets. Usually there are hinged and floor cabinets. How to assemble the kitchen set, in what order – the choice is yours. Some masters find it more convenient to assemble them in pairs – the upper, then the lower and so install. But there are two other ways: first collect all the upper, hang them on the wall, then – all the lower. They also do the opposite – collect and install the lower ones, then – the upper ones. In general, any method is correct, do as you wish.
Assembly of hinged cabinets
In any case, we start assembling cabinets. The usual hinged cabinet consists of two side panels, top, bottom, back wall of fiberboard and two doors – the front. The order of assembly is as follows:
Installing the hinges
Finally hang the facades (doors) after assembling and putting everything in place, but put the hinges from the beginning. They are mortise (considered more reliable) and overhead.

Fixing points are marked on the sidewall and door with holes. Fold the sidewall and door on a flat surface (table or floor) close to each other, aligning the marks. Put the hinges in place (included in the kit). Screw first to the sidewall, then to the facade. The door is a little lower in level than the sidewall. Under it you put a bar of suitable size or a rolled-up cloth to keep it at the same level, then screw on the hinge.
The hinge itself is disassembled (it consists of two split hinges, which are connected by a screw. Unscrew the screw, put the doors aside, and work with the sides further.
Assembling the body
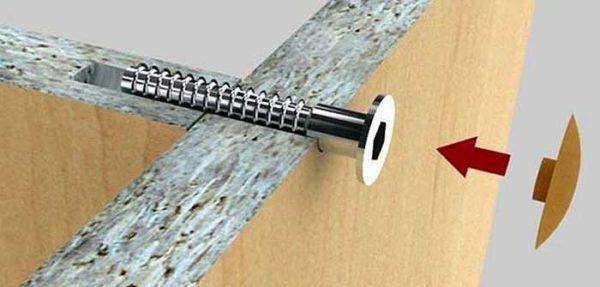
Attach the top and bottom to the sidewalls. They are fastened to the confirmaty – a special furniture fastener, which comes in a set, with a hexagonal head. If there is a corresponding bit, put it on the screwdriver, if not, work with a hand wrench.
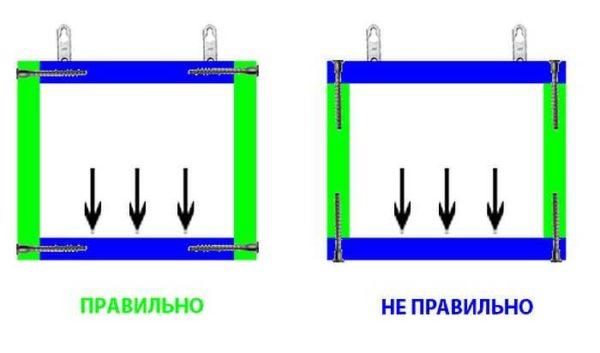
The places of installation of confirmats are marked on the outer part of the sidewalls. Fold the sidewall and the top, install the fasteners, then the bottom, and after – the second sidewall.
Turn “face” down, lay and align a sheet of laminated fiberboard, which serves as a back wall. It is nailed with small nails or staples from a construction stapler. First nailed in the corners, carefully aligning the edges, then in the middle of each side and further, dividing each section in half. As a result, the frequency of installation – 1 nail / staple approximately per 10 cm.
Installing corners or hinges, shelf holders
Hinges on which wall-mounted kitchen cabinets are hinged are different, they are installed in different ways. We will talk more about them below. Shelf holders are also different and different in material and shape, but they are attached mostly in the same way – in holes in the wall. Holes are drilled for them in the sidewalls. Sometimes we put plastic chopiks (small hollow plastic cylinders) in them, hammer them in with a furniture hammer and then put shelf stops in them. But most metal stops (which is probably what you need in kitchen cabinets) are simply placed in the hole.

Actually all, how to assemble a hinged kitchen cabinet you know. For a visual demonstration, watch the video. Floor cabinets with shelves without drawers are assembled in the same way, only first the legs are installed on the bottom and the upper part is the table top, and it is common to all cabinets and is put after all floor cabinets are installed and fastened.
Assembling the cabinet with drawers
We continue to assemble the kitchen set with our own hands. Now the most difficult moment – drawers with drawers. The general order of work is as follows: install the hinges, bottom and back wall. The table top is put after all the cabinets are assembled and fastened together with ties. There are still peculiarities – on the sidewalls it is necessary to attach guides for drawers. Let’s go.
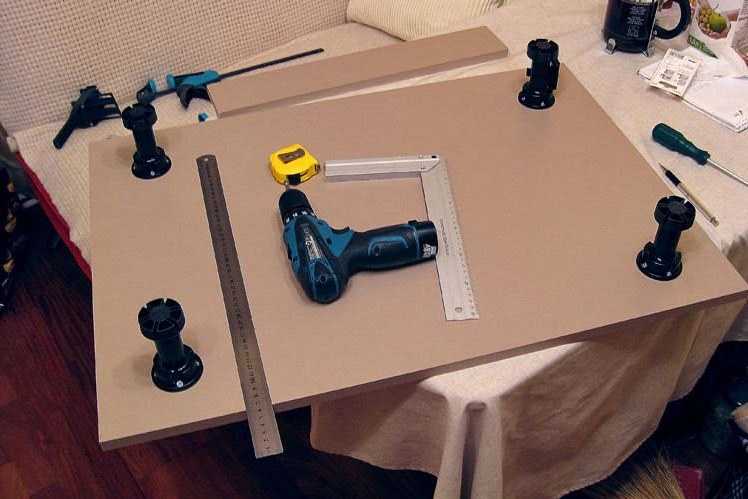
Installing the legs
Before assembling the kitchen set further on the bottom of the legs are installed. You can install the legs and after the frame is assembled, but it is not very easy to twist a heavy nightstand. In any case, it is best if they are adjustable – not always the floor is perfectly level. With adjustable legs, it is possible to expose them so that the load is redistributed to all legs. On small cabinets – up to 80 cm in length – put 4 stops, more than 80 cm need 6 support points.
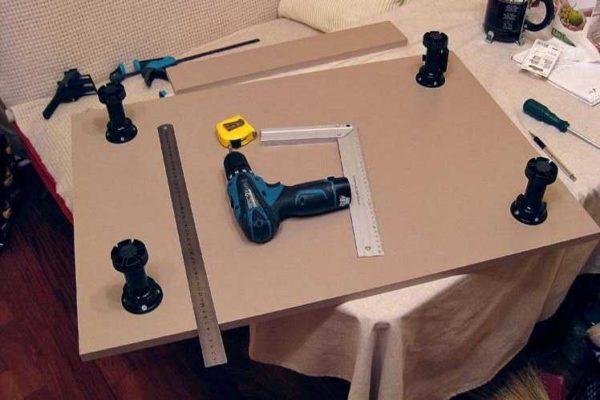
If there is a partition in the cabinet, the legs are placed under it. If there is no partition – in the middle. From the edges are set back 5-8 cm, screwed on self-tapping screws with a length of 15 mm (with a thickness of LDFP 18 mm). In most finished furniture under the legs also have countersinking – holes of small diameter. Align the slots in the legs with the holes and install the self-tapping screws.
Installation of guides and assembly for drawers
On the sides of the lower cabinets there is a marking for the installation of guides (they come in a set). For their attachment is used euro screw M6*13. Install the required number of guides on both sidewalls.
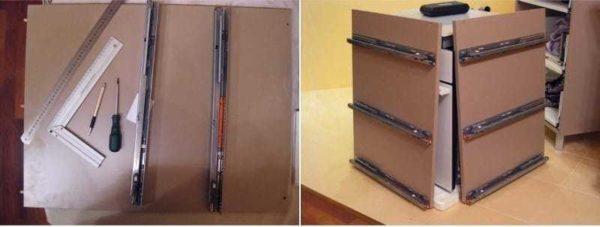
Drawers are assembled using 4*45 screws. First, the guides are installed. Depending on the design, they can be mounted on the walls of the drawer or on the bottom edge of the sidewall. If there are markings (holes) on the wall, then they are placed on the sides. If not, they are mounted on the sides. To be sure, look in the assembly instructions. There in the pictures there should be the installation process.
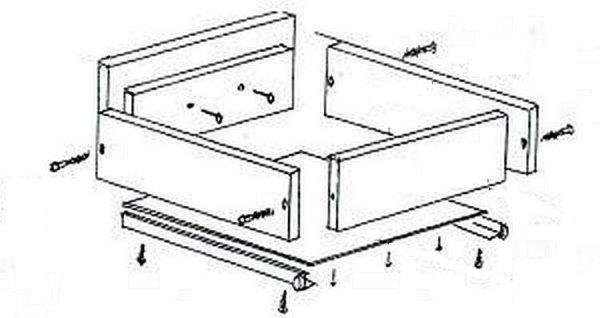
After the guides are connected, the sidewalls are connected to the back wall, then the front wall is installed, after – the bottom. Before installing the bottom, you check the diagonals. They must coincide to the millimeter. The bottom is attached with nails or staples.
Assembling the case
The assembly of the cabinet is already familiar: attach the cover to the sides, then the bottom part with legs. Put the cabinet in place, twist the legs so that the top cover is at the desired height and was horizontal. Horizon check with a bubble or laser level. After installing the covers.
Features of the assembly of the corner cabinet
The main feature is that in budget kitchen sets, the bottom consists of two parts (to reduce the cost of production). If this cabinet provides for the installation of a sink, the back wall is almost absent, but there are several ties-tsangs, which give rigidity to the design. Otherwise, everything else is the same as when assembling an ordinary cabinet with doors.
How to hang cabinets in the kitchen
Even before you assemble the kitchen set should be purchased for the attachment of hinged cabinets canopies and intersectional furniture ties. Let’s start with the canopies, they come in different types, so let’s talk about them.
How to assemble the kitchen set you already know, you need to figure out how to install it in place. Hinged cabinets of the kitchen set are mounted on the wall. They are attached with the help of furniture canopies. They are in the form of metal plates with holes for fasteners, but there are also more complex designs. Cheaper – ordinary plates of metal. They can be of different shapes, are made of ordinary or galvanized steel.
Simple canopies
The most familiar variant (above left) – a plate with two small holes for fasteners and one large one (in which a hook or the head of a wall-mounted screw is inserted). It is installed on the end of the sides – right and left. With a heavy load, this type of canopy can break out, since the fasteners are at a small distance from each other and the LDFP can fall apart. More reliable option from below – more fasteners, but there is still a risk.
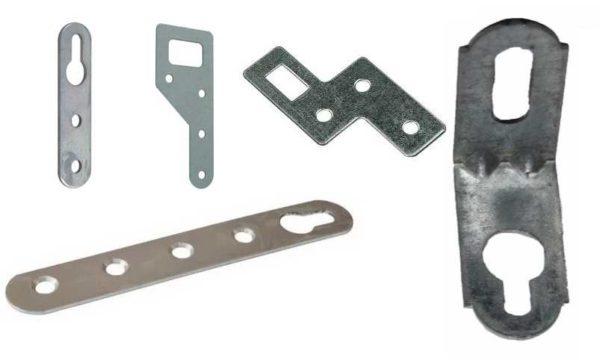
The other two types of furniture canopies are more reliable, since one of the screws will be installed also in the lid of the cabinet, that is, the load will be distributed over a larger area.
The corners have shown themselves well. One edge of this canopy is attached through the lid. Make a through hole, install a bolt with a washer at the bottom, and tighten with a nut (also with a washer) at the top. Install them at a distance of 5-10 cm from the edge, if a large load is assumed, you can put three or four pieces, which is impossible with previous models.
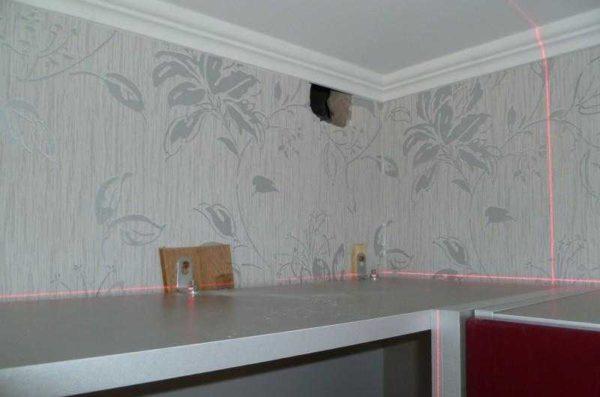
The common disadvantage of all these fasteners – they are not adjustable. As hung, so it will be. There is no possibility to move from the wall or to the wall. If the kitchen apron protrudes above the plane. wall, you have to mount a bar on the wall or under each fastener to select a lining (a piece of plywood, wood, etc.). The second disadvantage – under each awning must be installed a separate hook or dowel. Not very convenient.

Regulējams
More complex and expensive canopy consists of a plastic body, a metal canopy and a system of adjustments that allows you to move it forward/backward and up/down. These canopies are attached to the sides of the locker from the inside, with a small hole cut in the back wall. These hangers are paired with a mounting rail or strip. It is attached to the wall, and the hooks of the canopies are attached to its upper projection. Installing and removing hinged cabinets with this mounting system is very easy, and their “load capacity” is sufficient 20-50 kg per hinge (depending on the model and manufacturer).
How to install the kitchen set
As already mentioned, the order of installation of lockers is arbitrary. You can first hang the upper ones then the lower ones or vice versa. This is not important. The order of installation is important: always start from the corner. From how level this first cabinet will be exposed depends on how easy the further installation will go.
The height of installation of hinged cabinets depends on the height of the “users”, but not lower than 45 cm from the level of the tabletop. When hanging cabinets on the wall mark a horizontal line. It can be drawn with a bubble or water level, but the easiest way is to unfold the plane at the required height using a leveler or plane builder. On this line set the upper edge of the mounting bar or level the cabinets when mounted on conventional canopies.
The task is both simple and complex at the same time – to put the cabinets so that they were at the same level, and their walls were vertical and horizontal. In this case, there will be no operational problems.

Since kitchen furniture consists of individual cabinets, they are fastened together. There are two options – to install, then fasten, or first fasten, then hang. The second option is possible if you have helpers – even two fastened cabinets to hang alone is not an easy task.
Fasten the cabinets to each other with the help of inter-section ties. They are of different diameters and different lengths – under LDFP of different thickness. One wall needs at least two ties. They are placed in the area of the hinges – slightly below or slightly above. Two cabinets are exposed in one plane, fasten their walls with clamps, make a through hole – according to the diameter of the tie, in which the fastener is installed, tightened with a screwdriver or screwdriver.
How to install the countertop on the kitchen set
To assemble the kitchen set finally, it is necessary to install the countertop. It is fastened after the cabinets are tightened. Steel corners are installed on the walls, which are used to fix the worktop. The subtleties in processing the ends and cutouts for the sink, see the video.
How to process the cuts of laminated chipboard countertops, see the following video. It will come in handy for those who want to assemble the kitchen set according to all the rules.

