

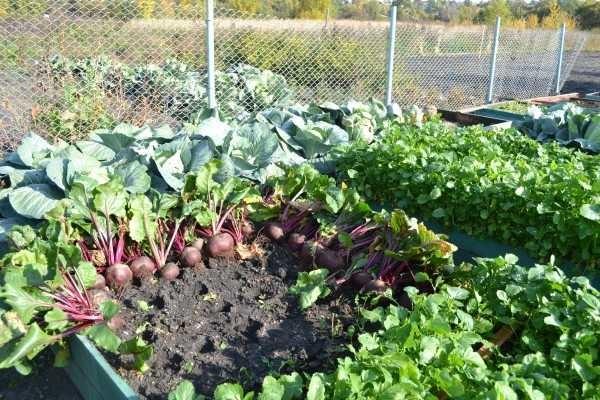
ダーチャの生産者の多くは、土壌の水分が高すぎることに悩んでいる。過剰な土壌水分はすべての植物に適しておらず、多くの植物は発育が悪かったり枯れたりする。この問題は、高いベッドを作ることで解決できる。そのような植栽の組織では、水分の程度を制御する機会があります。そして、この解決策の嬉しいボーナスは、成熟期が早まり、収穫がずっと多くなることである。
記事の内容
メリットとデメリット
高床式菜園は、過湿の問題を解決するだけでなく、種まきや植え付けを2~3週間早めることができる。また、埋め戻した土の大部分を占める植物性廃棄物の分解過程も、これに寄与している。このようなベッドがウォームベッドと呼ばれる所以である。このようなベッドにアークを敷き、スパンボノッドなどで覆えば、収穫をさらに早くすることができる。
さらに問題なのは、暑い気候の地域での装置である。この場合の課題は、地面をよりよく温めることではなく、オーバーヒートしないようにすることである。熱伝導率の悪い素材、例えば木材を高床の柵に使うのだ。より良い効果を得るには、二重の壁を作り、その間に例えばおがくずを流し込んだり、発泡スチロールを敷いたりする。暑い気候では、外壁に白いペンキやホワイトウォッシュを塗る方がよい。明るい色の表面は熱しにくいことが知られている。この場合、根系を過熱から救うことができる。南では、大地が非常に強く熱せられることがあり、植物が高い位置にあればあるほど涼しくなる。また、同じ被覆材をベッドに張ることもできる。保温効果だけでなく、過熱を防ぐ効果もある。
高床ベッドは、不耕起の土地では良い解決策になる。圃場全体に土を敷き詰めるよりも、ベッドに土を敷き詰めた方が便利だ。土層の下にある堆肥層は、肥沃度の維持に役立つ。
乾燥地域の問題も解決される。この場合、内側から高いベッドのためのフェンスは、瀝青マスチックで覆われているか、フィルムで裏打ちされ、底部(グリッド上)にロール防水材(ルーフィングフェルトはすぐに腐敗するので、それはハイドロゾルの近代的なタイプから何か良い)敷設されています。完全防水にはなりませんが、内部の湿気を十分な量に保つことはできます。
このように、バランスの取れたアプローチで、ほとんどの問題を解決することができる。ハイベッドのデメリットは少ないが、ないわけではない:
- ほとんどの場合、フェンスを作らなければならず、それには費用がかかる。
- 労働集約的なプロセス。繰り返しになるが、フェンスを作るには時間がかかり、なおかつ土や植物の残渣をそれなりに移動させなければならず、これは重労働である。
- 朽ちた葉、枝、樹皮には、偉大な熊や他の同様の動物を感じる。彼らと戦わなければならない。
- 妊孕性は維持されなければならず、"詰め物 "を新しくしたり、完全に取り替えたりしなければならない。
以上がデメリットである。高床式にする場合は、かなりの労力を覚悟してください。しかし、収穫はその何倍にもなる。試しに1つか2つのベッドを作ることができる。そして、必要かどうかを判断してください。
サイズ
この問題については厳密な推奨事項はなく、あり得ない:国や人々も非常に異なる条件。 多くの人が最適と考えるサイズがある。
では、ハイベッドの寸法は:
- 高さ - 20cmから50-60cmまで。ここで、難しい作業が判明した。ベッドが高ければ高いほど、加工は簡単だ。しかし、土や他のすべての「詰め物」は、より多くを必要とします。もう一つ:小さな高さのベッドが雪の下にあることができ、厳しい霜から覆われるならば、高いベッドは凍りつくでしょう:側面も開いています。一年草を播種するベッドの場合、それは何の役割も果たしませんが、多年草のイチゴの場合、それは問題です。従って、これらのことを考慮して高さを選ぶ。イチゴのための多くのdachnikiの経験によると、最適な高さ - 20センチメートル。その後、あなたはそれが凍結しないことを望むことができます。
- 幅 - 60cmから1.2mまで。ベッドを処理するのに便利な距離を選ぶ。ベッドへのアプローチが片側からしかできない場合は、60~70cmの距離を選びます。両側から手を入れられるなら、1メートル以上にすることもできる。真ん中も無理なく加工することが大切です。
- 長さ。ここでは、誰もがサイトの構成や彼の欲望に基づいて選択します。推奨は一切ありません。
ベッドが高すぎないように、その一部を埋めることができます:20〜30センチに埋め、上からすでに壁を置く。除去された土壌は埋め戻しに回され(土地が単に十分でないことが多い)、下層の粗い層の基質を厚くすることができる。そして、このようなベッドの維持費を最小限に抑えるために、点滴灌漑を行うことができます。
高さのあるベッドの囲いに使用できるもの
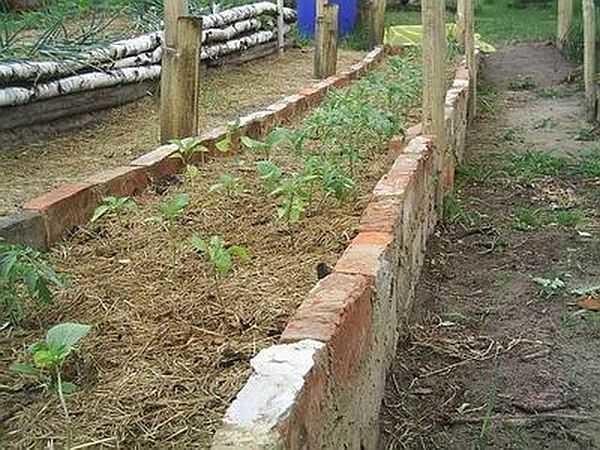
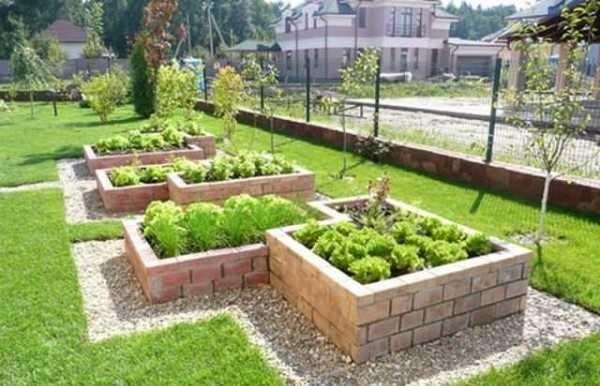
土を保持できるものなら何でも使える。最も耐久性のある縁取りは、レンガ、石、コンクリートでできています。
しかし、レンガはコストがかかるし、コンクリートは手間がかかる。コンクリート・フェンスは、まず型枠を作り、そこに補強材を敷き、コンクリートを流し込んで固まるまで待つという、あらゆるルールに従って作られる。しかし、その耐用年数は数十年と長い。
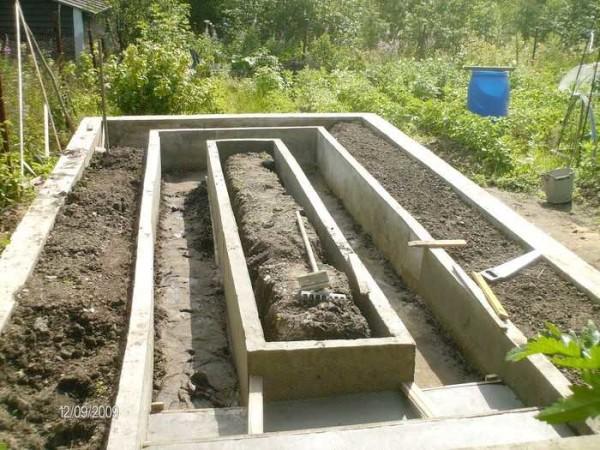
レンガや石の塀もまた、すべての規則に従って敷かれる。レンガの消費量を減らすため、塀はレンガの半分に敷き詰められる。土が動かないように、畝はメッシュで補強されている。
しかしこの場合でも、1メートル後に支柱を設置する必要がある。土が粘性で重く、しばしば過湿になる場合は、このような壁が圧迫される可能性がある。したがって、長い壁を固定する木製または金属製の支柱を設置するか、観賞用菜園のように小さなベッドを作る。
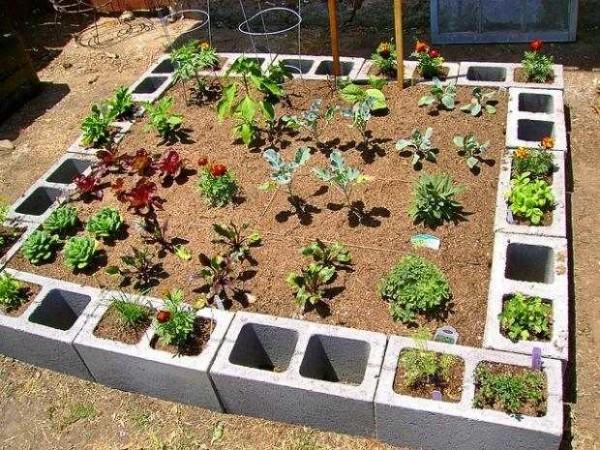
実績のある粘土ブロックのフェンス。空洞があっても土を入れることができ、小さな根系を持つ植物、例えばハーブやサラダを植えることができる。
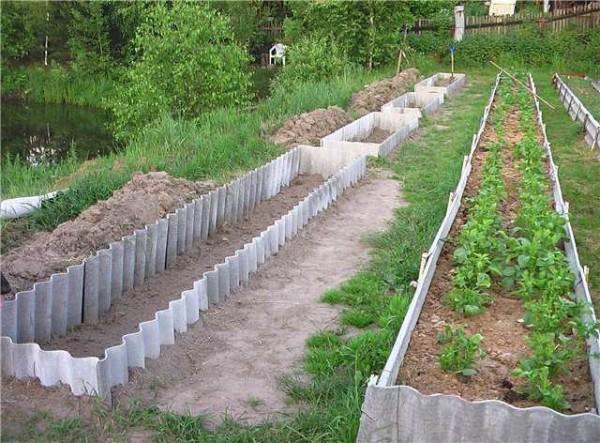
また、亜鉛メッキ金属とスレートで高床用のフェンスも作る。スレートは中古品でも、新品でも、波打ったものでも滑らかなものでも、違いはない。シートを必要な幅のストリップにカットします。それが有害であることを恐れては価値がありません。スレートはアスベストを結合状態で含んでおり、水には溶けない。粉塵が舞い上がり、呼吸器を通じて体内に入る。粉塵が舞い上がり、呼吸器を通じて体内に入る。害を減らすには、呼吸器を着用し、切断部分を濡らすこと。
プラスチックでベッド用の柵を作るサイディングを変えましたか?それを使いましょう。古いプラスチックのパネルがある。しかし、プラスチックには硬い土台が必要です。太いワイヤーで金属メッシュを作ります。
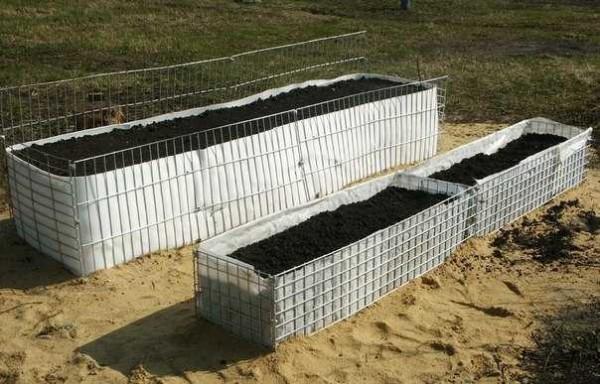
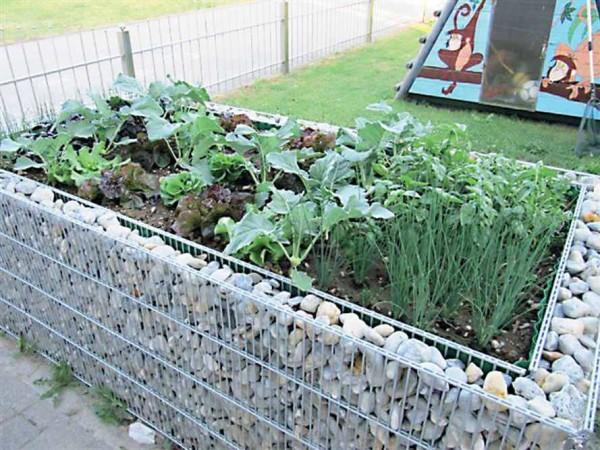
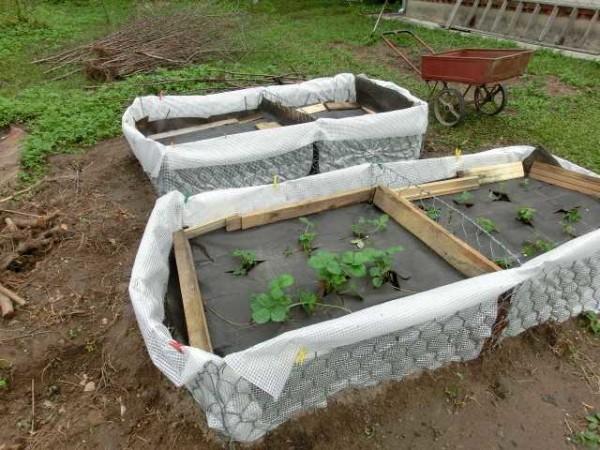
格子は小石やペレットの土台になる。この場合のみ、二重の枠が必要で、その中に石や他の材料を流し込む。このような技術は「ガビオン」と呼ばれ、そこからベッドやベッドの柵だけでなく、フェンスも作られる。しかし、ガビオンベッドの壁から水がしみ出すのを防ぐために、箱の内側は緻密なフィルムで覆われている。
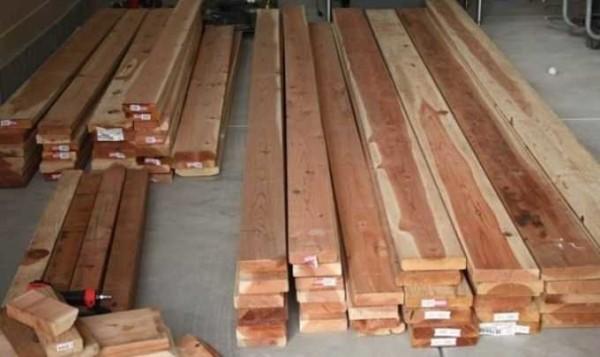
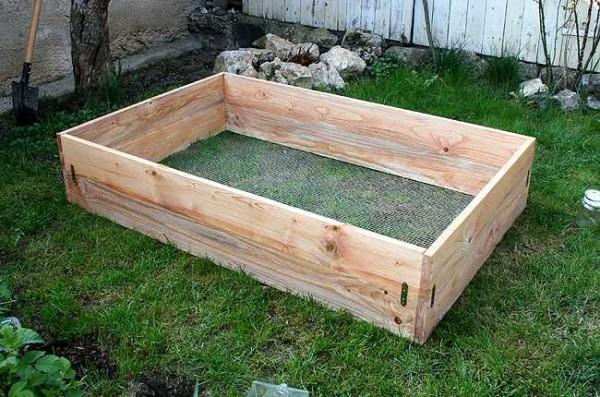
最もポピュラーなフェンスは木製だ。板でも梁でも丸太でもいい。木は腐ることを除けば、何にでも適している。
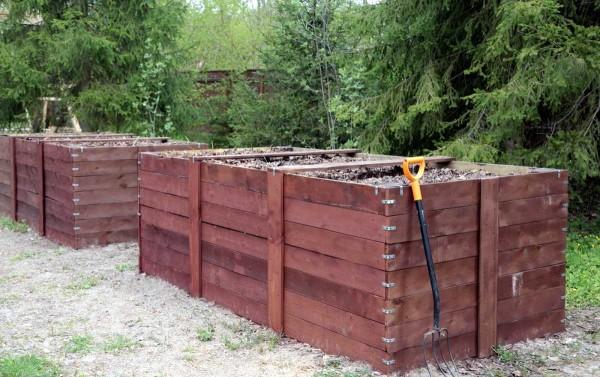
そして、高床にはこのプロセスが活性化するためのあらゆる条件が揃っているため、破壊はかなり早く起こる。板を塗装したり、生物保護組成物を含浸させたりすることで、このプロセスをいくらか遅らせることができる。しかし、それでも破壊に対する保証はない。
しかし、材料は安く、時には捨てることもできる:建設後の残り物、ハンプバック、古い丸太、パレットなど。必要であれば、枝でフェンスを作ることもできる。樹皮の下には幼虫や木虫がたくさんいる。ただし、埋め戻しの底に敷いた木質残渣も再利用してくれる。しかし、彼らも多すぎるのは困るので、やはり樹皮を取り除くのがベストだろう。
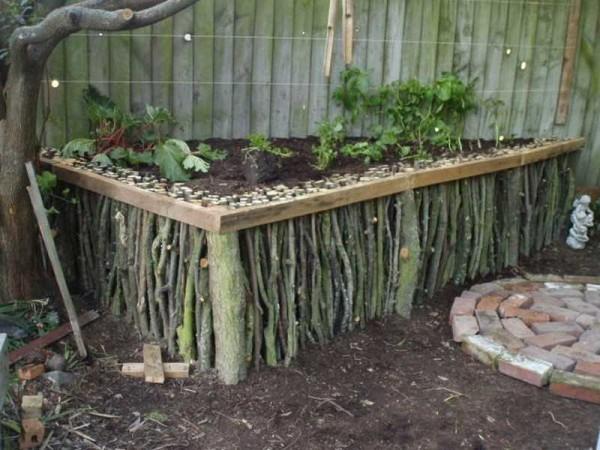
同じ枝で、切りたての枝だけで籐のフェンスを作ることができる。内側からフィルムを張って、水や土が入らないようにする。
籐の作り方については、こちらをお読みください。

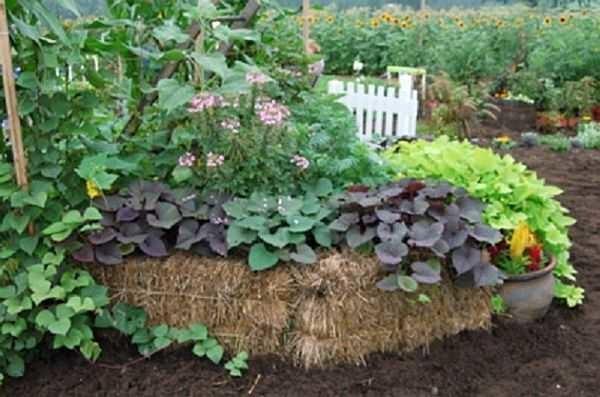
藁も使える。小さな束にして針金でつなぐ。単純に安くすることはできませんし、水と温度がよく保持されます。このオプションの唯一の欠点 - このようなフェンスは、最大2シーズン、より可能性が高い - 1を提供します。しかし、それはその後、層の一つとして使用することができます。
バルクベッド
柵のない高床ベッド、いわゆるバルクベッドがある。土は丘の形になるように流し込まれる。

水はけをよくするために、枝をベッドの内側に入れる。ベッドの高さを低くするには(トマト用など)、土を横に傾けて少し深くする。枝を敷き詰めた後、上から埋め戻しますが、輸入土を追加する必要があることがよくあります。畝間を深くすることができない場合は、畝を深くする。
この種の菜園の欠点は、水やりのときや雨のときに、表層の土が流されてしまうことだ。そのため、土が流されないように箱を作るようになった。
ハイベッドの層
枠を作るのは作業のほんの一部に過ぎない。出来上がった箱に詰め物をする必要がある。層の厚さは選択したベッドの高さに依存するので、値が与えられている場合、それは概算に過ぎないことをすぐに言うべきである。層の厚さにベッドのサイズに加えて、例えば、肥沃な、植物の選択に影響を与えます:誰かが5 cmで十分であり、誰かがはるかに多くを必要とします。
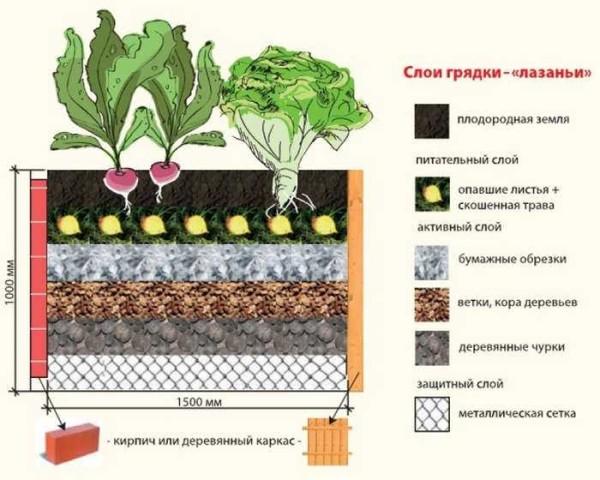
では、高さのあるベッドに何を入れるかというと、下から上へと層を重ねるのである:
- 底には、目の細かい金属メッシュかジオテキスタイルの層を敷く。段ボールを敷くこともできる。メッシュとジオテキスタイルは、ネズミやモグラからの保護になる。段ボールもほぼ同じ役割を果たすが、効果は低い。
- 太い枝、小枝、さらには塊や丸太。この層は、第一に水はけをよくし、第二に水分を木材に蓄積させる。あなたの地域の気候が乾燥すればするほど、木材は多くなるはずです。さらに、次のような木材の層もある。
- 細断した小枝、樹皮。その他、トウモロコシの茎や藁などの粗い植物残渣でもよい。その役割は2つある。水分を蓄え、分解するときに熱と養分を放出する。しかし、トウモロコシの茎やわらを使用する場合は、ベッドがすぐに沈むことを考慮してください:これらの残渣はすぐに腐敗するが、収量は高くなり、上に肥沃な土を注ぐことができます。
- 紙、薄い厚紙。通常は薄い層で覆われている。光沢のある紙は適さないので、新聞紙と同様に梱包用の段ボールを使うことが多い。古い不要な麻布(天然)があれば、それを敷くことができる。
- 植物の残渣:葉、草、半分腐敗したオガクズ。オガクズには注意が必要だ。酸性土壌を好む植物の下に敷くか、灰をまぶして中和する。
- 肥沃な土壌。
最後の2つの層には、完熟した堆肥をたっぷりと入れることができる。こうすることで、高床の植え付け準備が早まる。
自分の手でダーチャに池を作る方法については、こちらをお読みください。
いつ、何を植えるか?
高床を埋めるのは秋からが良い。この期間と「材料」は十分で、冬の間に内部のプロセスが勢いを増すだろう。この場合、春には植物を植え、高収穫を期待することができる。春に行うこともできるが、収穫量に大きな差が出ることはないだろう:プロセスは始まったばかりで、埋め戻しの肥沃度に顕著な影響を与えることはできない。灌漑用水の量の違いは間違いなく感じられるだろう。
植物ローテーション
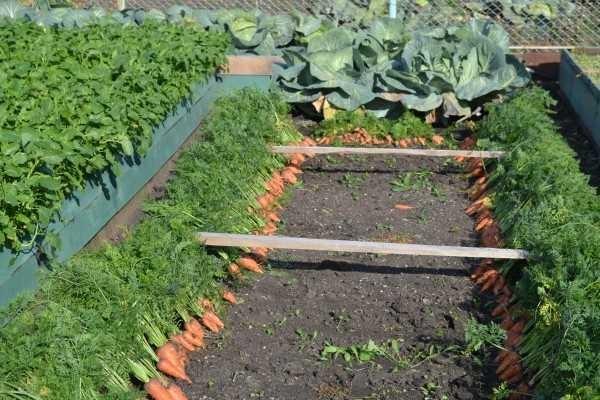
キュウリ、ズッキーニ、カボチャ、キャベツ、ナス、トマト、ピーマンなどだ。別の年には、スパイシーで芳香のある葉のハーブを植えることができる。根菜類は2年目が良い。
2回目の収穫後は、肥沃度を回復させる必要がある。ベッドの中身がたるんだ場合は、秋にdopyryu良い土と成熟した堆肥を混ぜる。散布する場所がない場合は、最上層の一部(堆肥ヒープ上または埋め戻しの一部として別のボックス内)を削除し、肥料と新鮮な土で置き換えます。
イチゴ用ハイベッド
違いは、完成した "パイ "の上に被覆材を敷くという点だけである。その中に穴を開け、そこに植物を植える。この方法は、水分の蒸発が少なく、畝間に雑草が生えない。2つ目の方法は、地面にマルチングをする方法です。
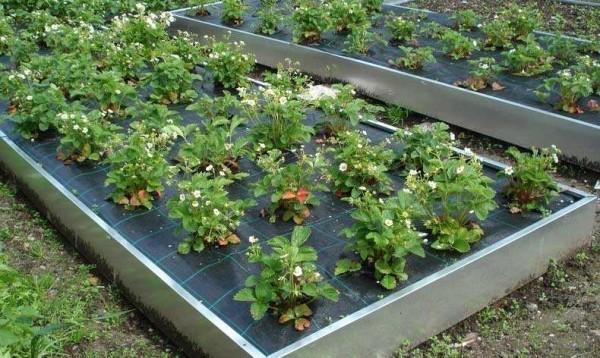
イチゴの特徴は、根が主に地表にあることである。したがって、肥沃な層は小さいことがあります。しかし、同じ特徴は、厳しい霜の場合には枯れる可能性があるという事実につながる。高いベッドの中で、土壌を加熱する分解プロセスがありますが、ベッドが雪なしで冬のために覆われていない場合、根系は凍結する可能性があります。
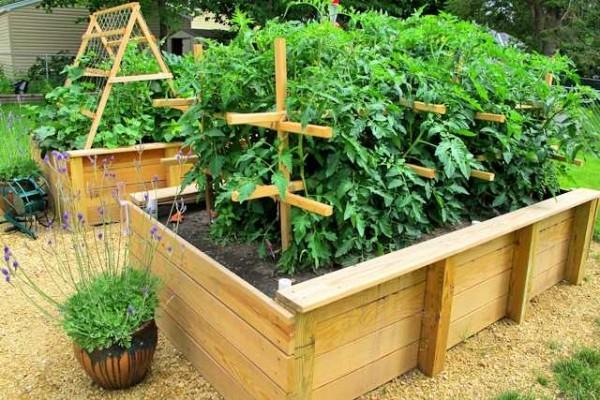
キュウリとトマトのハイベッド
その工夫によれば、何ら変わりはない。ただし、トマトの茂みやキュウリの枝を縛るには、支柱とクロスバー、あるいは端に張ったワイヤーが必要だ。
菜園や区画の自動灌漑の組織については、こちらをお読みください。
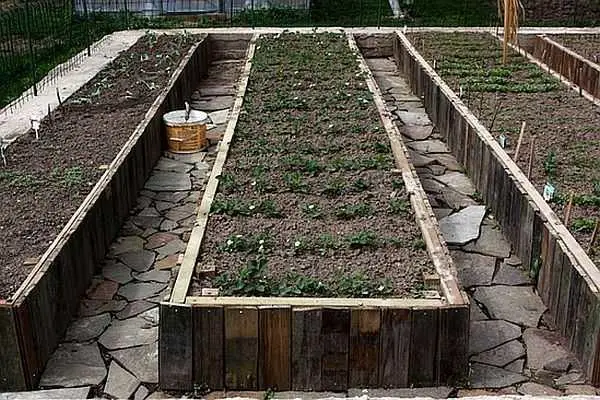
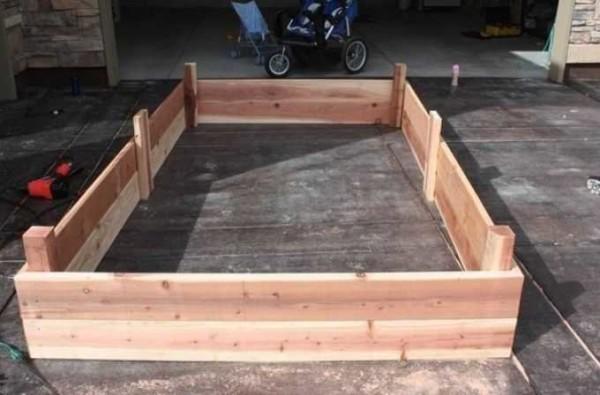
自分たちの手でベッドを高くする
多くの場合、疑問が生じるのは高いベッドに層を敷くときではなく、箱を作るときである。菜園は、ベッドのためのフェンスの製造まで、多くの場合、女性が寛大に従事しているので、彼らは多くの点を理解していない可能性があります。最も困難なことを明確にするために、私たちは板とスレートの箱を作る写真レポートを与える - 最も一般的なフェンス。
ボードより
上の写真にあるように、板を使った高さのあるベッドの作り方にはいくつかのバリエーションがある。主な注意点は、通常、角のつなぎ目にある。重ねて作るのが一番簡単で、一方をもう一方に90度でくっつけて釘を打ち込むだけだ。しかし、すべてを正しく行いたい美学者もいる。正しい方法とは、2枚の板を45°の角度で鋸で切り、つなげることだ。これが写真で紹介する方法だ。
フェンスを地面に固定するのに便利なように、1.2~1.5mの段差をつけ、ベッドの高さより20cmほど長い縦棒や板を釘打ちする。
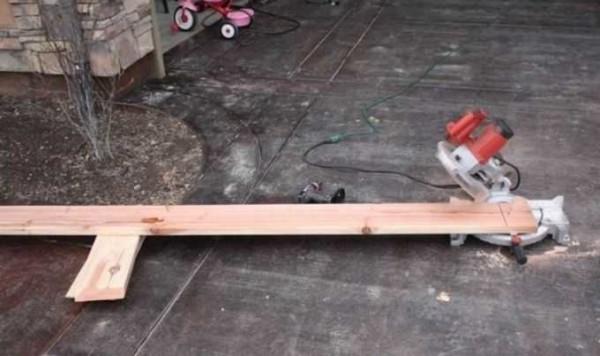
棒や板の下端を尖らせておくと、フェンスを地面に打ち込みやすくなる。次に、ノミか丸ノコで端を45°の角度でカットする。2枚の板を合わせると、完璧な90°の角度になる。
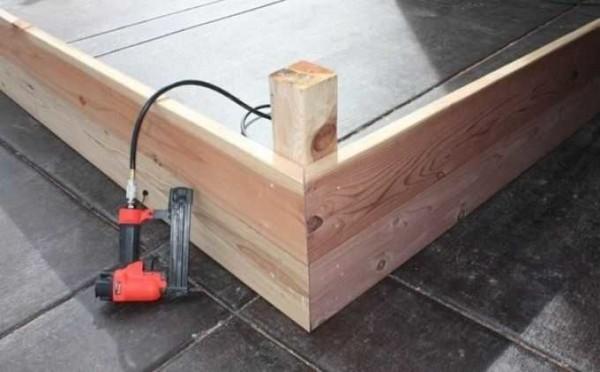
コーナーの内側を強固に連結するため、バーを取り付け、そこに板を釘で打ち付ける。
高いベッドのためのフェンスは、木材から長くはありませんが、さらに簡単にするために、ボードを突き合わせて接続し、強度のために金属製のコーナーを釘付け(下の写真)。
過去ログより
丸太を切り詰めて同じような箱を作るのは、それほど難しいことではない。例えば、このようなオプションがあります:2つの長い側面は丸太で作られ、短い側面はボードの断片で作られています。

ホワイトウォッシュ:害虫からフェンスを守り、見た目も美しく仕上げる。

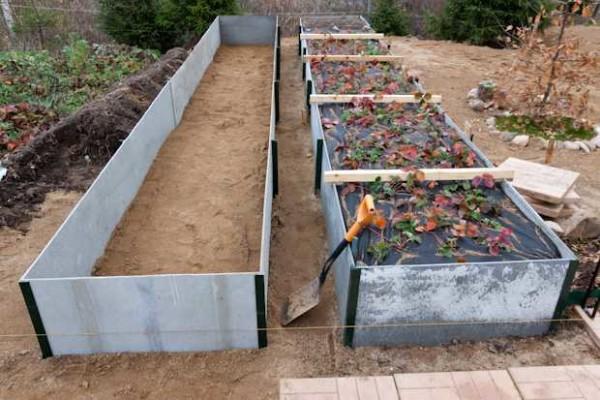
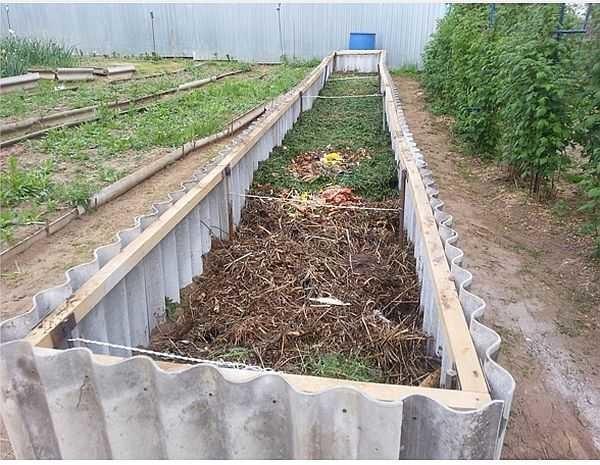
スレート
平らなスレートや波のあるスレートでベッドを作る場合、どのように固定するかという問題もある。最も簡単な方法は、掘り下げることである。しかし、それは経済的ではありません:あなたは、少なくとも10センチメートル広いストリップを作る必要があり、それでもスレートが春に "浮遊 "しないという保証はありません。脱酸された土壌では、スレートは単に塊を押し出すだけだ。修正することはできるが、不必要な時間と労力だ。
そのため、ほとんどの場合、シートの片側または両側に、スレート板を固定し、あまりずれないようにするための角やパイプが打たれています。写真では、角は外側だけに打たれている。内側からは、高床の層の塊によって押されるので、フェンスが内側に落ちることはない。
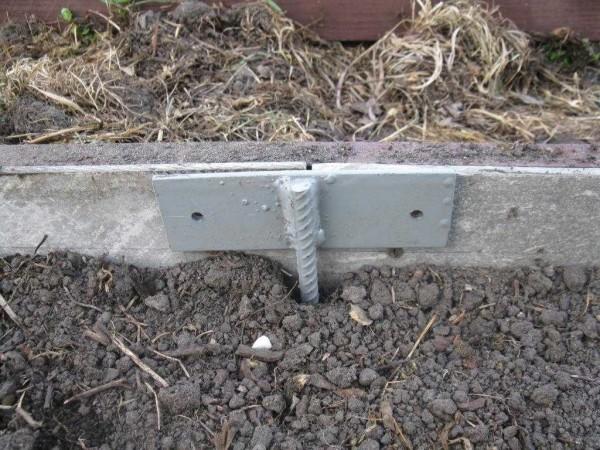
2枚のシートの接続部分は、特殊な溶接プレートによって保証されている。信頼性を高めるため、その側に取り付けた木製のバーにボルトで固定することもできる。
もうひとつの選択肢は、フレームを作ることだ。同じような支柱に溶接プレートを取り付け、バーやアングルを取り付ける。そして、スレート(よく保持で釘が、それはセルフタッピングネジで簡単です)のストリップに切断を添付するには、このフレームに。
同じ原理で - ガイドを使って - プラスチックパネルや他の同様の材料からベッドを作る。お分かりのように、ここでは特に名人芸は必要ない。主なことは、うまく保持することである。


私はハイベッドのアイデアが大好きだ!去年の夏、自分でベッドを作ったんだけど、これが大正解だった。ベッド下の収納はとても便利だし、部屋がとても居心地よくなった。次は絶対に新しい素材を試してみたい!
High beds can be a game changer for space! I built mine with some old pallets and a bit of paint. Not only does it look cool, but I can store stuff underneath, too. Just make sure it’s sturdy so you don’t have a surprise drop in the middle of the night!