

Acrylic bathtubs have rather thin walls and require reliable support. Installation of acrylic bathtub is possible in several ways: using the factory frame, which comes with the kit, or on bricks. There is also a combined option – when using a frame, propping up the bottom in some places with bricks. This method is needed if the bottom was too thin and “plays” under your feet.
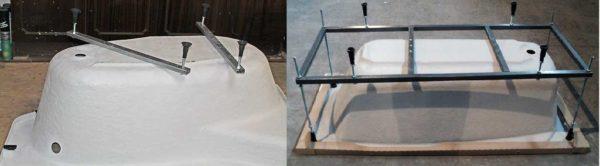
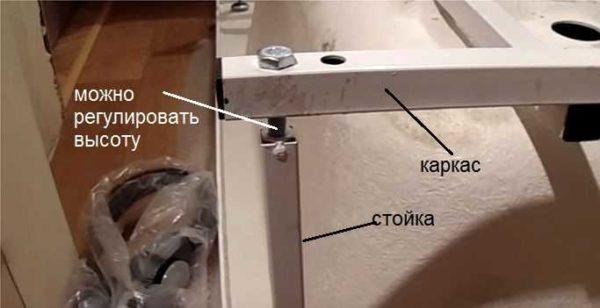
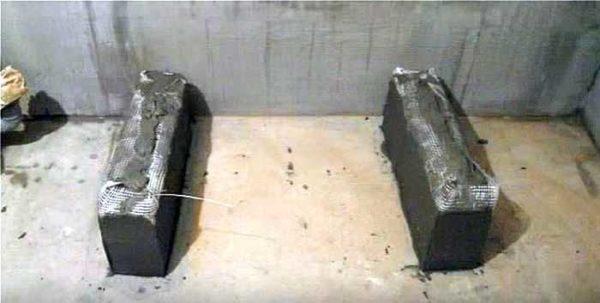
The frame or legs to the acrylic bathtub sometimes come as a set, sometimes – in an extended set. The difference between the legs and the frame is significant, and not only in price. The legs, installed on the slats, are attached only to the reinforced bottom, usually on two to four self-tapping screws. The boards remain unsupported (bottom left photo). The frame, most often, is more massive, made of thicker profiled pipe (square section), has more support points. Part of the supports comes from the sides of the bathtub, the other part is attached to the bottom, propping it up (photo on the right).
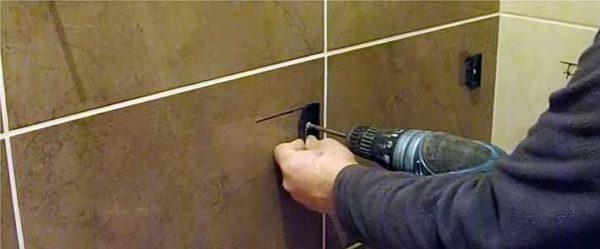
Regardless of the type of frame, it is necessarily attached to the bottom. To do this, holes are drilled in the bottom in the right places, into which self-tapping screws are then screwed. This moment should not be afraid. This is the technology for installing an acrylic bathtub. In the places of fastening there are reinforcement plates. But in order not to damage the bathtub, before starting the installation, carefully read the instructions, there are prescribed sizes of fasteners that can be used.
Contenuto dell'articolo
Installation of acrylic bathtub on the frame
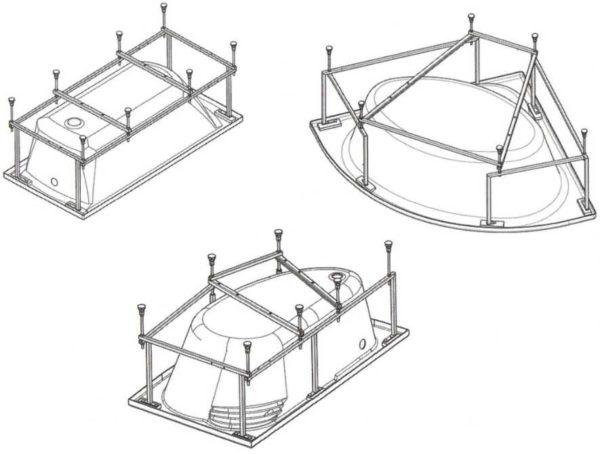
For each bathtub frame is designed different, so the nuances of assembly in each case are different. Even at the same company, under different models of the same shape, the frames are different. They take into account the geometry of the bathtub, as well as the distribution of loads. Nevertheless, the order of work is common, as well as some technical points.
Twisting the frame
A frame is assembled, on which the bottom rests. In some cases, it comes welded and it is not necessary to assemble it. The frame is placed on the bottom of the inverted bathtub, while it is not fixed with anything. It is leveled as it is to be fastened.
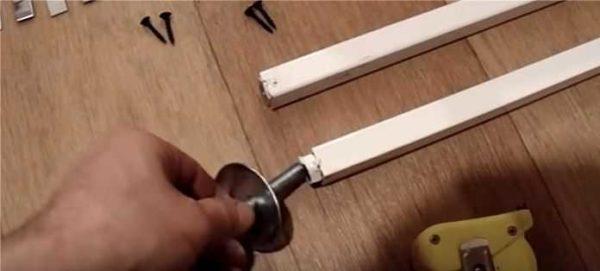
- Washers with fasteners are placed on the uprights. Racks are either pieces of profile (square section pipes), or metal bars with threads on both ends. They should be attached to the sides of the bathtub. Firms usually develop fasteners of their own shape. The photo shows one of the variants.

- Racks are usually installed in the corners of the bathtub. In these places there are plates, there may be holes, or there may not be – you will have to drill yourself. The number of racks depends on the shape of the bathtub, but not less than 4-5, and better 6-7 pieces. At first, the racks are simply assembled and placed on their assigned places (not fastened yet).

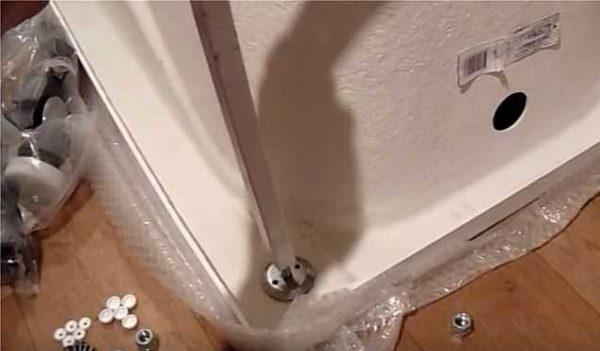
- The second side of the racks is connected to the frame supporting the bottom. There is a threaded nut in the end of the rack, screw the screw into it, connecting the frame and the rack.

- After installing the racks, using bolts to equalize the position of the frame. It should be placed strictly horizontally, and the bottom should lie on it tightly, without gaps.
Fixing the bathtub to the frame
After the frame is level, it is screwed to the reinforced bottom of the acrylic bathtub. It is necessary to use self-tapping screws of the recommended length, which come with the frame.
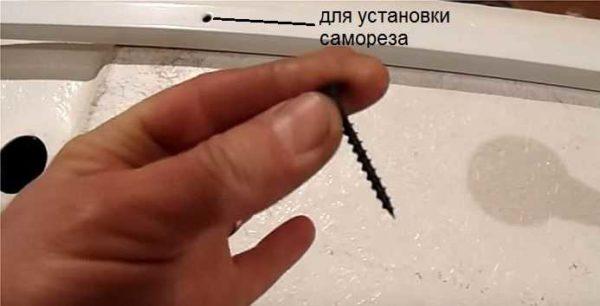
- The next step of acrylic bathtub installation is to set and fix the racks. They have already been adjusted in height, now it is necessary to set them vertically (we control them with a construction level on both sides or check the accuracy of setting with a plumb line). Exposed posts “sit” on self-tapping screws. The length of the fasteners is specified in the instructions for each bath, but usually they are smaller than those that fixed the bottom.
- Then we install the legs on the frame.
Mounting the screen
This is not quite the installation of an acrylic bathtub, but without this stage rarely do without: install the screen. If you bought this option, the kit comes with plates that will support it. They are put on the edges and in the middle. Having put the screen and adjusted the stops on the legs, fix them in the required position. Then on the bathtub and screen mark the places where you need to fix the plates, then drill holes for fasteners and fix the screen.
Next, it will be necessary to make the joint of the bathtub edges with the wall airtight, but about this below, as this technology will be the same for any method of installation.
The order of installation of an acrylic bathtub on legs
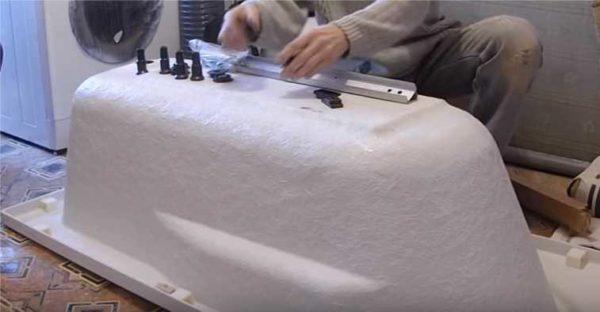
Assembly of an acrylic bathtub with legs is much easier and faster – the design is elementary. The kit includes two strips, four legs with pins, fixing the acrylic bathtub to the wall, a certain number of nuts and self-tapping screws.
Marking and assembling the frame
In an acrylic bathtub on legs, the frame is two slats that are attached to the bottom. To these strips go adjustable legs. The task is to screw the strips evenly, install the legs and level the entire structure. Not too difficult.
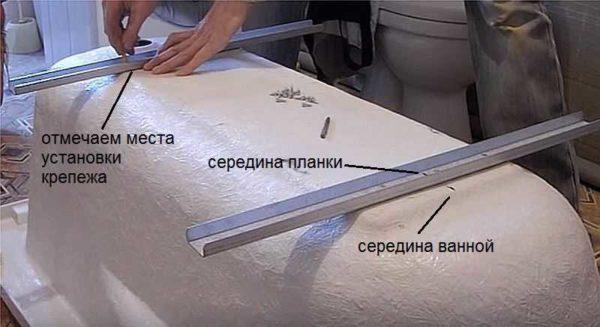
Find the center of the mounting strips and the bottom of the bathtub, put marks. Having combined the marks of the middle, two mounting strips are laid not inverted bathtub, a little away from the edge of the reinforcing plate (3-4 cm), install the strips. Use a pencil or a marker to mark the places where the fasteners are to be installed (there are holes in the strips).
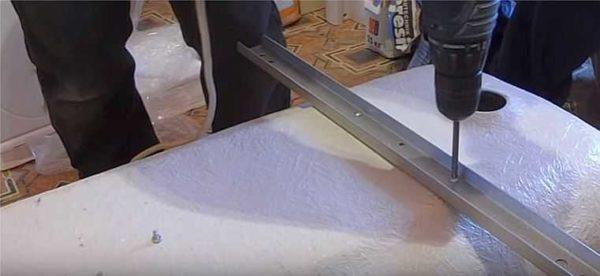
According to the marks, drill holes to a depth of about 1 cm (you can glue colored tape on the drill to make it easier to control the depth). The diameter of the drill bit should be 1-2 mm less than the diameter of the self-tapping screws (indicated in the instructions or can be measured). Having installed the strips and aligned the holes, fasten them with self-tapping screws (included in the kit).
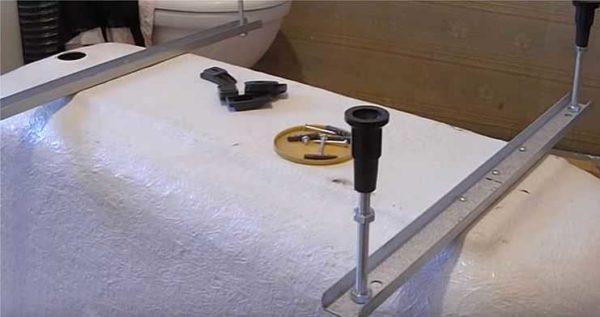
Putting the legs
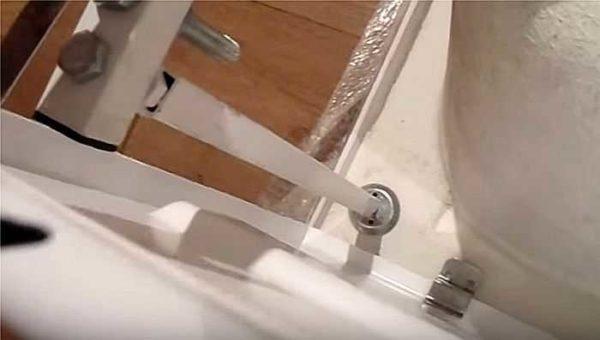
The next stage is the installation of legs. They are assembled in the same way as in the previous variant: one locking nut is screwed on, the rod is inserted into the hole in the mounted bar, fixed with another nut. An additional nut is needed on the legs on the side of the screen mounting (on the photo).
Next, we turn the bathtub over and set it horizontally by twisting the legs. We control the position with a construction level. Then it is necessary to install a fixture on the walls, with the help of which the sides are fixed to the walls.
Exposed to the level and height of the bathtub, put in place, mark where the sides end. Take the fixing plate, put it to the mark so that its upper edge was 3-4 mm lower, mark the hole for the fastener. The number of fasteners is different – one or two dowels, as well as the number of fixing plates on the wall (one or two on the wall, depending on the dimensions). Drill holes, insert plastic plugs from the dowels, put the fixing plates, screw.
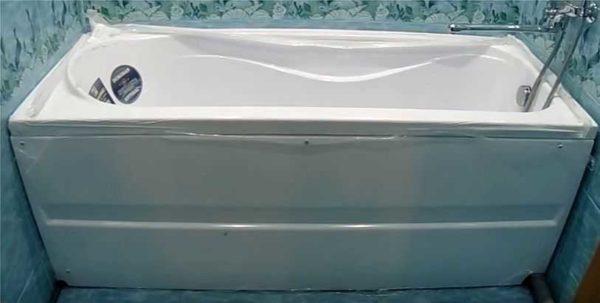
Now you can install the acrylic bathtub – it is lifted so that the sides were above the plates installed on the wall. Lower it by pressing the sides against the wall, they cling to the fixing plates. Installation of the acrylic bathtub on the legs is finished. Next – connect the drain and you can use.
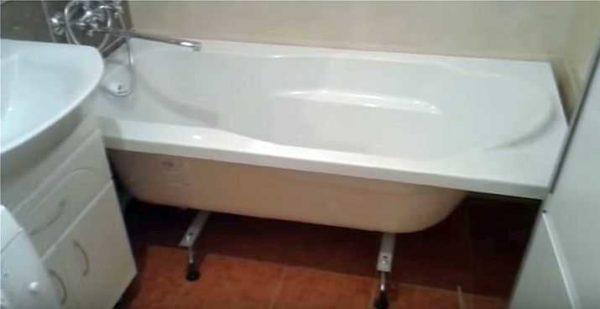
Assembling such an acrylic bathtub takes a little time. But very flimsy construction turns out to be. Not every adult feels confident. The bottom deflects, the legs slip on the tiles. The pleasure is below average.
There is also a combined version of the installation. This is when put on the legs and bricks is shown in the following video. After assembly, two bricks are laid on the mortar, a significant layer of mortar is laid on top (it should be kneaded maloplastic, adding a minimum of water). When you put the bathtub in place, part of the mortar is squeezed out, it is carefully picked up, correct the edges of the remaining part. The bathtub is loaded (you can fill with water) and left for a few days – to grip the solution.
Putting on bricks
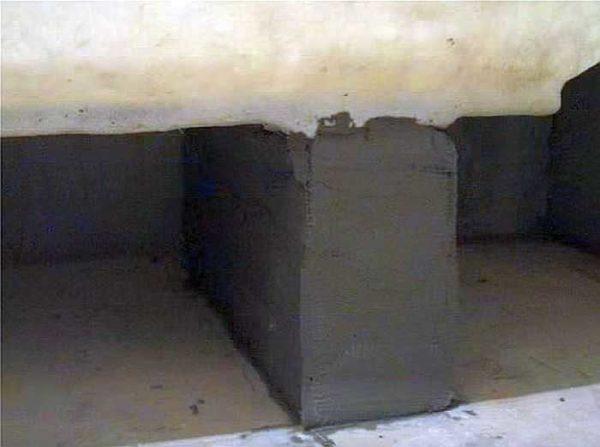
Installation on bricks requires accuracy and precision – it is necessary to set the support evenly, so that the sides of the bathtub were in a horizontal plane.
It is usually placed on two or three rows of bricks laid on the bed (on the wide part). The number of bricks depends on the location of the sewer outlet. Between the bricks lay a thin layer of mortar. The bathtub is placed on the bricks, check the horizontality of the sides, if necessary, adjust, changing the thickness of the mortar between the bricks (on the top while nothing to put anything).
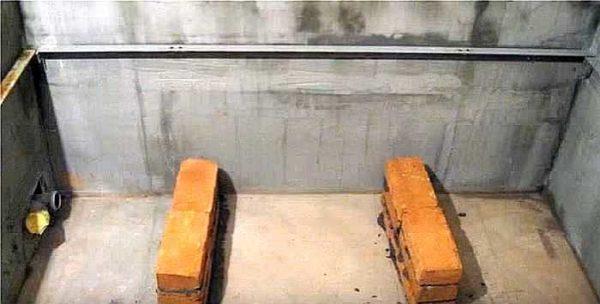
Having set out, mark on the wall at what level are the sides. According to this mark the corner is fastened, which will support the sides of the bathtub. The corner is better to take aluminum, the width of the shelf – 3 cm, thickness – 2-3 mm.
To give the base an aesthetic look, you can wrap them with a plaster mesh, plaster them. In fact, plaster also reduces the hygroscopicity of red brick, prolonging the life of the support. So this stage is undesirable to skip.
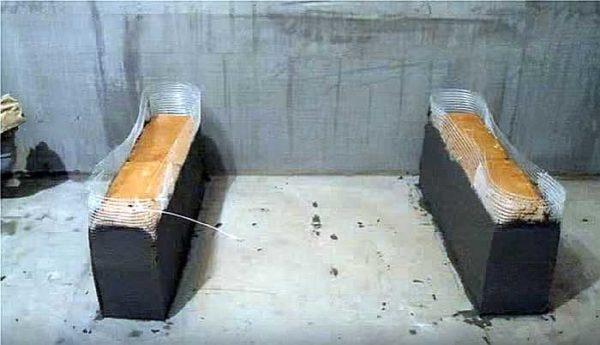
Having bent the painter’s net, a solid layer of cement-sand mortar is applied to the tops of the bricks. A solid layer of sanitary silicone is applied to the corner, after which the bathtub is installed. It is pushed to the wall evenly, so that the gaps between the side and the wall were even.
We pick up the silicone squeezed out, forming a beautiful seam. It can be smoothed with a teaspoon. If you lead it without taking your hand from edge to edge, you get an even and smooth seam. Then remove the squeezed out solution. Silicone is removed earlier – it “sets” faster. The solution should be picked up no later than 20-30 minutes after laying, so also do not delay.
If the silicone was not enough and it did not squeeze out – not terrible. Form a seam, filling the gap on top with silicone. This is the installation of the acrylic bathtub on the bricks is finished. Next – connecting the siphon and finishing, and this is not quite to this topic.
Sealing the joint between the bathtub and the wall
How tightly do not put the bathtub to the wall, the gap still remains. With acrylic, the problem is complicated by the fact that their sides in the middle of a little bend inward. Therefore, just seal the gap with silicone will not work. You need additional means.
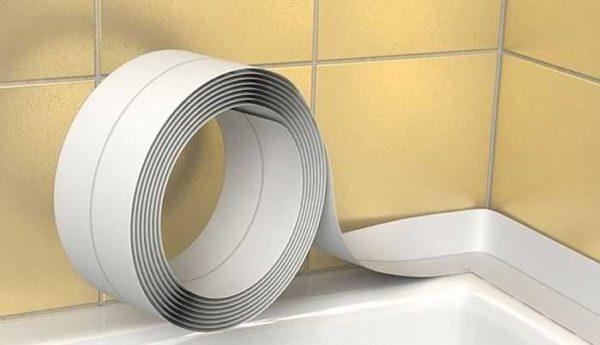
The easiest way to fix the tape – it is sold in rolls. One is enough to seal three sides. The width of the shelf is 20 mm and 30 mm. The tape is rolled along the edge of the bathtub, fixed on silicone.
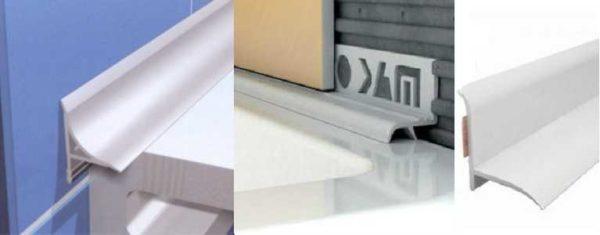
There are also various corners for the bathtub. They are made of plastic, and the edges are rubberized – so that the joint was tighter, and the seams between the tiles did not flow. Profiles and the shape of the corners come in different forms. There are those that are mounted on top of the tiles, there are those that wind up under it. And they can be of different shapes and colors.
Regardless of the shape, they are installed in the same way: in the corners, the lower parts are cut at an angle of 45 °. The quality of the joint is checked. Then the surface of the wall, the curb and the corner is degreased (preferably with alcohol), silicone is applied, on which the corner is installed. Everything is left for the time necessary for polymerization of the sealant (indicated on the tube). After that, you can use the bathtub.
In the case of acrylic bathtubs there is one nuance: before applying the sealant, they are filled with water, and in this state leave the composition to polymerize. Otherwise, when the water sets and increasing the load on the sides, microcracks will appear on it, into which water will flow.
A few words about what sealant is better to use when sealing the joint of the bathtub and the wall. The best option – sealant for aquariums. It is not less durable than sanitary, but has some additives, thanks to which it does not mold, does not change color and does not bloom.


Installing my acrylic tub was a game changer! The step-by-step guide made it super easy. I just followed the tips on leveling and sealing, and now I’ve got a cozy spa vibe at home. Totally worth the effort! Can’t wait to soak in it!