

It is quite difficult to sharpen a knife correctly by hand. It takes some time to develop the habit of keeping a constant angle of sharpening, which is not easy at all. The task can be made easier by a device for sharpening knives. There are factory options. But for a good copy of the need to fall back a couple hundred dollars, and this is clearly not a small amount. The good news is that these devices are not difficult to make their own hands. And many homemade sharpeners for knives are not worse in functionality than from well-known manufacturers, but cost many times cheaper.
Contenu de l'article
Basics of knife sharpening
Knives have different uses, and even not the usual kitchen, there are several of them. There are for cutting bread, other soft products, there are for cutting meat, chopping bones, other hard objects. And this is only domestic. And there are still those that are taken for hunting and fishing. If you look closely, you will see that they all have a different angle of sharpening (this is if they have not already been sharpened at home). The angle of sharpening is the most important characteristic, which is determined by the purpose of the blade.
What angle
The angle of sharpening is determined based on the main application of a particular blade:
These are general recommendations introduced on the basis of many years of experience. There are, however, variations: some blades have several zones with different sharpening angles. This makes them more versatile, but the complexity of sharpening increases manifold.
It follows from the above that a knife sharpening device must be able to set the required angle of sharpening. And this is the main difficulty in its design and manufacture.
How to sharpen
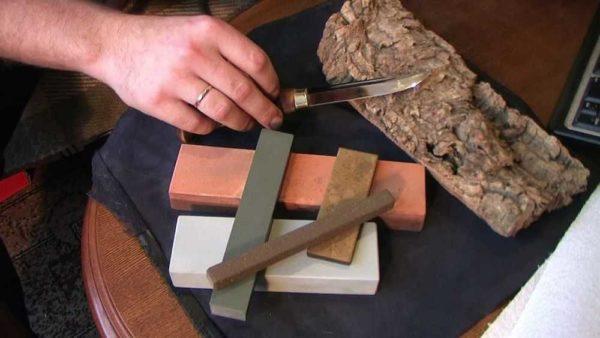
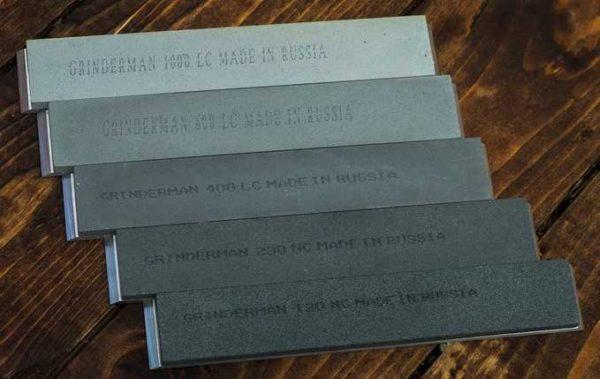
For sharpening knives, sharpening stones of different grits are used. They are conditionally divided into coarse, medium and fine. Why conventionally? Because different countries have their own designation of grit. The most convenient classification is by the number of grains per unit area. It is expressed in numbers: 300, 600, 1000, etc. Some companies duplicate more English terms. Here is an approximate division:
- 200-250 – very coarse (extra coarse). They are not used for sharpening knives.
- 300-350 – coarse (coarse). They are used when profiling the cutting edge of a damaged or very dull blade. If the cutting edge has no visible flaws and you do not plan to change the angle of sharpening, this abrasive should not be used.
- 400-500 – medium. Many manufacturers do not have bars of this grit, as it is easy to do without them.
- 600-700 – fine. The main type of stones used for sharpening knives. They are used to sharpen knives that are dulled during normal use.
- 1000-1200 – very fine (ultra or extra fine). They bring the sharpened blade to a mirror shine.

In addition to the grain size, sharpening stones are distinguished by origin: there are natural (slate, corundum, etc.), there are ceramic and diamond. Which ones are better? It’s hard to say – it’s a matter of taste, but natural ones grind faster and are rarely fine-grained.
Natural ones are soaked in water before use or just wet with it. They absorb water and, when sharpening, water and separated abrasive particles form an abrasive paste on the surface, which increases the efficiency of sharpening. For the same purpose, you can use a special little (honing oil) or a mixture of water and soap (who likes it better). In general, with each of the sharpening stones should try all these options and choose the best one.
The form of sharpening stone for sharpening knives – a bar, and it is desirable that he its length was much longer than the length of the blade – to sharpen easier. Convenient bars with a double grain – on one side is larger, on the other – finer. For sharpening ordinary knives, it is enough to have two bars with medium grain (different) and two fine (one can be very fine).
Procedure for manual sharpening
The device for sharpening knives only facilitates the process of pointing the edge, so knowledge of the techniques of manual sharpening is mandatory. It is impossible to sharpen a knife correctly without them.
The order of sharpening knives is as follows:
- First take a bar of medium or coarse grit – according to circumstances, lay it on the table. It is better if it is fixed – you will not have to worry about not moving it when working.
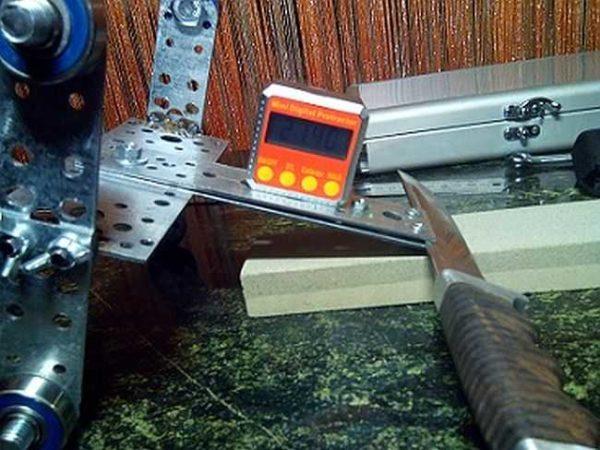
- Calculate the required angle of sharpening – it is equal to half of the selected angle. Approximately at this angle we hold the blade. Now the main task is to keep this angle constantly.
- All movements when sharpening a knife without strong pressure. Smoothly and evenly.
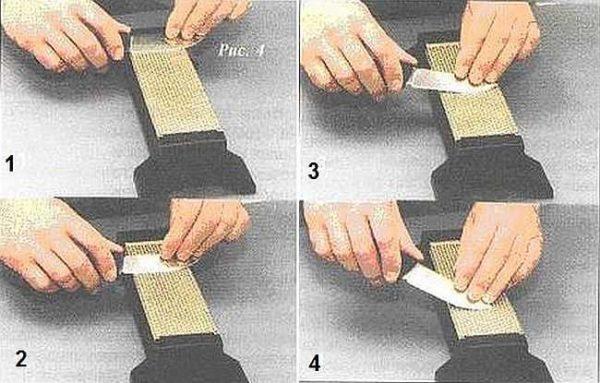
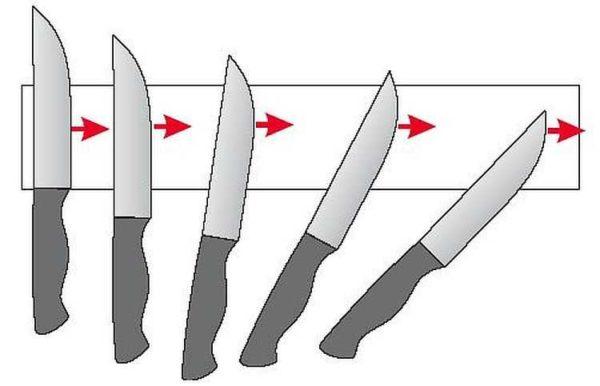
- We start sharpening by moving “away from yourself”. In one pass the blade should “pass” over the stone from the beginning to the end. Here, too, there is an important point: at the point of contact with the bar, the edge must be perpendicular to the direction of movement. There is no problem with the straight part – you drive straight, but as the rounded edge approaches, you have to turn the handle to keep it perpendicular (see photo).

- When the movement is complete, the point should remain on the surface of the bar. It must not break off, as it may dull the point and damage its side surface. To make this possible, the length of the bar should be 1.5-2 times longer than the blade. Then the movement will be smooth and even, as it should be.
- After the tip of the blade has stopped, start the reverse movement.
- Repeat the movement back and forth until a burr is formed on the back side of the blade – a thin edge wrapped inside. It is felt with a finger, running perpendicular to the edge (not along – you will cut yourself). Ideally, it should be even along the entire length of the blade. If not – work through more, and not in areas where there is no burr, but along the entire length.
- When the burr is there, turn the blade to the other side and repeat the same thing. The burr will go to the other side, but it will be a little less.

- You change the bar, and with a “away from you” motion you continue to sharpen the blade (there is no more backward motion). The finer grit leaves finer grooves on the edge and the burr is slightly smaller.
- On the same sharpening stone you work the second side.
- Change the abrasive to an even finer one. You repeat the process again (the same movement – from yourself). And so on until you achieve a “mirror-like” edge, and it is achieved on a very fine stone. This means that the grooves left by the abrasive are very small and the cutting edge is polished enough to cut well.
- But even then, there is a burr left on the back of the blade. This is removed on the finest stone you have. We do the learned movement “from yourself” once for each side, gradually reducing the pressure. In this way you can reduce the burr to a minimum, which almost does not interfere with the work.
This is the end of knife sharpening. Some people still finish the edge on an old belt. A piece of belt can be fixed on a wooden block (glued, not nailed), rubbed with goi paste. Next, several times spend alternately one and the other side, but turning the cutting edge backwards. So polished the last grooves left by the abrasive and not “sliced” in this case the belt.
How to make a homemade device for sharpening knives
All homemade sharpeners for knives solve the main problem – they allow you to accurately maintain a given angle of inclination of the bar to the blade, which is very important for obtaining a good cutting edge. There are very simple devices, there are a little more complicated, but allowing you to work with great comfort. Choose to your taste.
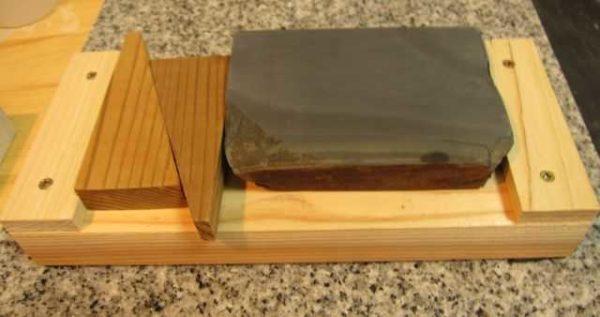
Simple device for sharpening knives
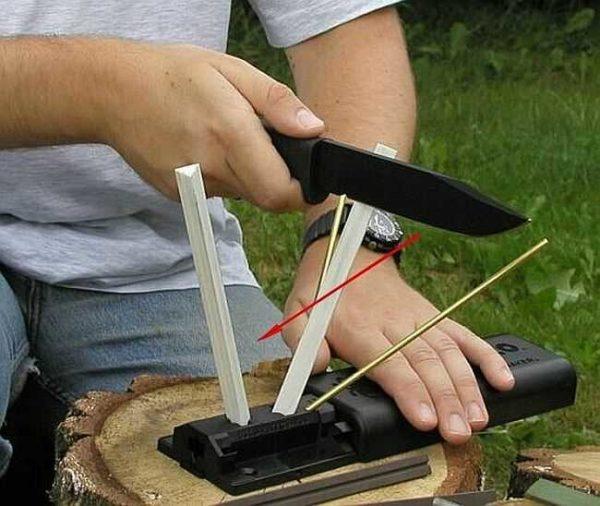
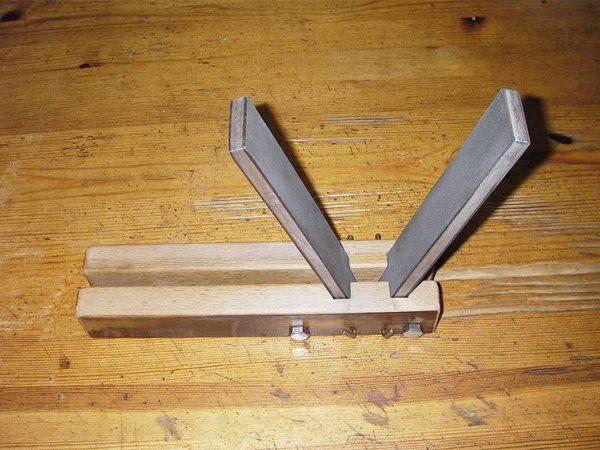
In fact, this is a holder for sharpening stones. Everything is elementary: two triangles of wood, which are connected by pins with “thumbs”. The bar is clamped between the corners at the required angle. The angle can be set using a protractor, a special program on a smartphone or using the rules of trigonometry (right triangle).
When sharpening on such a device, the knife should be kept all the time directed strictly vertically. This is much easier than holding it at a certain angle.
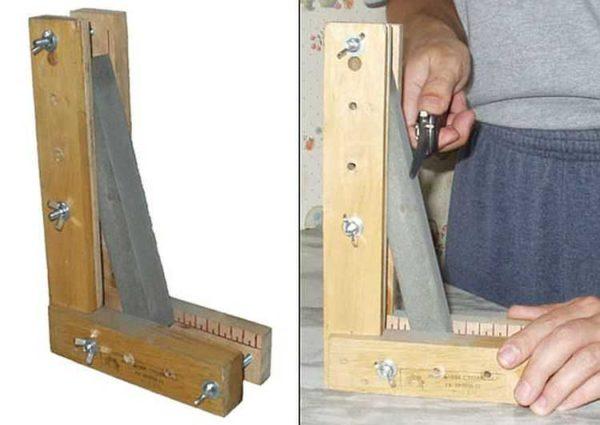
The same idea has another embodiment: on a secure base to make movable holders, in which the bars are inserted and fixed in the desired position. The branded prototype is shown in the photo below.
Homemade adaptation for sharpening knives is made of wooden bars. It turns out to be light, so that it does not move out of place, it must be fixed with something. To avoid holding it by hand, you can use clamps.
Such a device for sharpening knives, of course, makes the work easier, but it is still quite difficult to maintain the angle: you need to control the verticality of the blade all the time. Such a habit is developed over time, but it is difficult to start.
Device on wheels
An interesting variant of the manual knife sharpener with a fixed bar and a cart on wheels, on which the knife is fixed. It is made on the basis of knife sharpeners for chisels and planers. With a knife, such a device works well too, but to sharpen the rounded edge must be adapted.
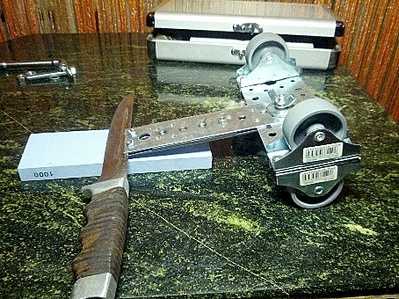
In this version, as in manual sharpening, the bar is stationary, and the knife blade moves, fixed on a movable cart. The angle is set by the height of the location of the bar relative to the platform on which the blade is fixed. The peculiarity of this device – it is necessary for the table to be level. It can be a tabletop made of natural stone, you can put glass on an ordinary table.
In the above version, the angle changes slightly, which is usually enough for sharpening the same type of knives – kitchen knives, for example. If necessary, the design can be improved by adding holders (pictured below).
All this is realized very simply, as it resembles an ordinary constructor: bars, holes in them, everything is assembled on bolts and screws.
To ensure the immobility of the bar, there is also a device.
The plus side of this design is that it is easy to turn the knife while maintaining perpendicularity in the rounded area, and also very easy to process from the other side: it is necessary to turn the cart over. Four pairs of wheels are made for this purpose.
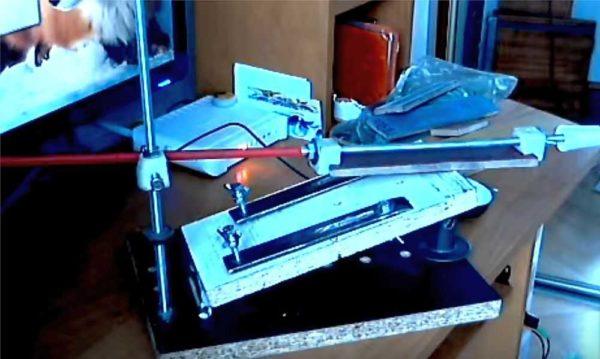
Homemade manual machine for sharpening knives
Slightly more complicated and much more convenient homemade devices that are made on the basis of well-known branded devices. They have an adjustable platform on which the knife is fixed. The platform is exposed at a given angle. The bar is attached to a movable bar attached to the stand.

Devices made with their own hands in some respects repeat the design presented above, but there are some differences. There are many variants. Let’s give some of them.
Option one: a fixed platform, on which the blade is fixed
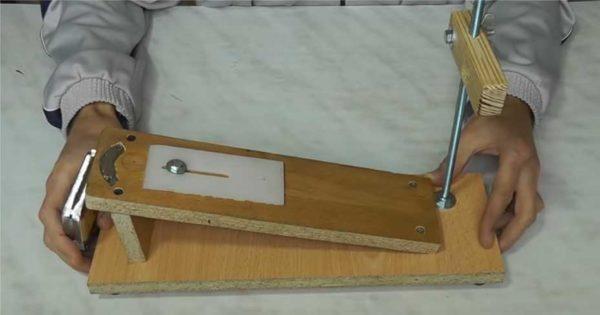
This device is made from the remains of laminate (you can use chipboard), two steel bars with a diameter of 8 mm and a movable fastener.
In this design there is a fixed base, which is attached to the usual hinges with a platform with a knife holder. The near edge of the platform can be raised at an angle convenient for work. But otherwise it is stationary.
On the vertically mounted steel bar there is a movable fixator, in which a hinge is attached to the side. The bar is inserted into it, on which the bar is fastened. This hinge is a simple, but not the best solution: there is no rigid fixation, which means that the angle will “walk”.
Special attention should be paid to the fixer of the bar. On the bar at some distance from the edge (about 30-35 cm) make a stop. This will be a fixed fixator. The second is made movable, it is fixed after installing the bar with a screw and thread cut in the body of the holder. The second option is to cut a thread on the rod and press the installed bar with a nut.
Knife holder – one or two plates made of steel, fixed on a movable pad. They are fixed movably – by means of screws and “thumbs”. Having loosened the fasteners insert the knife blade, clamp it. It is not easy to move it. Then, installing a stud with a fixed bar in the hinge, adjust its height so that the desired angle is exposed.
You can, as in the photo, make templates with the desired angles and achieve a coincidence of planes. After the cross bar is fixed, you can work – conduct the bar in the desired direction.
This device for sharpening knives works well, but only move the abrasive along the blade can only be used when sharpening a kitchen knife. Classic sharpening – movement perpendicular to the cutting edge. On the straight part of the blade, this can be achieved. If the blade is short, it will be almost perpendicular, but on a rounded part on a stationary holder can not do this. And all such devices “suffer” from this disadvantage. Once again: they are an excellent option for sharpening kitchen knives (below is another good option from the same series).
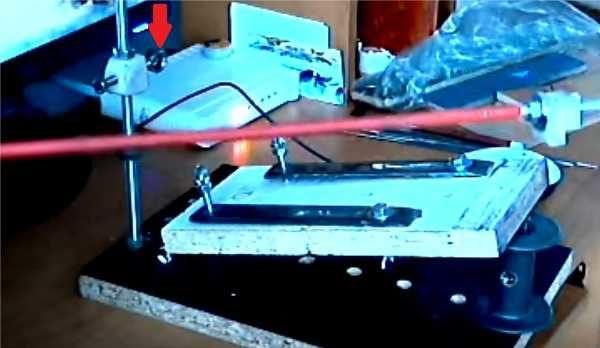
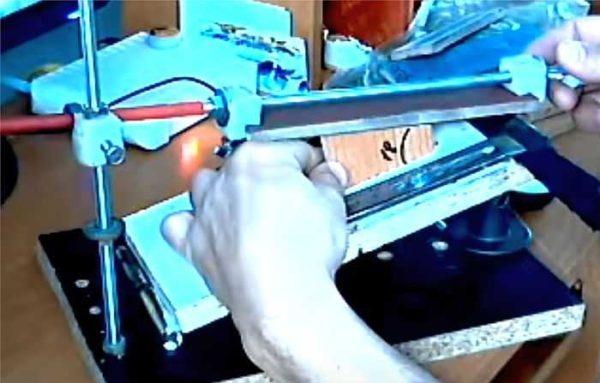
Option two: with a movable platform and a magnetic holder
In this version of the homemade device for sharpening knives, the problem of previous sharpening is solved. Here the frame remains stationary, which sets the angle of movement of the bar. The bar holder moves freely along the guide, exposed at the desired angle. The knife is fixed on the movable table. It is possible, as in the presented variant, to make a magnetic holder, it is possible – the usual one made of a plate of metal and “thumbs”. The table moves so that the movement of the abrasive was perpendicular. Actually, everything is in the video.
One clarification: in this case, it is very important that the surface on which the table moves with a fixed knife, was horizontal and level. You can put glass under it or use a polymer table top (marble table top will do too).


I totally love the idea of making knife sharpeners at home! I tried it once with an old file and it worked wonders. There’s something super satisfying about DIY projects, plus you save cash. Can’t wait to try more hacks like this! Keep up the great work!