The idea of decorating the walls is far from new, but painting pictures, weaving tapestries or making bas-reliefs, often do not have time, and skills are not enough. Today there is a quick way to decorate and change the interior – interior wall stickers. They are ready to work. All you need is to find a suitable place and stick them. And the glue is applied to the back side. The whole operation takes a couple dozen minutes.
Artikkelin sisältö
What are wall stickers
Sometimes you really want to change the “mood” of the interior, to bring something new. Start repair – even cosmetic – long and expensive. Quickly transform the room or add accents, allow you to stickers on the wall. They are also called interior, decorative.
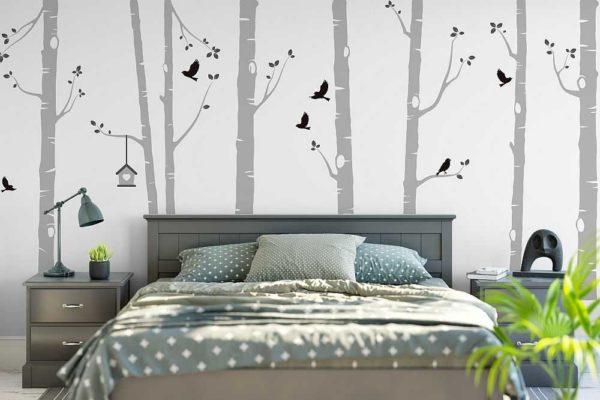
Often in the course of the name “stickers”, since this type of decor is attached due to the adhesive layer. Just like regular paper stickers. This is a good alternative to painting and stencils. Distinguished wall stickers are easy to apply (glued), a wide variety of themes, sizes and types.
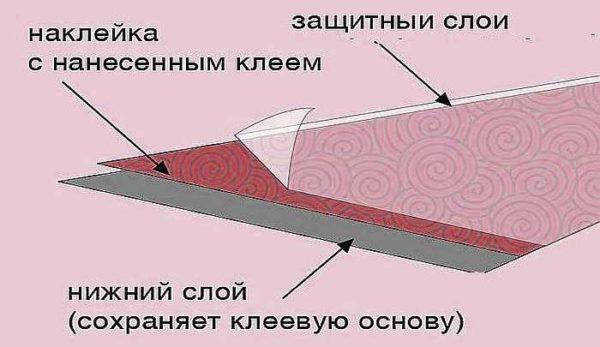
To begin with, let’s talk about what stickers are. If we talk about the technical side, they are made of vinyl film (polyvinyl chloride or PVC). On one side is applied a drawing (this is if the image is multicolored), on the second – a layer of glue. There are two additional layers to protect the image and the glue. The glue is covered with paper (from the bottom), the picture is covered with a transparent film. The film covering the picture is more rigid than the vinyl film. It prevents the sticker from pulling or tearing during application.
What stickers are like in use
Before the first experience of stickers on the walls, there are questions about what surfaces you can glue them on, how they will behave, whether they will peel off, whether they can be removed if you do not like it or get tired of it, whether after removing the sticker the surface will not be damaged, whether there will be no traces. And so on. The questions are understandable. Let’s talk about all these nuances.
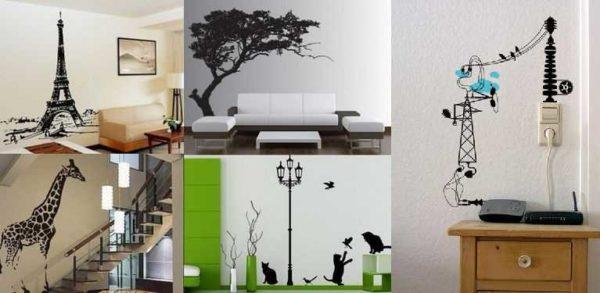
On what surfaces can be glued and how well they will hold up
Stickers can be glued on any surface that is not too embossed and not too soft and delicate. And not only on the walls, but also on the ceiling, furniture, doors, etc. So, on what materials you can stick stickers:
In general, without question, stickers can be glued on any hard materials: smooth or with not pronounced relief. On the others, you have to check. How. Some manufacturers put a test sticker in each kit (DesignStickers, for example). In this case, this test sticker is glued according to all the rules on the intended surface. Leave it for 24 hours. After this period, check how the picture behaves. If it did not fall off after a day, the edges are held, then in a year, and in two years nothing will happen to it. If it has fallen off, look for another surface.
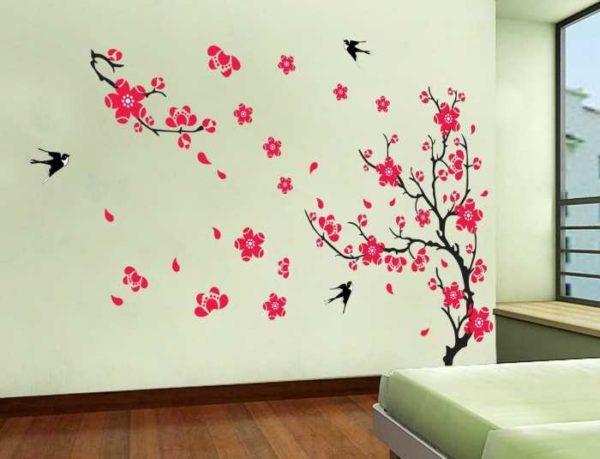
But that’s not all. It is necessary to check whether there will be no traces after removal. To do this, take and remove a test sticker. Remove correctly: pick up the top edge, wrap and pull down, not “on yourself”. Usually, it comes off “cleanly, without problems. If you are unlucky and part of the paint or fragments of wallpaper remained on the surface – look for another place.
What to do if there is no test sticker? Perhaps your wall sticker consists of several fragments. Choose one small one, do the whole process. Only the protective film (transparent) do not remove. If it peels off without “wall fragments”, it can be re-stickered. And the third time. Maybe, and in the fourth … Depends on the adhesive composition and the strength of the film. Except that the walls must be clean.
Types of wall stickers
If we talk in general, then wall stickers can be divided into several groups:
Mirror stickers are made of acrylic. This material is covered with a special metallized layer. Externally, it turns out also a mirror, but not on the glass. The accuracy of the image may be insufficient, but it is not a mirror, but a decorative element. Call this material is also called “flexible mirror”. It is cut out of it various figures, on the back side of the glue is applied, which is protected by a film. Such a sticker will not replace the usual mirror, but can be an interesting interior move.

Vinyl decorative stickers can be monochrome or colored. Monochrome are most often black, you can find gray. Other colors are rarely found on sale, most likely made to order. Colored stickers are ordinary – two-dimensional – and volumetric. The so-called 3D. As far as the interior will fit such a picture – you need to look, as they are too attract attention. If you need to divert this attention from something, then a 3D wall sticker is the best option.
By purpose
The first and main task of stickers is to change the existing design. The time required is literally a few minutes, and the result is impressive. In addition to its direct function – to decorate the wall – vinyl stickers can have a special purpose:
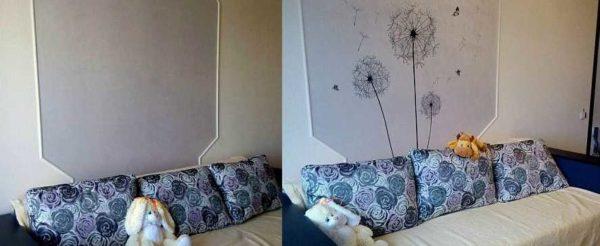
These are the ideas that lie on the surface. Surely you can use them in other ways.

According to the theme
Stickers for walls to pick up is not as easy as it seems. To determine the color scheme is not very difficult. It is either monochromatic black, or colors that are already there or planned in the design of the room. But there are so many patterns that you have no idea where and what to look for. To make it a little easier, here is a list of topics. This way it will be easier for you to look for stickers.
The first thing that will facilitate the search – a specific room or object where you plan to sticker. You can search separately for stickers for the following objects:
- Toilet and Bathroom:
- Kitchen and dining room:
- Children’s room;
- Car.
In each of the categories there is where to turn around, options in colors, shapes quite a lot. But this division does not exclude the use of pictures from “neutral” categories, which are difficult to attribute to any zone/device. Here are the thematic subdivisions you can look for:
- Abstract.
- Vintage.
- Around the world:
- Orient;
- world maps;
- trains, airplanes, buses;
- sights;
- ethnic motifs.
Vinyl car stickers can hide scratches, dents, but not necessarily
- Nature:
- Trees;
- animals;
- birds;
- flowers;
- SEALs.
- Landscapes:
- Celebrities.
- Music.
- Romance:
- Family;
- inscriptions.
- Sports.
- Fishing and hunting.
- Ornaments and patterns.
- Hours.
- Erotica.
Already by one list of topics it is clear that there is a lot to choose from. And if you take into account that many companies offer all this or much, in different sizes and colors, it becomes absolutely clear that it will not be easy to choose.
Miten valita
In general, it is not easy at all to choose the right sticker, because it should be part of the interior. Therefore, we choose the type based on the task that the sticker will perform. If it will be the center of the composition, then you can and something bright, catchy. Like a large drawing or even a 3D picture. But just remember that the rest of the environment should match.
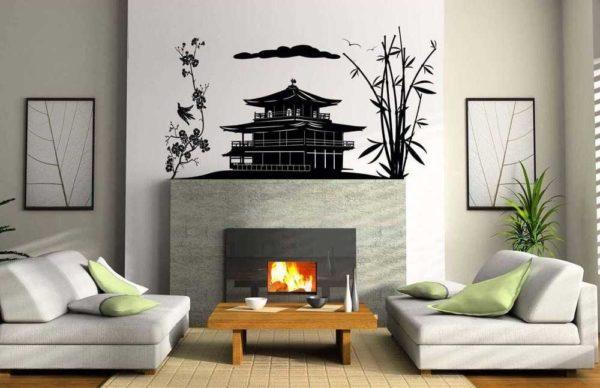
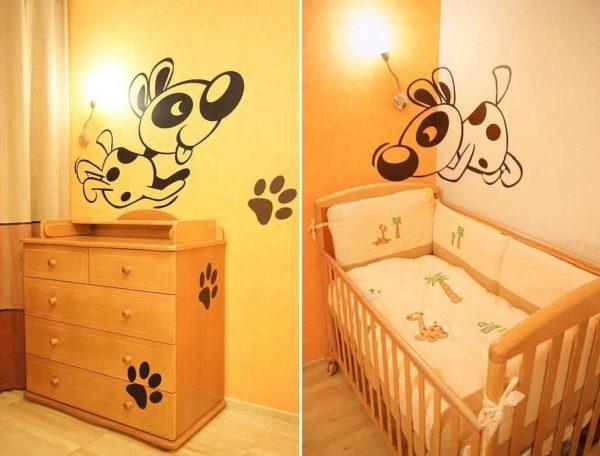
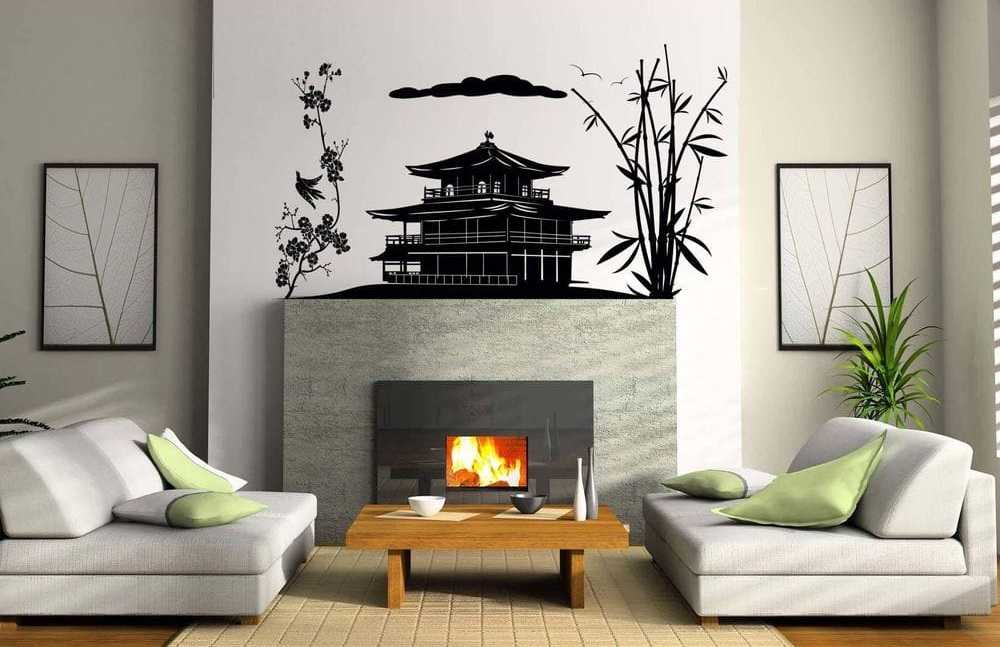
For example, you want to use a Japanese or Chinese landscape. That’s fine. But the design of the room should also have this theme. Such or similar bright themed picture in the usual average design will look “no way”. If you have an interior in the process of development, you can try to build everything around the found theme. In fact, it is not so difficult. But “attach” a bright big picture in the existing interior is almost unrealistic. The exception, perhaps, the children’s room. Here bright pictures are in theme. What is good that vinyl stickers can be changed as the child grows, changing his tastes and preferences. The background of the walls to make neutral, and on the drawings can be the heroes of your favorite at the moment cartoon or images of the toy.
In the nursery and not only, you can use stickers to combine everything into one ensemble. To do this, use the same type of stickers of different sizes. They can be glued on the walls, furniture, ceiling. One of the techniques is the transition from one wall to another, from a piece of furniture to a wall or to another object.
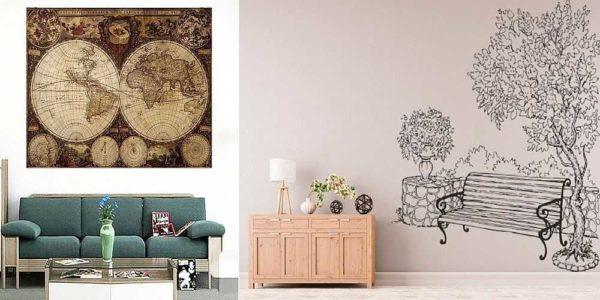
For other rooms, the easiest and most universal way is to use monochrome images. The most ideal and neutral option – inscriptions, silhouettes. They are easier to fit in. Patterns and abstractions are good in this sense.
How to glue
It is not difficult to stick vinyl stickers, but it is necessary to follow certain rules. First, the room must be warm. The temperature should not be lower than +15°C. Secondly, the humidity is normal, the walls or any other surface should be dry and clean. There should be no dust, grease or dirt. If possible, you should treat the area under the sticker with a degreaser (solvent).
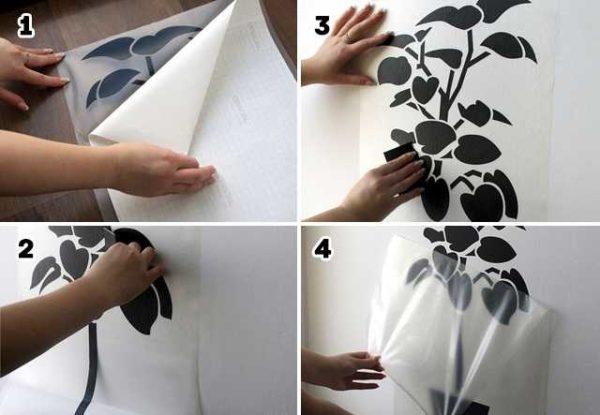
To work you will need a small plastic spatula, which can be successfully replaced by an old plastic bank card. If you do not like working with plastic, try a dry clean soft cloth. These devices will help to drive out air bubbles from under the film.

Gluing a large picture from vinyl film
The area for work prepared, then the order of action is as follows:
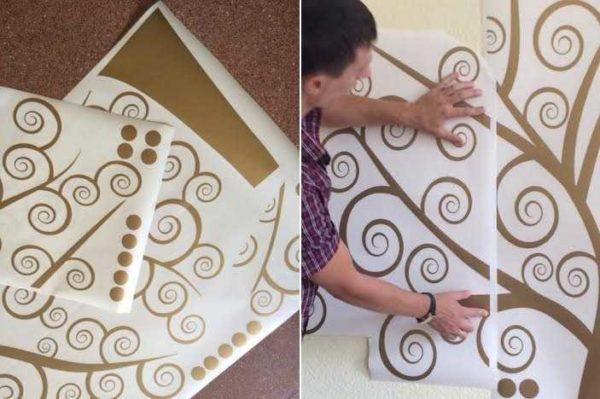
- Disassemble the sticker, see how it will look. Very often it is a set of fragments. We take the fragments, assemble them into a picture. Attach them with pins or office tape in the intended place. Step back, look. If you are satisfied with everything, start gluing.
- Start from the bottom, move upward. First glue the central fragment, to it join the others. So it turns out that you have to move in two directions – from bottom to top and from the center to the edges.
At first it is not clear what and how - From the bottom of the fragment we peel off a small part of the backing, which protects the adhesive layer. Apply it to the work surface. We try to glue evenly, but if it fails, it’s okay – peel off, try again. After the “start” glued correctly, take a plastic or a rag. Peel off, bending a small part of the protective paper, glue the strip. Peel off the protective paper again, glue it on. Moving up and sideways, glue the whole piece.
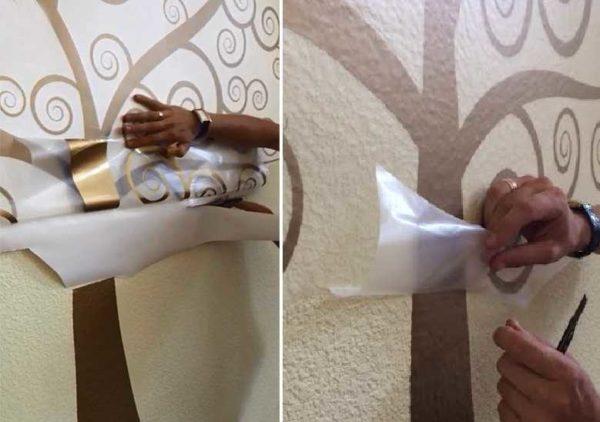
When gluing, do not remove the protective film from the front part of the fragment - Look, the fragment is glued evenly, everything is good. Remove the protective film from the front part.
- Repeat the operation with the next piece of the picture. Only now we need to join the parts. The slightest discrepancy will be visible, so do not rush. Glued, checked, removed the protective layer from the front part.
- Glue all the parts in the same way.
That’s all. A few remarks on the process. It is important to try to expel air from under the vinyl film. Therefore, we move slowly, not allowing skips. Then there will be no bubbles. If the peeled backing interferes, it can be cut.
The film, which is glued on the front side, we remove it after the fragment is glued completely, all the air is removed. At the same time, you can’t leave it on the piece when the next one is glued – the seam will be visible.
Features of a small picture
Above described the process of gluing a large picture, consisting of several pieces that need to be docked with each other. But not always such complexity is needed. Some images are a set of elements that can be arranged relative to each other in an arbitrary order. Such elements are usually glued on one sheet. They only need to be removed from the backing and glued to the wall.
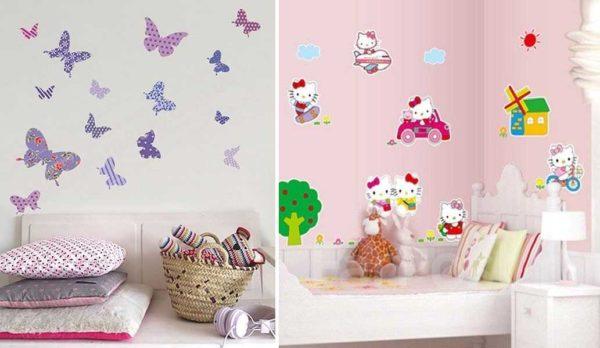
But even in this case, in order not to make a mistake and not to re-glue from place to place fragments, cut them out together with the backing. It is not necessary strictly along the contour, you can capture free areas of the substrate. Now distribute these pieces on the surface, as you imagine it, using pieces of painter’s tape. Evaluate the result. You may have to move something somewhere, change places. When you are satisfied with the result, start gluing.
How to remove a boring vinyl sticker from the wall
That and good stickers on the wall, that they can be removed without harm to the coating. Usually it is not difficult. You pick up the edge, wrap it and pull it down. Note, not “on yourself”, but downward. Then the paint and wallpaper remain in place.
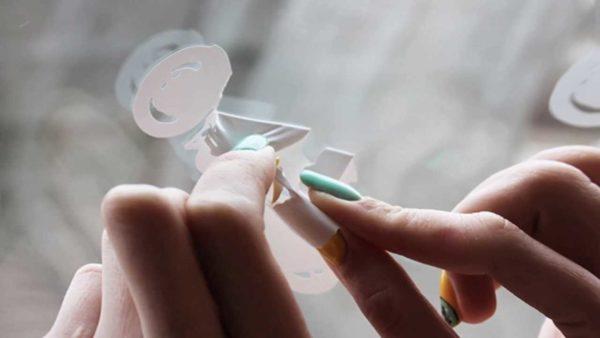
If the vinyl film is too well “friended” with the surface, to tear off the edge, you will need a knife. This happens with smooth flat materials – glass, ceramic tiles, plastic, etc. In the most difficult situations, you can use a hair dryer. You heat the film, pull it down. So, gradually, you remove it. Usually everything comes off without traces.







OMG, I recently decked out my room with these funky wall stickers! They totally transformed the vibe! I went for tropical themes, and now it feels like a beach getaway. Super easy to apply and remove too! Can’t stop staring at my new happy place!