

Küttesüsteemi paigaldamine või renoveerimine hõlmab kütteseadmete paigaldamist või asendamist. Hea uudis on see, et soovi korral saate seda teha oma kätega, ilma spetsialiste kaasamata. Kuidas peaks toimuma kütteradiaatorite paigaldamine, kus ja kuidas neid paigutada, mida on vaja tööde teostamiseks - kõik see artiklis.
Artikli sisu
Mis on paigaldamiseks vajalik
Igasuguste radiaatorite paigaldamine nõuab seadmeid ja tarvikuid. Vajalike materjalide komplekt on peaaegu identne, kuid näiteks malmist radiaatorite puhul on pistikud suured ja Maevsky kraani ei panda, vaid kuskil süsteemi kõrgeimas punktis pannakse automaatne õhuventilaator. Kuid alumiinium- ja bimetallküttega radiaatorite paigaldus on täiesti sama.
Ka teraspaneelradiaatoritel on mõningaid erinevusi, kuid ainult riputamise osas - need tulevad koos klambritega ja tagapaneelil on spetsiaalsed vormitud metallklambrid, mille küttekeha klambrite konksude külge kinnitub.
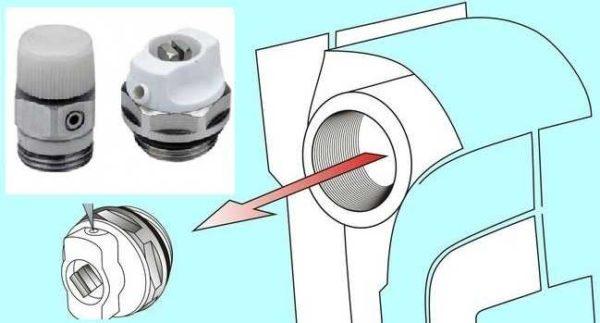
Maevsky ventiil või automaatne õhuventilaator.
See on väike seade radiaatorisse koguneda võiva õhu väljutamiseks. See paigutatakse vabale ülemisele väljalaskeavale (kollektorile). See peab olema igal radiaatoril alumiinium- ja bimetallradiaatorite paigaldamisel. Selle seadme mõõtmed on palju väiksemad kui kollektori läbimõõt, seega vajate ikkagi adapterit, kuid Maevsky ventiilid tulevad tavaliselt koos adapteritega, teil on vaja ainult teada kollektori läbimõõtu (ühendusmõõtmed).
Lisaks Maevsky klapile on olemas ka automaatsed õhuventilaatorid. Neid saab samuti panna radiaatoritele, kuid need on veidi suuremate mõõtmetega ja neid toodetakse mingil põhjusel ainult messingist või nikeldatud korpusega. Valge emailiga neid ei ole saadaval. Üldiselt on pilt ebaatraktiivne ja kuigi nad lasevad õhu automaatselt välja, kasutatakse neid harva.
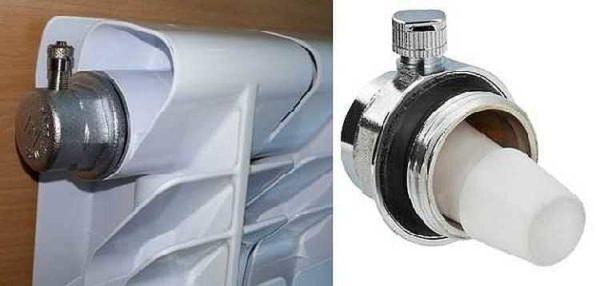
Pistik
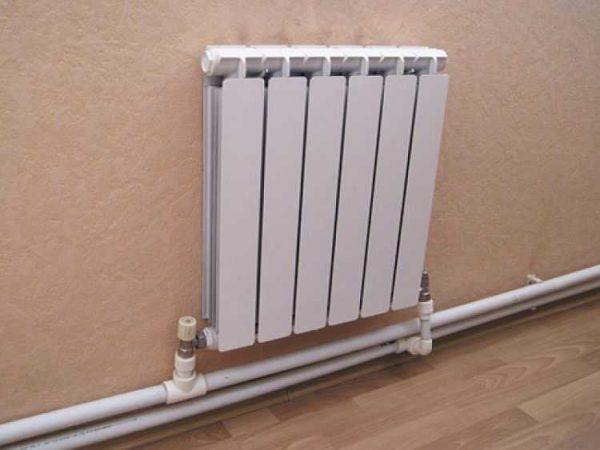
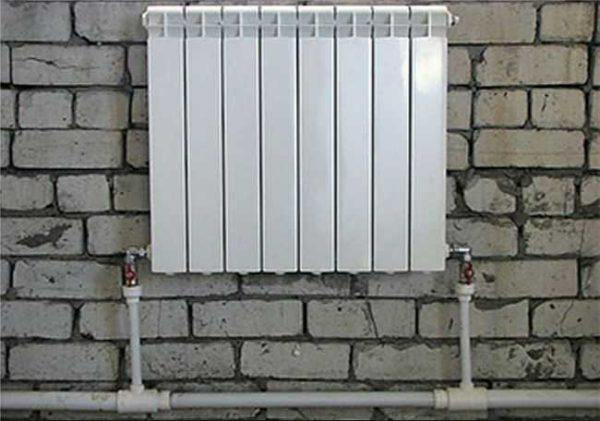
Külgühendusega radiaatoril on neli väljundit. Kaks neist on hõivatud ette- ja tagasivoolutorustiku poolt, kolmandale on pandud Maevsky kraan. Neljas väljalaskeava on suletud pistikuga. See, nagu enamik moodsaid patareisid, on enamasti värvitud valge emailiga ja ei riku välimust üldse.
Sulgemisühendused
Teil on vaja veel kahte reguleerimise võimalusega palliventiili või sulgemisventiili. Need paigutatakse igale akule sisse- ja väljalaskeava juures. Kui tegemist on tavaliste kuulventiilidega, on neid vaja selleks, et vajadusel (avariiremont, asendamine kütteperioodi ajal) saaks radiaatorit lahti ühendada ja eemaldada. Sellisel juhul, isegi kui radiaatoriga midagi juhtub, katkestate selle ja ülejäänud süsteem töötab. Selle lahenduse plussiks on kuulventiilide väike hind, miinuseks - võimatus reguleerida soojusvõimsust.
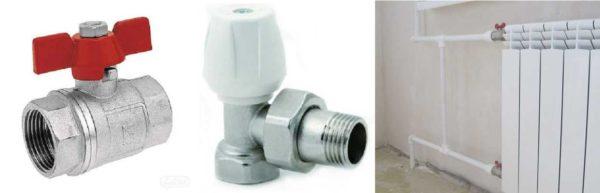
Peaaegu samad ülesanded, kuid võime muuta jahutusvedeliku voolu intensiivsust, täidavad sulgemisreguleerimisventiilid. Nad on kallimad, kuid nad võimaldavad ka reguleerida soojuse väljundit (teha seda vähem), ja nad näevad paremad välja, on olemas otsene ja nurgaversioon, nii et rihma ise on täpsem.
Soovi korral võite panna termoregulaatori jahutusvedeliku juurdevoolule pärast kuulventiili. See on suhteliselt väike seade, mis võimaldab teil muuta kütteseadme soojusvõimsust. Kui radiaator soojendab halvasti, ei saa neid panna - see on veelgi hullem, sest nad saavad ainult voolu väiksemaks muuta. On termoregulaatorid on patareid erinevad - automaatne elektrooniline, kuid sagedamini kasutada kõige lihtsam - mehaaniline.
Seotud materjalid ja vahendid
Rohkem seintele riputamiseks on vaja konksusid või sulgusid. Nende arv sõltub patareide suurusest:
- kui sektsioone on kuni 8 või kui radiaatori pikkus on kuni 1,2 m, piisab kahest kinnituspunktist ülevalt ja ühest alt;
- iga järgmise 50 cm või 5-6 lõigu kohta lisage üks kinnituspunkt ülal ja üks all.
Liigeste tihendamiseks on vaja kasutada fum teipi või linane mähis, sanitaarpastat. Vaja on ka puuri koos puuriga, tasandit (parem tasandik, kuid tavaline mull piisab), mõnda arvu tüübleid. Vaja on ka varustust torude ja liitmike ühendamiseks, kuid see sõltub torude tüübist. See ongi kõik.
Kuhu ja kuidas paigutada
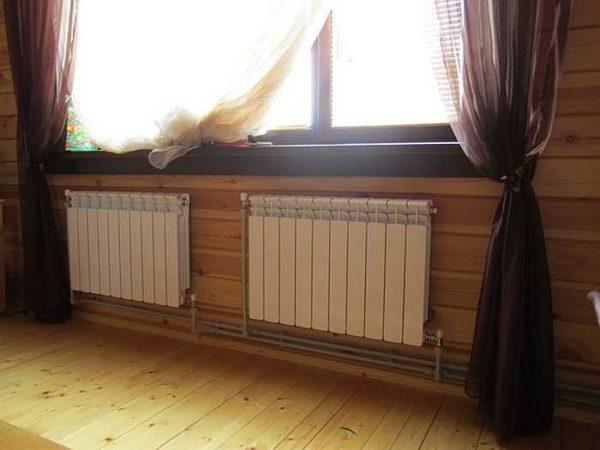
Traditsiooniliselt paigaldatakse kütteradiaatorid akna alla. See on vajalik selleks, et tõusev soe õhk lõikaks külma aknast ära. Et klaas ei higistaks, peaks küttekeha laius olema vähemalt 70-75% akna laiusest. See tuleks paigaldada:
Kõik need on soovitused, mille järgimine tagab normaalse sooja õhu ringluse ruumis ja tõhusa kütmise.
Kuidas valida polüpropüleenist torusid loe siit.
Kuidas õigesti paigaldada
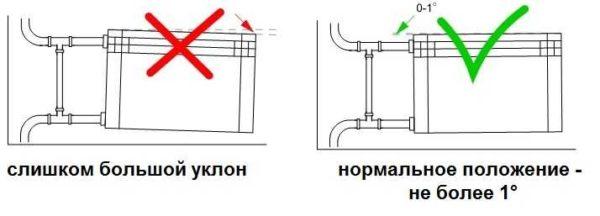
Nüüd sellest, kuidas radiaatorit üles riputada. On väga soovitav, et radiaatori taga olev sein oleks tasane - nii on lihtsam töötada. Märkige seinale avause keskkoht, joonistage horisontaalne 10-12 cm allpool lävepaku joont. See on joon, mida mööda radiaatori ülemine serv tasandatakse. Konsoolid tuleb paigaldada nii, et ülemine serv langeb kokku joonistatud joonega, st on horisontaalne. Selline paigutus sobib sundkütte süsteemidele (kui on olemas pump) või korteritele. Loomuliku ringlusega süsteemide puhul tehke kerge kalle - 1-1,5% - piki jahutusvedeliku kulgemist. Rohkem ei tohi teha - tekib stagnatsioon.
Paigaldamine seinale
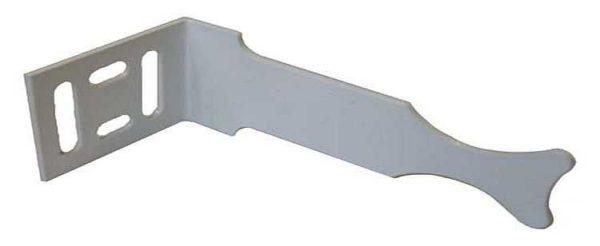
Seda tuleks arvesse võtta radiaatorite konksude või kronsteinide paigaldamisel. Konksud paigaldatakse vastavalt tüübile - seinasse puuritakse sobiva läbimõõduga auk, sellesse paigaldatakse plasttüübel ja sellesse kruvitakse konks. Konksu korpuse sisse- ja välja kruvimisega saab hõlpsasti reguleerida kaugust seinast ja küttekehast.

Kui paigaldate konksud kütteradiaatorite alla, arvestage, et põhikoormus langeb ülemisele kinnitusklambrile. Madalam teenib ainult kinnitamist antud asendis seina suhtes ja see paigaldatakse 1-1,5 cm madalamale kui alumine kollektor. Vastasel juhul ei ole teil lihtsalt võimalik radiaatorit üles riputada.
Kinnituste paigaldamisel kantakse need seinale kohas, kuhu need paigaldatakse. Selleks asetage kõigepealt aku paigalduskohale, vaadake, kus klamber "seisab", märkige koht seinale. Kui olete aku asetanud, võite panna klambri seinale ja märkida sellele kinnituste asukoha. Nendesse kohtadesse puurige augud, sisestage tüüblid, kruvige klamber kruvide külge. Olles paigaldanud kõik kinnitusdetailid neile, riputage kütteseade üles.
Põrandale kinnitamine
Kõik seinad ei kannata isegi kergeid alumiiniumpatareisid. Kui seinad on valmistatud kergbetoonist või kipsplaadist, on vaja põrandakinnitust. Mõnda tüüpi malmist ja terasest radiaatorid on varustatud jalgadega, kuid need ei sobi välimuse või jõudluse poolest kõigile.
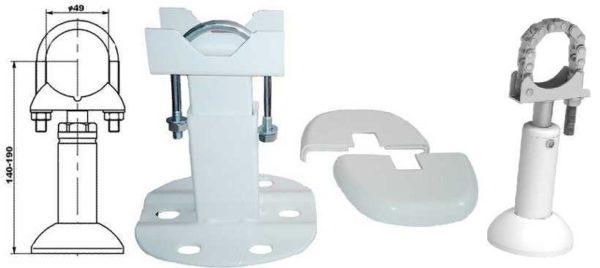
Võimalik on alumiiniumist ja bimetallist küttepatareide põrandale paigaldamine. Nende jaoks on olemas spetsiaalsed klambrid. Need kinnitatakse põrandale, seejärel paigaldatakse kütteseade, kaarega kinnitatakse alumine kollektor paigaldatud jalgadele. Sellised jalad on reguleeritava kõrgusega, seal on fikseeritud. Põrandale kinnitamise meetod on standardne - naelade või tüüblite külge, sõltuvalt materjalist.
Radiaatorite torustiku valikud
Kütteradiaatorite paigaldamine eeldab nende ühendamist torustikuga. On kolm peamist ühendamisviisi:
- sadul;
- ühepoolne;
- diagonaal.
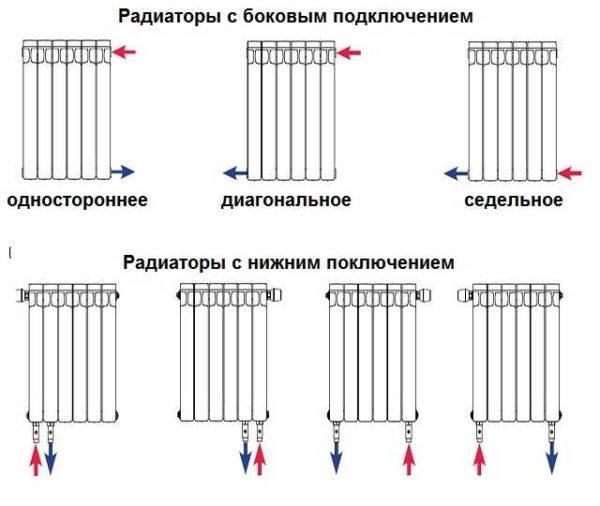
Kui paned radiaatorid ja alumise ühenduse, siis ei ole sul valikut. Iga tootja seob jäigalt ette- ja tagasivoolu ja selle soovitusi tuleb rangelt järgida, sest muidu lihtsalt ei saa soojust. Külgühendusega on rohkem võimalusi (täpsemalt on neist kirjutatud siin).
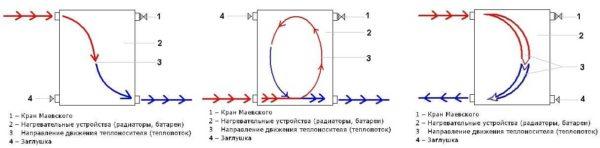
Rihmimine ühesuunalise ühenduse juures
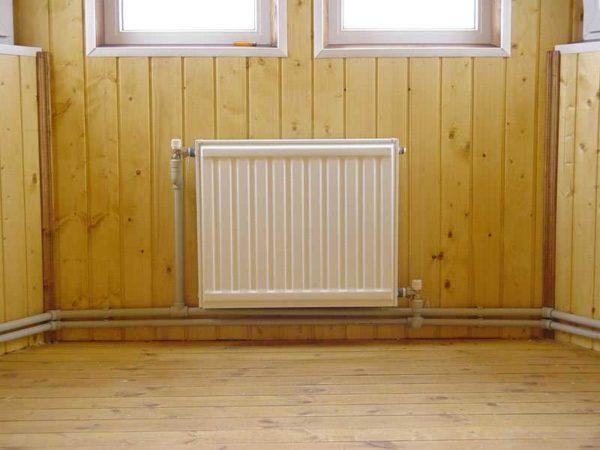
Ühepoolset ühendust kasutatakse kõige sagedamini korterites. See võib olla kahetoruline või ühetoruline (kõige levinum variant). Korterites kasutatakse endiselt metalltorusid, seega kaaluge võimalust siduda radiaator terastorudega kurvides. Lisaks sobiva läbimõõduga torudele on vaja kahte kuulventiili, kahte teetorustikku ja kahte painutust - mõlemast otsast väliskeermega osi.
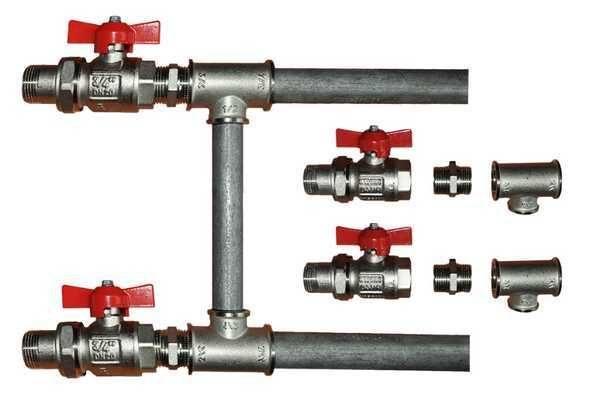
Kõik see on ühendatud nagu pildil näidatud. Ühe toruga süsteemis on möödavool kohustuslik - see võimaldab teil radiaatorit lahti ühendada ilma süsteemi peatamata ja tühjendamata. Ärge pange ümbersõidule kraani - see takistab jahutusvedeliku liikumist läbi tõusutoru, mis tõenäoliselt ei meeldi naabritele ja suure tõenäosusega satub trahvi alla.
Kõik keermestatud ühendused tihendatakse fum-tape'i või linase mähisega, mille peale kantakse tihenduspastat. Kraani kruvimisel radiaatorikollektorisse ei ole vaja liiga palju teipi. Liiga palju võib põhjustada mikrokragusid ja hilisemat purunemist. See kehtib peaaegu kõigi radiaatorite tüüpide puhul, välja arvatud malmist radiaatorid. Kõigi teiste paigaldamisel palun fanatismita.
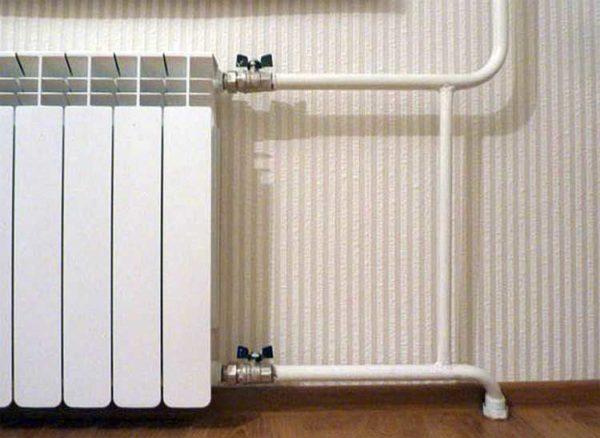
Kui teil on keevitusoskused/võimekus, võite keevitada ümbersõitu. Nii näeb tavaliselt välja korterite radiaatorite torustik.
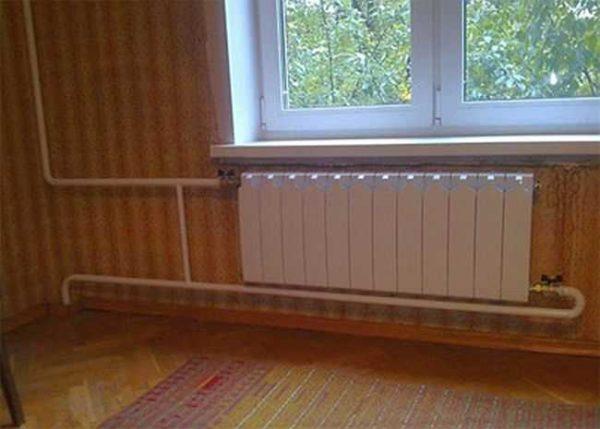
Kahe toruga süsteemis ei ole ümbersõit vajalik. Toitevool ühendatakse ülemisse sisselaskeavasse ja tagasivool alumisse sisselaskeavasse ning loomulikult on vaja kraane.
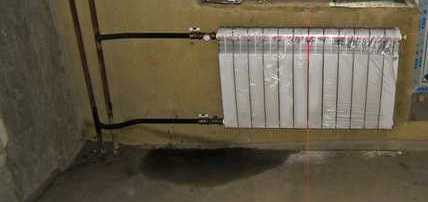
Kui alumine jaotamine (torud on põrandale asetatud), tehakse seda tüüpi ühendust väga harva - see osutub ebamugavaks ja inetuks, sel juhul on palju parem kasutada diagonaalühendust.
Rihmade kinnitamine diagonaalühenduses
Diagonaalühendusega radiaatorite paigaldamine on soojusvõimsuse poolest parim valik. See on sel juhul kõige suurem. Alumisel jaotusel ei ole seda tüüpi ühendust raske realiseerida (näide pildil) - juurdevool ühel pool üles, tagasivool teisel pool alla.
Ühe toruga süsteem vertikaalsete tõusudega (korterites) ei näe nii hea välja, kuid inimesed lepivad sellega kõrgema tõhususe tõttu.
Pange tähele, et ühe toruga süsteemi puhul on jälle vaja ümbersõitu.
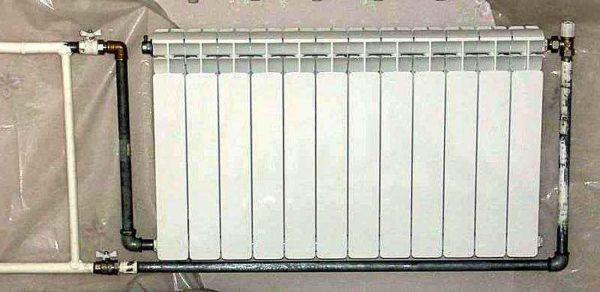
Rihmaga kinnitamine sadulaga ühendamise korral
Sellisel viisil paigaldatud radiaatorite puhul on see kõige mugavam ja kõige vähem märgatavam paigaldusviis.
Sadulaühenduse ja alumise ühe toruga paigaldamise korral on kaks võimalust - ümbersõiduga ja ilma ümbersõiduta. Ilma ümbersõiduta on kraanid endiselt paigaldatud, vajaduse korral võib radiaatori eemaldada ja paigaldada kraanide vahele ajutise ülemineku - painutuse (vajaliku pikkusega torutükk, mille otstes on keermed).
Vertikaalse jaotuse puhul (kõrghoonete tõusud) ei näe seda tüüpi ühendust sageli - liiga suured soojuskaod (12-15%).


Ise kütteradiaatorite paigaldamine oli päris suur seiklus! Võtsin kaasa mõned põhilised tööriistad ja järgisin mõnda veebiõpetust. Alguses oli see veidi keeruline, kuid kui ma sain hakkama, läks kõik klappima. Nüüd on mu kodu mõnusalt soe ja soe. See oli seda vaeva täiesti väärt!
That sounds awesome! I did something similar when I installed my first ceiling fan. At first, I was like, “What did I get myself into?” But once I figured it out, it was such a win seeing it all come together. So satisfying when it works out, right?