Installing and replacing a doorbell is not the most difficult task. If you know how to work at least a little with electricity, you will succeed. Next we will talk about how to connect the bell in the apartment, house – wired and wireless.
Contenido del artículo
Types of apartment bells
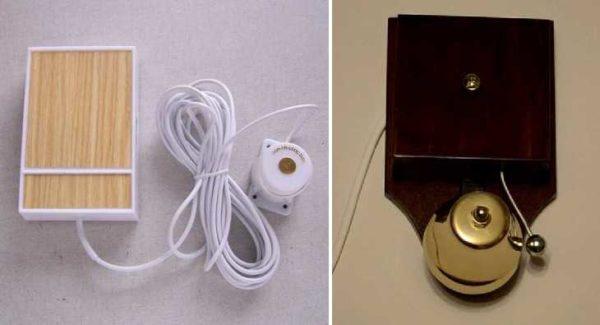
Electric apartment calls on the method of connection are of two types – wired and wireless. Wired are connected to the network 220 V, there are models that work from a reduced voltage of 12 V. Called wired because the bell button and the internal unit must be connected by wires.
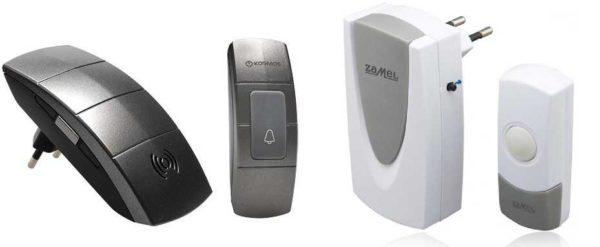
In wireless ringers, the button and the internal unit are not physically connected. They have a miniature transmitter (in the button) and receiver (in the internal unit). They communicate with each other on some frequency. There are two types of power supply for wireless ringers:
- The indoor unit and the button are powered by batteries.
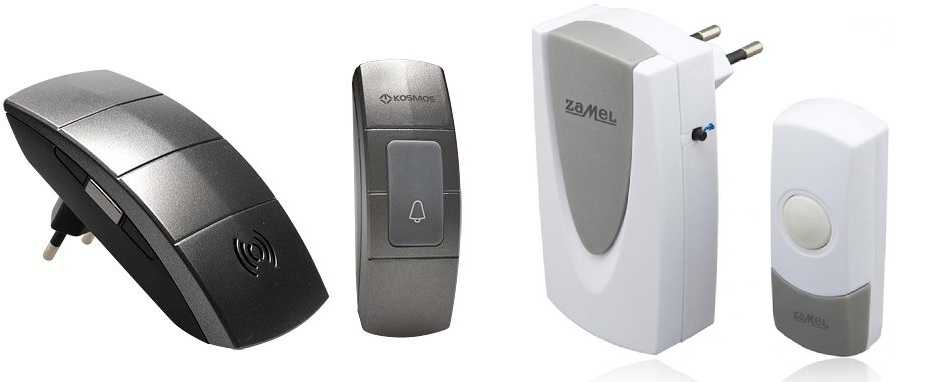
- The button is powered by batteries, the internal unit – from the 220 V network. And there are two ways of realizing internal blocks: with a standard connection to the leads with wires and with installation in a socket. In the latter option on the body there is a conventional electrical plug. In this case, connect the bell in the apartment and house is very simple: you need to install the internal unit in the socket, screw the button on the entrance / tile and insert the battery.
As already said, in the wireless version, the button and the electric bell “communicate” with each other by means of signals. Signals can be transmitted in analog or digital form. More reliable signal transmission in digital format – less prone to distortion. In addition, such models have the ability to change the channel on which the reception/transmission occurs. When transmitting an analog signal, there is no such possibility. What is it bad? The range of calls – 100 meters and more. And if in this area there is some device that operates on the same frequency (call or other), your receiver can catch its signals. In this case, there are false alarms.
More doorbells are divided not apartment and street. They differ in that for those that are installed on the street, the buttons make hermetically sealed and dustproof. In addition, it is recommended to install them under a small visor – there will be fewer problems.
Connecting wired electric doorbells
As we have already said before, wired doorbells are distinguished by the fact that the button and the internal unit must be connected by wires. The connection scheme through the junction box in the photo below.
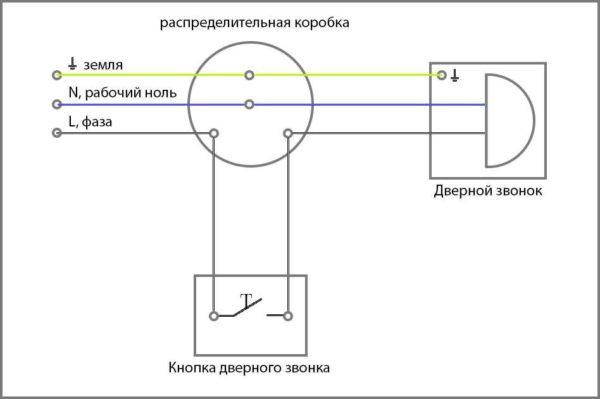
On the button leads phase wire, from the second terminal of the bell, it goes to one of the wires of the internal unit. On the second remaining free wire connect the “zero” (in compliance with color coding it is usually blue or blue color) junction box. If the indoor unit has a terminal to connect the ground, it is connected to a conductor of yellow-green color, which should also go from the junction box. If there is no such terminal, but there is a conductor, it is isolated.
The complexity of connecting the apartment bell is that the wires must be conducted through the wall. Sometimes this is too inconvenient, then the hole is made near the door frame.
If this connection seems too complicated for you, look for models of wired bells with an internal block, which is inserted into the socket. There are also such. Example on the photo.
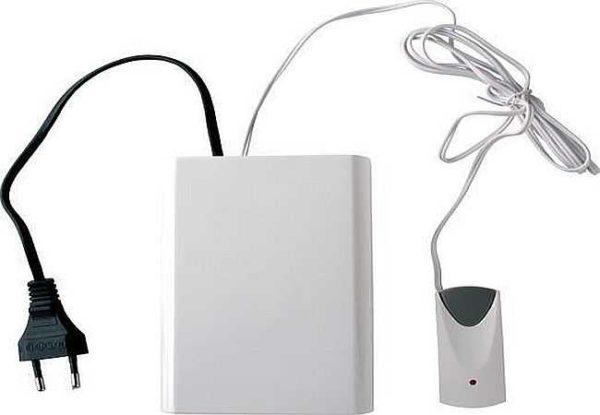
How to connect the bell in the apartment if it has an electric plug, everyone knows. In this case, it will only be necessary to pull the wire connecting the two units through the wall. To do this, it will be necessary to disconnect it from one of the parts, pull it through the prepared hole, then connect the wires in place.
Connecting and powering wireless calls
First we will talk about those models whose internal blocks are connected to the 220 V network. If there is a plug on the body, you know exactly what to do. If there is no plug, but there are two wires, to them you connect two wires that come from the junction box. If there are three wires, you isolate the yellow-green one and connect the blue and the second one (it can be brown, red, black, white, etc., but definitely not green or yellow-green).
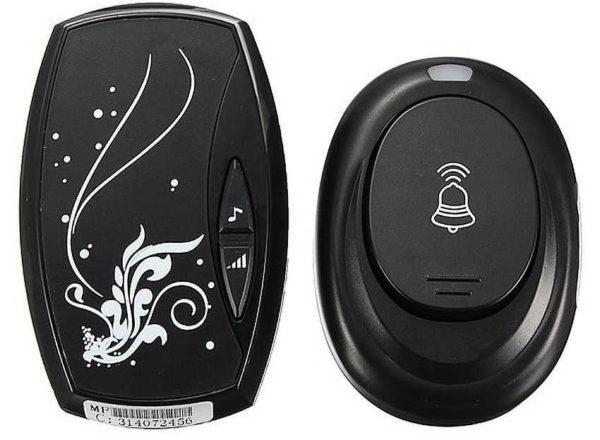
If both units are battery powered
With how to connect the bell in an apartment or house if both units are powered by batteries, there are no problems. Just in a suitable place in the house you hammer a nail or screw in a screw, on which you attach the internal unit, put batteries. Do the same with the button, but it is mounted outside – near the door or gate. In order to fix the button the case must be opened (there may be small screws, but usually you just need to pry the case with a screwdriver).
There are several holes on the back wall for fasteners. Fix the back cover on self-tapping screws or dowels (depends on the material), then install the batteries and close the cover. This completes the connection of the wireless bell.
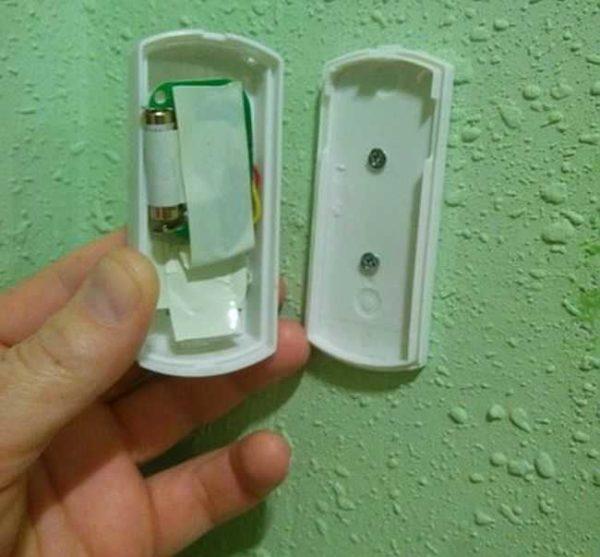
How to power a wireless button in freezing weather
Wireless bells are good for everything, except that in winter there may be problems: some types of batteries freeze and stop working. They have to be replaced every 10-15 days. Very inconvenient, as it is difficult to realize that the call stopped working because of a dead battery. You can get rid of this situation in the following ways:
- Use lithium batteries. They are not afraid of frost – they can work without problems up to -30°C.
- But batteries of this type for 9 V or 12 V are simply unrealistic to find. They are almost out of stock. Outputs:
- To put batteries in the house, to the button to pull wires.
Having finalized the system in any of the proposed ways, the problems with the power supply of the call button on the street you will have much less. Now you know not only how to connect the bell in the apartment and on the street, but also how to ensure its operation in frosty weather.
Non-standard equipment
In some cases, two buttons or two bell units are required. If two buttons are needed, they are connected in parallel.
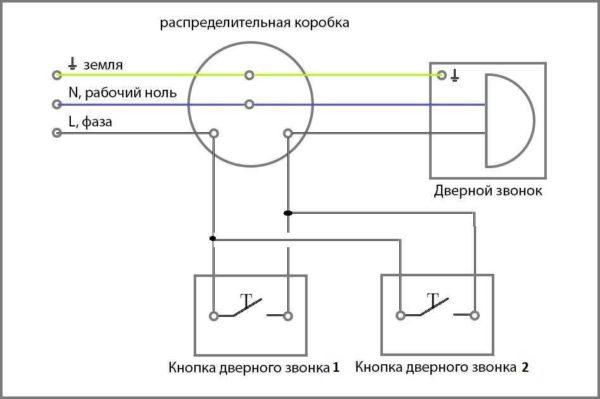
In practice, this means that the phase comes to the first button, and the wire that goes to the second button is connected to the same contact. From the second contact of button #2, the conductor goes to the free contact of button #1, and then goes to the doorbell.
The wire connecting the two buttons is desirable to find the same color that comes from the junction box. You can and other, but not blue or yellow-green. All, you know how to connect the bell in the apartment with two buttons.
In other situations, you need to connect two bells. This is often necessary when installing an electric bell in a private house. For example, one in the house, the second on the street or on different floors, in two different wings of the house, in the summer kitchen. In general, there are many options.
Among wireless doorbells there are such sets – in two bells and they are set to one frequency, so you just need to install them in the right places. With wired will have to mess around – to pull wires. In this case, the bells are connected in parallel.
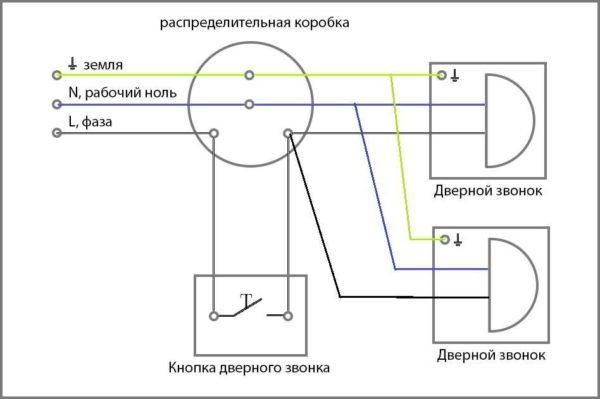
The electrical connection is similar to the one described above. Phase from the button goes to one bell, from it goes to the second. On the free contacts of one and the other bell connect the neutral wire from the switchboard.




I remember when I installed my electric bell. Took a bit of trial and error, but once I got the wiring right, it was so satisfying! Just follow the manual closely and double-check your connections. It’s a handy upgrade for any apartment or house!
Installing an electric bell in your apartment is a game-changer! The convenience of not having to run to the door every time is priceless. Trust me, once you’ve got it set up, you’ll wonder how you lived without it. It’s low-key affordable and super easy to install!
I remember when I finally hooked up the electric bell in my apartment! It was a game changer! No more running to the door every time someone knocked. I had to deal with some wires, but it was totally worth it. Now I feel like a tech whiz!
Installing an electric bell in my apartment was a game changer! It’s super handy, and I love how it adds a modern touch. Last week, it rang while I was cooking, and I felt like a pro rushing to answer the door. Definitely recommend it for every home!