When buying a built-in oven, sellers recommend entrusting the connection of the equipment to professionals. But this service, even in the presence of normal wiring costs about 1500 rubles (about $25), which is a lot. And if you have to pull the line from the switchboard, the cost still increases, and solidly. But connect the oven with their own hands can be an ordinary person who knows how to hold a screwdriver in his hands. With the laying of a separate power supply line, the matter is more complicated, but it is also possible to cope. The only disadvantage of such actions – you will not have a corresponding column in the passport. On the basis of this you can refuse warranty repair, if the warranty case suddenly comes. So the choice is yours.
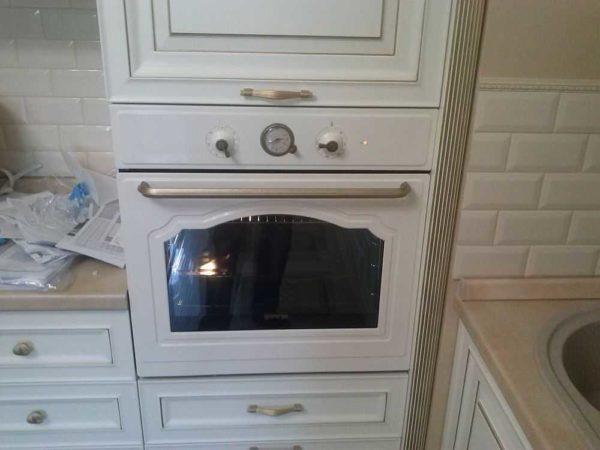
Electric ovens come in two types – dependent and independent. Dependent ones come with a cooktop and are connected together with it to the same power source. They must be located next to each other, usually the hob above the oven. They are connected to each other by cables, as the position of the oven controls affects the operation of the hob. All requirements are detailed in the instructions and must be followed exactly.
Independent ovens are fully self-contained devices that are connected independently. The choice of their installation location is also arbitrary. Because, probably, such models are more popular.
Contenido del artículo
Connection procedure
Regardless of the type of device, the connection of the oven is carried out in several stages:
It is necessary to assess the existing wiring. You can connect the oven only if:
- The physical condition is good.
- The cross-section of the conductors is not less than necessary.
- There is a circuit breaker or at least a switch on the line. These are required to de-energize the equipment in the event of an emergency.
If the existing wiring does not meet the requirements, it is necessary to lay a new line from the switchboard to the proposed place of installation of the oven. On this line it will be necessary to put an automatic circuit breaker of a suitable nominal value. We will talk more about the cross-section of the wires and the rating of the circuit breakers.
What to do
First you need to prepare the oven for connection to the power supply. The oven may have a power cord. Sometimes it ends with a three-pin plug (with grounding), sometimes there is no plug. Depending on how you connect it, you can put a plug on the cord, or you can do without it. You can even change the cord – it doesn’t even affect the warranty.
It’s all about the connection method you choose. You can choose the traditional one through a three-pin socket with a plug. You can use the one that is not so convenient, but is considered more correct. Through a terminal block. Depending on the chosen method of connection, make the connection of electrical wires (more on this below).
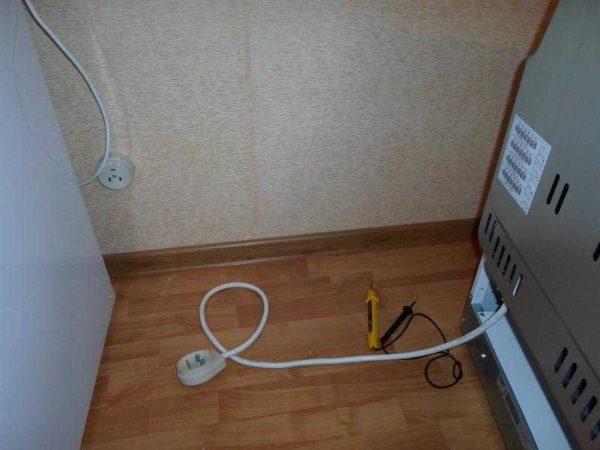
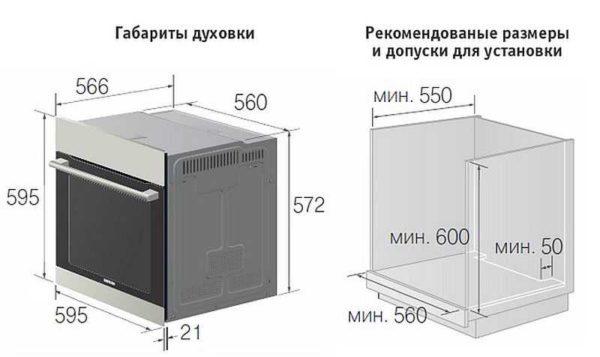
- Prepare a place to install the built-in oven. Usually, manufacturers recommend that there should be cold air coming in from the back and bottom for ventilation. If the furniture has a back wall, a hole is made in it or it is cut out as far as possible. In order to provide air flow from the bottom, you can lay pads on the sides of a few centimeters high (it is important that at the top between the oven and the countertop, too, there is an air gap. In addition, the side racks of the cabinet should be adjusted to the size of the oven – it should be fixed to the sides with screws.
- The built-in oven is put in place, check the verticality and horizontality of the installation with a construction level, if necessary, correct it. Open the door, there are holes on the side strips, in them install self-tapping screws that will hold the oven in place. In order that when screwing in the screws, the walls of the furniture will not break, make a hole beforehand, using a drill bit with a diameter slightly smaller than the diameter of the screw.
That’s all there is to it. Connect the oven is already connected, but not everyone is fully aware of some of the nuances and, most likely, there are a lot of questions on the electrical part. We will talk about them further.
Connecting to electricity
If you have everything well with the wiring, it is laid recently, there is a separate line for connection with a properly working grounding, and the oven is not very powerful – about 2.5 kW, there are no questions – put a plug, turn on and that’s it. But if the wiring is already more than ten years old, in what condition it is you do not know, what section of the wire – it is unknown, it is better to pull a separate line, do everything according to the rules and only then connect the oven. In this case, you will not have to be afraid that something will happen to the wiring.
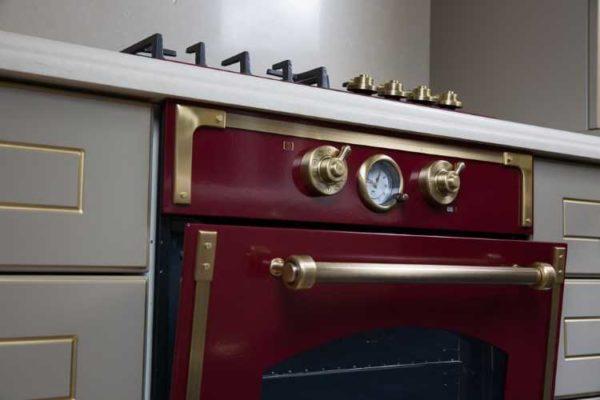
Cross-section of conductors and rating of the automatic protection device
The latest models of ovens have become not very “voracious” – the fight for savings gives its results. If you look at their characteristics, the average mounting power for a built-in oven is within 2.6-3 kW. But this is a speech about fairly expensive products. Appliances in the cheaper segment can have a much higher power. Also more powerful will be models with pyrolytic cleaning.
That is why it is recommended to connect the oven to a dedicated line with a large cross-section of conductors, on which the automatic protection device is installed. The recommended cross-section is 6 mm2. Such a conductor can withstand a long-term load of 10 kW, which is more than enough. On this line it is recommended to install an automatic circuit breaker of protection class C 32. This is with a very large safety margin – lines with such parameters are often put at the entrance to the dacha or house in the village. Its laying will require a solid investment – and the cable is not cheap and the circuit breaker costs enough.
| Cross section of copper wires | Permissible continuous load current | Maximum load power for single-phase 220 V network | Rated current of the circuit breaker | Limit current of the circuit breaker | Approximate load for single-phase circuit |
|---|---|---|---|---|---|
| 1.5 sq. mm | 19 А | 4.1 kW | 10 А | 16 А | lighting and signaling |
| 2,5 sq. mm | 27 А | 5,9 kW | 16 А | 25 А | socket groups and electric floor heating |
| 4 sq.mm | 38 А | 8.3 kW | 25 А | 32 А | air conditioners and water heaters |
| 6 sq.mm | 46 А | 10.1 kW | 32 А | 40 А | electric stoves and ovens |
| 10 sq. mm | 70 А | 15,4 kW | 50 А | 63 А | input lines |
If your oven has a power of much less than 8 kW (even if all the available devices are switched on at the same time), you can lay the cable with a cross-section of 4 sq. mm, and put the automatic circuit breaker C 25. This will be no less reliable, but more economical. By the way, for greater safety when installing the oven, it is recommended to use two-pole circuit breakers. When triggered, they will disconnect not only the phase, but also the zero, which in some cases is important (in case of insulation breakdown).
Cable can be used VVGng or NYM. Parameters, respectively 3*4 or 3*6. Only when buying be sure to measure the diameter of the conductor – too often manufacturers in an attempt to make products cheaper, save on copper. As a result, instead of the stated 4 sq.mm have at best 3, and this is already unsafe – the wiring can heat up, which can lead to a short circuit and fire. So, check the diameter of the conductor. For a cable with a cross-section of 4 sq. mm it should be 2.26 mm, for 6 sq. mm – 2.76 mm. Read more about how and what to measure and how to calculate here.
RCD – is it necessary or not?
On the line to which it will be possible to connect the oven, in addition to the circuit breaker, it is recommended to install an RCD. The automatic circuit breaker protects the wiring from overheating and short-circuit currents, and the RCD – protective earth device – will protect users. If the insulation breaks to earth or if the phase wire is touched, it will cut off the power supply. Electrics are an area where it’s best to be over-insured and an RCD is usually an over-insurance, but it’s better if you have one. Safer.
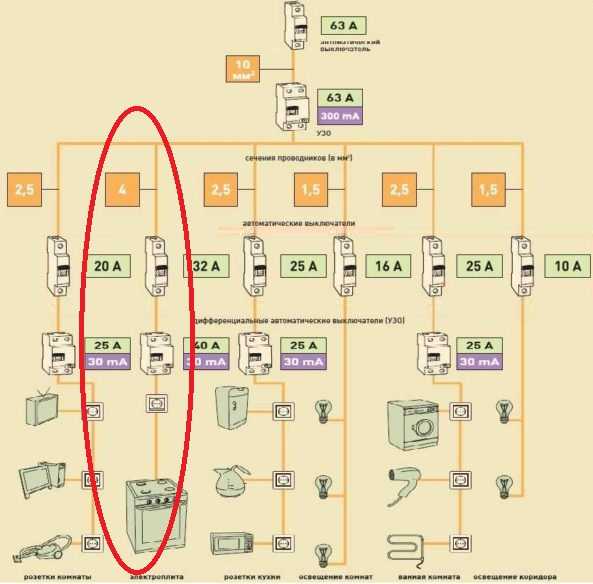
Selection of RCD parameters is simple – its rating is one step higher than the rating of the automatic protection device. That is, if you set the automatic machine at 25 A, RCD take 32 A, if the packer is at 32 A, RCD will need 40 A. The second parameter is the cutoff current. With him everything is simple – for lines to which one device is connected, take it 10 mA.
It is still necessary to discuss the type. It is better to install class B (B 25, for example), but class A (A 25) is also suitable. But you should not take class AC. Although they are cheaper, they do not provide a proper degree of safety.
Once again: if you want to connect the oven correctly and reliably, use a large cross-section wire, automatic circuit breaker and RCD. Such an installation will guarantee a long and safe operation of the equipment.
Socket or socket strip
Connecting the oven to the power supply line is possible in two ways: using a power plug and socket with suitable parameters (selected according to the maximum current, which must be specified in the technical specifications) or in the section “Safe operation”. In general terms, a power plug and socket with a maximum current of 15 A is required for a 3-3.5 kW oven, while an oven up to 5 kW requires a socket with a 32 A plug.
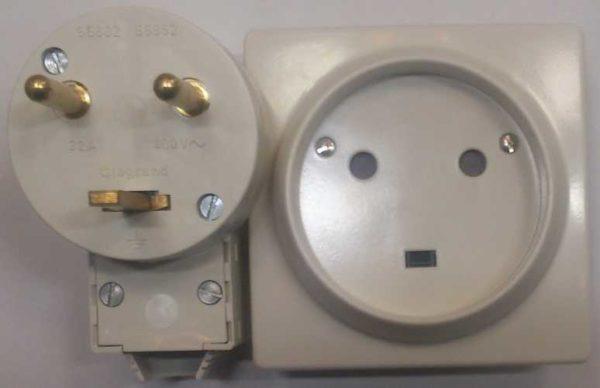
To the bottom plug connects the ground wire (usually yellow-green color), to the other two phase and zero (blue or blue). When connecting, do not confuse – the phase and zero on the socket and plug must coincide.
The second option for connection is a terminal block. This method is simple and reliable. There is a plate of heat-resistant plastic, on which several pairs of contact plates and screw clamps are mounted. The wires of the two cables are connected from two opposite sides. When connecting, the color marking is observed: the yellow-green wire is “ground”. These conductors are connected strictly one opposite the other. The same with the blue-colored wires – this is the neutral or “zero”. The remaining wires are the phase and they too are connected one opposite the other.
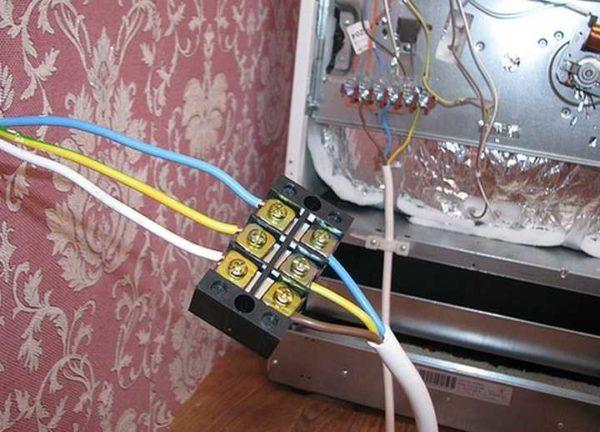
Of course, you must work with the voltage off – turn the automatic circuit breaker to the “off” position. The wires are connected simply – a 7-9 mm stripped conductor is inserted under the top plate. It can be loosened beforehand – turn the clamping screw by a couple of turns. Then the screw is clamped, ensuring good contact. After the screw has been tightened, pull the conductor several times with sufficient force to make sure that it is well secured.
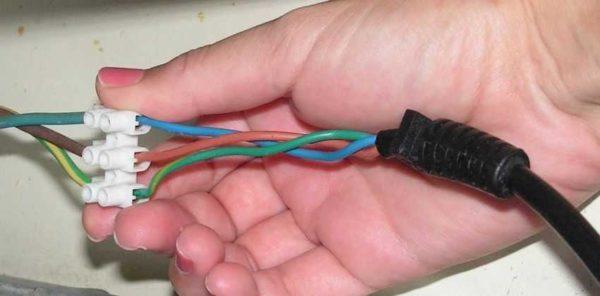
To keep the terminal block with the wires exposed, it is possible (and highly desirable) to pack it into the enclosure. It is possible to use an ordinary junction box, or a small plastic wiring cabinet in which everything can be packed very neatly.
Jumpers
In most cases, the oven is delivered from the store with the power cord already attached. Naturally, in this case there are already installed jumpers according to what kind of network you have – single-phase or three-phase. But if there is no cord, you have to put the jumpers yourself.
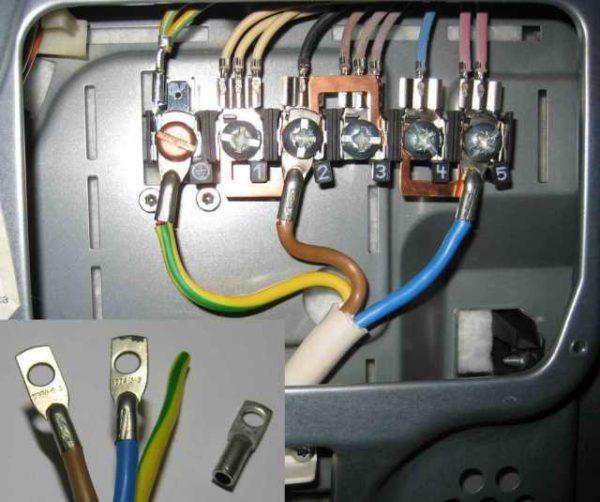
It’s not difficult at all. On each device and in the instruction manual there is a table in which it is drawn what jumpers should be put for which network. An example of such a table is on the photo below. In this case it is stamped on the back cover, but can be glued near where the leads come out of the oven and where the cord is attached.
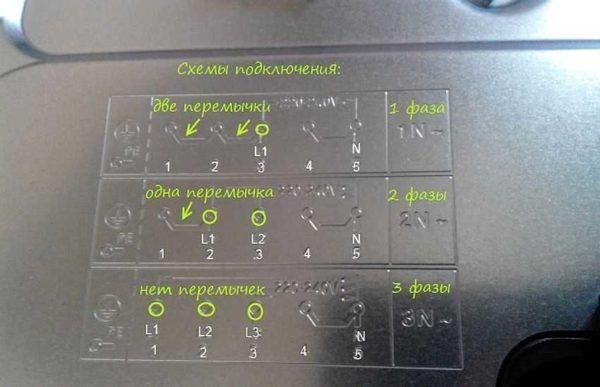
As it follows from this diagram, the first diagram is suitable for single-phase 220 V mains. It is signed 1N. It is shown that in this case it is necessary to connect three pins signed 1, 2 and 3. For this purpose it is necessary to install two jumpers. Note that the “ground” pin in this model is on the right. A yellow-green conductor should be connected to it, the same conductor from the cable/cord should be connected there.
The one on the left is the neutral or “zero” lead. Note that there should be a jumper there too. This is usually the default (always), but it’s a good idea to check. A blue wire goes to this pin, the same color conductor is connected from the cable.
The remaining lead is the phase lead. Having installed two jumpers on the remaining three free contacts, connect this wire. It can be any color except yellow, green and blue. Most often has a black, brown or red color, but not necessarily.
If you have a three-phase input (380 V) in your house or apartment, then except for the jumper on the neutral wires, others are not needed. In this case, it is also better to connect first the protective wires – ground and neutral – and then already phase. The order of connection of phase wires is not important, but it is desirable that they were connected in the same order as on the electric plug. The less confusion, the better.

Connecting my oven myself was a game changer! I felt like a total DIY pro. Watching those wires spark to life was wild. Now I whip up my favorite dishes all the time. Seriously, if I can do it, anyone can! So satisfying to tackle home projects!
Totally get you! I remember when I fixed my own leaky faucet. The rush of DIY victory was unbeatable! It’s amazing what you can accomplish with a bit of patience. Now, I’m hooked on tackling more projects around the house too. Keep up the great work!