

Most of the population of our country has small-sized apartments. Both in old houses and in new buildings, they are the first to be bought: the prices are more acceptable. After buying such housing immediately raises the question of how to make repairs in a small apartment so that it was convenient, functional and beautiful. The matter is not easy, but since such a task is very common, a number of solutions for different tastes and requests. We will talk about them.
Contents of the article
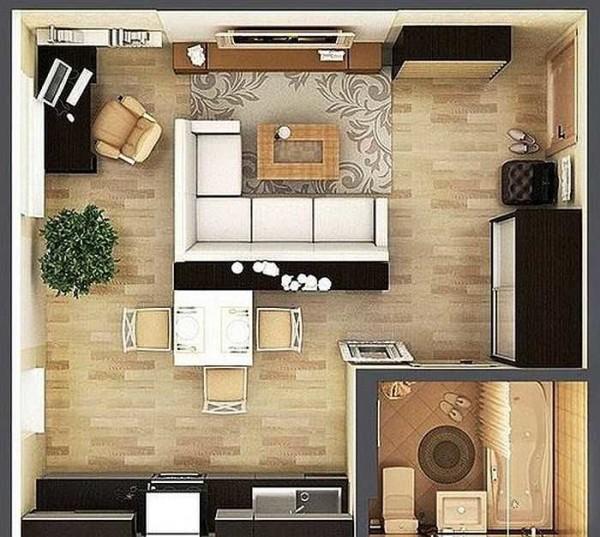
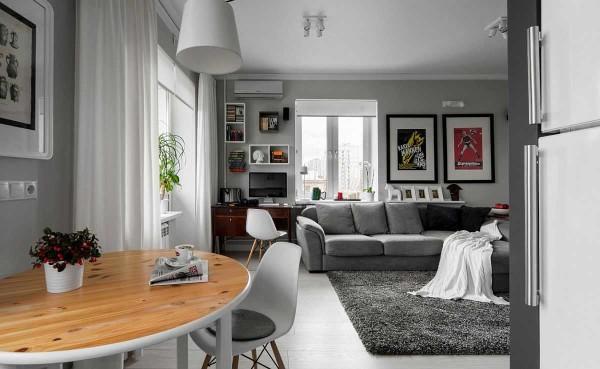
Make a studio apartment
In recent years, studio apartments have become popular among young people (and not only). These are rooms with a minimum of partitions. Dedicated remain only a toilet with a bath, sometimes – a bedroom. All other walls are demolished completely (if they are not load-bearing) or partially.
There are a few subtleties that you need to know with this type of repair:
In any case, redevelopment with demolition of walls must be approved. To do this, order a project of works, it is signed in the department of architecture and only then begin the repair itself. Then you will not have any problems.
Pros
The following points can be attributed to the positive sides of remodeling an ordinary apartment into a studio apartment:
- You get a spacious room instead of several rooms of small area.
- The usable floor space is increased. It only seems that the walls take up little space. Count: a wall with a length of 3.5 meters and a width of 20 cm (narrow partition) occupies an area of 3.5 * 0.2 = 0.7 square meters. This is one very small wall.
- For a large room you can choose any style, apply interesting ideas.
In general, such a repair in a small apartment will allow you to visually (and actually) make it bigger. And the functionality does not suffer in any way, and it becomes more comfortable to live.
Disadvantages
Without disadvantages can not do without. The first is the lack of privacy. If the apartment is designed for one person, he will feel comfortable in it. If two people will live, you need to be ready for the fact that you are constantly in front of each other.
The second is the spread of odors from their kitchen. The lack of partitions leads to the fact that all the aromas from the kitchen freely penetrate into all corners of the apartment. A proper ventilation system and a powerful extractor hood can save the situation.
Third – the need to maintain perfect order. Immediately, from the threshold you see all or almost all the space. So there can be no mess.
The decision to turn the apartment into a studio is radical and not suitable for everyone. Unusual for us is the lack of separate rooms. But there are other ways to make repairs in a small apartment, improving its functionality.
Combine the bathroom
Most of the standard layout of apartments suffers from one disadvantage: a very small area allocated for the bathroom – toilet and bath. And, for some reason, initially these two rooms are separate. As a result, both in the bathroom and in the toilet can not turn around and definitely nothing additional can not put (washing machine and water heater, for example). Correct the situation by removing the partition and making it joint.
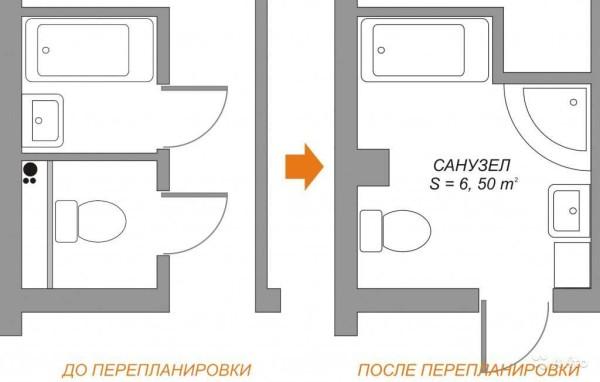
The specific plan of remodeling depends on a similar layout, but the general idea is the same: destroy the partition, remove one of the doors. In some variants it is possible to slightly increase the area of the bathroom at the expense of the area “stolen” from the corridor (as in the photo above).
As we have already written above, it is possible to increase the area of wet rooms only due to the clear technical rooms. At the same time during the repair it is necessary to be particularly careful about waterproofing. It is necessary to apply several hydrophobic layers (at least 3).
Pros
The advantages of remodeling the bathroom into a combined one are quite obvious. Its area is increased, the number of doors is reduced. More functional becomes the room. About whether it is convenient or not, it is useless to argue. Someone this option is suitable for someone, someone not.
Minuses
They can manifest themselves in “densely populated” apartments, when everyone is simultaneously going to work or to school. If one of the family members for a long time occupies the bathroom, the rest are nervous.
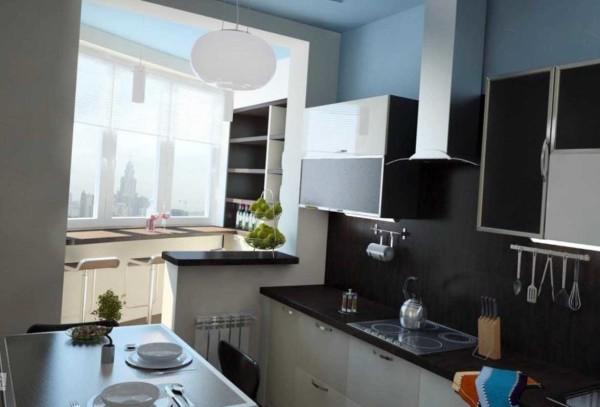
Insulating and connecting a balcony or loggia
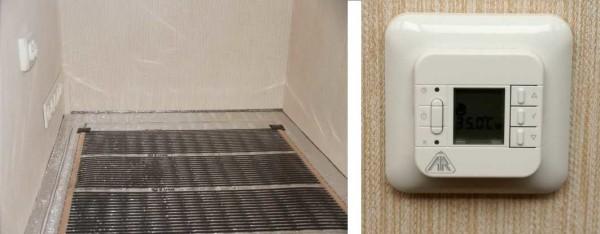
The emergence of new insulating materials makes it possible to qualitatively insulate the balcony / loggia, glaze it and, having removed the window block, connect it with the room. To the former balcony was definitely warm, there is heating. Just note that the removal of central heating radiators there is strictly forbidden. In this case, you can make electric floor heating. Since the area is small, the bills will also not be huge (with proper insulation).
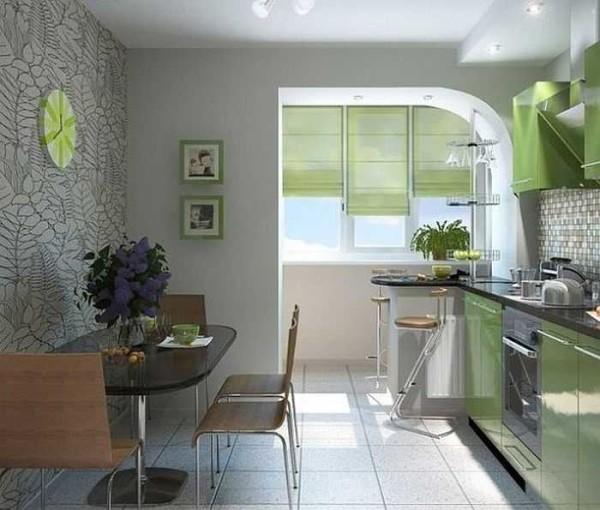
Note that on balconies and loggias you can not take out gas appliances and plumbing. This is relevant for the kitchen. You can put a few cabinets, refrigerator, take out the dining area, but the gas stove and sink must remain on the “main” area.
Another important point concerning the repair itself. When combining the room with a balcony or loggia, only the part of the wall that was under the window unit can be removed. To break the remaining pieces of the wall can not be categorically. These “remnants” are part of the load-bearing structure and without them the house can simply collapse.

Pros
With the advantages of such a solution, everything is obvious. Such a repair in a small apartment leads to the fact that the useful area is significantly increased. This is especially noticeable precisely in small-sized rooms. You had a kitchen of 6 square meters, together with a balcony it is already 8 squares, and maybe more.
Minuses
The disadvantages also lie on the surface. This is a significant cost. It is important to make good insulation. In order not to lose precious space, it is necessary to use quality materials that give good thermal insulation values (extruded polystyrene foam) at a small thickness. The cost of these materials is not pleasing – they are expensive.
The same situation with glazing. Usually put plastic (PVC) windows. In this case, high-quality, preferably three-chambered double-glazed windows are needed, and the profiles should have at least five chambers. Such plastic windows belong to the category of elite, and cost accordingly. But buy cheaper ones we do not advise: it will be cold in winter.
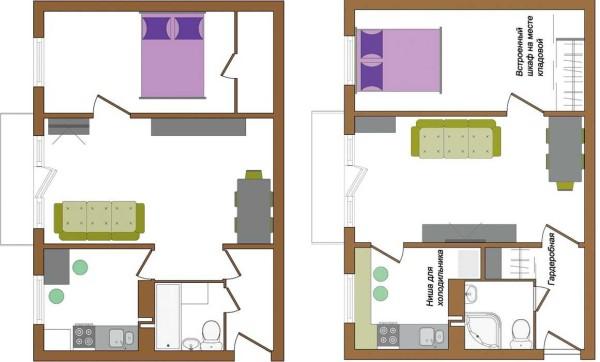
Redevelopment
Another radical way to make repairs in a small apartment and improve its living qualities – to make redevelopment. It is difficult to talk about it without reference to a specific plan, but there are basic points that are found in most cases:
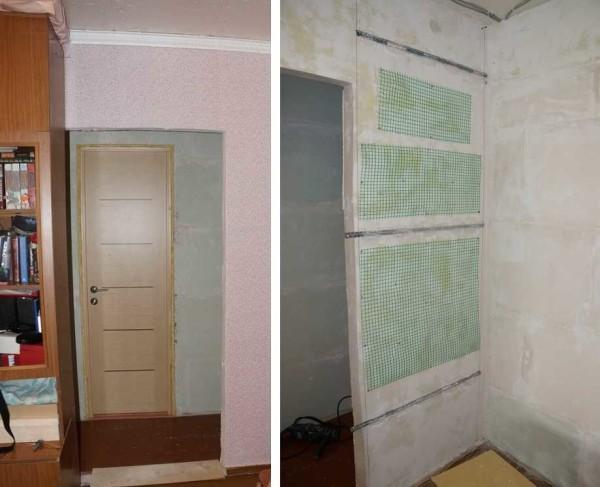
- Door relocation. For some unknown reason, doors in rooms are often made in the middle (or almost) of the wall. This is very inconvenient, as it greatly reduces the possibility of using the area. In this case, the doors are moved closer (maybe even close) to one of the walls. This type of remodeling does not apply to redevelopment and does not require prior approval.

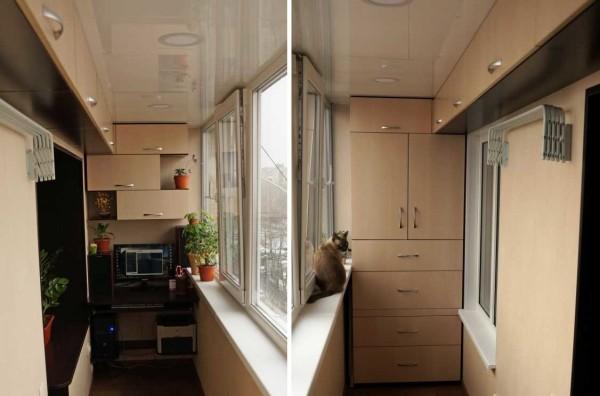
- Dismantling of built-in closets and pantries. On the freed space or in another allocated zone, you can make a dressing room or a modern closet (there are in the picture above).
- From a one-room to make a two-room apartment. This trick is best in corner apartments, which have two windows. In this case, you get two small but full-fledged rooms.

- Separation of passing rooms. In this case, the living space is often lost, but to have isolated rooms is sometimes more important.


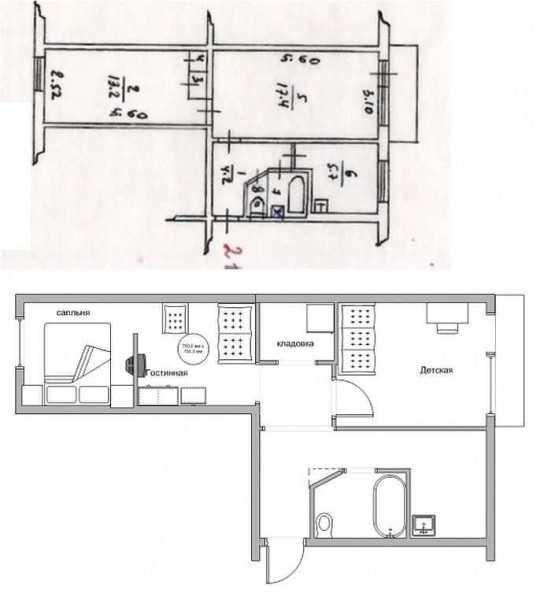
This is basically all the moments that are often found. They can be combined, achieving the characteristics that you need. Plan remodeling should be scrupulous, Knowing the exact distances and postponing them on the plan. You can use design programs that allow you to create three-dimensional spaces and even fill them with furniture. So it is easier to assess the result than on paper.
Example of repair in a small apartment (photo report)
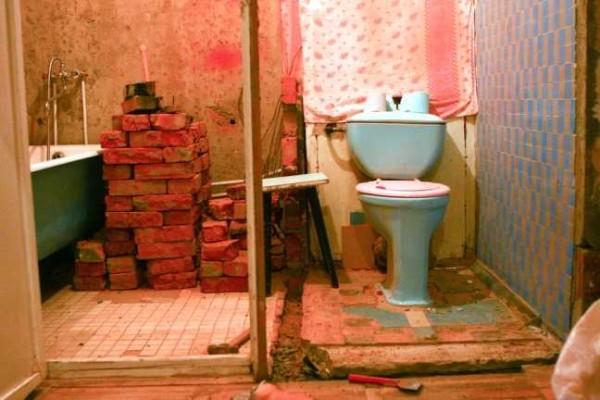
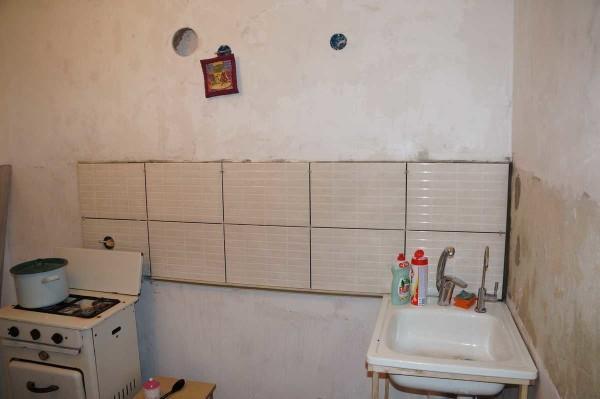
An ordinary small-sized studio apartment in a house of old construction.
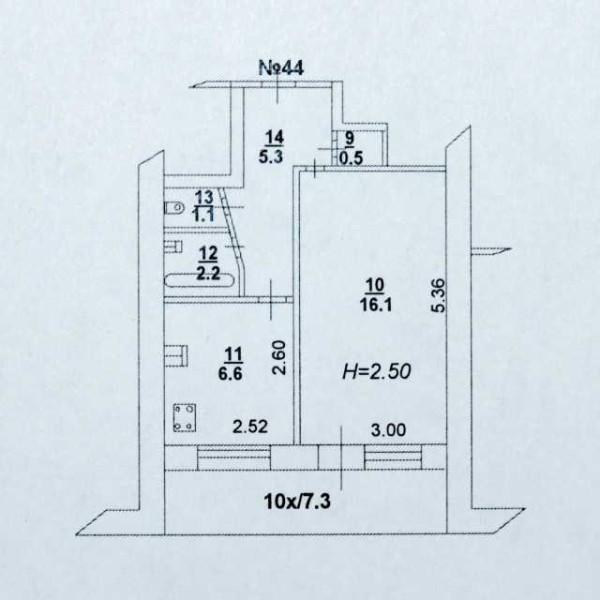
Repair of a small apartment decided to start with the unification of the bathroom. In addition, the wall, which now stands at an angle, will be leveled.
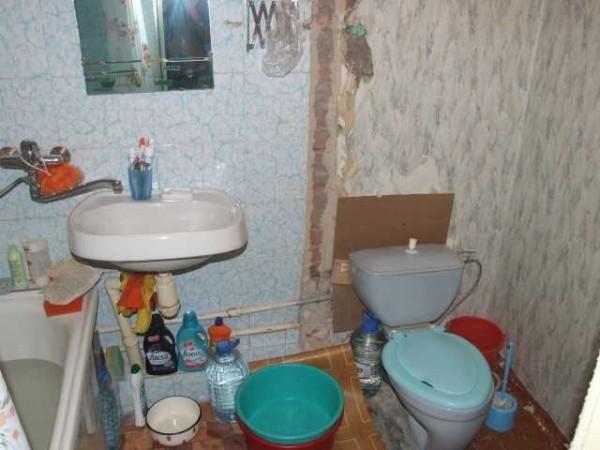
Repair in the bathroom
First we break the partitions in the bathroom.
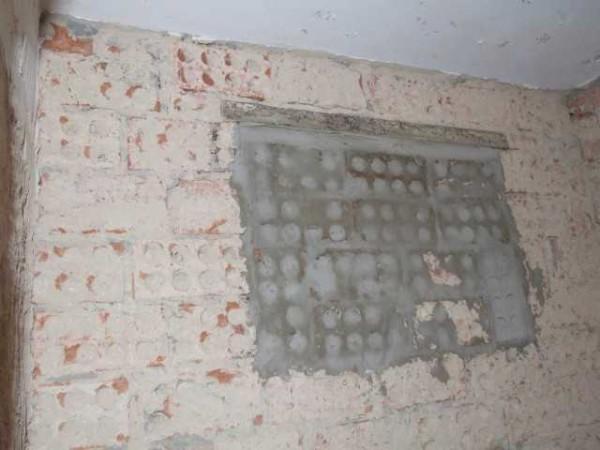
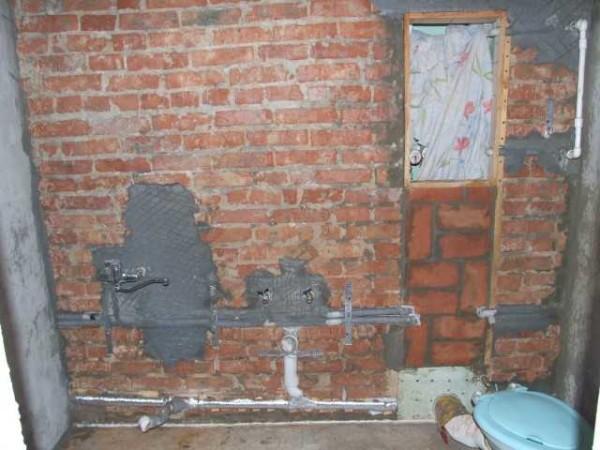
Next, all the walls are knocked down to the brick, removed and the tiles on the floor. Work perforator dusty, a lot of debris.
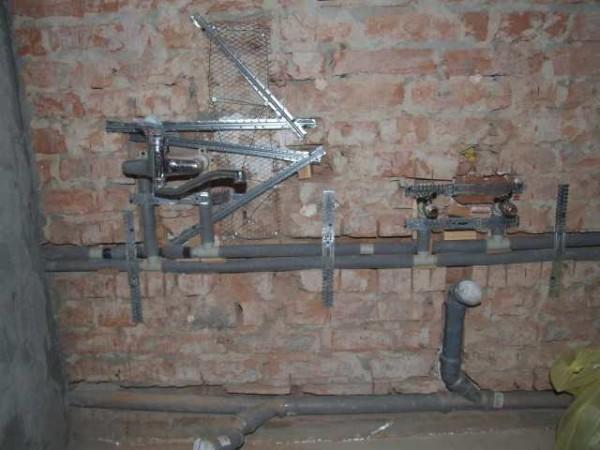
Under the pipes of cold and hot water, under the sewerage we make grooves. First cut the brick with a Bulgarian Bulgarian with a diamond disk, then cut out the interior with a chisel and hammer.
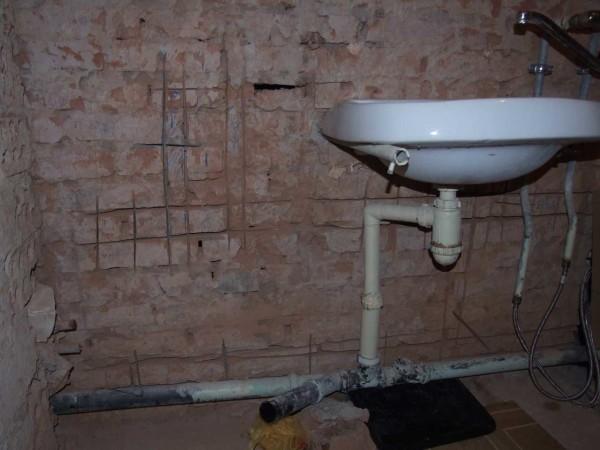
In the prepared grooves lay water and sewer pipes. Water pipes are soldered from polypropylene. Good material, easy to solder, has a long service life.

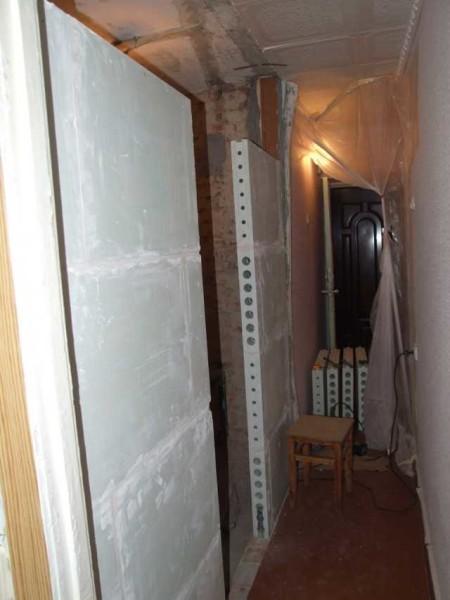
At the place of the riser make a box of plasterboard – for taps, meters and other plumbing devices. Free space at the top of the brick.

Next, we proceed to the installation of partitions. For this purpose, we use wall boards (PGP). In the places of adjoining to the walls and floor lay cork backing, glue with special glue, fasten with straight hangers for drywall. Before fixing carefully check the verticality and horizontality.
The floor is very uneven. First lay out the brick almost to the desired level, roughly leveled with mortar. After drying pour a thin layer of self-levelling mixture.
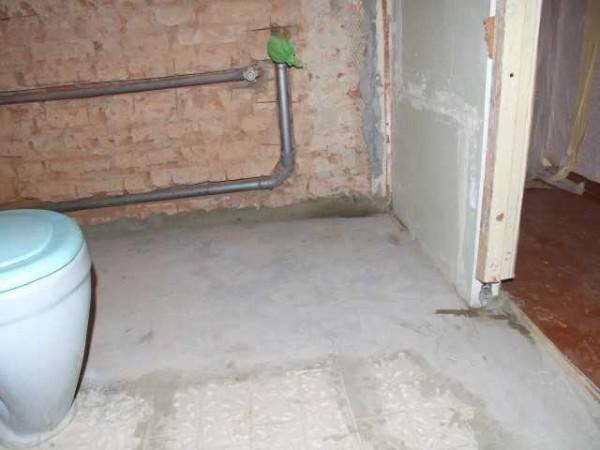
Check the results of leveling – deviations of no more than 5 mm. Under the tiles will be fine.
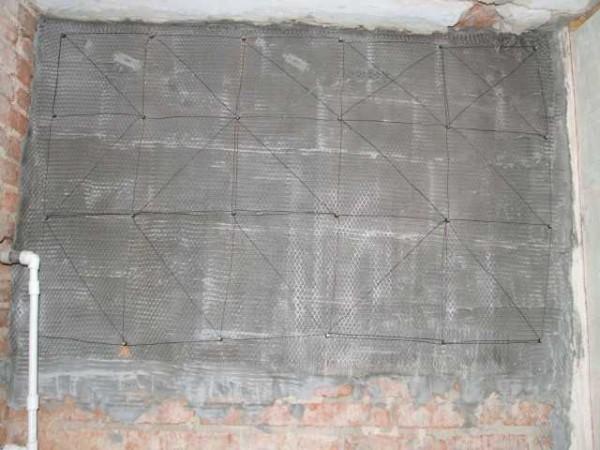
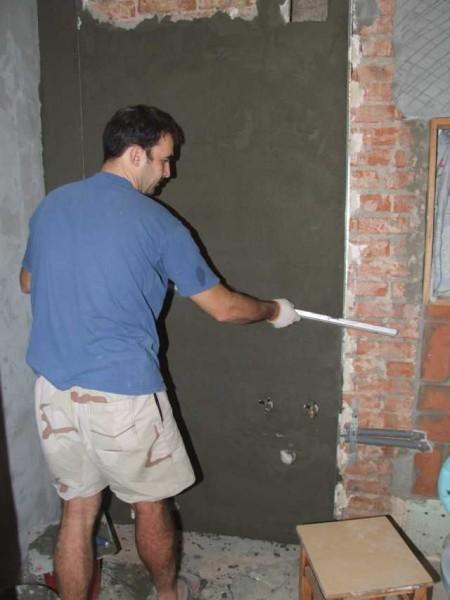
Now we can level the walls. One of the walls is heavily piled, approximately from the middle of the height upwards. The difference is almost 7 cm. We take the mortar, wire and layer by layer, reinforcing the layers.
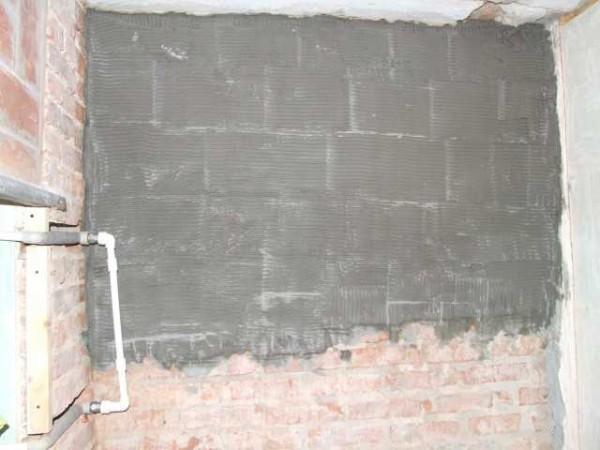
When the wall has become more or less level, you can put out beacons, then plaster on them.
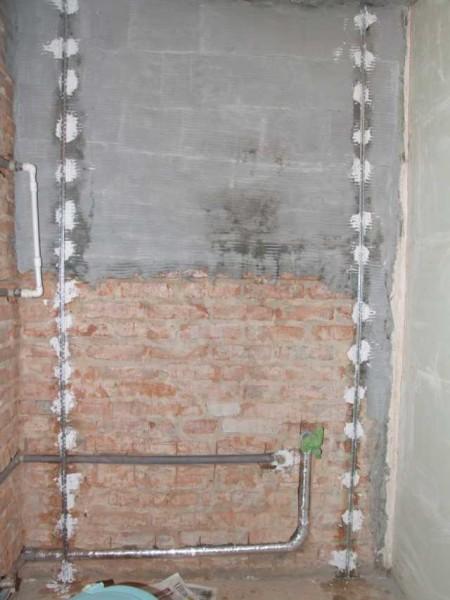
On the other wall near the place for the bathroom and washbasin taps there are big holes. They also need to be fixed with reinforcement – a layer of more than 3 cm.
Start plastering (how to plaster the walls on the beacons read here).
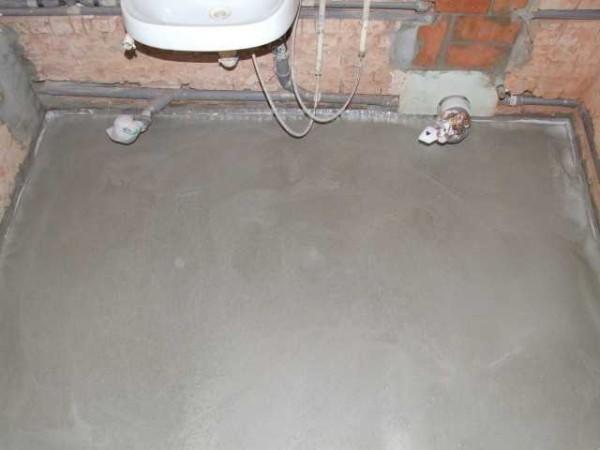
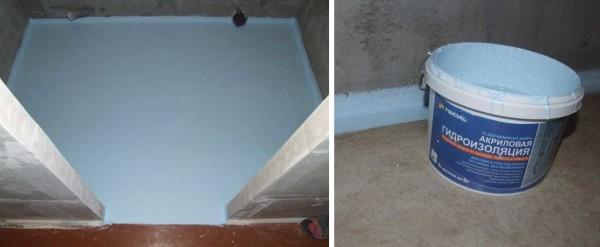
While the walls are drying, lubricate the floor with waterproofing. We apply it in two layers, the corners are additionally glued with serpianka.
You can put tiles on the dried plaster.
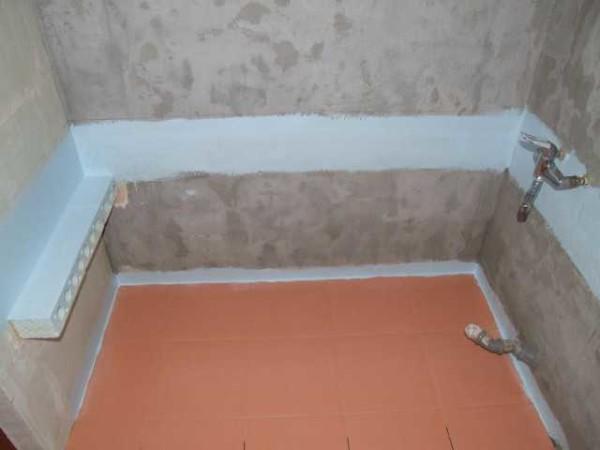

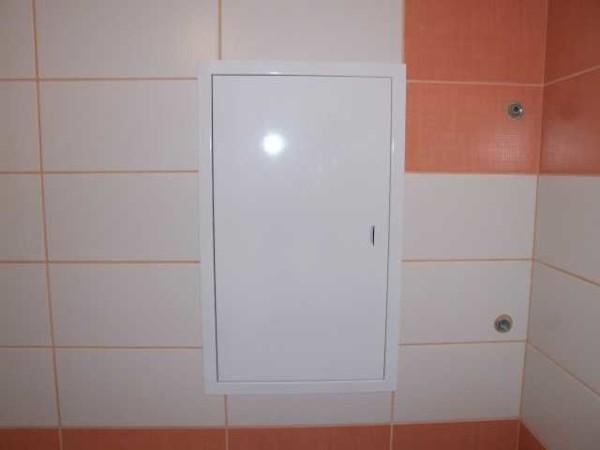
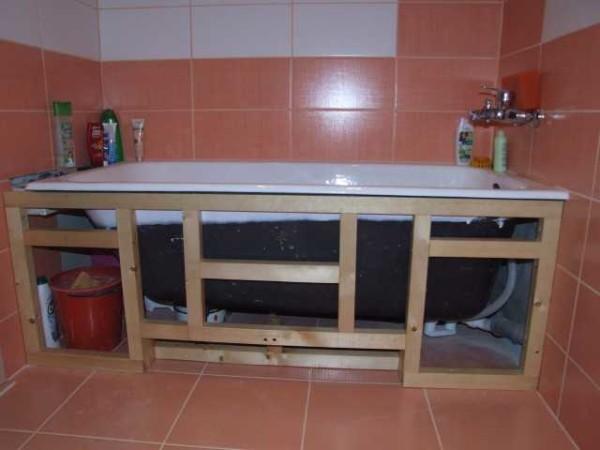
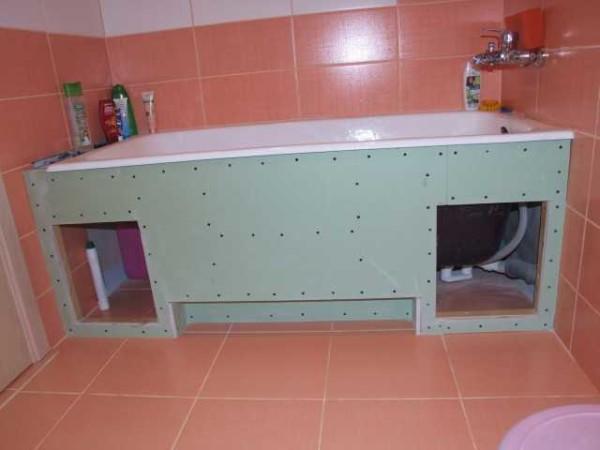
After the tiles are laid, we decorate the bathroom. Collect the frame for finishing, cover it with plasterboard (moisture-resistant), and on it install hatches and glue tiles.
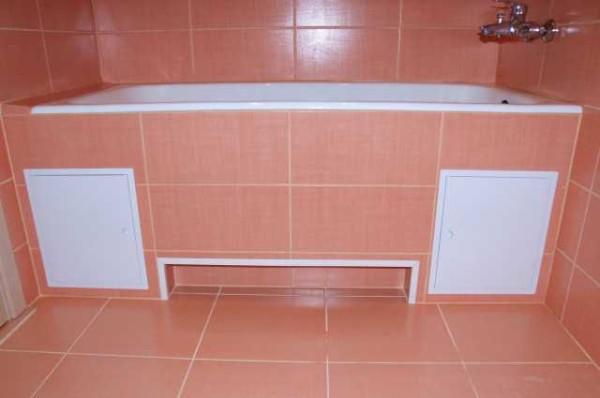
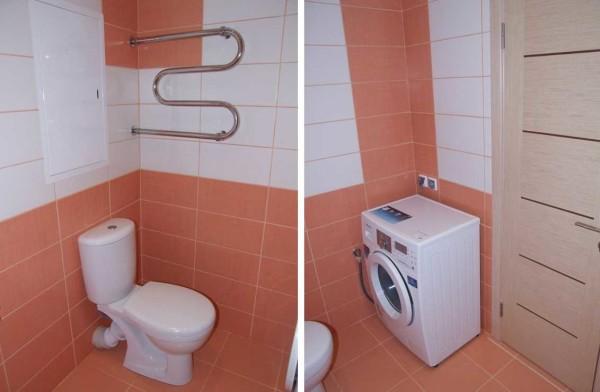
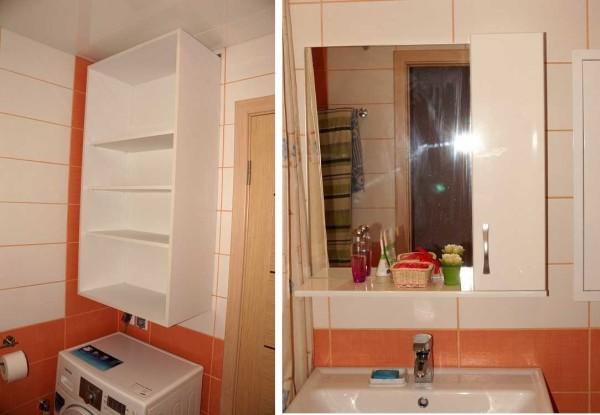
Joint bathroom is ready, let’s move to the kitchen.
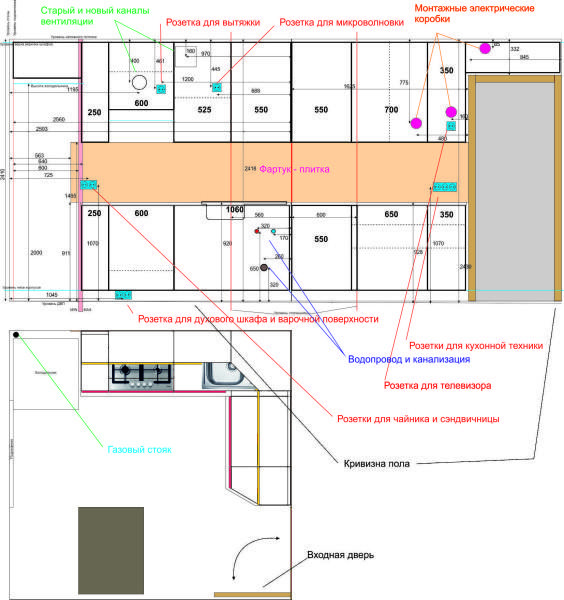
Renovating the kitchen
In the program CorelDraw developed a project of the kitchen set. It was drawn up taking into account the connection of water supply and sewerage, according to the results was developed scheme of electrical wiring. In the program it is much more convenient to do it than on a piece of paper, immediately there is an opportunity to put the existing dimensions and then from them to start.

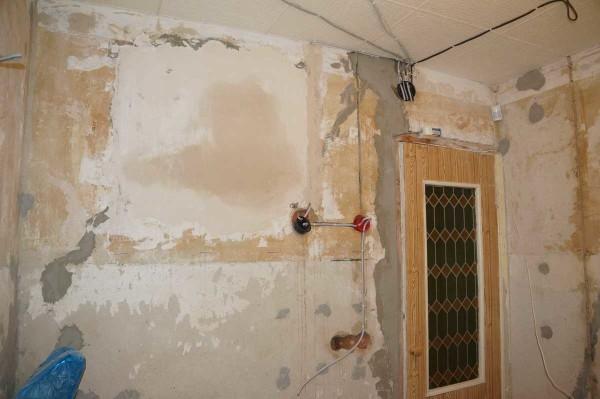
Next is the actual process of repair. It all starts with the removal of old finishing materials, badly held plaster, paint is removed. Everything is stripped down to the materials of the walls.
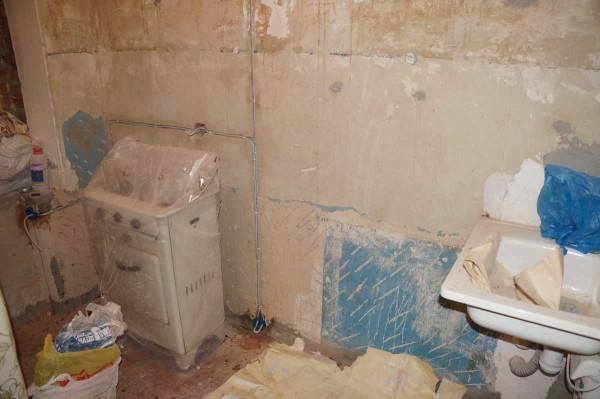
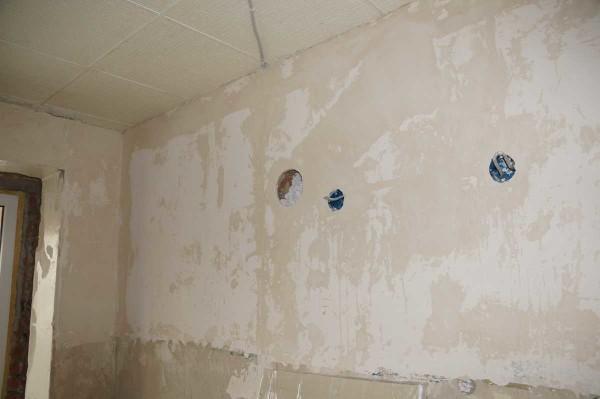
On the walls, we make the grooves, lay them wires, bringing in the places where the outlets will be located. Long and dusty. On the ceiling do not gutters – it will be stretched, so just over the top lay and fasten.
The walls are more or less even, so there is no need to plaster. Enough putty (how to putty the walls read here).
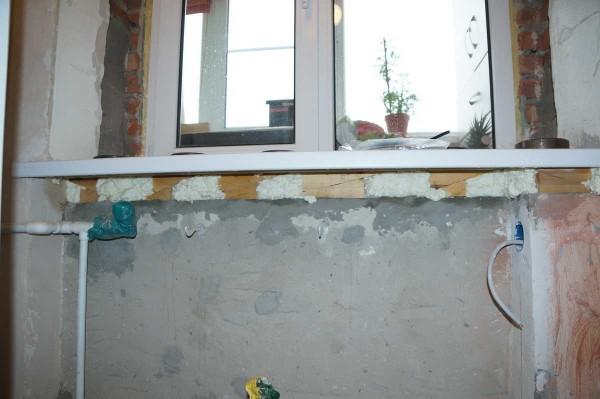
We put a plastic window and divide the heating system.

In order to expose the window sill to the desired height, the board is sawn into small bars. With the help of wedges the window sill was leveled. We put a weight on top (circles from a collapsible dumbbell), the gaps were filled with assembly foam. The foam was taken with a weak expansion – so that the window sill did not bend.
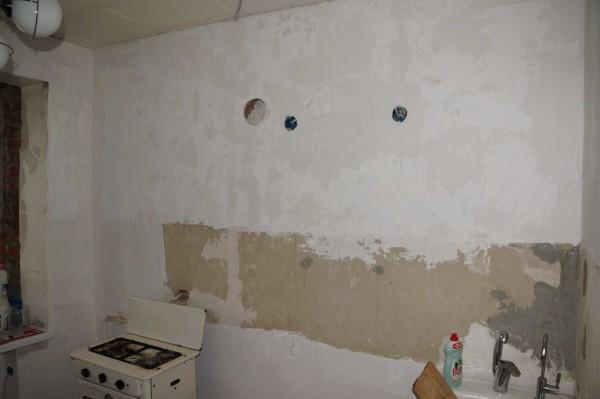
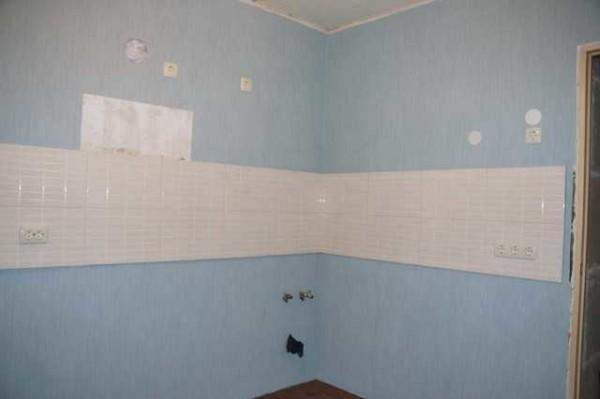
We continue to tidy up the walls. We put tiles apron. According to the level, exactly in the horizon fix the guides (better profile drywall, as wooden strips are rarely perfectly level). Although the guide is needed only for a while, it is necessary to fix normally, so that it did not shift when working. When laying the apron, simply rest the tiles on the exposed bar.
About the types of kitchen aprons you can read here.
Proceed to repair the floor. First remove the old organolite, then remove the paint from the wooden floor, level it. Long and painful. There would be enough money, you could replace it completely, but we left it as it is.
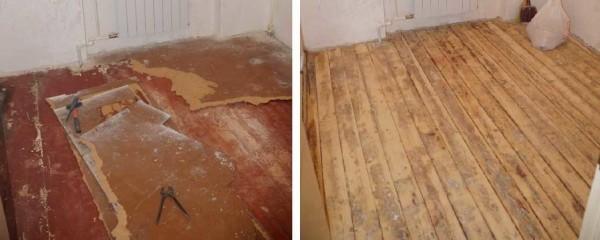
We spread fiberboard, nail it around the perimeter, and then staggered around the area. We spread linoleum on top.

Now it’s the turn of the walls. Everything is simple – we glue wallpaper.
Laminated chipboard parts were ordered at the factory according to their dimensions. Edges were glued independently. We take an iron, iron the edge, gluing it to the cut chipboard. Cool down with a wet cloth, cut off the excess with a sharp knife, and smooth the edges with fine sandpaper glued to the bar. It turns out exactly like the factory edge.
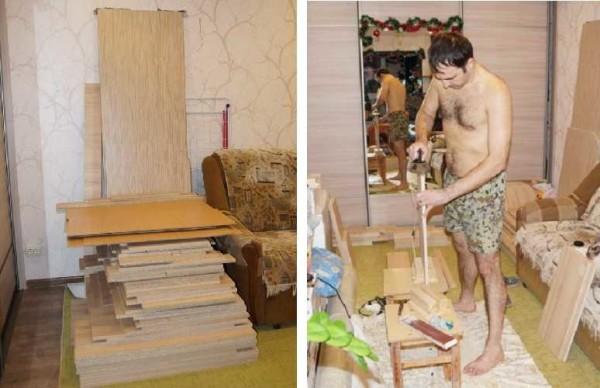
After the drawings we assemble the entire kitchen set. This – already from another opera, but in my case was included in the repair.

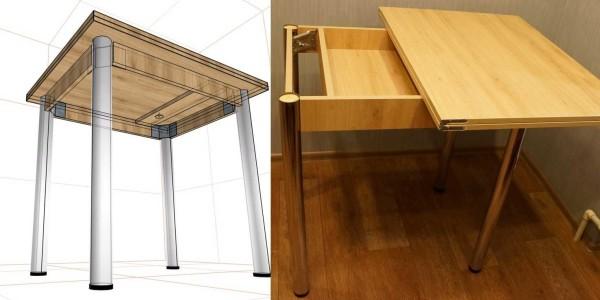
The dining table was decided to make a folding table with a swivel mechanism. It is folded along the long side of the table top, the two halves are fastened with lomber hinges, there is a turning point (in the photo where you can see the cross bar), along which the table top is turned. When folded, the table is small, when unfolded – twice as big.
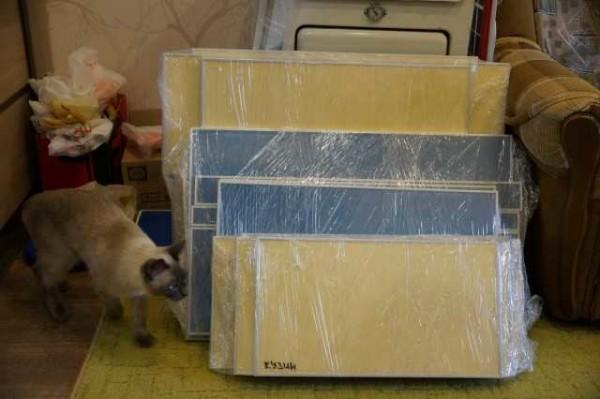
While everything was assembled, the fronts arrived – MDF, covered with plastic in an aluminum frame. Beautiful and very reliable in terms of impact resistance.
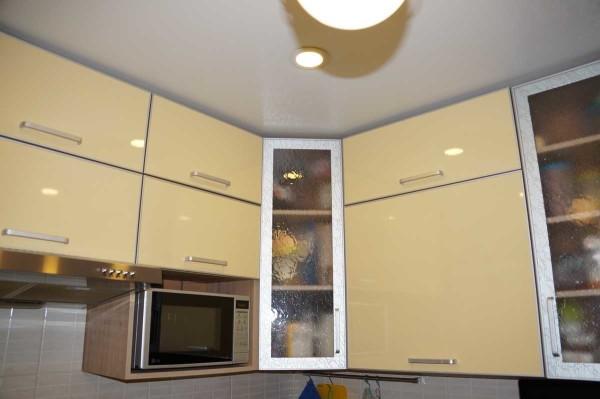
The kitchen renovation is finished. Now it is the turn of the balcony.
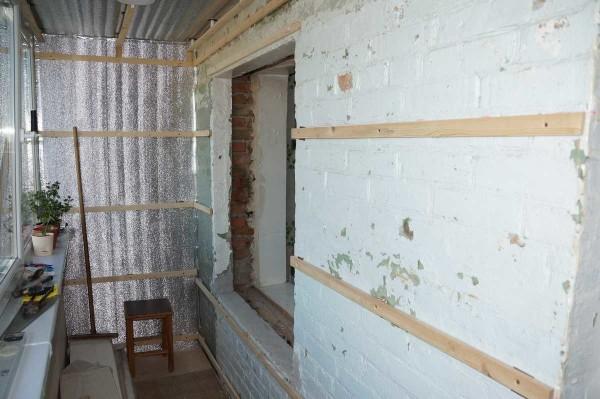
Repair on the loggia
It was decided to combine the loggia (7 square meters. m.) with the room. With small areas such an addition is very tangible. First removed all the finishing, removed the old glazing. Parapet left for now – for safety and began with the leveling of the floor for laying gas blocks.
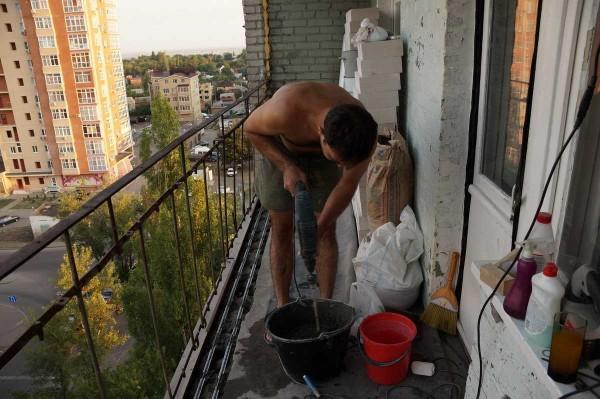
When laying the wall through the row laid reinforcing rod, the ends of the reinforcement is embedded in the walls. Under the reinforcement in the laid blocks is made a groove, in it – the rod (8 mm), which is laid with glue. (Read more about laying aerated concrete partitions here).
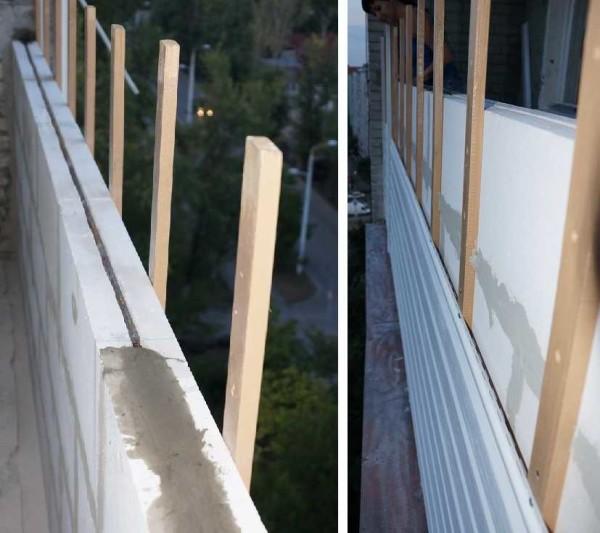
Having laid out three rows of blocks, outside fastened laths – purlin under the siding. To them immediately and attached the siding. Later to do this will be problematic. In the meantime, tied for insurance ropes to the block built into the wall (9th floor), worked bent over. The wall was assembled quickly, as was the exterior cladding.
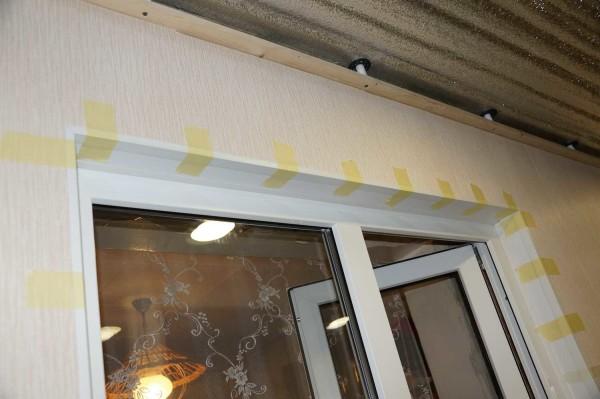
A team from the company came and put the windows in. The joint between the window and the wall is closed with a vapor barrier tape – so that warm air does not get into the microscopic gap and there is no condensation.
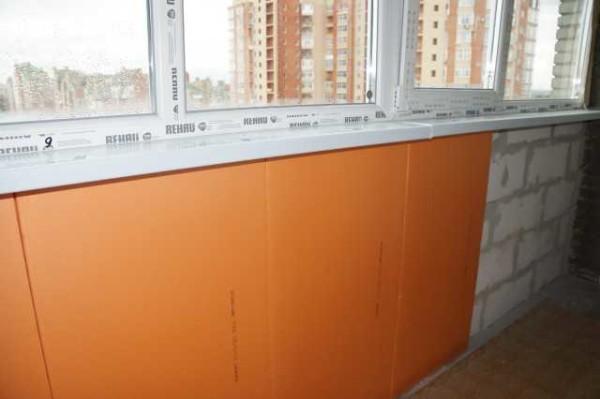
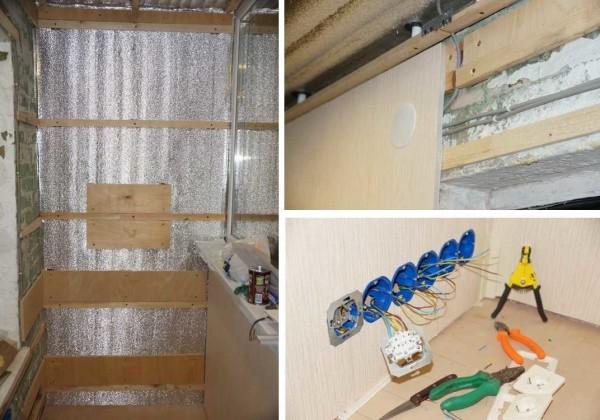
On the walls, ceiling and floor we bought insulation – extruded polystyrene foam. On the walls it is fixed with special plastic mushrooms, on the floor – on the foam. Since a wooden floor will be laid on top of the insulation, with a step of 60 cm wooden tabs are attached, to which the lagging will be attached later.
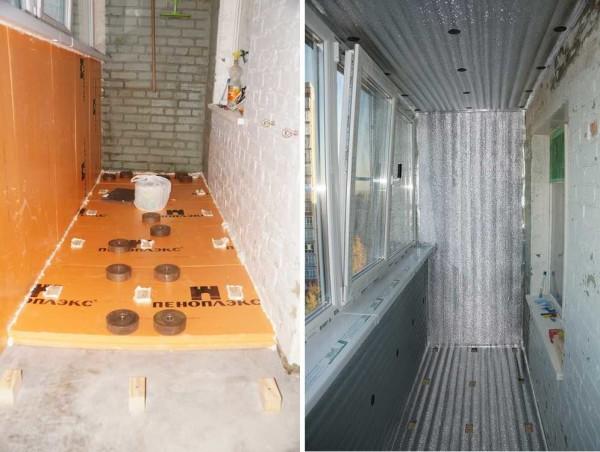
On top of the thermal insulation glue foamplex with lavsan heat-reflecting film. They advised foil foamed penoplex, but there was no foil in the stores. All surfaces are glued, except for the warm wall. On top of it nabita lath for finishing with plastic panels.
In one of the ends there will be a computer desk. In this place the plywood is attached to the wall. The table frame and monitor will be attached to it. Immediately pull to this place wiring, Internet cables, install outlets. Then you can cover with panels.
Covering with plastic panels – one of the fastest and easiest operations in the whole repair. We put the starting strip, in it we insert the panel, cut to size, shoot it to the strips with staples from a construction stapler. And so on.

One of the tasks – properly make slopes from plastic It seems to have turned out well (how to make plastic slopes read here).
Proceed to the floor. On the foam plywood lay plywood, on it – another layer of foam plywood, to which we fix the floor temperature sensor.
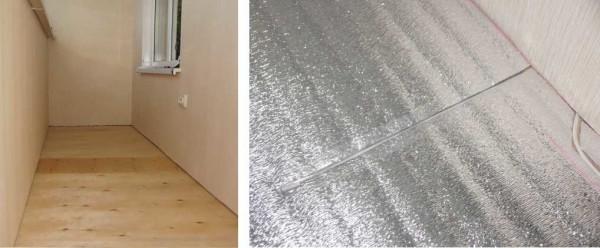
Roll out the heating foil on the floor and fix it with double-sided tape. It should not be under the furniture, so the consumption is not too high. Install the thermostat on the wall.
If we were laying laminate flooring, we could put it directly on the heating foil. We will have linoleum, so we put another layer of plywood on top of it and the linoleum on top of it.

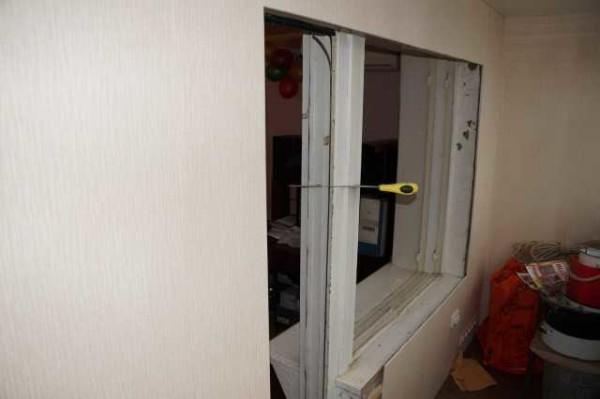
Now it’s time to remove the window side and doors to the balcony.
The remaining aperture is ennobled with laminated chipboard. We do on the principle of slopes, sit on the mounting foam. How to install slopes from LDF or MDF read here.

Next we assemble and install furniture – we bring cut parts, also glue edges, assemble.
Room
In the process of repair moved the doors. The partition is made of foam concrete blocks, so it was easy to cut a new doorway. The old one was laid with tongue-and-groove boards, fixed with metal strips and the joints were glued with painter’s net.
The rest of the finishing is uninteresting and standard: tear off the old wallpaper, lagging plaster. Primed, plastered anew and glue fresh wallpaper. In general, the repair of the room was the easiest part.
The floor was flat – on the screed laid plywood, so this time just lay the laminate on top. Easy, fast and dust-free.

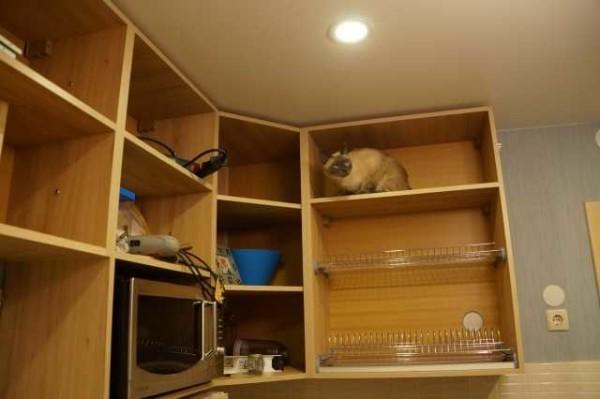
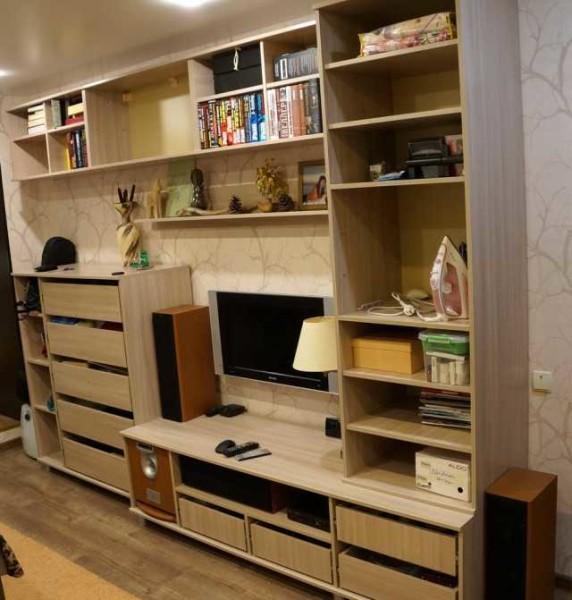
The last stage is furniture assembly. It was also developed in the same program, we ordered chipboard cut to size. A wall cupboard with compartment doors is installed in one wall from edge to edge.
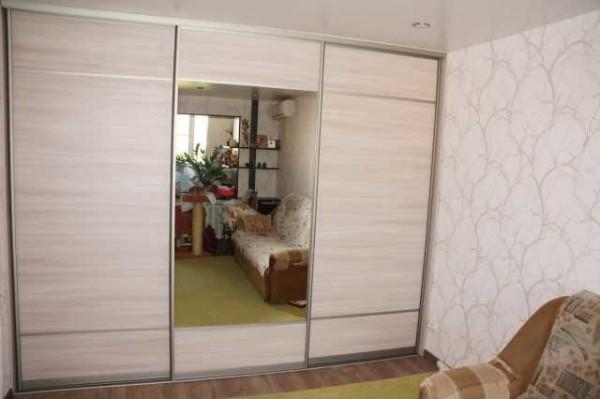
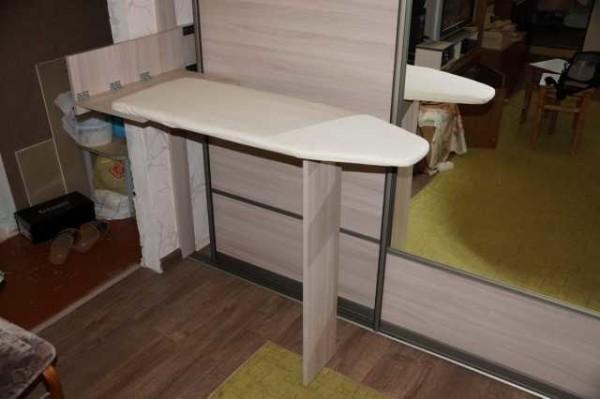
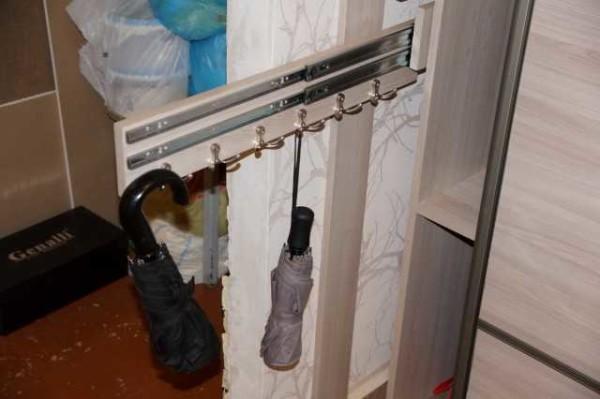
I liked two “accoutrements” – a retractable ironing board and a hanger for small things. Very convenient, by the way.
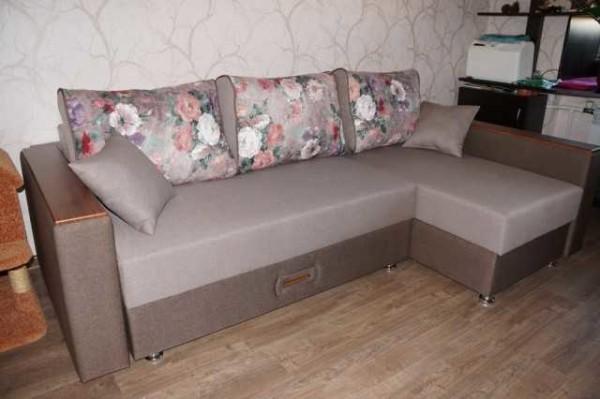
Brought the ordered corner sofa.
The free wall was occupied by shelves-cabinets, and the TV was placed there.
That’s all, the repair in a small apartment is finished. By terms it turned out to be more than a year, but everything was done in one hand. The exception – stretch ceilings and PVC windows.


