

Traditionally in our country, the kitchen is not only a place where food is cooked, but also a place for eating and private gatherings. Therefore, lighting in the kitchen should be not only practical, but also beautiful and comfortable.
Contents of this article
Principles and requirements
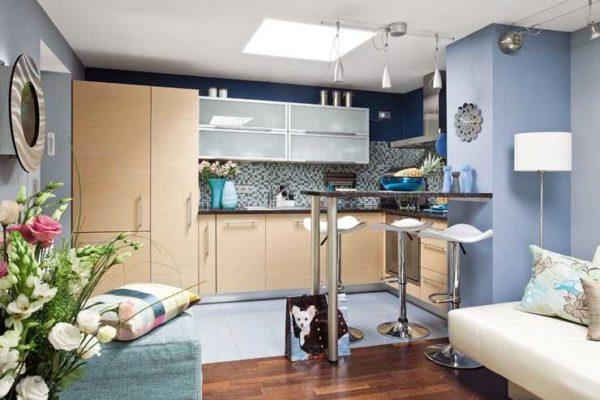
The kitchen is a room that has at least two areas with different purposes – a working area for cooking and a dining area. From the different purpose of the different requirements for lighting in the kitchen: in the working area should be bright lighting that allows you to see everything clearly, and in the dining area – softer.
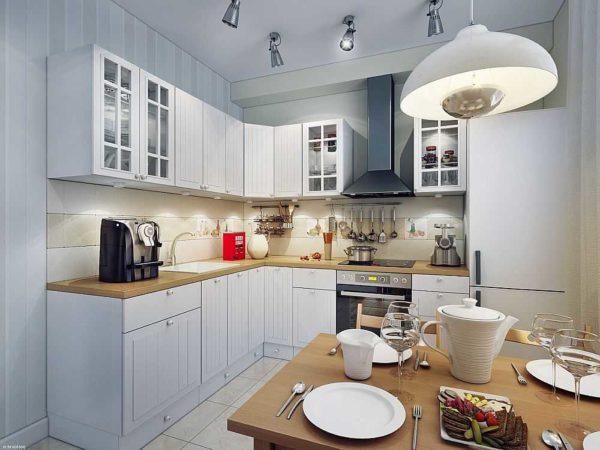
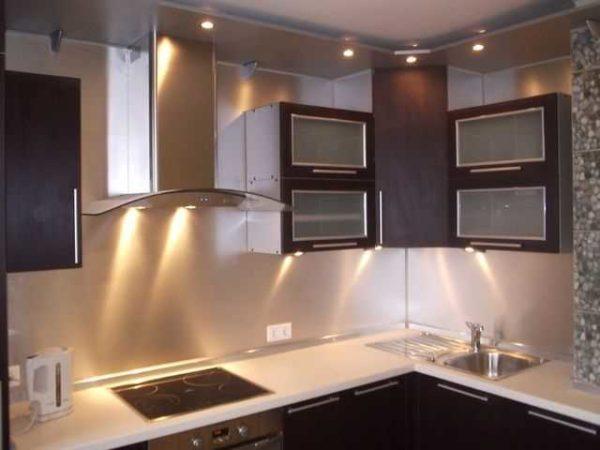
But zoned kitchen lighting does not exclude the presence of a chandelier. Its functional value is small, since the light spot is obtained in the center of the room, which is mostly empty. But in terms of equalizing uneven illumination, this method is very good. As an option, you can use a few soffits, as in the photo above, or install built-in ceiling lights, if the ceiling is stretched or suspended from plasterboard.
To think about the lighting of the kitchen should be at the stage of repair, when the electrical panel is collected, pulls the wiring, mark the places of installation of outlets and switches. Later, after the repair is over, to do this is very problematic – you have to lay the wiring on top or in cable channels.
Lighting standards
When you just plan lighting in the kitchen, the question arises, how many lamps are needed and what power. It’s simple: there are norms of illumination for each room for the kitchen is 150 Lux per square meter of area. Counting illuminance in watts is no longer relevant, since the LED lamp at 7 W can give light as 50 W incandescent or 650 Lm.
For example, let’s calculate the amount of light required for a kitchen area of 12 m2. To do this, its area is multiplied by the norm: 12 m2 * 150 Lx = 1800 Lx. And since 1 Lux is equal to 1 Lumen, it is necessary to install bulbs that in total give at least 1800 Lm.

If you decide to do zoned lighting, that is, the work surface will be illuminated separately, there will be a light source above the table, it makes sense to count everything separately. To do this, the plan of the kitchen should be divided into zones, calculate the area and based on these figures to select the number of lamps and lamps for them. Just take into account that two lamps at 50 W will not give as much light as one at 100 W, and about 1/3 less.
Lamp type, color and light
Another important consideration. When selecting lighting, it is best to choose lamps of the same type: halogen, LED, daylight. In an extreme case, you can combine two types, but all three are better not to use. They give different lighting and it is almost impossible to get a sane result. About incandescent lamps, it does not matter, since they are used very rarely: they require too much electricity, giving out a small amount of light.
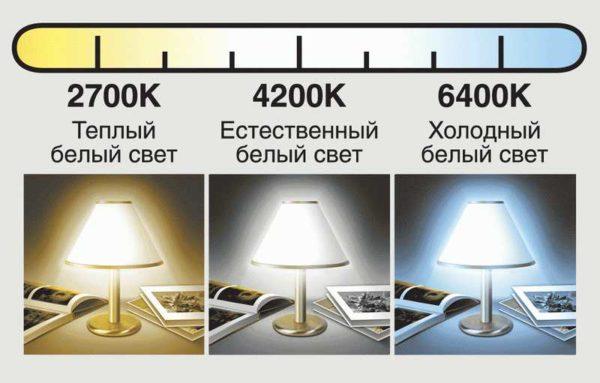
In addition to the type of lamps, you should choose lamps that give light of the same color, which is also called the color temperature of the lamps. They can give light with a blue, yellow, white shade. Basically, you have to choose, but the best option = natural or neutral. It is better for the eyes and for the perception of colors.
General lighting in the kitchen
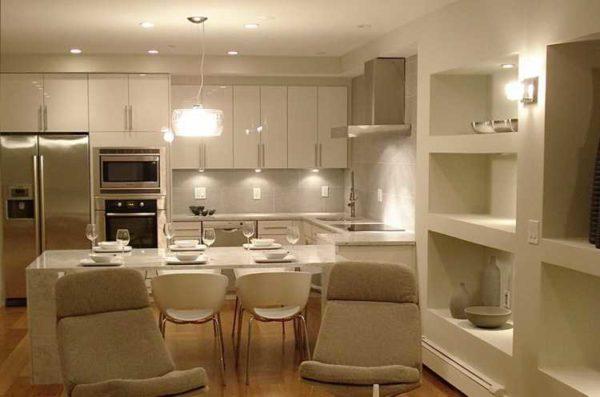
Now let’s understand what ways you can make general lighting in the kitchen. The traditional option is a chandelier. But it does not fit into every modern interior, nevertheless, it has a place.
Often kitchens have not a square, but a rectangular shape. In this case, you can find a chandelier, stretched in length. For a long and narrow room, this is the best option, which will ensure optimal light distribution.
With low ceilings, you can not hang a chandelier – it will interfere. The way out is to find a lamp almost flat. You can square or round – whichever suits the chosen style of kitchen design.
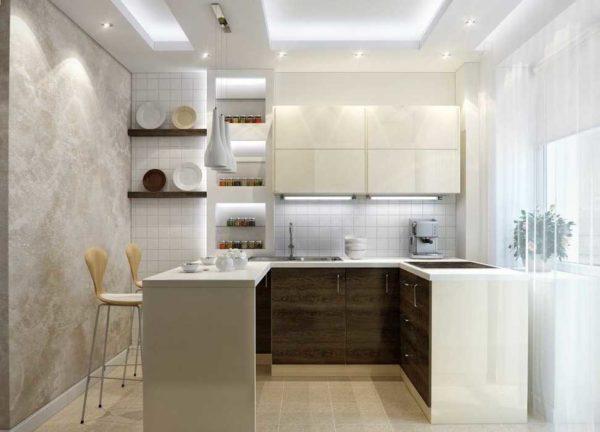
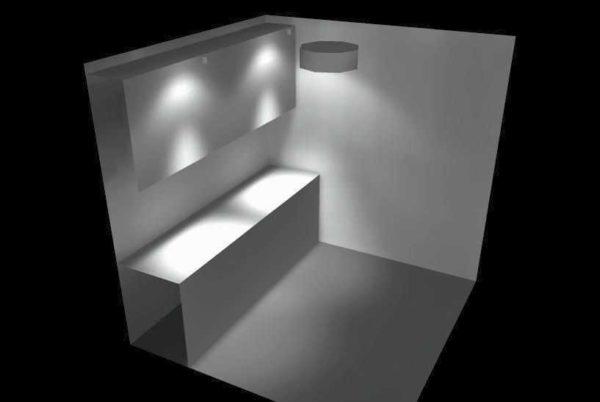
If you are going to make a suspended or stretch ceiling, you can “scatter” spotlights on the surface or create a pattern of them (read here about the ways of placing spotlights and not only). You can also do backlighting around the perimeter of the “central” zone. Such lighting in the kitchen visually helps to raise the ceiling, make the room a little more spacious.
All these ways can be combined, so the number of options is very large. But it is important not to forget that there is still lighting of the other two zones and look for lighting fixtures at once and for it, because they should match in style.
Lighting of the dining area
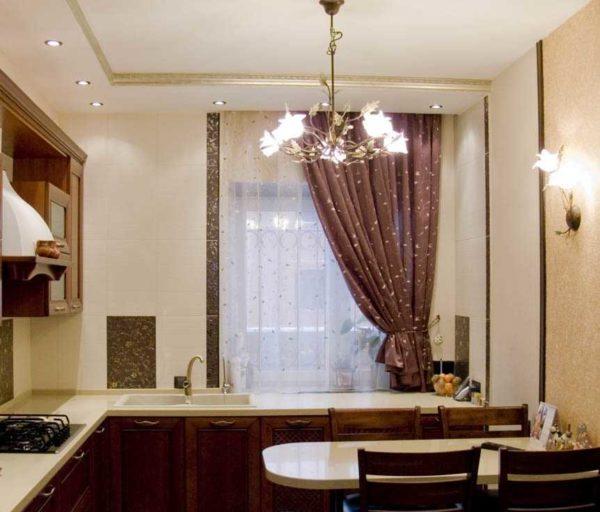
Light near the dining table can be made in just two variations: a sconce, one or more lamps on a long cord from the ceiling.
Sconces can be used if the table is near the wall. When choosing the location of the wall lamp is guided by two considerations: the degree of illumination and convenience. The lamp should not interfere, for which it is located at a height of 60-80 cm above the tabletop. To make it illuminate the entire table, it is desirable to find a model that allows you to lead the plafond away from the wall.
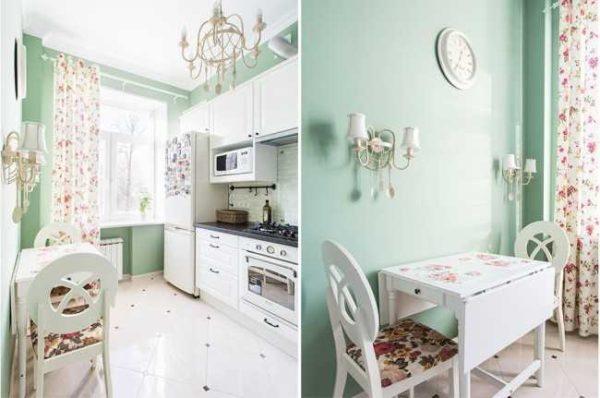
To illuminate the kitchen not only bright, but also beautiful, all lamps-chandeliers-bra are selected in the same style, which should also harmonize with the overall style of decoration.
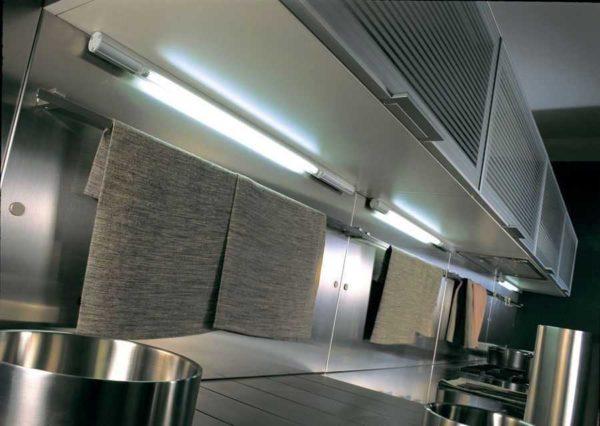
Illumination of the working surface
In lighting the working area in the kitchen, there are more nuances. First of all, you need to decide where to place the lamps, then choose their type, type and shape of lamps.
Choosing the location
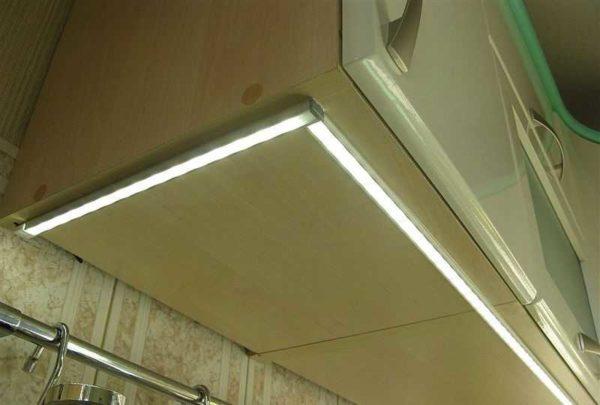
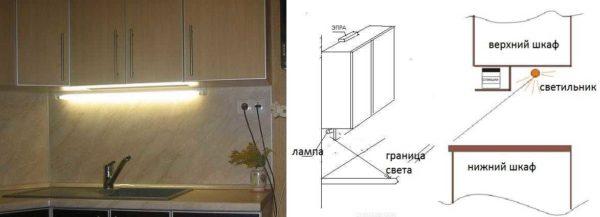
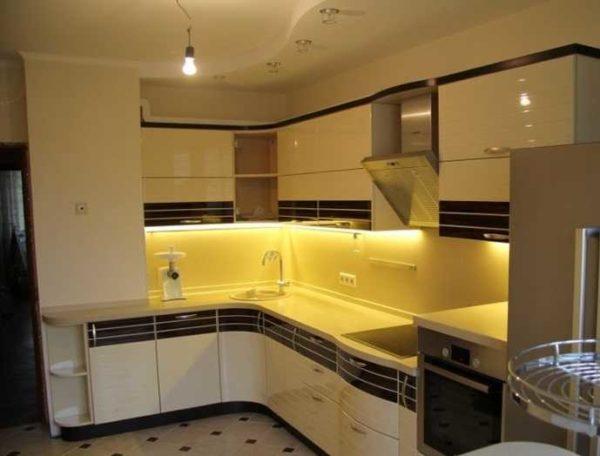
When illuminating the working area in the kitchen, lamps are usually located on the underside of hanging cabinets. And this is the best of the possible options. Because all the others are much worse. For example, if the light source is on the ceiling (position 1 in the photo), standing with your back to it you cover the light. Even if the lights are located along the line of the kitchen set, but high up – on the ceiling or just above the level of the upper cabinets (position 2) – only a narrow part of the work surface at the edge is illuminated, the rest is in shadow. Because the illumination of the working area in the kitchen do fixing lighting devices at the bottom of the cabinets. Then the lighting in the kitchen has a pronounced zonal character, but work so much more convenient.

Here again there are options: lamps can be placed closer to the wall, in the middle, closer to the outer edge of the cabinets. The best option is closer to the outer edge (position 4). This way the lighting is most effective and there are fewer shadows in the working area. The third option is also good. It is somewhat worse in terms of illumination, but more practical in implementation.
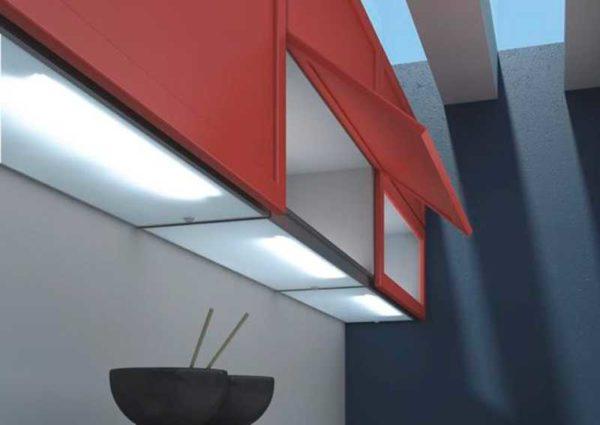
So that backlighting in the kitchen does not get in the way
If the illumination of the working surface in the kitchen to do at the bottom of the cabinets, other problems arise:
- Not everyone is satisfied with the appearance of the lights attached in this place.
- The light hits people sitting at the table in the eyes.
Both of these problems have one solution: you need to put a decorative bar, which will cover the light fixture and limit the spread of light. The lighting in the kitchen is softer and the light fixtures themselves are not visible.
The location of the bar, its height, the position of the lamp should be selected on site: light sources have different heights, different brightness, the light flux can also be directed differently. Therefore, the parameters of the bar are selected experimentally. Ideally, if the light will not even fall on the floor, and will only illuminate the tabletop.
As an option, the bar can be designed as a small shelf for various kitchen trifles. Usually decor or spice jars are displayed here. If you don’t like this idea, just make a bar. If you think that even the bar spoils the look or it just does not fit into the style, make the cabinets double bottom, hiding the light sources inside. In this case, you can install frosted glass, which will soften the light.
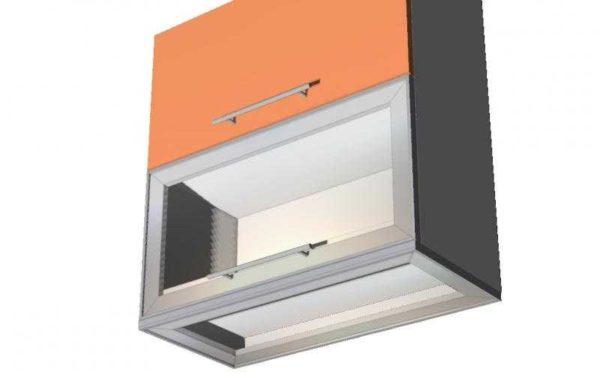
The door in this case is made along the entire length, although it is not necessary. To avoid problems with the attachment of glass, on the perimeter of the bottom you can install an aluminum corner, on which you can simply lay a piece of frosted glass or translucent polykrbonate cut to size.
Spot lighting
When organizing lighting in the kitchen in the working area, it is immediately necessary to determine what type of light sources you will use. There are two options – point and tubular. In the case of using spotlights, you get such a zebra, the contrast of which can be negated by more frequent installation of bulbs.
The plus side of this solution – the lights are quite decorative and looks beautiful. The minus – it is not always convenient when cooking. Another disadvantage: spotlights have a fairly large height and put them only with a second bottom in the cabinets.
If you choose this way to make lighting in the kitchen, take LED lamps. Now they are the most economical – with low electricity consumption give a lot of light, last a long time. In this case, their undoubted plus – they practically do not get warm, so that the furniture will not threaten anything. A slightly worse option – halogen lamps (warm, “pull” a little more electricity), even less economical – fluorescent lamps with a conventional socket and the most unfortunate – incandescent lamps.
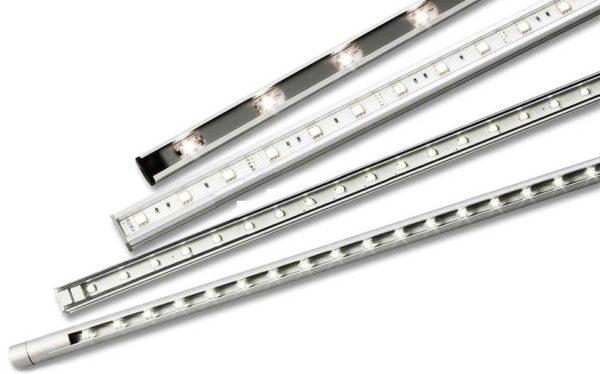
Linear light sources
When using linear lights, the illumination is almost uniform, since the illuminators can be mounted with a distance of a couple of centimeters between them.
When choosing light sources for linear illumination, there are even more options and the range is constantly expanding. Perhaps there are already new means that few people know about yet. And so far there are three: LED tape, LED and fluorescent fixtures. There is also neon lighting, but it is quite heavy in installation, and it costs more. Therefore, lighting in the kitchen with neon tubes or flexible hoses almost do not do.
LED strip
Tape and LEDs can be mounted simply on the furniture, because it has a sticky layer. But this layer is unreliable, because they prefer to fix it in some way – double tape, staples from a stapler. If you intend to fix the tape directly on the furniture, choose models with a high level of protection – IP44 and above. But it is better not to take those that are sealed in a tube – in the conditions of the house they overheat (especially in the kitchen), quickly fade, and soon burn out. For this case, it is better to take the types filled with lacquer or other protective composition.
When choosing an LED strip to illuminate the work surface in the kitchen, you need to pay attention to the brightness and size of the crystals. Choose the largest 50*50 or 50*75, and it is better if they are arranged in two rows. Their total power should give not less light than determined in the calculations. On the types of LED strips and the rules of their installation read here.
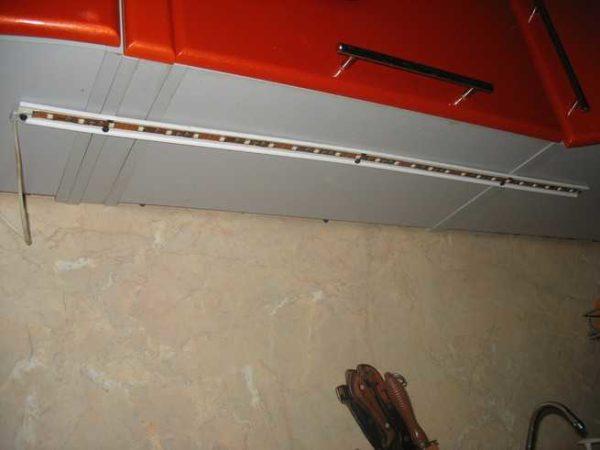
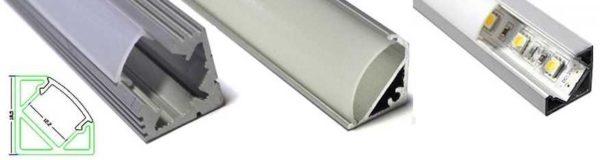
Install LED strip can be installed in special profiles (they are also called cable channels or trays). They are usually made of aluminum, have a transparent or translucent removable front panel. Inside there may be a shelf on which the tape itself is attached. These are the most convenient types, and in others you have to do something wise.
The pros of installing LED lighting in such a tray – there is no point in worrying about the degree of protection of the tape, decent appearance. Disadvantage – less bright light, so that the power of the crystals should be more calculated. In any case, lighting in the kitchen using LED strips is becoming increasingly popular. That is the reason for the ease of installation and low power consumption.
LED lights for the kitchen
LED lamps can be not only spot or conventional – in the form of a pear with a standard base. There are also in the form of tubes.
They are installed on clips – plates that are attached to the furniture, in which the tubes are inserted. Some can be mounted on magnets. Responsive metal plates are attached to the furniture (can be on double-sided tape), and the lights are simply attracted to them due to the magnets built into the body (Sensor model).
Fluorescent luminaires
Tubular fluorescent lights are the traditional way of illumination. They are good in that they are included directly in 220 V, while LEDs require a special adapter that will issue the required voltage.
The disadvantages have long been known – light pulsation, which negatively affects the eyes. There is another not-so-pleasant moment: LEDs are more economical. They consume very little electricity and last longer. Their service life is calculated in thousands of hours. Fluorescent lamps have to change much more often (once every five), but they cost less. In general, it’s up to you to decide what type of bulbs you want to use in your kitchen lighting.
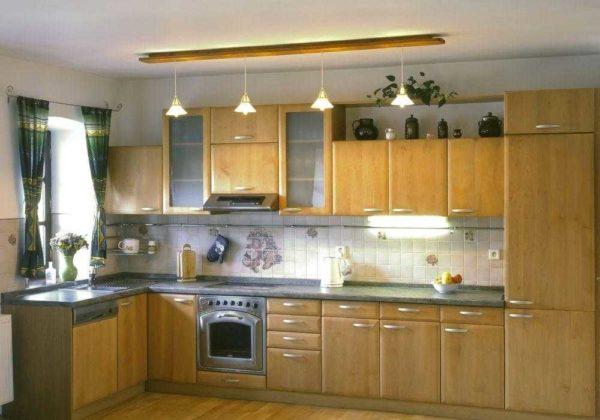
If you decide to do the illumination in the kitchen with fluorescent lamps, the optimal size is the G13 base (diameter 26 mm). In length, they can be 60 cm, 90 cm, 120 cm, 150 cm. There are different models today – from the usual to quite cute (as in the photo above).
You can, as told above, hide such lamps in a double bottom, installing a light-diffusing glass. In this case, you can buy the most inexpensive lamps. But it is unlikely to save money – the cost of the profile for the installation of glass and the glass itself or equal or may even be more.
As you can see, lighting in the kitchen is better to do multi-zone, and use at the moment it is better to use LEDs. The lamps are quite expensive, but they are economical, shine brightly, work for a long time and do not get warm.
")


I just redid my kitchen lighting and wow, what a game changer! Swapped out those old fluorescent lights for some warm LEDs. It totally brightens up the space and makes cooking way more fun. Plus, it’s super energy-efficient! Highly recommend giving your kitchen a little glow-up!
Totally feel you! I switched to LED lights in my kitchen last summer, and it was such a vibe change. Cooking feels way cozier now. Plus, my energy bill dropped, which is a win-win! Definitely a glow-up! Gotta love those warm lights!
For sure! I switched to LED bulbs in my living room last winter. It totally transformed the space! I noticed my mood lifted while hanging out with friends. Plus, my bills went down too! Cozy vibes and saving cash? Can’t beat that! Warm light really does make a difference!
Absolutely, I get it! I switched to LED in my living room last winter, and man, what a difference! It felt so much homier, especially during movie nights. Plus, my electric bill was way lower. Definitely a smart move, and I’m all about that cozy glow too!
Absolutely, I feel you! I replaced my kitchen lights last summer too. Those bright LEDs transformed my space completely. It’s amazing how a little change can make cooking feel more like a vibe and less like a chore. Definitely a glow-up worth doing! Great call!
I totally get the struggle with kitchen lighting! Last year, I changed my fixtures to brighter LED ones, and it made such a difference. Cooking feels way more enjoyable now. Can’t believe I waited so long to upgrade! Good lighting really does make a big impact.
I totally revamped my kitchen lighting last month! Swapped out those old bulbs for some warm LEDs, and wow, what a difference! Now, it feels so cozy when I’m cooking or just hanging out. Gotta love how good lighting can change the vibe!
Man, I totally revamped my kitchen lights last week! Swapped out those old bulbs for some cool LED strips. The vibe is on point now! Cooking feels like a breeze and the whole place looks super fresh. Definitely a game changer for whipping up meals.