Bright spots of flowerbeds and flower beds on the plot are not only a way to decorate the plot. They are a great distraction from some of the problem areas. This, by the way, can also be guided when choosing a place. On how to make flowerbeds and flower beds with their own hands in the dacha, in the yard of a private house and we will talk further. Not a simple matter, of course, but it does not require knowledge of higher mathematics.
Artiklens indhold
What are there
First of all, let’s find out what is the difference between flowerbeds and flowerbeds. A flowerbed has clear boundaries and shape: circle, oval, square. Most often it is separated from the rest of the site and elevated above it. This type of landscape design we most often observe in parks, on the streets.
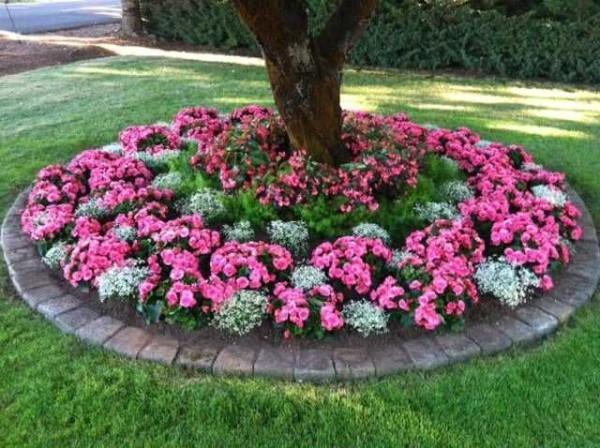
Flower bed is any place of planting plants of arbitrary shape. It can be with a fence, and it can be without. Hanging on the fence or wall boxes with flowers – this is a flower bed, planted plants in old overshoes – too, a flower spot on the lawn and a ribbon along the path – these are all flower beds.
The terms have been dealt with a bit. Now about what they are. They are distinguished first of all by the time of flowering:
- Regular. In them, all plants begin to bloom almost simultaneously. According to this feature there are spring, summer, fall.
- Irregular – the flowering time is selected so that the flowering of different plants continues from spring to fall.
According to the type of plants planted there are annuals, perennials, and there are mixed. Some are planted with only one type of plant. They are called monocloombes or monoflowers.
There are elevated, they are also called high, there are tiered. Their device consists of several stages: first of all, the fence is built, then in the ready-made form the earth is poured and plants are planted.
With the theory is all, let’s move on to practice. We start with where you can make flowerbeds and flower beds with your own hands.
Where to make
When the yard is spacious, it is just fine. Find the most viewable place and there you break the flower bed. What to do if the whole territory is already mastered, but you want to plant flowers? You can always find a place. For example, near the house you have a platform concreted or lined with slabs, stone, etc. At the wall of the house you can make an excellent elevated or even tiered flower bed with your own hands. And there is no need to break the pavement. Right on it, a fence of brick or stone is built. It is desirable to put them on the solution, and then from the inside cover with a waterproofing impregnation (bituminous mastic), so that when watering, water does not flow onto the path. Then you can pour the soil and plant flowers.
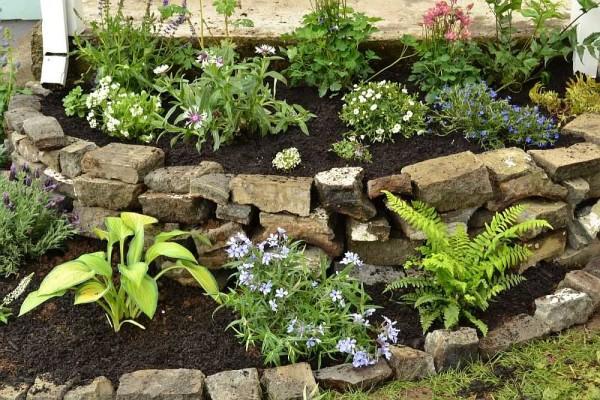
Break flower beds along fences. This is a common way to decorate, for example, a long driveway to the house. But it can also be done in different ways. Here, as well as near the lawn, a high flowerbed looks better.
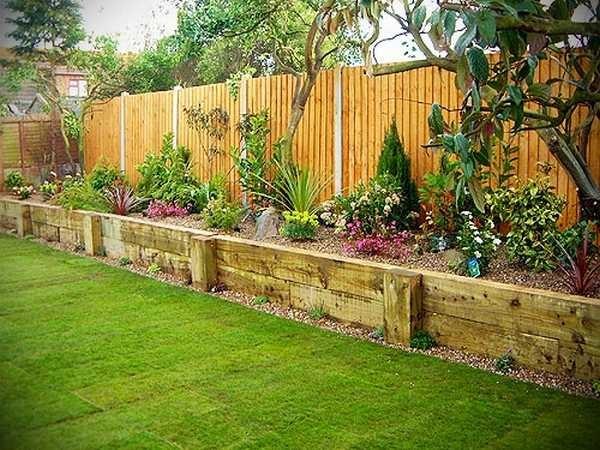
You can make a flowerbed in front of the gate. Street beds should be durable. Therefore, for their execution usually use stone fences: just in case. If desired, you can make tiered flowerbeds. They are more difficult to build, but much more attractive than flat.
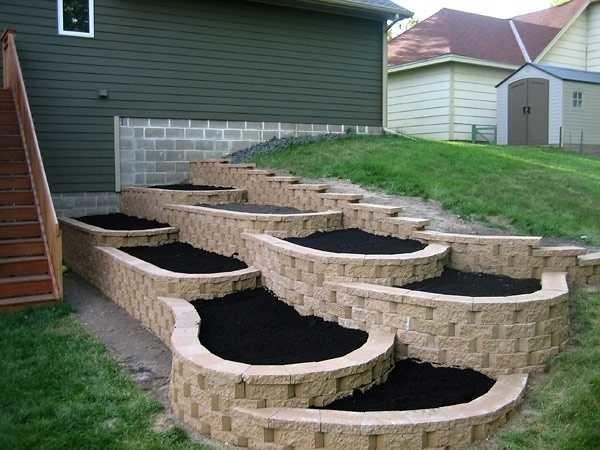
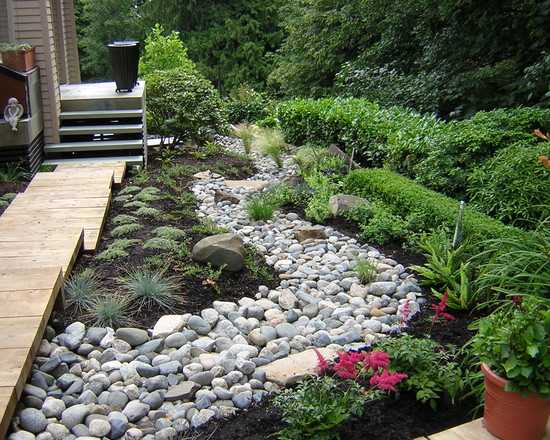
Even if the yard is surrounded on all sides by walls, and then you can find a place for flowers: Hang on the walls, in pots or in the form of a flowering wall, put a stand, etc. Flowerbeds in the yard of a private house with their own hands can be made of everything and everywhere. It is important only not to make a mistake with the style: it should coincide with the design of all buildings. Some ideas in the photo gallery.
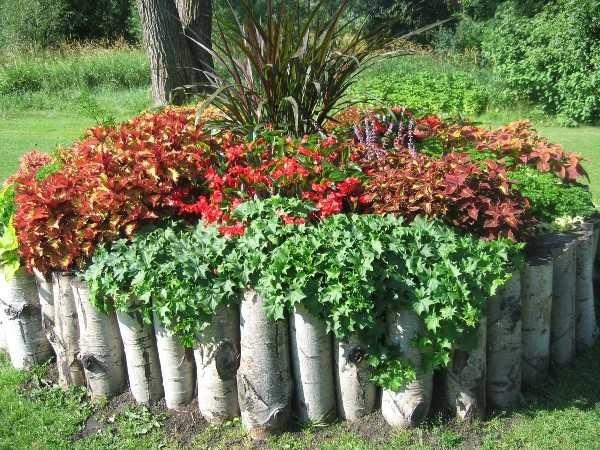
Make a flower bed at the dacha can be made near the tree. They already belong to the category of garden. Do not want it to be banal? Come up with an interesting fence.
About the basics of landscape design, read here.
From what and how to make a fence
The most common fencing for flowerbeds – brick, wild stone, boulders. Brick can be used to make a structure in a strict “parade” manner. Boulders and wild stone are already more chamber, non-standard fences.
Since they have a decent weight, under the brick or stone fence for flowerbeds often make a foundation. Not if one or two rows are laid, but if the rows are four or more. If the device is on a concretized site, you can do without a foundation at all, if the bed is broken on the lawn or soil, it is desirable to make it.
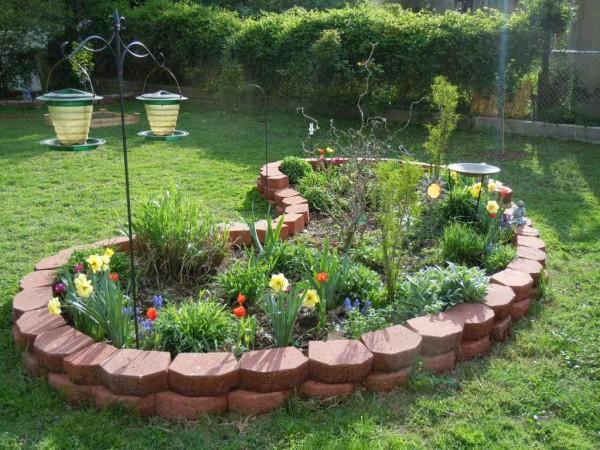
The first thing to do on the marked area is to remove the sod. If you plan to make a high flowerbed, around the perimeter dig a ditch about 20 cm deep and 5-10 cm wider than the planned fence. This ditch is filled with crushed stone, tamped, poured with liquid cement-sand mortar. For 1 part of cement M400 take 4-5 parts of clean sand, mix and pour water to the state of sour cream. This semi-liquid solution is poured over the crushed stone. When the concrete sets – a few days you need to wait – you can lay out the curb for flowerbeds.
How to make paths is written here.
How to make a curb from brick or stone
Flowerbeds and flower beds with their own hands made in the fence of stone and brick are the most expensive in the device, but also the most durable. They will stand for several years without problems.
Stones or bricks are put on a cement-sand mortar, similar to the one used to pour crushed stone, but thicker. There should not be much mortar between bricks – 5-8 mm. If you put cobblestones or natural stone, it is easier to first put them together “dry” picking up the size, and then move with the mortar.
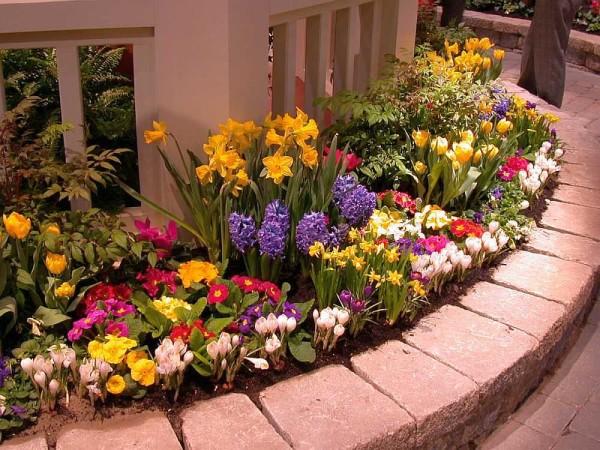
A few ideas of how to design stone borders for flowerbeds and flower beds in the photo gallery below.
If you do not need to so raise plantings, and you only want to mark the boundaries of the planted with flowers of the site, but you are afraid that if you just dig a brick, it will fall, then you can dig a trench, fill it with rubble, and in the rubble to insert flagstone (sawed into plates of stone, it can be found in the section selling materials for exterior decoration of the house) or standing put bricks. Around the installed fence elements, pour liquid cement-sand mortar. After two or three days, when the concrete will set, you can continue the work: pour fertile soil, but load the curb or step on it is not allowed for about a month: so much time is required for it to gain strength.
On the same principle, you can make the framing of the flowerbed with your own hands from cut strips of slate or shingles. The flowerbed can be made of metal or asbestos slate. Remained scraps after the device of the roof – use them. Here’s what can turn out.
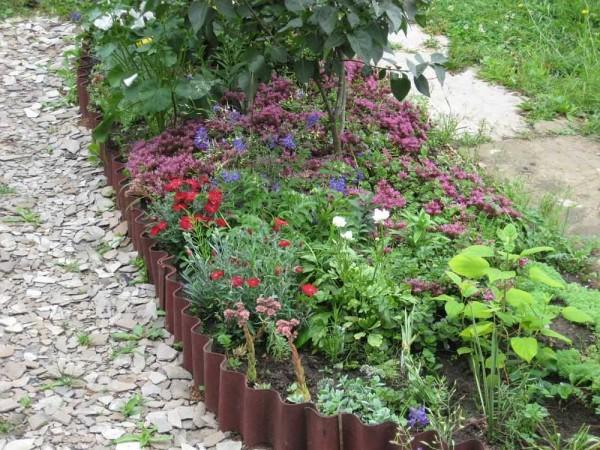
From wood
Making a fence for a flowerbed from wood is easier: it weighs not so much. On the other hand, it is less durable. Flowerbeds and flowerbeds made with their own hands from wood can stand a few seasons. Then you will have to restore or remake them. For ceremonial flowerbeds is used very rarely, but at the cottage or near a private house flower bed, fenced with a wooden border – original and stylish. Especially if it echoes the style of design of buildings on the site.
Use for the design of dacha flower beds can be wood in any form. Make flowerbeds from boards, small-diameter roundels (small logs), block house (boards, one side convex, similar to a log) and any other wooden remnants. You can even saw a withered tree into chunks, bury them / hammer them into the ground, making such an unusual flowerbed.
How to make a wooden border? Find a small-diameter log, saw it into chunks of different lengths and split them in half. You will get blanks, as in the photo on the left. Lay them on a flat surface with the convex side down, one next to the other. Take a flexible thick wire and use staples from a construction stapler or bent nails to fasten the wire to the flat side of the wood. One wire is nailed at the bottom, the second – at the top. You get a flexible border of wood, which can be used to enclose a flower bed of any shape (pictured right).
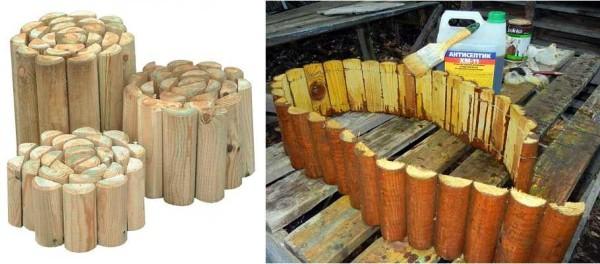
To ensure that wood does not lose its attractiveness and does not rot, it is treated with protective impregnations. They can simultaneously give it color, and can be colorless. From such assembled in a ribbon of wood you can make flowerbeds with your own hands of any shape. You dig a shallow groove, a little wider than your fence, insert there a fence for a flowerbed and cover it with earth, tamping it down.
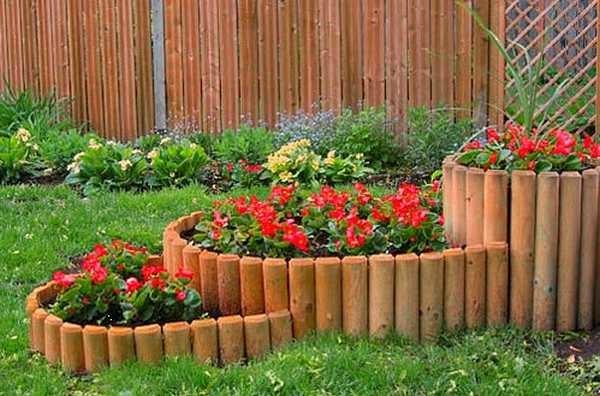
From boards and timber
In our country, one of the most inexpensive building materials is wood. That’s why they build from it a lot and often. Make of wood and fence or fencing for flowerbeds. The easiest way to fence a flowerbed with boards. For the support will need a few bars – not very thick, but wide. Approximately 50*150 mm and trim board 20 mm thick. You can choose its width yourself so that several pieces installed on the rib will give you the necessary height.
Impregnate the wood with protective impregnants, when it dries you can start working. First install the support bars. They can be sharpened at one end and carefully hammered without damaging the upper surface (put a piece of bar and beat on it), or you can dig a hole, depth of about 50 cm, in it to install the bar, bury and compact the earth around. The bars are installed in increments of 1-1.5 meters, depending on how wide the flower bed will be. The wider and higher it will be, the more weight will have to hold, so more often put supports.
Søm brædderne fast på de synlige støtter. De kan sømmes fast indefra, så støttestængerne bliver synlige, eller de kan sømmes fast udefra. I den anden mulighed vil kun væggen af brædder være synlig. Bræddernes samlinger skal være på stængerne.

Blomsterbede af brædder kan laves meget forskellige i form. Selv i form af en pyramide. Et par interessante ideer er nedenfor.
From plastic
Der findes en hel del typer af færdige hegn til blomsterbede, som er lavet af plastik eller plast. De har særlige ben, der nedsænkes i jorden langs kanten af det beplantede område.
Men dette handler ikke om dem, men om blomsterbede af improviserede materialer. For eksempel kan du lave et anstændigt hegn til et blomsterbed af plastflasker.
De vælges efter liter og farve. Så hegnet kommer til at se bedre ud. Skær derefter halsene af på samme niveau, og stik dem ned i jorden. Dette er en mulighed for fastgørelse for at skabe en lav kantsten. Den anden vil vise sig at være meget højere. Den kan bruges ved opbinding af højere planter. I dette tilfælde skal du tage en træbjælke, til den i en vis afstand, så flaskerne viste sig tæt ved siden af hinanden, sømme hætterne. Flaskerne skrues fast i hætterne. For at gøre et sådant plasthegn til et blomsterbed mere stabilt, er det gennemboret gennem ledningen tættere på bunden og tættere på stedet for indsnævring i nakken. Den færdige del af hegnet er installeret og fastgjort på jorden.
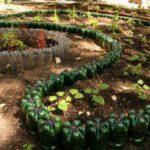
På trods af at materialet er smidt væk, hvis alt er gjort nøjagtigt, ser et sådant hegn anstændigt, pænt, smukt ud. Billeder af hegn til blomsterbede og blomsterbede fra plastflasker er på billedet nedenfor.
- Omhyggeligt lavet hegn til blomsterbede af plastflasker
- Hvis du kigger godt efter, kan du se den stang, som flaskerne holdes på.
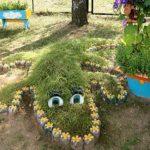
- En sød krokodille lavet af flasker i landskabet vil appellere til børnene
- Udvalgt efter størrelse og farveflasker skaber et smukt hegn. Blomsterbede og blomsterbede med egne hænder med deres hjælp kan laves ved dachaen eller i nærheden af et privat hus
Kunne ikke gå forbi ... et hegn lavet af gamle cykelhjul. Originale blomsterbede kan laves af alt muligt skrammel. Hvis der er talent, selvfølgelig...
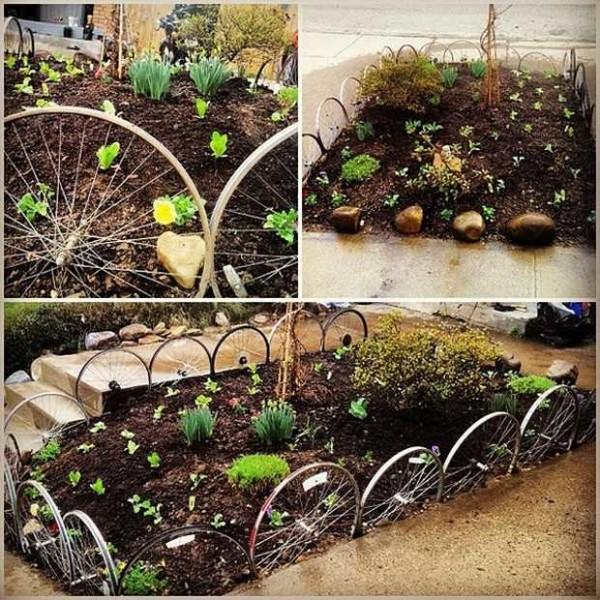
Hvordan man organiserer drypvanding, kan du læse her.
Original and unusual flower beds and flowerbeds
Nogle gange undrer man sig over, hvad folk formår at lave af originale, usædvanlige og ikke mindst smukke ting. Så i designet af blomsterbede. Jeg ville aldrig selv have troet, at en gammel kuffert, overtrækssko eller hat kunne forvandles til et blomsterbed eller en vase til planter. Se selv - billederne lyver ikke.
Tire beds
Helt uinteressante bildæk forvandles til smukke blomsterbede. Dækkene skæres op, og kanterne slibes med en bolsje med en smergellignende dyse. De resulterende vaser vaskes med en sæbeopløsning og tørres: Planter udvikler sig ikke godt, hvis du ikke vasker maskinolie, benzin og andre lignende stoffer, der kommer ind, ud.
Når det er tørret, males det. Maling af dæk (dæk) kan males med almindelig oliemaling, kun overfladen skal være affedtet, tør og ren. Det holder i flere år. Der findes specielle malinger til dæk. De koster meget mere - de er lavet til dækstyling. Når malingen er tør, kan du installere et færdigt bed af dæk og hælde jord i det og plante planter. Hvordan du kan lave et blomsterbed af dæk med dine egne hænder, eller rettere sagt, hvordan du designer, se nedenfor (fotogalleriet ruller automatisk, hvis du har brug for at stoppe, skal du klikke på billedet).
Læs her, hvordan du laver en dam på siden.
From old things
Om det vil overraske dig eller ej, ved jeg ikke, men der bliver plantet blomster selv i gamle ting. Voksede børn ud af gummistøvler? Hvorfor smide dem væk? Du laver et par huller i sålen til dræning, fylder med jord og planter et par blomster. Du får originale bede til blomster og ampelplanter.
Støver du af i skurets gamle gaskomfur? Det kan også bruges til et blomsterbed. På samme måde med den gamle kommode - skufferne trækkes ud til forskellige niveauer, hæld jord i dem og få et blomsterbed i flere lag. Har du et gammelt badekar? Eller en gammel bil? Plant blomster i dem. Det bliver et stilfuldt og originalt blomsterbed. I fotogalleriet kan nogle lide usædvanlige blomsterbede fra gamle ting. De kan ikke kun sættes på dachaen, men også i gården til et privat hus.
Nu har du sikkert ikke et spørgsmål: "Hvad kan man lave et blomsterbed af?". Nu er det svært for dig at beslutte, hvad du præcist vil lave det af....

