
")
Steaming up the house in the summer when you could be spending time outdoors? Not a good idea. And cooking or making twists is even worse. It is much more pleasant and useful to spend time under a canopy or in a light, ventilated building, which many people call a “summer kitchen”. Summer kitchen with their own hands is built easily, especially open versions.
Artiklens indhold
Open summer kitchen: types and photos
Open is more like an open gazebo or veranda. A very good option for the warm season. Not in all regions, even in summer, you can be outside for a long time. Then make closed summer kitchens – it is already a small house, which can be built by any technology that you find most attractive.
Summer kitchen – an annex
Let’s start with open areas. If it is supposed to transfer the main activity to fresh air for the summer, it will be more convenient to attach the summer kitchen to the existing house. In this case, a veranda is made. Most often first make it open. It is easiest to make a wooden extension. In a very open version, it can be just poles that support the roof.
This option is very good for southern regions, where most of the year you can be outside for as long as you want. For more northern regions or if it is a house of permanent residence, it is usually decided to make the extension more closed. First they make a railing, and then they often think about closing the spans with something else: they want to extend the “period of use”. As a result, the open summer kitchen becomes closed.
The most common material for this kind of annexes – wood. It is plastic, forgives many blunders, which can later be corrected without disassembling the structure, so it is easy to work even without skills. It is also light, so the foundation for a summer kitchen made of wood can be made light – column or pile, you can – with a rostver.
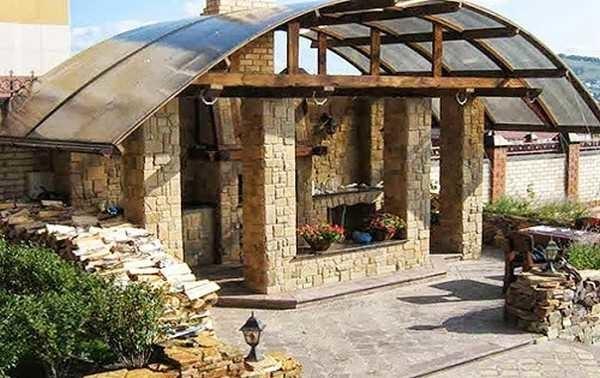
The second most popular material – brick or decorative stone. If there are “straight” hands and compliance with technology and with this material can work amateur builders. For the construction of a house without experience should not be taken, but to put the pillars and partitions under the summer kitchen you can try.
But since even a post made of brick or stone weighs not under a hundred kilograms and more, the base under it requires a more solid. If you take into account that it will still take the load from the roof, you will have to make poles or piles with good load-bearing capacity.
If you are thinking about then putting brick walls, it is better to immediately pour a pile-and-tape foundation, and the tape is buried below the depth of frost. If this option is not suitable – the depth of freezing is large or soils do not allow, you will have to either make a monolithic slab, or to abandon the brick partitions, making them according to another technology, though their same wood or frame-shield technology. Built with your own hands summer kitchen is good that knowing all the features of the design to details, you can later modernize the building.
Freestanding building
Someone does not really like the kitchen odors that can get into the house from the annex. Then erect a small building at some distance from the house. Summer kitchens are an almost obligatory attribute of private houses in southern regions. Before the era of air conditioners, cooking in the heat indoors was a real torture: high temperature “overboard”, heated walls, and even the heat from the stove – the conditions are hellish, and the rest of the room is also heated. That’s why they made at least small free-standing houses-gazebos, in which in cities they put a gas stove and a cylinder with liquefied gas, in villages they put a small stove. Some even cooked on “kirogas” or primus.
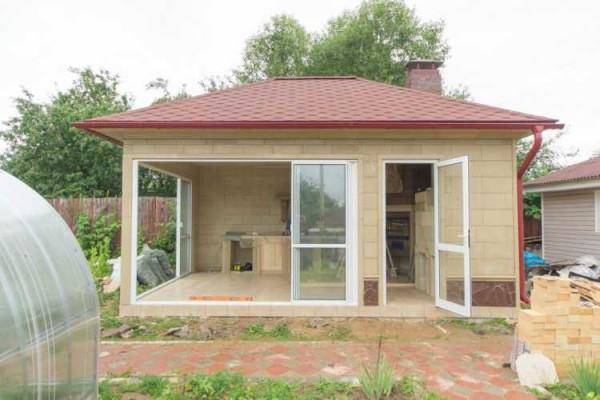
Modern climate technology makes it possible to negate all these inconveniences, but freestanding summer kitchens still continue to be built. They are often still used as a guest house – making them with an attic floor.
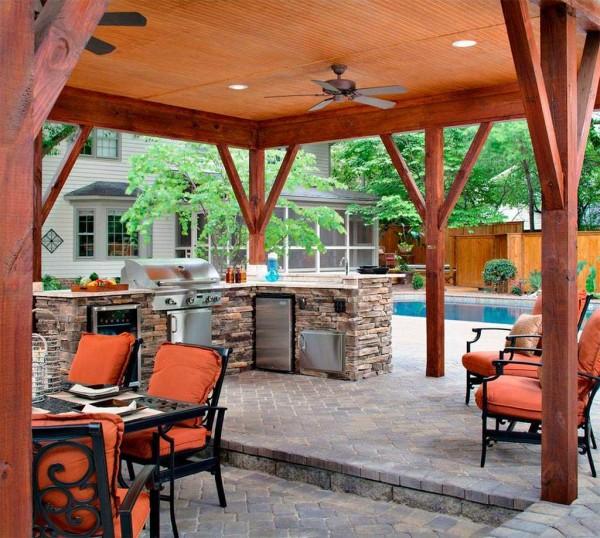
The cheapest option – poles that support the roof. They can be wooden, brick or combined – consisting of a plinth made of stone, and the top – of timber. This is the best option in terms of operation: wood is protected from most precipitation, and at the same time the weight is not very high.

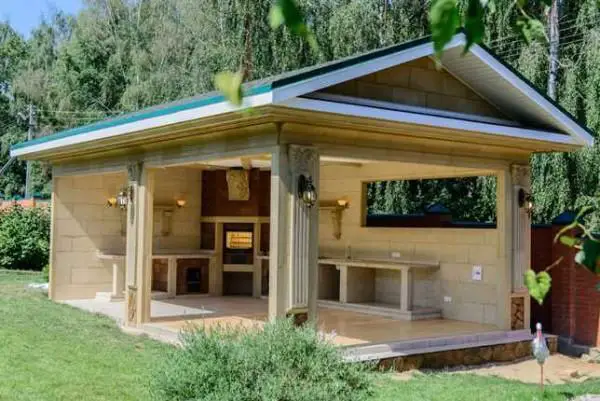
Options for freestanding outdoor summer kitchens – a lot. They are built according to the same type as gazebos, only, perhaps, have a larger size. The technology of construction of an open area from brick can be seen here, the process of building from wood is described here.
Sometimes, they can have platforms for braziers or barbecues. How to make a simple brazier from brick read here, about a brick barbecue – here.
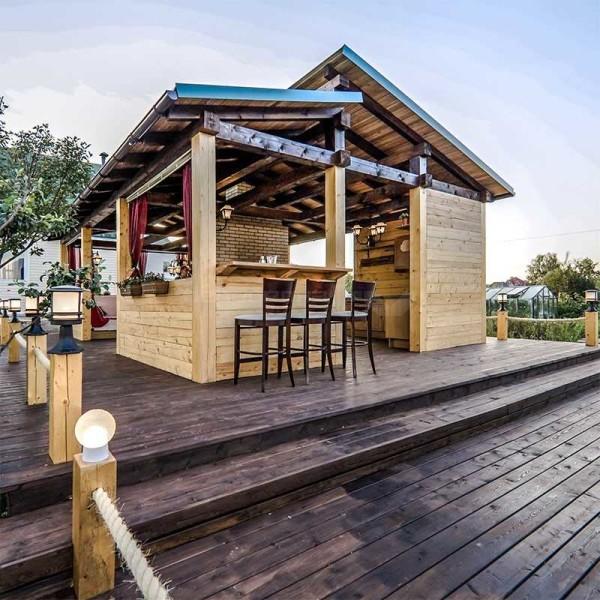
What to make the floor of
The floor in such a kitchen can be boarded. It is easier to make, but many people are confused that the wood will be almost unprotected. You can solve the problem in two ways. The first is to use effective protective impregnations – like oils or waxes for wood, designed for outdoor work. They do not create a shiny surface, but protect well and from moisture and dirt. Using varnishes for summer kitchens is not a good idea. They start to break and crack, to renew the coating the old one has to be removed completely, while oils and waxes require only a thorough pre-cleaning, after drying a fresh coat can be applied.

The second method is to use a wood-polymer composite (WPC) rather than wood. These are planks that are made up of a mixture of wood fibers and polymers. They look and feel very similar to wood. The only difference is that almost do not change size depending on humidity, however, the thermal expansion is present. Such boards are called “decking” or “planken” depending on the profile of the board. There is also “garden parquet”. This is a covering made of the same material, only assembled into boards, similar to parquet. They can simply be laid on the ground, without any preparation.

The advantages of WPC include a long period of operation without changing its original properties. It is counted in tens of years, but varies greatly depending on the manufacturer. The minus is not the most democratic price. Perhaps this is due to the fact that the technology is relatively new, not yet particularly mastered, although there are Russian manufacturers of similar products.
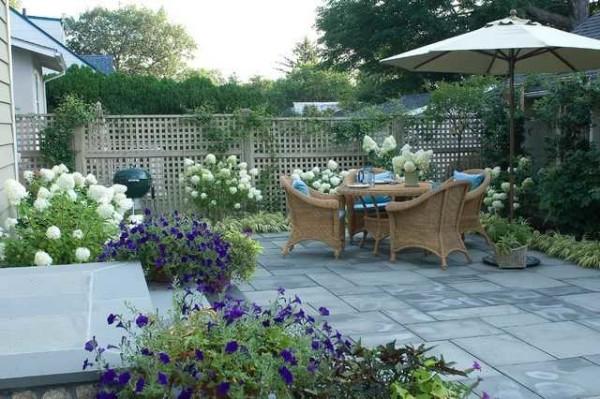
Better tolerates the effects of weather stone or specialized tiles, but the device of such a floor is not easy. If you just put on the gravel and sand backfill, locking in the fall, in frosts, the tile can crack or peel off. We have to make an insulated monolithic slab, observing all the technology: with sand and gravel layer, insulation, reinforcement, pouring concrete. The dimensions of this slab – 50-60 cm larger in perimeter than the planned building. In general, the costs and work are no-nonsense, although it is convenient in operation.
After a time when the concrete gains strength (at least 2 weeks should pass, and this is at an average temperature of +20°C), you can lay the coating. You can use flagstone – stone sawn into layers, porcelain stoneware or frost-resistant tiles.
A simpler option is to pave the area with paving slabs. But this is only a summer option. But – without fiddling with the foundation.
If the summer kitchen with their own hands is built on the dacha, this is probably the best option. It turns out inexpensive and practical.
Closed summer kitchen
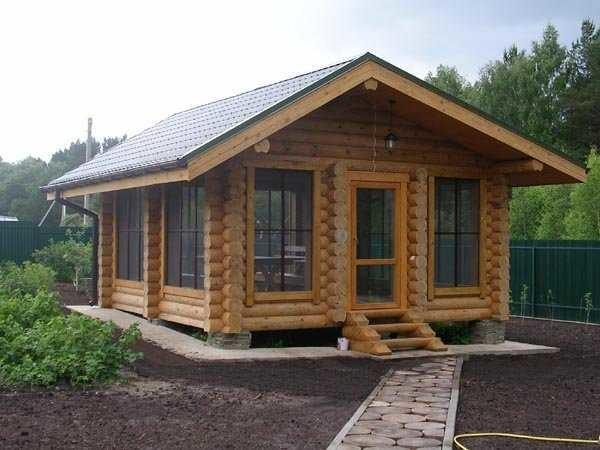
Those who want to have an all-season summer playground for sitting or cooking, put more capital structures. Most often these are buildings on the frame technology – quickly and relatively inexpensive, more expensive, but more capital – from logs or beams.
In the case of frame construction, everything is very simple: with a small step put uprights of timber (you can even splice the boards), then they are clad on both sides of any finishing material. What – at your choice, though wagon – wooden or plastic, blockhouse, any other material. Inside, to save money, they are often covered with plywood, fiberboard, fiberglass, OSB or something similar. If desired, it can be insulated. Clad the frame on one side, lay the insulation (usually mineral wool), mount the cladding on the other side. You can insulate not only immediately, but after some time, only have to remove the cladding on one side.
Another frame building is convenient because it can be given any shape, and the foundation can be relatively light – depending on the soil – pile or strip. Such foundations are also needed for wooden buildings – made of logs or beams. Here all the rules are the same. It is important to find or order a project, and to assemble – a matter of technique.
Naturally, you can build and from any other materials – from foam blocks – to brick or even bute. It’s all about the amount you plan or can spend on this construction. Still inexpensive to build from foam concrete, aerated concrete, some building blocks, adobe. Slag block, as well as adobe, can be made independently, so that the choice of material – only for you, and then everything is built according to all the rules. Only with one deviation: insulation for a summer kitchen or do not do at all, or make it minimal. Another point – heating, as a rule, is absent, and this must also be taken into account when choosing materials for construction and finishing.
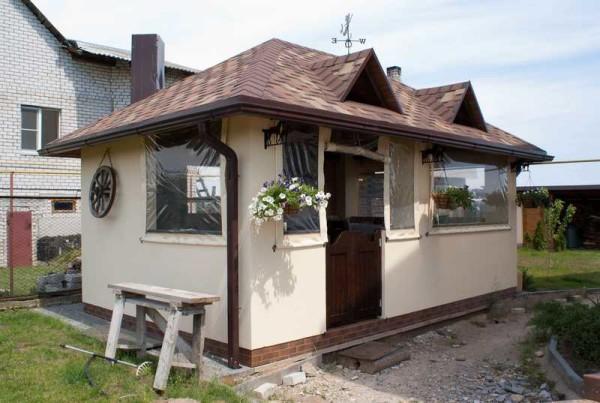
Photo report on the construction of a summer kitchen with an open veranda
Built a summer kitchen with the opportunity to “sit in the air”. Therefore, the option with an open veranda was chosen. The base of the house is made of 200*200 mm timber, internal partitions are made of 150*100 mm. Outwardly like lafet, but it is ungodly expensive, so the timber was hewn to create a similar relief.
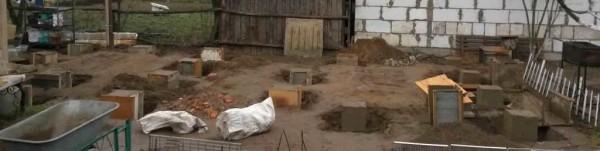
The foundation is made columnar. Since the building is light, the soils are normal, the posts were buried only 60 cm.
The strapping was made of 200*200 mm timber. It was previously impregnated with antiseptic. The corners were connected as usual – we made notches. Crossbeams were mounted on metal U-shaped plates. The timber was not fixed rigidly, as the heave will still be, so that the building had the opportunity to “walk”.
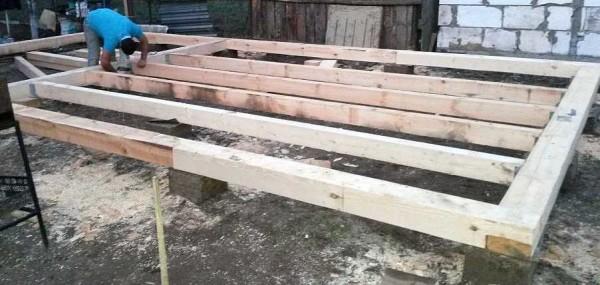
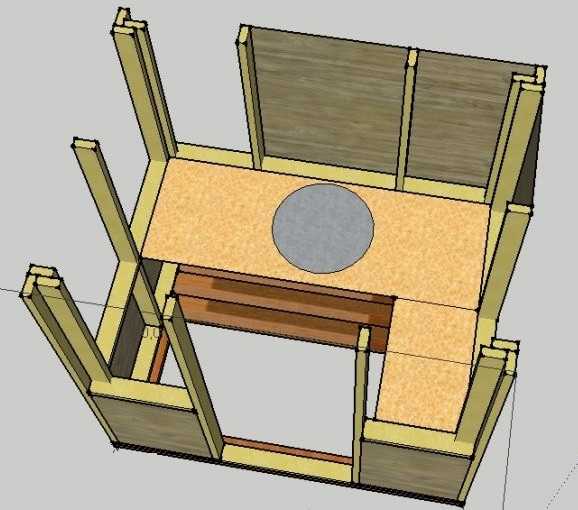
The posts were made of 200*200 mm timber, the inner filling of 150*100 mm.

The walls were assembled quite quickly and without problems: there were no nicks, just the required length pieces of timber are nailed to the posts. The roof is made gable, with a small angle of slope. On one side of the rafters are more – to make a canopy on the side of the veranda, which will also cover from slanting rain.
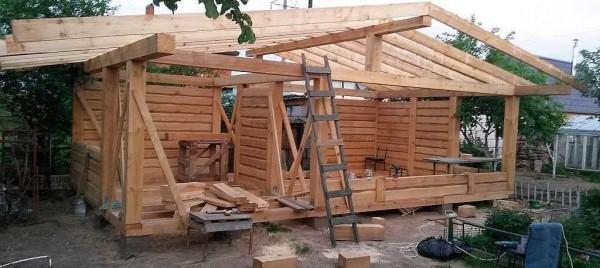
The ceiling trim is made of untrimmed board, which was then brought to the mind on their machine.

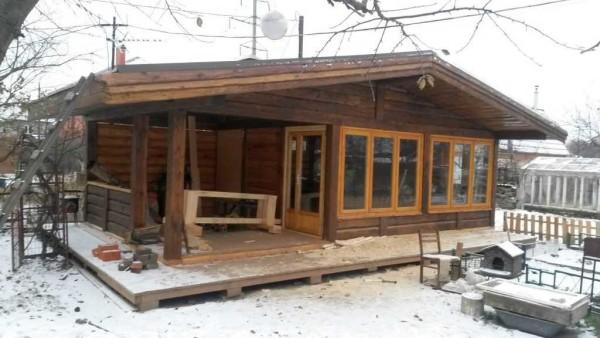
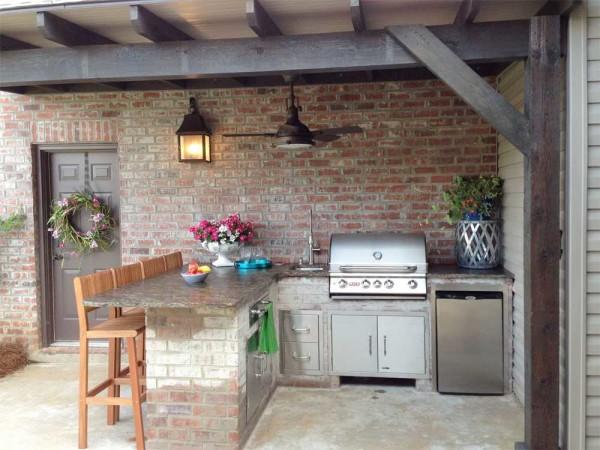
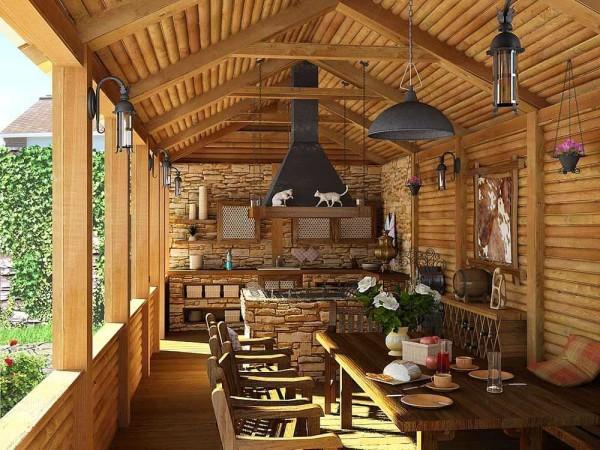
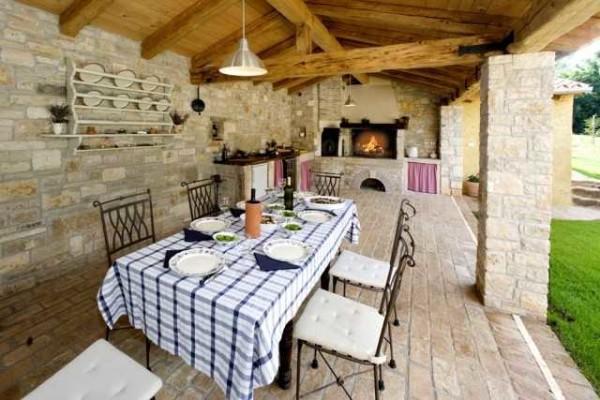
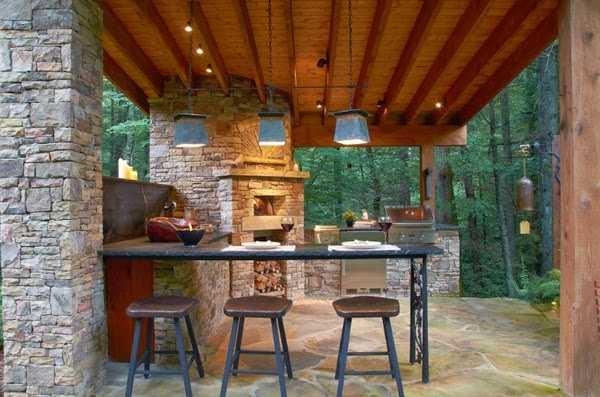
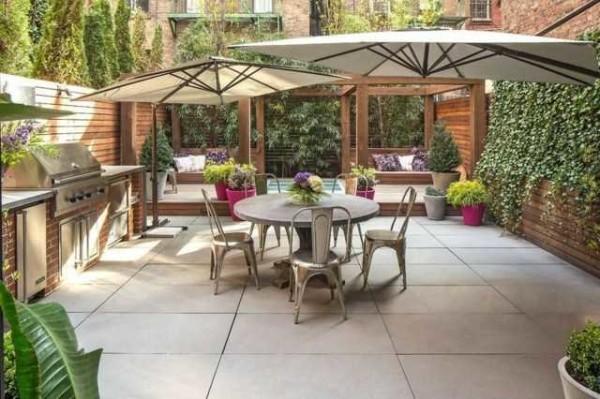
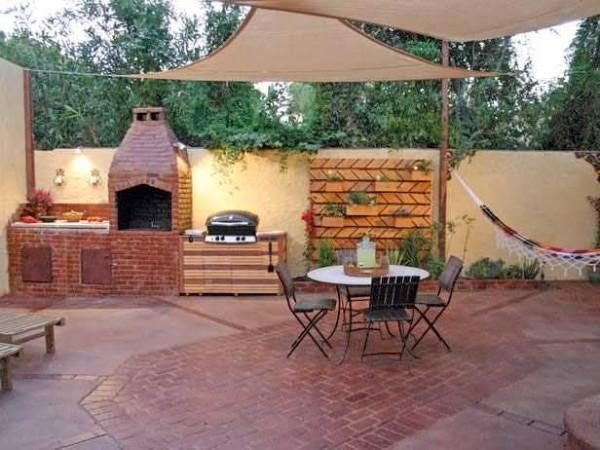
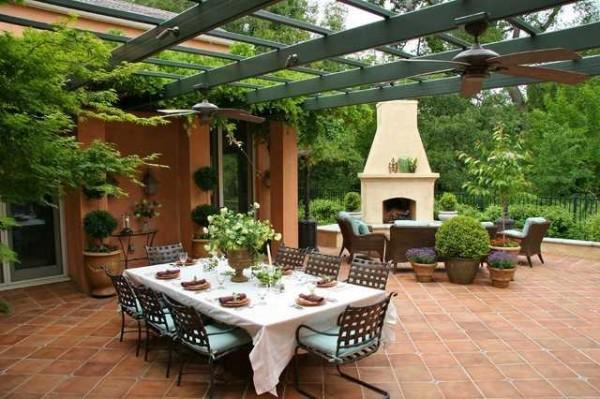
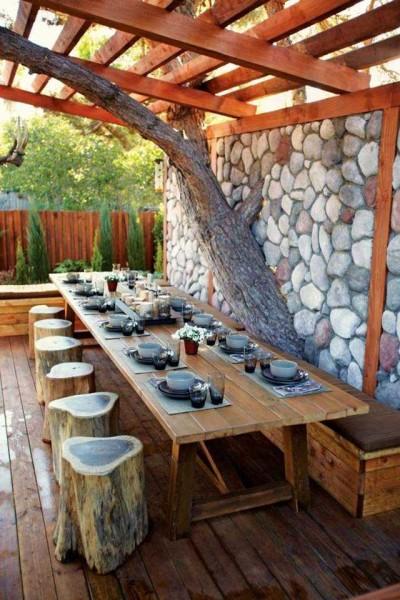
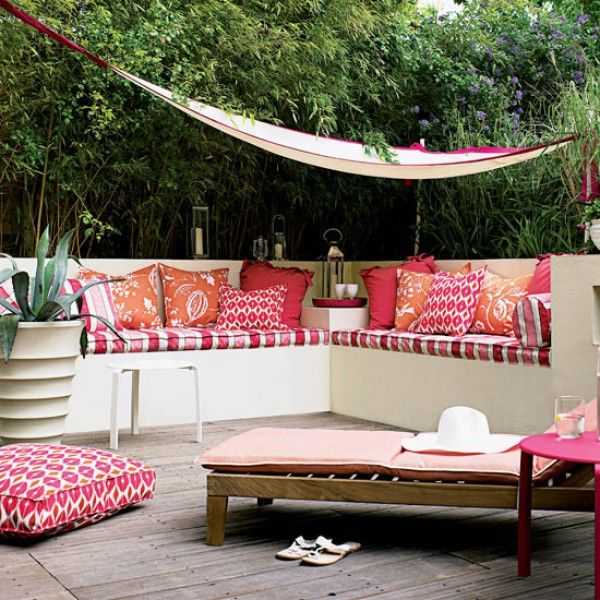
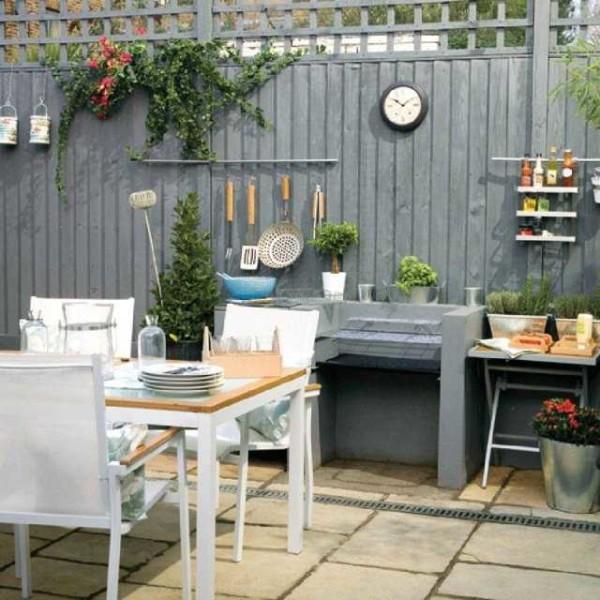
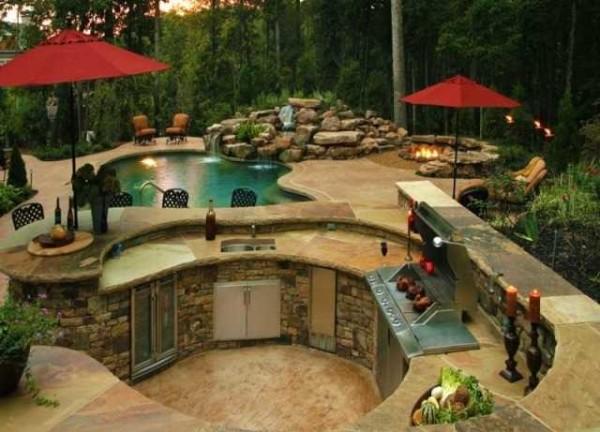
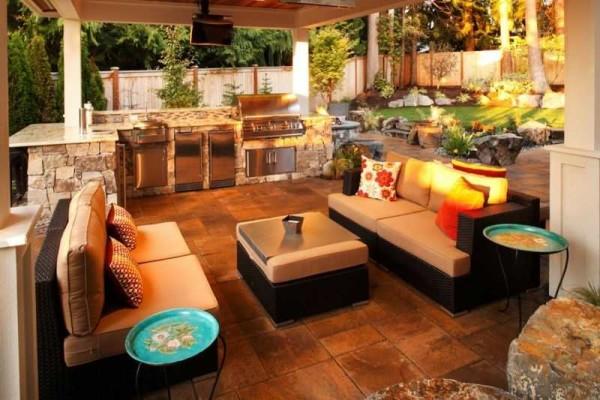
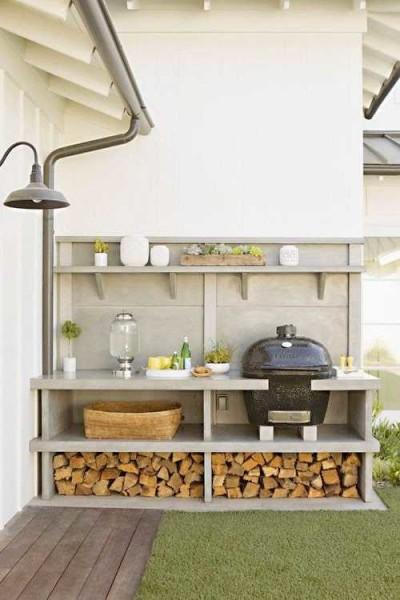
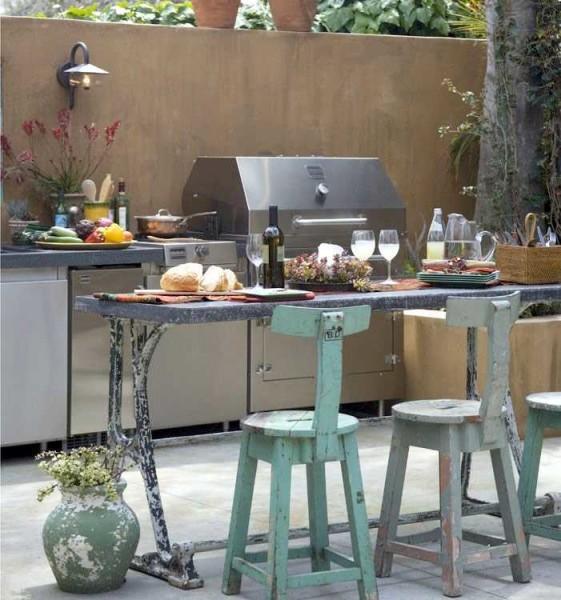
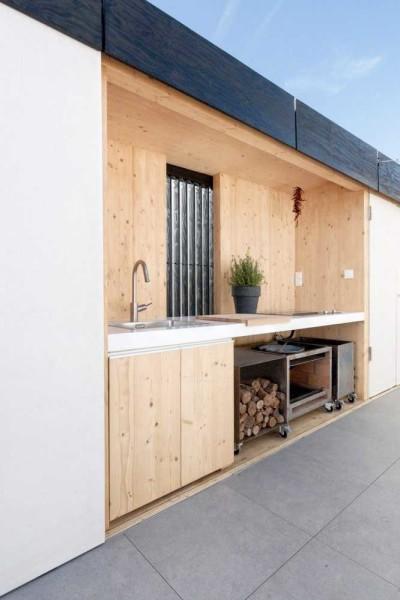
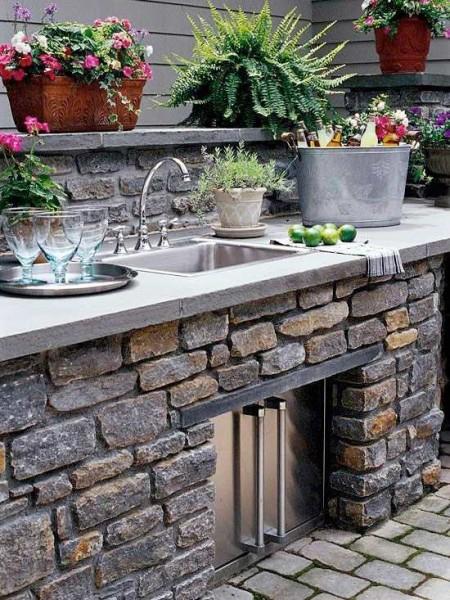
Summer kitchen design: photo
After building a summer kitchen, another problem arises: it is necessary to formalize it. The arrangement includes not only the choice of table and chairs, it is still necessary to somehow organize the working area, somewhere to store wood for the stove, which is often put here.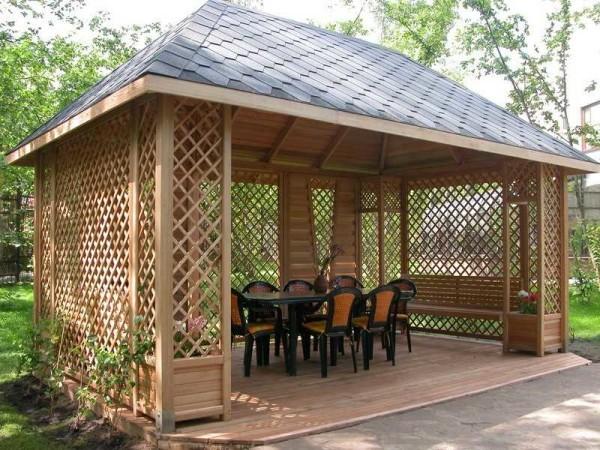

And some more ideas in video format
")


Building a summer kitchen sounds awesome! I remember when I set up mine, the grill became the hangout spot for friends. Can’t beat those lazy BBQ evenings! Loved seeing the ideas in the photos—totally inspired to add some cool vibes to my space!
Oh wow, building a summer kitchen sounds like a blast! I remember when we set up ours last year – grilling burgers and chilling with friends. Can’t wait to see those photos for more ideas! The vibe is just perfect for summer hangouts!