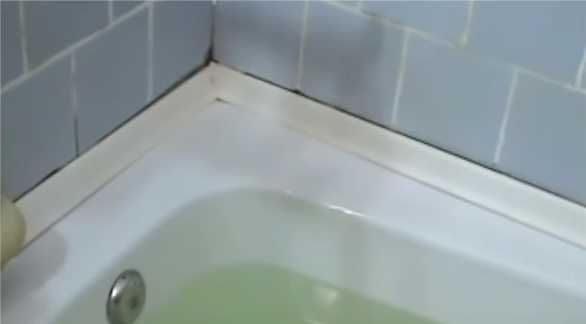
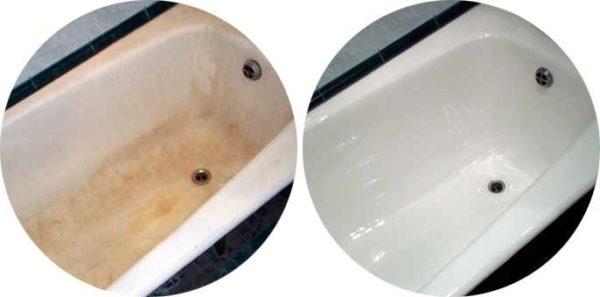
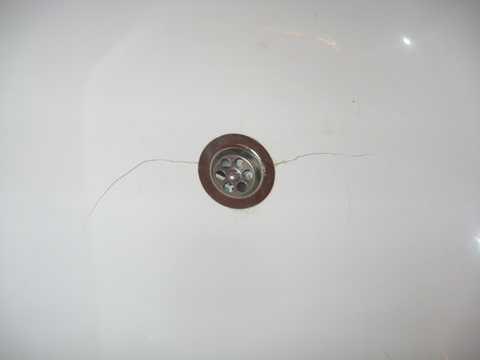
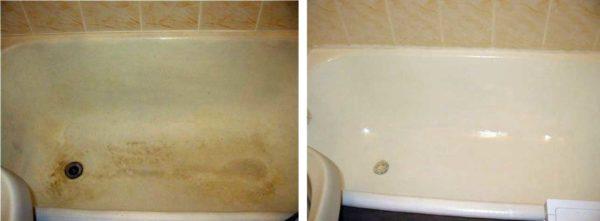
What to do if the bathtub has a far from presentable appearance, and to put a new one is not possible or desirable (major repairs when replacing is almost inevitable)? There are several technologies that allow you to make a new bathtub from an old one – to renew the coating. Restoration of the bathtub is possible with your own hands, you just need to choose which specific method you will apply.
Contents of the article
Methods of restoration of the bathtub, their advantages and disadvantages
Restoration of the bathtub with your own hands can be done in three ways:
- painting with special enamel;
- liquid (poured acrylic);
- inserting an acrylic insert (bathtub in the bathtub).
If we talk about independent work, then most often restore the coating of the bathtub by painting or pouring acrylic. Just the cost of the acrylic liner is about 80% of the total amount that firms charge for this procedure, so rarely anyone wants to understand the subtleties. In addition, if you install it yourself, you lose the warranty. Nevertheless, and according to this method, you can update the bathtub with your own hands.
Painting with enamel
Now about the pros and cons of each method. Painting enamel – the cheapest option, but also the most short-lived. Such a coating is enough for several years – from 3 to 5. The specific figure depends on the thoroughness of the preliminary preparation of the surface and the quality of the paint.
The process of painting is not the easiest – to get a good result requires the application of several (at least three), and each of them has to “work up”, removing buildups, sweat, smoothing out irregularities. All this requires time and patience. But, as a budget option, the method is not bad. After the paint starts to peel off, it is removed (heated with a construction hair dryer, removed with a spatula) and, after processing the surface, the bathtub can be painted.
The composition of the enamel has a very sharp persistent odor, which lasts quite a long time. It is better to work in a respirator, but it is desirable not to open the doors – the paint will dry faster, it will be more difficult to correct.
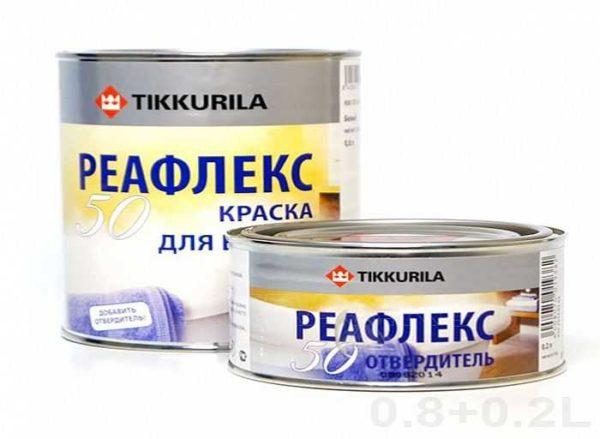
On the brands of paint that are used for painting the bathroom. First of all, it is Tikkurila REAFLEX 50 (Tikkurila Reaflex). Two-component enamel. Not cheap, but of high quality. Reviews of its use are positive. In principle, the quality of the coating depends on how precisely the proportions are observed when stirring the components. It is impossible to pour neither less nor more. It will only be worse.
There are other enamels – organosilicon, on which it is written “for baths”. Others can not be used, as they in contact with warm water can release harmful substances.
Poured bathtub
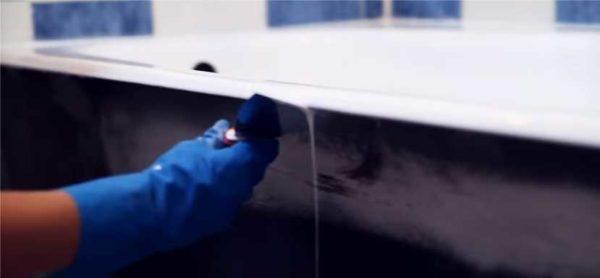
Restoration of the bathtub with the help of poured acrylic is becoming more and more popular. This is a two-component composition that is mixed just before use. The cost of the kit is about $50 (more or less depends on the size of the bowl). As in the previous option, the durability of the coating depends on the quality of surface preparation. And it should not be any dirt, grease stains, and the surface itself requires a smooth and rough. The process of applying the composition is not difficult – it is simply poured with a thin stream from a small container, and it is leveled itself. On the walls, the layer turns out thinner, at the bottom – thicker. Ideal for the operation of the state of things. If everything is done correctly, such a coating will serve up to 5-7 years, although manufacturers say that the service life is more than 10 years, some even talk about 15 years.
In addition to durability, this material also pleases with the absence of odor. Or rather, there is an odor, but very weak, almost imperceptible, so it is comfortable to work with it.
About the materials that can be used to restore the bathtub at home. Basically there are reviews about two brands: Stakril (Stakril) and Plastall (PlastAll). Both materials have a good reputation (if done correctly). There are a large number of cheaper brands of liquid acrylic on the market, but they rarely have hygienic certificates. And without documents, it is better not to take risks.
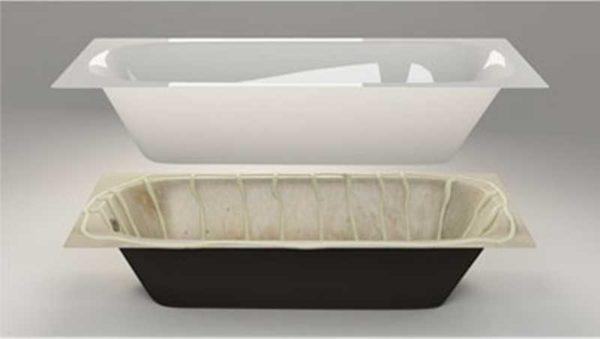
Insert in the bathtub
The plus side of the option “bath in the bathtub” in the durability of the coating – up to 15 years, but the guarantee is usually given for 2-3 years. Nevertheless, and with this method is not all so simple. To put an acrylic liner and easier and more difficult at the same time. First, there are so many inserts on standard bathtubs, and not everyone has them. Secondly, on thin-walled metal or from “light” cast iron to put them can not – the metal is thin, under load walks, because of which the insert is quickly separated from the base and burst. Since these are the most frequently restored pieces, companies simply “forget” about this point.
There are three more negative points in the use of the “bathtub in a bathtub” method. They are not necessarily present, but they can be and lead to damage to the liner, so it is desirable to know about them. So, what can negatively affect the service life of the acrylic bathtub liner:
- The molded liner has a perfect geometry, and bathtubs, most often, have deviations. In places of these inconsistencies usually and cracks are formed.
- Acrylic sits on a special two-component foam. She though and better holds the load than the construction, but still can crumple. In these places voids are formed, and they lead to cracks.
- In places where the siphon and overflow are installed, two containers are connected. It is very important to carefully seal this joint. First, because the water will flow to the floor, and secondly, it can flow into the voids, there to bloom and spread the corresponding “flavors”.
In addition to all the nuances of installation, it is important to choose a quality insert. And this is very difficult. Sanitary acrylic is expensive. Therefore, the inserts are sometimes very thin or made of cheap porous and fragile acrylic, sometimes – of fiberglass with spraying.
The thicker the layer of acrylic in the liner, the higher the price. In cheap inserts thickness is very small – 0,5-1 mm, in the average quality 2-3 mm, and find an insert with acrylic in 4 mm is very difficult, but they are the most durable. When calling firms, ask about the thickness of the liner on the bottom. If they say that 5-6 mm or even more – you are deceived. Such simply do not make and there is nothing more to talk about. The second thing you should ask about is the presence of a hygienic certificate. Sometimes inserts are molded from counterfeit material, and it is very short-lived – it cracks after a few months. Such goods do not have any documents, although they may give “left” ones. But still… The next stage of quality control is visual. When visiting the firm from which you plan to buy a plastic insert in the bathroom, inspect several pieces. They should be perfectly even, and the color – snow white. Not grayish, greenish or yellowish. Snow white. No tints. Here in this case, you can hope that the bathroom restored by him will serve for a long time.
Preparation
Preparation of the bathtub for restoration is important in any case. Even if you are going to put a liner. There, too, you need good adhesion (grip) with the foam. And in the case of enamel or acrylic, the preparation plays a very important role.
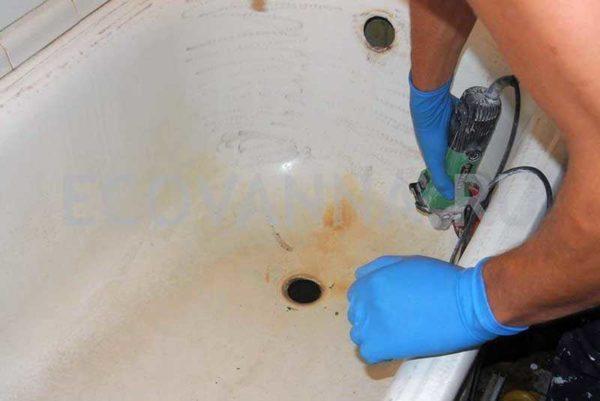
If you look at the description of the work of firms engaged in the restoration of bathtubs, they have a preparatory stage – it is to remove the drain and overflow, well go over the entire surface with sandpaper with abrasive powder, washed and dried. If there are any, caulk the chips with automotive caulk. Sometimes it is added that it is necessary to degrease the surface with a solvent. That’s all, then the enamel is applied or acrylic is poured. All work takes a maximum of 3-4 hours.
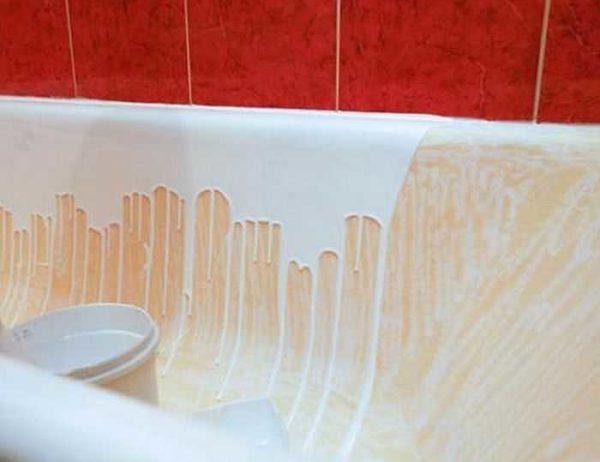
When studying reviews of independent restoration, the picture is different – the stages are much more and the preparation is often delayed for a day. There are two ways. The first is to remove the top layer with the help of a Bulgarian and petal sandpaper (remove the top layer of enamel, not clean to metal). Once the dust is removed, you can paint.
The second way – to remove contaminants with the help of acids, alkalis, solvents. Both methods are tried, work equally well. It’s up to you to choose what’s better – the dust and sound when you treat it with a bolt cutter, or the odors when you treat it with chemistry.
Here’s what to do before restoring enamel using the chemical cleaning method:
That’s it. Next, the enamel or acrylic is applied and the liner is installed.
Applying poured acrylic
Restoration of the bathtub with the help of poured acrylic is probably the easiest way to renew it (although not the cheapest), only you need to know a few subtleties.
The first point concerns the density and temperature of the material. For a normal polymerization process, a temperature of 22-26°C is required. To liquid acrylic normally spread, it should stand in a warm room for at least a day. During this time, the composition will gain the required temperature. There is another option – put in a bucket or basin with warm water (not hot, but warm). Only in this case there is a possibility of overheating. Then it will be too fluid, the layer on the bath will be much thinner than required. So we try to bring it exactly to the necessary temperature.
The second point is the absence of any drafts. Good craftsmen work in closed rooms. Even scrape the enamel with a bolt cutter or treat it with acid. They do it in respirators, which we advise you to do. But they need to hurry, because for them time is money, and the owner has nowhere to hurry. If you are doing the bathroom renovation for yourself, you can do all the dusty or “smelly” work with the doors open and the ventilation on, then close the doors and wait until the temperature reaches the desired limit of 22°C or a little higher.
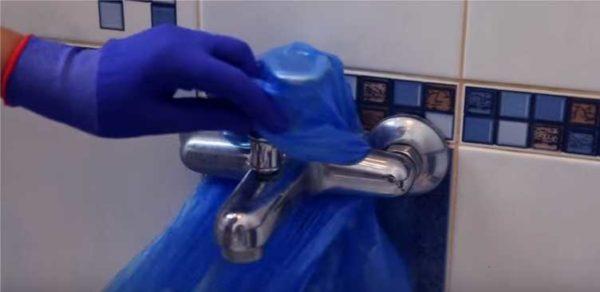
The third point is to keep out water droplets and dust. While the room is warming up, it is necessary to wrap all taps with polyethylene, completely excluding the possibility of water ingress. In addition, it is necessary to wrap a cloth around the shelves, towel dryer or other devices and objects that are above the bath. This is necessary to prevent the formation of condensation, drops of which can damage the surface of the unfrozen pouring bath. More: during the work and curing (from two to five days) the doors should be kept closed. So you keep the required temperature, and also reduce the possibility of getting on the surface of dust, debris and insects. It is very frustrating when a gnat or fly lands on a beautiful white surface. It is almost impossible to remove it without traces. You will have to sand and pour again after complete hardening, but the trace usually remains – the qualification is not enough.
When the temperature in the bathroom has risen to 22 ° C, under the outer edge of the bathroom put a film or paper, under the drain hole put a clean container into which the excess material will be drained. If the edge of the bathroom is tiled, so as not to stain, it is covered with painter’s tape, making sure that the edge was even.
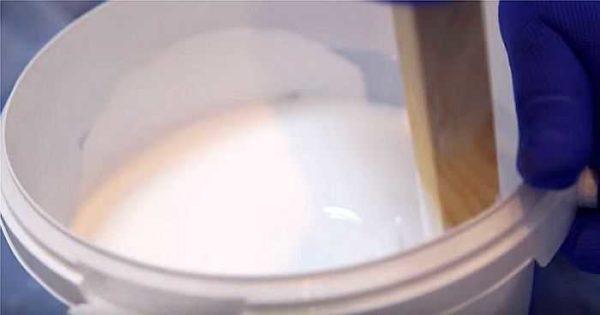
For further work, you will need an ordinary or rubber spatula width of about 10 cm, a plastic container with a volume of 500-600 ml (a beer glass will do). The jar with acrylic heated to the desired temperature is opened, the remains of acrylic from the lid are carefully removed with a spatula, sent to the jar. Then also scrape off the material from the walls. All walls should be clean, so that there is no acrylic left on them, not stirred with hardener.
Pour the hardener that comes with the acrylic into the jar and stir for 15 minutes. Stirring can be sharpened wooden stick or nozzle on the drill at low speeds. Stick safer – guaranteed not to damage the can and do not splash the material. If you decide to use a drill, the nozzle should not have burrs or sharp protrusions, the speed – the lowest. When stirring, work the bottom and edges well.
Stirred naive acrylic for the bathtub leave for 10 minutes, then stir again for 5 minutes. It is necessary to work either without a shirt or in clothes that will not touch the edges of the bathtub.
Put the jar in the bathtub, take a container, pour the composition into it from the jar. From the glass, start pouring on the edge of the far edge of the bathtub, going around it on three sides. The composition slowly flows down, enveloping the surface, distributed in an even layer.
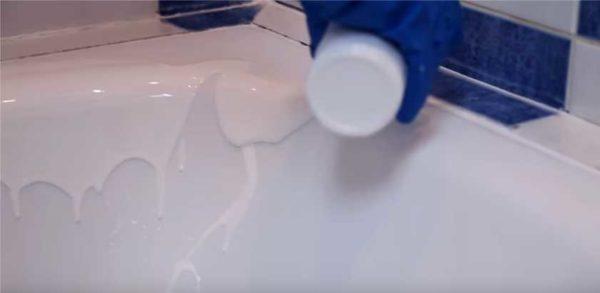
Pouring on the edge exactly under the wall is not possible, and the edge looks ugly. Take a spatula, carefully distribute the composition, covering the entire surface. It will level itself.
Having poured three sides along the edge, we start pouring just above the place where the old coating is visible. We go over the three sides again. Usually two or three passes are enough to cover the entire surface, in some places you can slightly adjust with a trowel, directing the material in the right place.
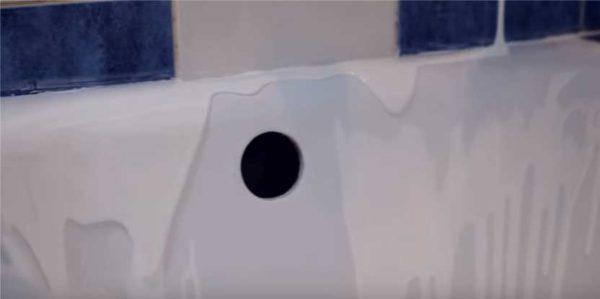
Last pour the nearest edge. From it begins to drip, so work carefully. The process is the same. First on top, then a couple of times a little lower.
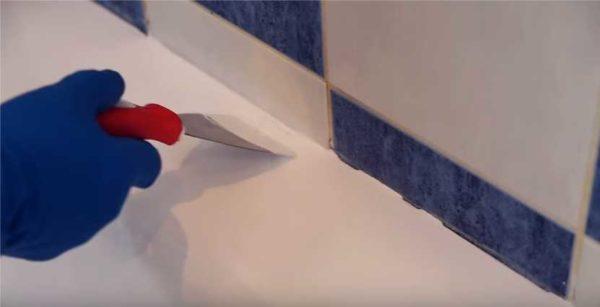
Final touches. Spend on the bottom of the bath with the corner of the trowel in a zigzag movement. This will help to evenly distribute the composition, to avoid the build-up. In the end, with a spatula remove from the outer edge of the rim drops that hang there (just run the blade of the spatula along the rim).
The bathtub is left for 48 hours. After that, you can remove the scotch tape, film, paper, which you spread around. That’s it, the restoration of the bathtub with your own hands is finished, but it will be possible to use it in three more days.
Enameling a bathtub at home
About good compositions for enameling was told above, it is desirable to use them. On the can there are instructions for use, but the rules are practical the same as with conventional painting. Unusual only preparation, but it has already been written about.
Some firms offer before applying enamel to the bathtub surface primed. If there is such an opportunity, it should be done. Primer is applied as well as enamel, after drying (the term is indicated on the can), sanded to smoothness, then cleaned of dust, washed, dried. Next, the enamel is applied.
To distribute the composition, you can use a good brush made of natural bristles or a small foam roller. In order not to get out of the brush bristles, soak it for a day in water and hands to take out all that will turn out. There are no problems with the roller.

The hardener is poured into the main composition. Measure exactly according to the recommendation, no more, no less. Stir well, paying special attention to the bottom and walls. When using a roller, some of the enamel is poured on the bottom of the bathtub – so it is easier to work. With a brush, the composition is taken from the can. Try to apply enamel or primer evenly, without leaving unpainted places or streams.
After priming is mandatory sanding with subsequent cleaning from dust, and after applying enamel should look at the results. If everything is even, you can stop here. If you are not satisfied with the appearance, it is necessary to process again with sandpaper. leveling the unevenness and paint again. Sometimes you need up to 4 layers.
Self-installation of acrylic insert (insert)
Restoration of the bathroom using this technology has its own peculiarity: if the edge of the bathtub is finished with tiles, it must be removed. Not the most pleasant moment. You can do without tile removal if the bathtub rim comes from under it by at least 1 cm. Then the liner can be trimmed along the edge. Cut it with a bolgar or a jigsaw along the drawn line
Removing the tile, it is trimmed along the wall with a bolgar with a diamond disk. Then the perforator bit by bit beat off the edging. Next, remove the trap, drain and overflow hole cleaned of dirt. Measure their position in the bathroom – the location should be transferred to the insert. The alignment must be perfect. In the marked places with the help of a crown of the appropriate diameter, put on a drill, drill holes.
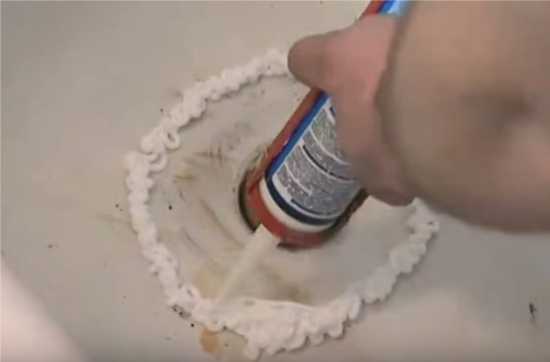
Proceed directly to the installation of the acrylic liner:
- In the bathtub, around the drain and overflow hole, apply a solid strip of acrylic sealant. The sealant is not to be spared – it will prevent leaks.

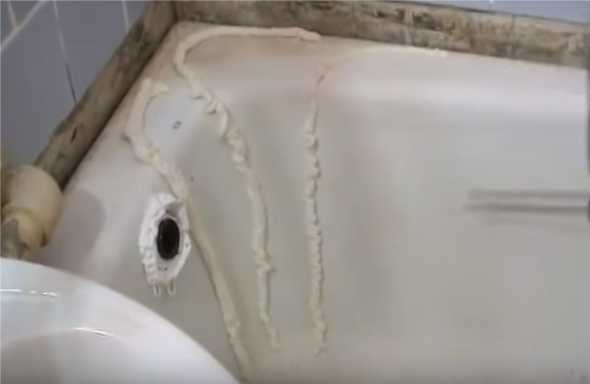
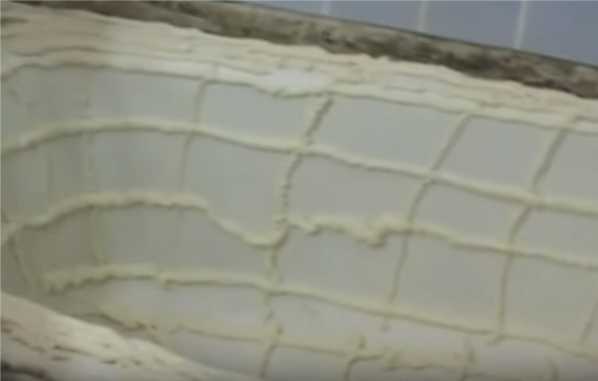
- With special foam (FOME-PRO) we apply strips on the surface of the bathtub. On the bottom – 4-5 pieces along and with a step of 5-7 cm transverse strips. On the side surfaces, with an approach to the rim – three strips in the corners, and on the sides make a cage with a step of 5-7 cm. Two strips are placed on the curb. In general, the foam should be distributed evenly.


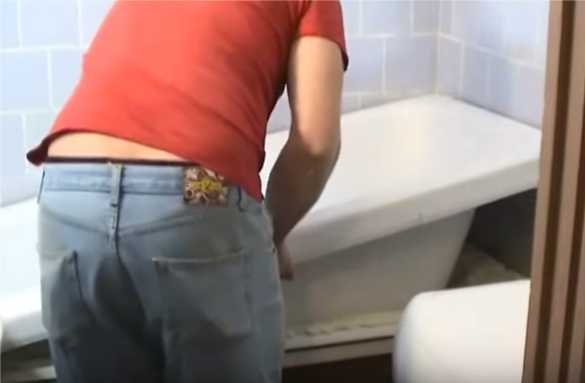
- Insert the liner from above, trying not to displace the foam on the sides. It is necessary to lower it in the center, carefully.

- Smooth the insert along the entire length of the sides, walls and bottom. The bottom should be pressed particularly carefully.
- Silicone will protrude from the drain holes. Remove it.
- On the drain and overflow put special grids – they have a special fixing, because the thickness of the bath is much greater.
- Fill the bathtub with cold water, leave it for 8-12 hours – the time of polymerization of the foam.

- Install the edges. They are placed on the assembly foam, the joints are sealed with sealant.
- The bathtub is ready.