

Most often the bathroom is decorated with tiles. This material is durable, hygienic, easy to care for. But the cost of such repairs is considerable, so try to design everything so that the bathroom looked the best for a long period of time. To solve this problem carefully choose the collection, select colors, the way of laying. About what options for laying tiles in the bathroom there are, how they are perceived – in the article.
Artikkelens innhold
General principles and rules
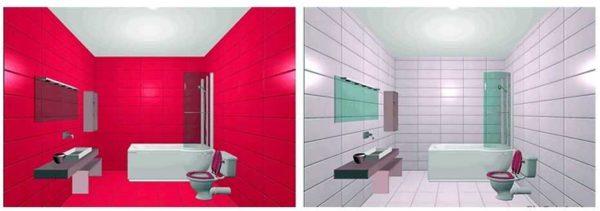
Everyone knows that light-colored walls visually make the room more spacious. Nobody is going to argue with this, and this fact is taken into account when choosing options for laying tiles in the bathroom. But there are still a few interesting points, knowledge of which will help to avoid shibok when compiling the layout and selection of the color of tile, its location, the color of grout.
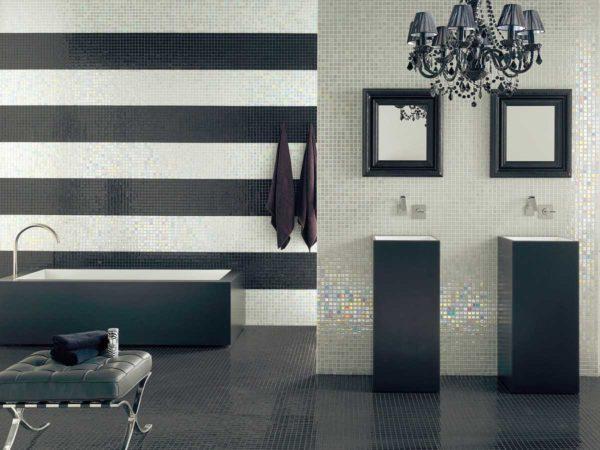
Vertical and horizontal layout
Recently on the walls more often put rectangular tiles. In this case, the first thing to determine – horizontally or vertically arrange the tile on the walls. It is believed that the horizontal layout visually makes the room wider, and vertical – higher. In fact, on the colored, bright tiles, the seams between which are sealed with grout of the same or similar color, the difference is very slight (on the photo a couple of pictures below). In this case, the direction of laying has almost no effect on perception. In this case, you can choose options for laying tiles in the bathroom based only on your preferences.
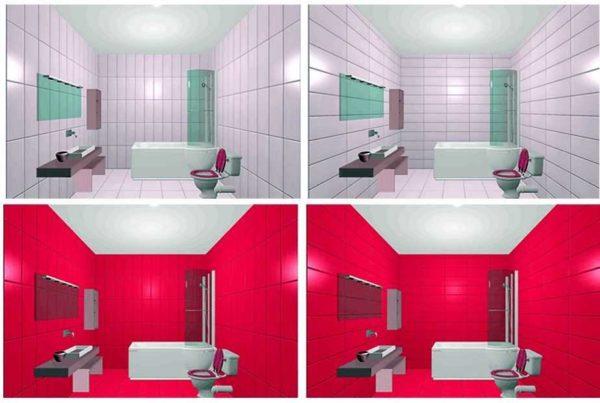
This effect is more pronounced with light-colored tiles with contrasting grout (top pictures). In this case, the eye “glides” along the seams, creating the desired visual changes. In this case, the vertical or horizontal layout really makes an impact on our perception.
Directional stripes
To expand the room or raise the ceiling, when selecting the layout make vertical or horizontal “guides”. These are strips of tile in a different color that the eye slides over. These strips change the visual perception of the size of the room.
A lighter horizontal strip, which runs along the perimeter of the room at about mid-height, visually greatly expands the space. If a darker strip is added to light-colored walls, there is no effect. Or rather, the room will look at “its” volume, since the dark strip neutralizes the visual increase in space due to the light tones in the finish.
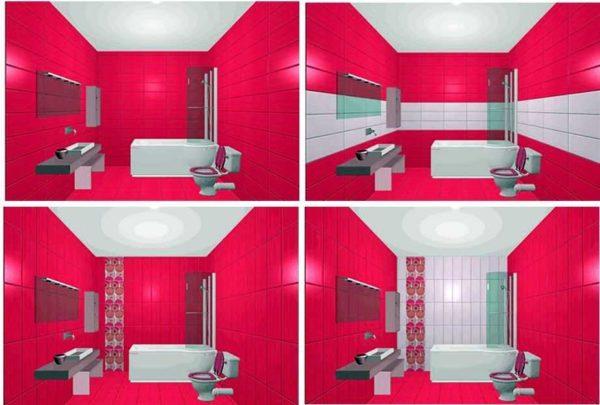
If you need to make the ceiling visually higher, with a vertical layout, you can lay a strip of lighter tiles on one of the walls (preferably opposite the entrance). Even with bright or dark tiles and grout in tone, the ceiling will “lift”. If you use a lighter-colored tile on this wall, with contrasting grout and a vertical strip of ornamented tiles, the effect will be even more obvious (in the picture below right).
Border
Another way to make the room look taller is to place decorative tiles in the form of a border closer to the ceiling. Being high, they attract attention and make the room appear taller. The border does not have to be made along the perimeter. It is enough to make one wall of another light shade, in the top to place the border. And this contrasting wall can be darker or lighter.
All these techniques are not difficult to implement, but help to competently compose the layout of tiles. To visualize what you get, you can use special programs.
Examples of tile layouts
In addition to the above examples of layout, there are tile laying options that can be considered a classic, others, on the contrary, have recently appeared and, although they often go against many recommendations, look very good.
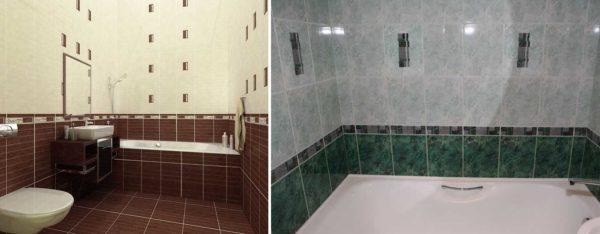
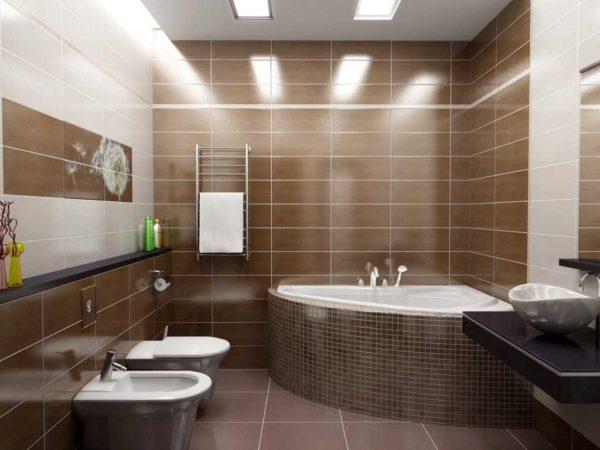
Darker bottom
This technique belongs to the classics: the lower third of the wall is made darker color, the upper – a few tones lighter. This way of laying ceramic tiles, to put it mildly, is not at the peak of popularity. It was popular about a decade ago. But there are several techniques that give the classics a modern sound.
With this method of laying tiles, the room seems spacious, as most of the walls are decorated in light colors. In this case, the tiles on the floor choose the same color as the tile on the bottom of the wall. If exactly the same pick up is not possible, look for a very close in texture and color. In the “pure” form looks like this way of laying tiles is not very modern.
To make this option of laying tiles in the bathroom look more modern, you can add vertical or horizontal strips that will break the monotonous design. Many collections offer not only darker and lighter versions of tile, but also decor of different sizes, which form strips of different widths.
More often combine not two, but three types of tile: two monochrome and decor, combining both main colors. Decorative elements can be different widths. Then they can be used to make strips or columns of different widths. That the upper part was not so monotonous and boring add thin strips of the same color as the lower part of the wall, and at the bottom add a vegetable or floral border.
Most factories produce collections in which there are two basic colors of tiles – darker and lighter – and a set of decorative elements. Such collections are usually not cheap, but from them it is easier to make a competent composition, and in size they fit, so that with the laying and fitting problems will not be.
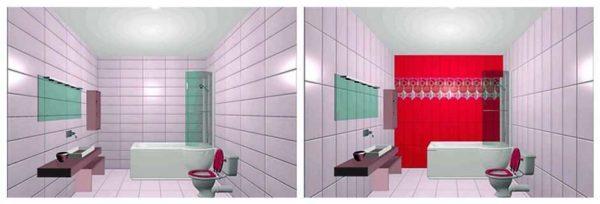
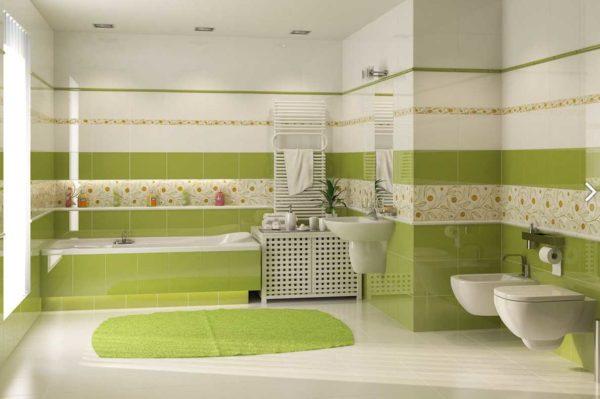
Accent wall
If the division of walls by height you do not like, but the monochrome design brings gloom, you can consider the option of an accent wall. Most often it is decorated with tiles of the same color, but a different shade – a few tones lighter or darker than the main.
In this case, brown tile is finished not one wall, and it goes to a part of the neighboring. This technique is suitable for narrow long rooms – it visually makes the room more like a square.
The accent wall does not have to be decorated with tiles of the same size. It looks great one wall decorated with mosaic or tiles of small format.
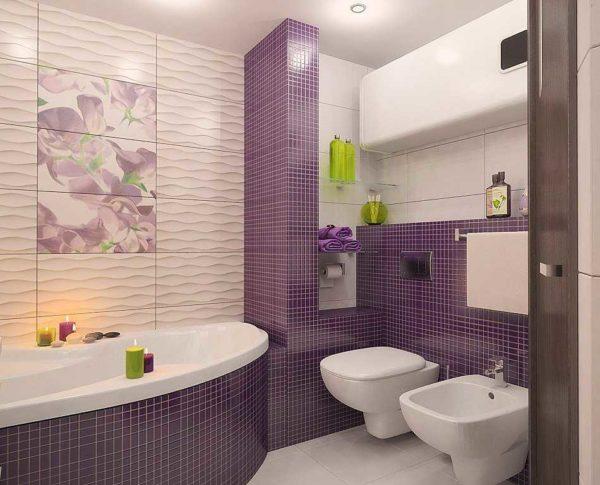
Mosaic looks great both by itself and in combination with tiles of different formats – square, rectangular, large and medium-sized. It is used when finishing curved surfaces – thanks to its structure it fits even columns of small radius.
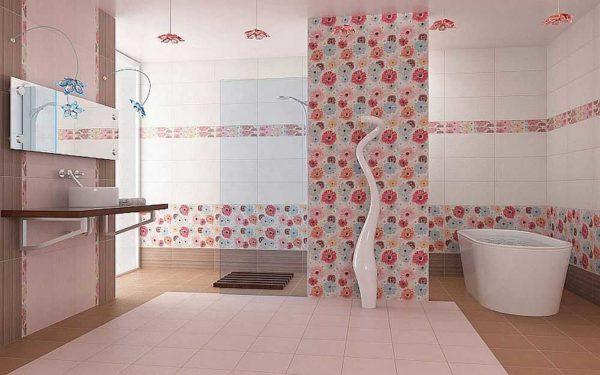
Floral motifs
Recent trends in design have led to the fact that most of the tile for bathrooms make monochrome. Many collections are characterized by an interesting texture, but are made in the form of monochrome fragments. Not all such design is to taste – too “cold” turns out the interior. Add fantasy can be tile with flowers or butterflies, plant or geometric motifs.
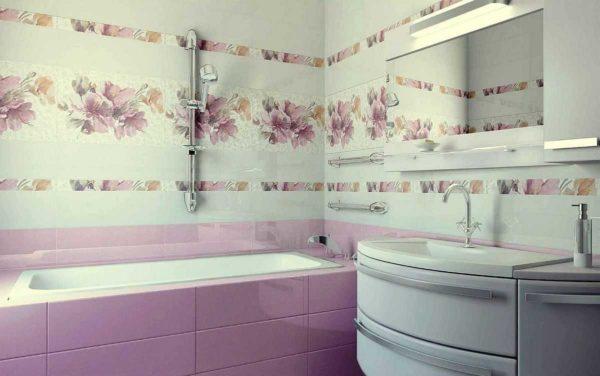
But with this type of decor must be careful: it is too easy to “overdo” especially in a small volume. But also a few single fragments do not look either. So with floral decor is desirable to work in programs that give a volumetric picture – it will be easier to imagine what you actually get.
Layout of tiles on the floor
In addition to choosing options for laying tiles in the bathroom on the walls, you need to decide how to design the floor.
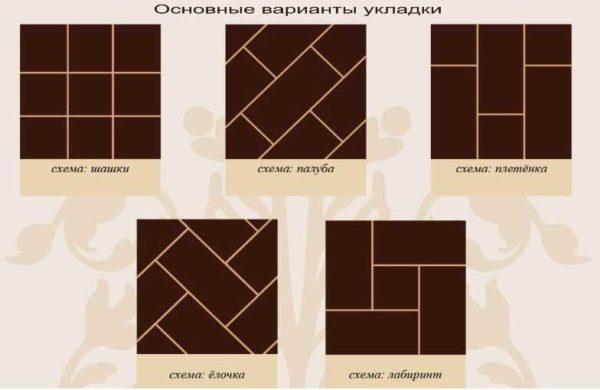
When using square tiles usually lay it in the form of a checkerboard (checkerboard scheme), a method with an offset of 1/2 tile can be used. There are two directions of laying – parallel to the walls and diagonally.
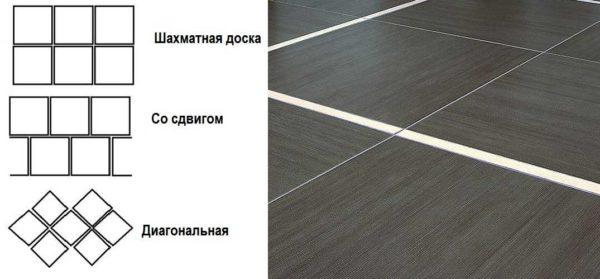
If a rectangular tile is chosen, the layout options are more – with an offset (deck, wicker, herringbone). There are also options for the combination of rectangular and square tiles – labyrinth, if the methods using fragments of different sizes.
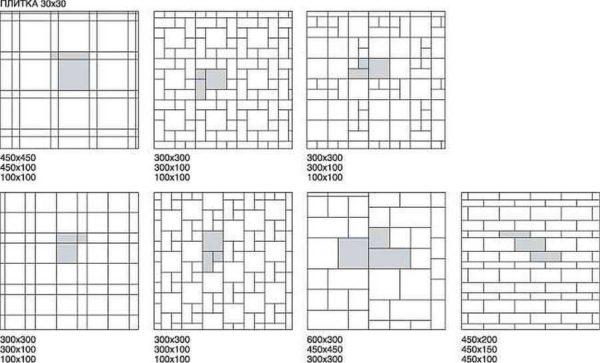
All more or less complex schemes makes sense to realize in rooms of large size – here unusual compositions can be appreciated. In small bathrooms most often choose the simplest schemes – usually only a few tiles are placed, so there is no point in complicating the work.


