

Barstoler ble en gang i tiden brukt på et serveringssted for å sette seg ned og ta en drink. Men med tiden flyttet de over til kjøkkenet og slo rot der. Den har gjennomgått endringer, og en moderne bardisk til kjøkkenet kan ha en rekke forskjellige design. Varianter av stativer kan variere sterkt i design og stil, og det funksjonelle formålet med dem kan også være forskjellig.
Artikkelens innhold
Formål og typer
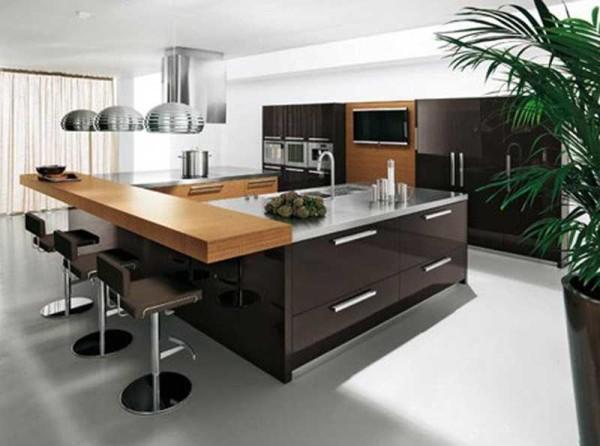
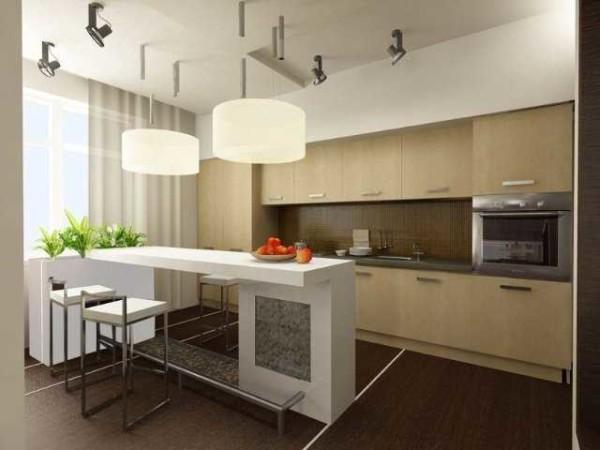
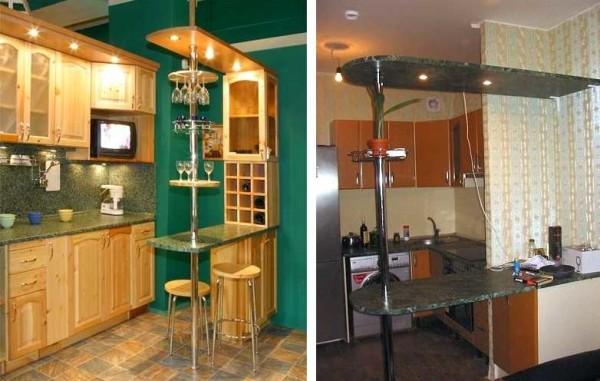
Hvis kjøkkenets areal tillater det, er bardisken på kjøkkenet satt på det direkte formålet: å sette seg ned for å drikke en kopp kaffe eller noe sterkere, noe å spise. Da er "utstyret" tilsvarende: holdere for glass, fløyter, shotglass, ved siden av hyllen / holdere for juice, flasker osv. Den er plassert med den ene kanten hvilende på veggen eller kanten av kjøkkensettet, noen ganger plassert i form av en søyle - midt i frisonen.

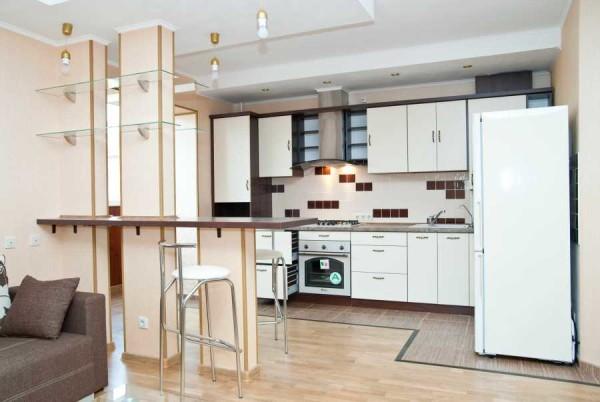
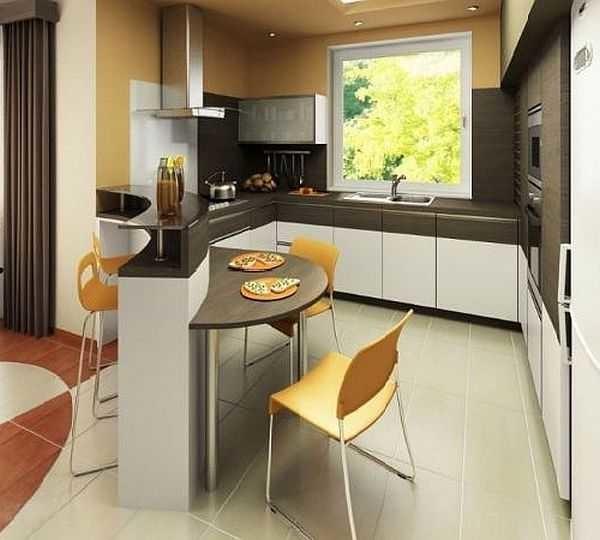
I små kjøkken er det ofte multifunksjonelt. Den kan brukes som en skillelinje i soner - spisestue og kjøkken, i svært små områder brukes ofte som spisebord. Og det kan være plassert ikke-standard - på veggen.
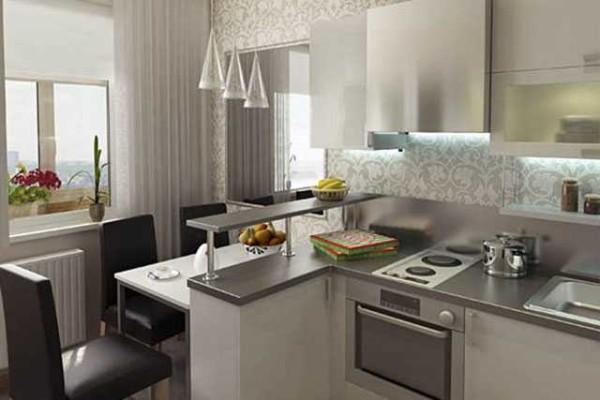
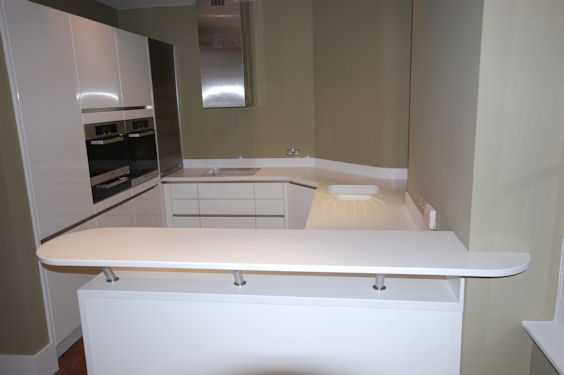
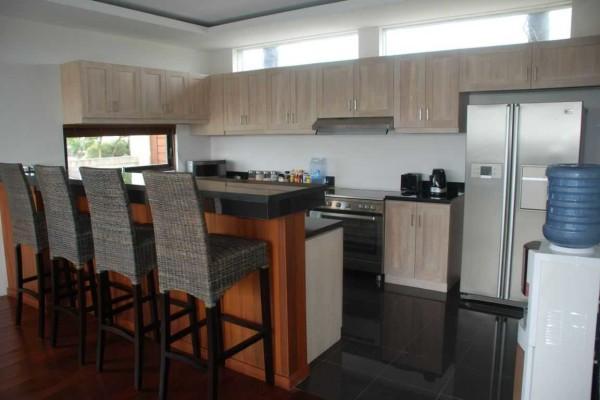
I mellomstore kjøkken - 10-12 meter - utføres ofte i form av en halvøy - et lite fremspring på siden. For å gjøre mer rasjonell bruk av plass, er stedet under benkeplaten okkupert av hyller eller et skap. Denne designen er veldig enkel - benkeplaten på baren støttes ofte av flere biter av rette eller skrå rør, festet på skapbordet.
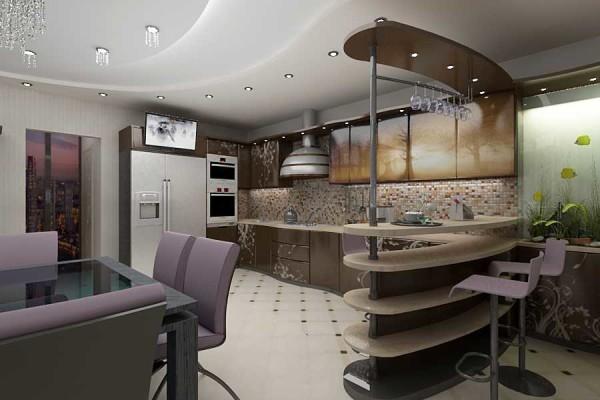
Slike flertrinnskjøkken har nylig blitt populære: forskjellige operasjoner på kjøkkenet er mer praktiske å utføre på overflater med forskjellige høyder.
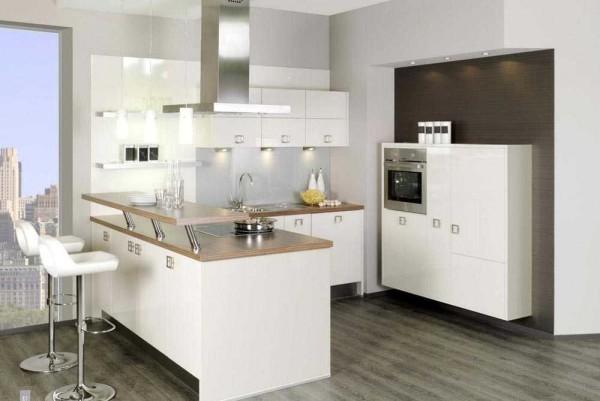
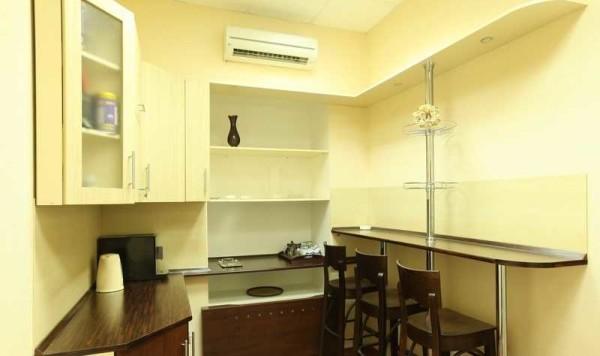
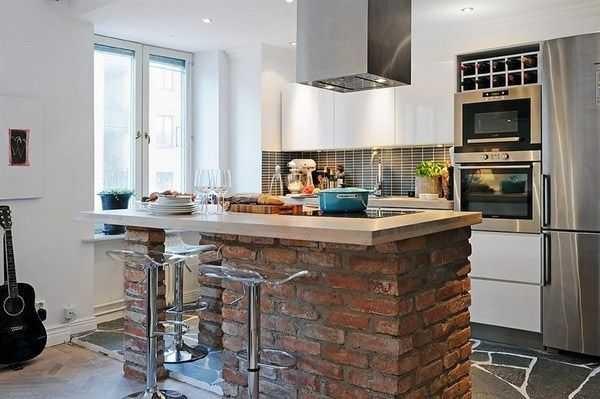
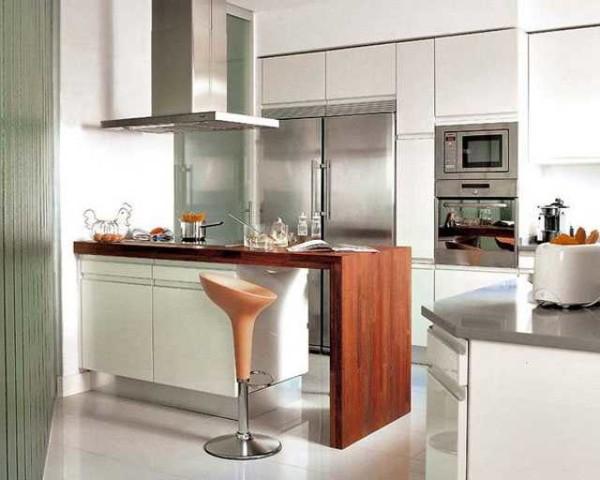
Men likevel, oftere er en bardisk for kjøkkenet til stede i studioleiligheter for å avgrense to soner: kjøkkenet fra stuen eller fra gangen - hvem har hva som er kombinert. Og det er ofte en fortsettelse av skrivebordsøya eller halvøya.
Gjør mer i form av en partisjon. I dette tilfellet er basen oftest laget av gipsplater, og til den er "festet" - ovenfra eller fra siden - overflaten.
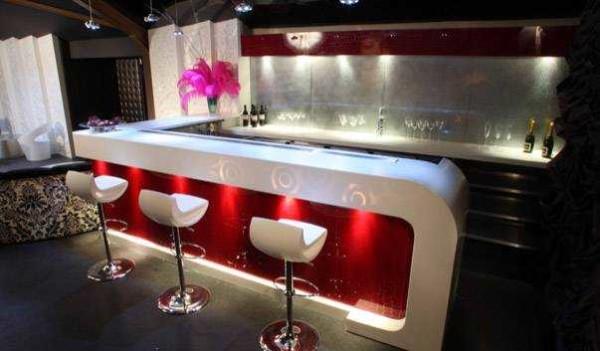
Generelt er det mange alternativer, variasjoner og forskjellige typer. Tilpass ideen du likte under dine forhold, og du kan gå videre til realisering.
Dimensjoner og mål
Det finnes ingen strenge normer på dette området. Det er noen anbefalinger, som brytes i omtrent halvparten av tilfellene. Anbefalinger gjelder bare høyden og bredden på benkeplaten:
- På høyden på bardisken er det vanlig å lage 1,1-1,2 meter. Deretter plasseres spesielle høye stoler i nærheten av den.
- I bredde - minimum - 30 cm, optimalt 50-60 cm. Mindre enn 30 cm bør ikke gjøres: selv en liten tallerken allerede på en slik bordplate vil være i fare. Og det er bare ubehagelig: verken albuer å sette, eller å lene seg på.
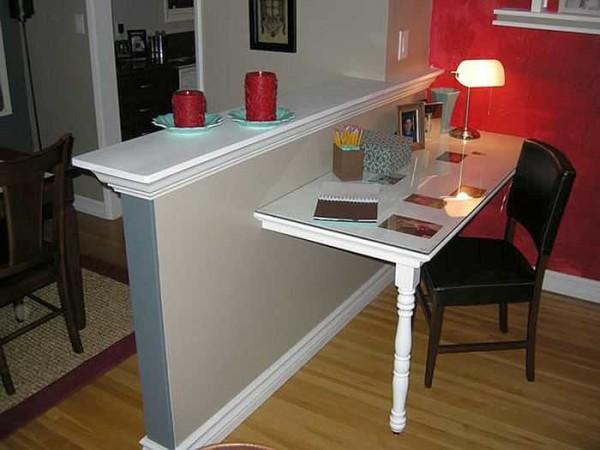
Lengde, form, antall og form på beina - alt er opp til deg. Snakker av ben. Tradisjonelle stativer, som var i å drikke etablissementer - det er en bordplate på en pidestall. Men for kjøkken "klassisk" for noen grunn regnes som en benkeplate på et enkelt rør fra gulv til tak.
Forresten, i denne formen er det praktisk talt ikke brukt lenger. Mer funksjonelle analoger med skap og skuffer råder.
Bardisk til kjøkkenet: stadier, produksjonsmetoder, fotorapporter
Det enkleste alternativet i utførelse er nøyaktig det klassiske: en bordplate, festet med den ene kanten til veggen eller møblene, og den andre lener seg på røret. Med bordplaten er det alternativer:
- Lag av et bredt bord, helst ikke av bartre - treverket deres er for mykt.
- Bestill fra samme selskap der kjøkkensettet ble laget. Hvis du kjøpte en ferdig, må du se etter et lignende materiale fra bildet eller bære en liten reservedel rundt verkstedene for å demonstrere hva du trenger.
- Lag av tykk kryssfiner, så noe å dekorere - lim plast, fliser, mosaikk.
Alt annet er bedre å velge i en butikk som selger møbelbeslag. Valget er veldig bredt, og prisutvalget generelt forbløffer. For eksempel kan et rør med samme diameter koste tre ganger mer. Men en slik forskjell er ikke uten grunn. Med billige kinesiske rør / nett / kurver begynner forkrommingen å falle av i flak etter en stund. Tyske beslag har en veldig høy prislapp, men livstidsgaranti, Poles er i midten både i pris og kvalitet. Valget er opp til deg.
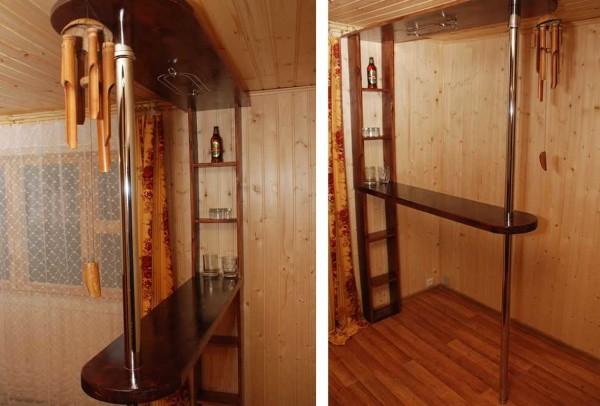
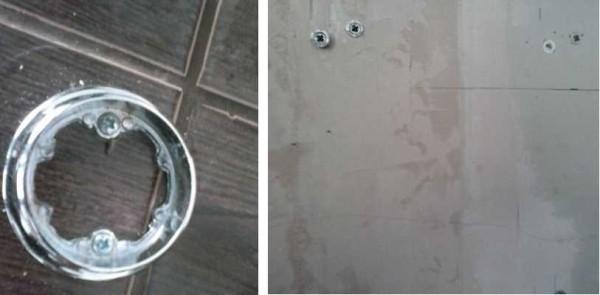
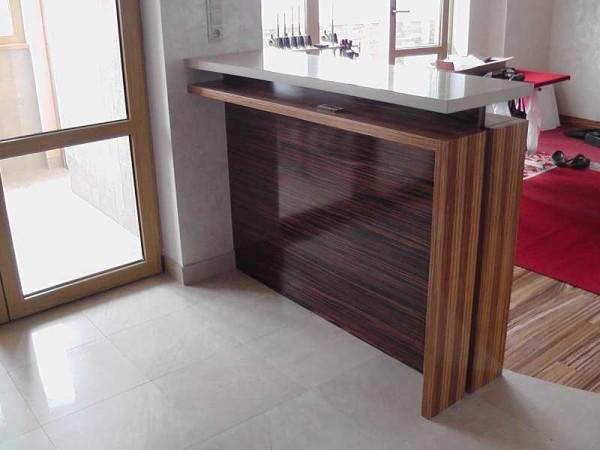
På bildet over er en hjemmelaget bardisk, som ble laget av et tykt bord. Den hviler på den ene siden på en hylle festet til veggen (også laget av tommestokkplater). Den andre støtten er et tradisjonelt rør. Et hull med passende diameter bores i bordplaten for røret. Under bordplaten på røret er installert på festestøtten "ringfeste", hullet er lukket med en dekorativ ring på toppen. Det er også en "sokkel" eller universell festing av røret til gulv og tak, samt forskjellige holdere og hyller på den.
Hvis benkeplaten vil bli festet direkte til veggen, for disse formål, er hjørner vanligvis brukt. Du kan ta forsterket, og velge farge basert på finishen. Men denne typen feste er installert slik at den ikke er synlig - sett tilbake fra kanten noen centimeter. Du kan sette flere små hjørner, eller ett solid.
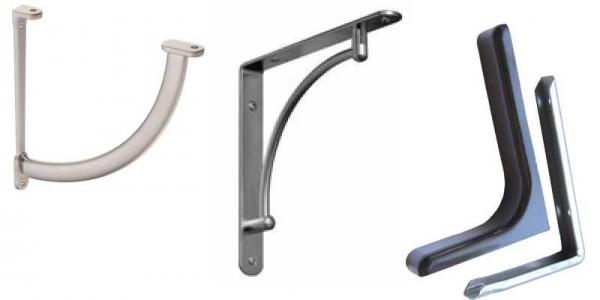
Hvis det er besluttet å lage en bardisk på kjøkkenet langs veggen, kan du bruke dekorative braketter for hyller. Deres bæreevne skal være nok for benkeplaten, spesielt siden du kan sette flere stykker. Et eksempel på montering av en bardisk med en enkel design med et rør på bildet nedenfor.
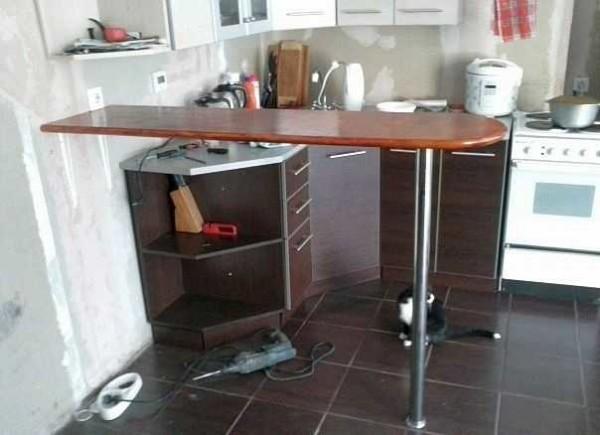
Fotoreportasje nr. 1: hjemmelaget teller fra en bordplate og et rør
Benkeplaten ble kuttet fra en vinduskarm (solid), kanten avrundet, pusset, tonet og lakkert. Reservedeler - barben, braketter og feste til gulvet - kjøpt i avdelingen for møbeltilbehør.
Til bordplaten skruer vi stoppet, til kanten - hjørner. Alt sitter på selvskruende skruer med et flatt hode. Arbeidet tar omtrent 7 minutter.
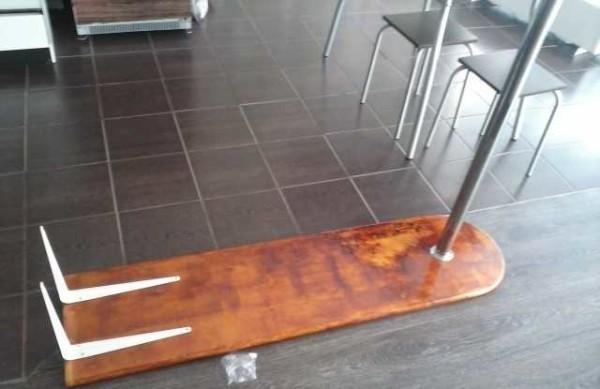
Etter å ha satt det monterte stativet på veggen, merker du på veggen stedene der det er nødvendig å installere dybler. Merk røret på gulvet med en markør: dette merket vil bli brukt til å plassere fotstøtten. I henhold til merkene monterer vi stoppet for stativet og setter dybler i veggen.
Sett stativet på plass, fest det med skruer. Sånn, ja. Ferdig.
Barstativ med hyller
Hvis designet med et rør ikke liker det, kan du klare deg uten det, men du må fjerne den øvre delen, som er under taket. I stedet for et ben, for eksempel, kan du lage den samme hyllen som nær veggen. Utsikten vil umiddelbart bli mer dynamisk og moderne.
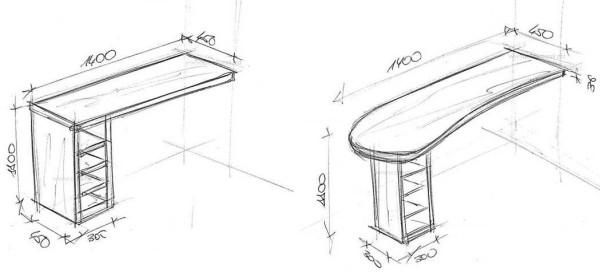
And in general, the whole structure can be assembled from wide boards, joining them at right angles. Looking at the photo below, you will understand what we are talking about.

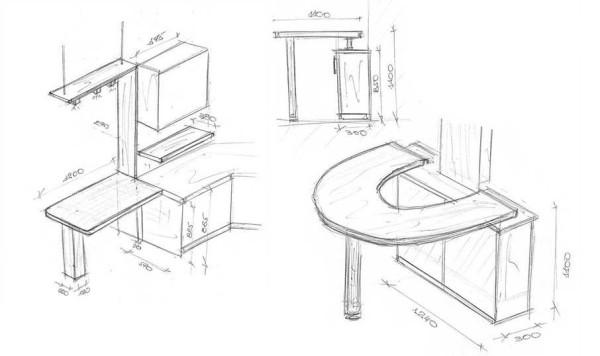
In modern interiors in general, broken lines fit better. If the kitchen in the style of minimalism or hi-tech, it is hard to fit the classics there, but something consisting of broken lines will look very good (several sketches in the picture below).
A slightly more traditional option is presented in the photo. From this it did not become less interesting. A non-standard approach even in small doses significantly changes the perception.
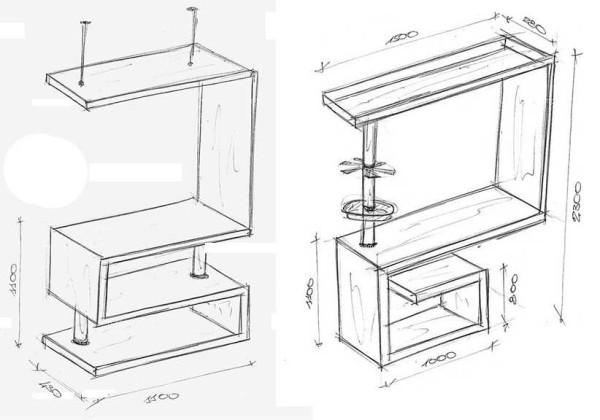
Bardisk på basen
All this we considered options without a base. But the tabletop can be attached to some kind of a pedestal. If the countertop will be exactly above the surface of the table, we take a pipe and standard fasteners to horizontal surfaces. If, as in this case, the surface of the bar is offset, there is a special inclined fastener.
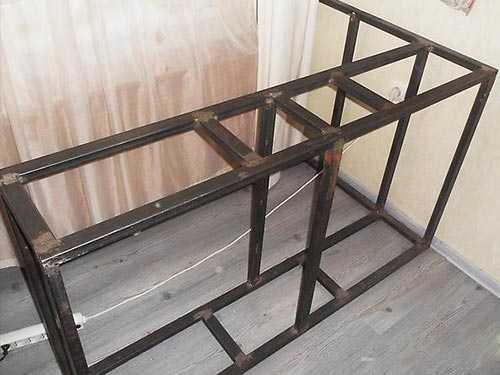
The cabinet can be mastered independently. Actually, the main thing is to assemble the frame. It can be covered with furniture plywood or any other finishing material – it depends on the style of your kitchen. The frame can be made of wooden (dry) laths, and you can weld and metal angle.
As an option – to collect from profiles for drywall, cover it with the same or GVL. Another option – to build a base of brick. But this, if the load-bearing capacity of the floor allows.
Med en base av gipsplater: fotorapport № 2
Often choose the device of the base of gypsum board. The material is inexpensive, the technology is tested, the mechanics are familiar, the result – at least – good. According to the order of work, no news: collect the frame. In this case, wooden planks are used, but it is also possible to use profiles.
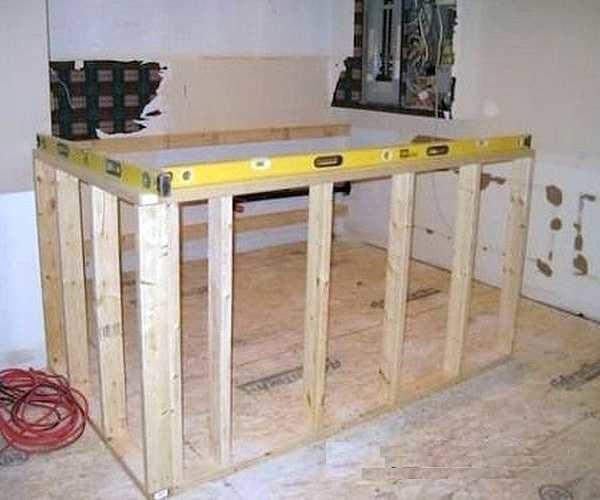
The main thing is to observe the verticality and horizontality of the planes, put the posts exactly at 90 °. Everything is checked with a good construction level, verticality is better monitored with a plumb line: it has no error. When the frame is assembled, on both sides is covered with gypsum board or gypsum board.
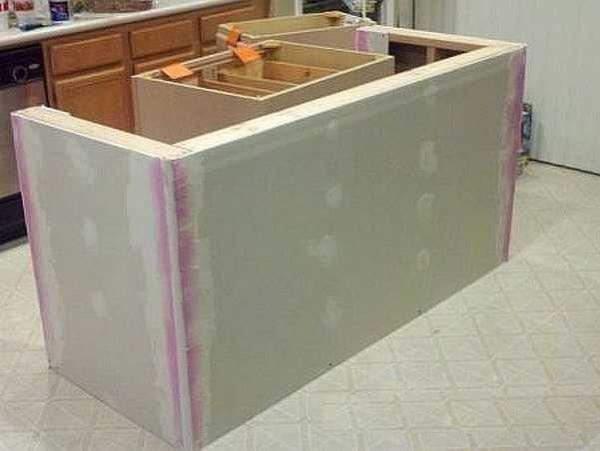
Traces from self-tapping screws, corners and joints putty. Further depends on the selected type of finishing: some need puttying (painting with water-emulsion), others do not. In our case, we chose texture paint, it is applied in a thick layer, and you can – directly on the drywall.
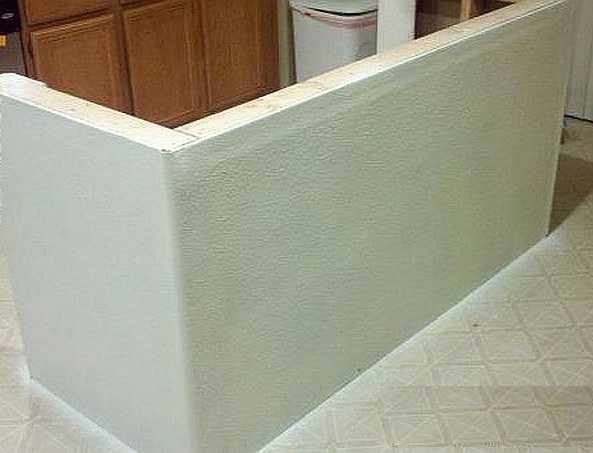
It remains to install the countertop on the bar. You choose which one is more suitable for the rest of the furniture in your kitchen.
Fotoreportasje #3: Bardisk med vask
This was the first experience in creating furniture (and in general something good) with their own hands, as a result of some design flaws. Not the most successful design, although, about tastes do not argue.
Source materials:
- inexpensive countertops bought on sale;
- remnants of a cabinet made of laminated chipboard;
- lumber;
- a couple extra doors;
- plumbing fittings: sink, siphon, faucet and required pipes, hoses and fittings.
Installation and replacement of the mixer in the kitchen is described here.
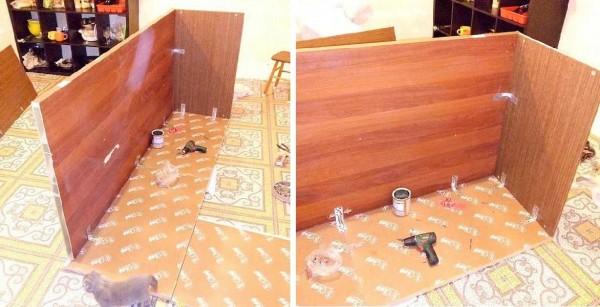
The countertops are laid out on the floor face down. They are connected in the form of a letter “G” with the help of glue, which is smeared on the ends and a steel strip with perforations, in which self-tapping screws are screwed. The strip, of course, is fixed at the bottom.
The sides were supposed to be decorated (presumably – with laminate), so we used the remnants available in the household – an old door and a piece of cabinet. They are screwed with the help of corners, aligned to the edge of the tabletops. And this is the first mistake. And visually such a cabinet looks heavy, and it is uncomfortable to sit. The sides should be moved from the edge by at least 10 cm.
After the sidewalls are installed, the cabinet was turned over and put on a permanent place. All other work was carried out on site. Sawed out the hole for the sink, installed and connected the plumbing part.
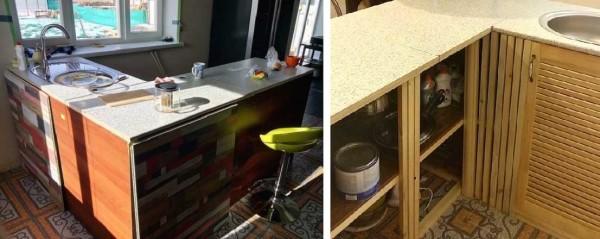
On the floor nailed laths – along the walls and slightly offset from the outer edge (made an offset of 5 cm, you can 10 – more convenient), made shelves. The cupboard on the sink side is closed with a door, the shelves on the left side are left open. The space is partially finished with wooden strips.
At first we thought to put a few different “gimmicks” on the pipe, but there were semi-circular edges left from the worktops. It was decided to use them on the pipe. As an external finish of the cabinet used panels for decorating balconies (bought in Leroy). They almost fit the size, and the remaining gaps were closed with twisted cord. How as a result looks homemade bar counter with a cabinet for the sink look at the photo below.
There are more comments on the finish. First – the cord will soon be soaked in various liquids, will have a pale appearance and a strong “flavor”. To push back the time of the appearance of the odor, it can be covered with something, at least the same PVA glue. The second thing is that the countertops are simply docked. Water will get into the gap, and various small debris will accumulate. Even at the stage of “docking” edges should be smeared with sealant (transparent, silicone, not acrylic). It is also possible and necessary to treat the edges of the cutout under the sink. Then the countertop will not swell. Joints of countertops can be finished with furniture overlays, the same or similar to use and instead of cord. Another budget option – plastic corners and the same T-shaped strips.
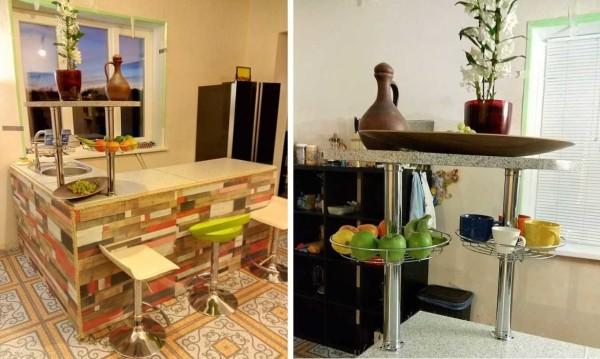
Bardisk til kjøkkenet på restene av veggen
If the kitchen is united with the balcony, a piece of wall remains. The place is where the window used to be. If you do not want to destroy it, you can make a bar counter.
There are two options:
- At the height that there is, put a countertop. This will be another work surface or shelf. Above it on the pipes at a height of about 1.1-1.2 meters to fix another plane, which will be the actual bar counter.
- Dostavlyaet/dorosti wall to the desired height and put the table top.
Both options are not bad, but the one on the right is more practical: two surfaces in the kitchen are always better than one. Note that the dimensions of the countertop are larger than the width of the “leg”. This is not accidental: so you can sit more or less comfortably without turning sideways.
And if you are not lazy to remove this wall, you can make something more comfortable – so that you can put your feet. An example is on the photo.
Ideer til fotodesign
Video om emnet
Hvis du vil sette en bardisk i et utendørs sommerkjøkken, kan du låne ideen fra denne videoen. Fyren fra snags funnet i skogen og et tykt bord bygget en interessant teller.
Ofte er det spørsmål om hvordan du lager en benkeplate til en bardisk. Du kan fullføre det med mosaikk. Og hvordan - se i videoen. Generelt er teknologien for å legge mosaikk ikke vanskelig: på et spesielt lim av hvit farge med den etterfølgende fuging av leddene mellom flisene. Det er vanskelig å danne en ujevn kant. Slik gjør du det - se i videoen.
Bordplaten limt av stenger
")


