

More and more often, instead of a stove in the kitchen, a cooktop and a separate oven are being installed. Built-in appliances fit better into the interior, have a more modern look. Today we will talk about how to repair such appliances, namely – cooktops. They are electric, induction and gas. Each type has its own damage, but there are some common points. In more detail about the repair of the cooking surface of different types, we will tell you further.
Raksta saturs
Electric cooktop repair
In any breakdown of electric and induction cooktop, the first thing to do is to check whether the power supply is normal. Start with elementary things.
Only after you have checked all these parameters should you move on. Repair of the hob should begin with determining the exact nature of the malfunction. According to it, you can assume what may be the cause.
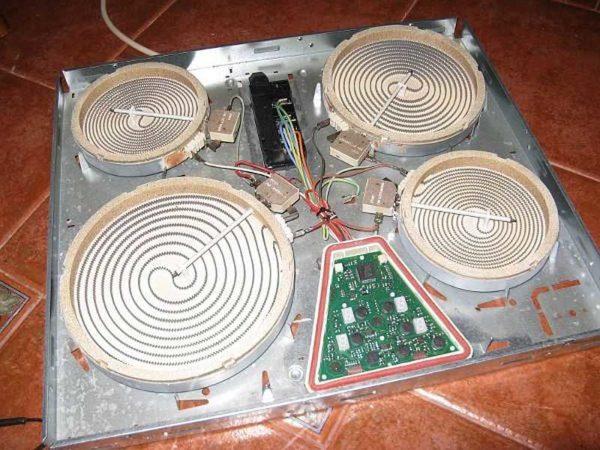
Disassemble the cooking surface
To further repair the cooking surface with your own hands, it must be disconnected and dismantled, then disassemble – remove the front panel. We disconnect the power at the switchboard, disconnecting the automatic circuit breaker and RCD on this line. If the cord was used for connection, it is removed from the socket. After that, put a sharp object in the gap between the cooking surface and the countertop, lift it.
If you have connected the hob directly or through a block, you need to unscrew the wires. To do this, remove (lift or unscrew) the cover that covers the wires. Before removing them, draw or better – take a picture of how the wires are connected. This will make it easier to put everything back in place.
After that, the cooking surface is transferred to the table (cover with a clean cloth, so as not to scratch the front panel) and laid “face” down.
Next, unscrew the fasteners around the perimeter of the panel. After this, you can remove the ceramic stove.
Problems with burners
If all burners are not heated, there may be problems with the power supply, but we would have already identified them. What else could it be? A power circuit fuse has blown. This happens with power surges. Find where it is installed and inspect or wire it and replace it if necessary. It costs very little and is easy to replace – take the old one out of the holders and install the new one.
If the problems with heating the burners began immediately after installing the cooking surface, perhaps the reason is that the wire is selected insufficient cross-section. Read this article and choose the correct cross-section, connect a new cable or cord.
If one of the burners does not heat (or heats weakly), the reasons may be the following breakdowns:
- The heating element has failed (when measuring the resistance, it shows a break). This can only be cured by replacing it.
- Bad contact in the connection circuit. Again, visually inspect the wires that go to the broken burner, pull them, if necessary, twist / solder. Take a tester, carefully measure what voltage is supplied to the bad burner. If it differs from 220 V, look for the problem in the power supply circuit.
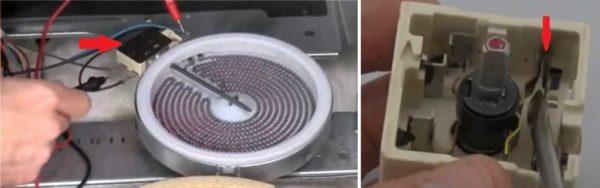
- The temperature sensor or relay of the heating element of the burner is out of order. They are usually not repaired, only replaced. How to determine that it is defective? Disassemble it and assess the condition of the contacts. It can be disassembled simply by prying off the plastic cover with the tip of a screwdriver, pressing the clips at the same time.

.
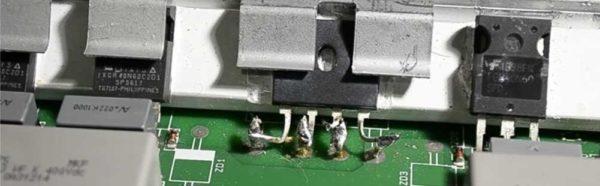
Inside there is a thermocouple – a pair of contacts that open/close, maintaining the desired temperature. They may be burned or fused (as in the photo below). You can try cleaning them up. For some time, perhaps, workability will be restored, but not for a long time. Therefore, as long as it works – look for the right temperature sensors (thermorelay) as replacement will still be needed.
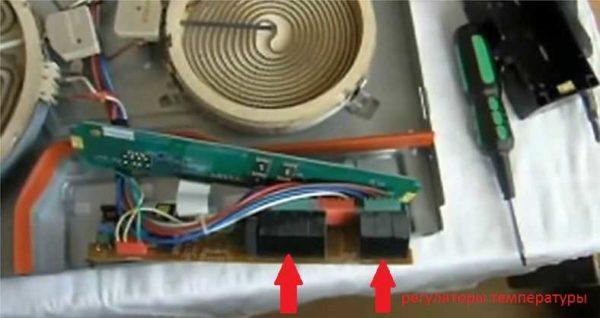
- Similar is the case with the temperature regulator (control relay). Inspect it, clean the contacts, measure the readings and compare with the regulator on the neighboring burner. If there are differences, it is better to replace it. They are located most often under the control board. They can also be white, gray, but are usually located on the board.

.
cooktop .
These are also small plastic boxes with contacts inside. They also burn or fuse. And they can also be the cause of inoperability or problems with turning the burner on and off.
Most often, various problems with burners are associated with a malfunction of the temperature sensor or control relay. If one burner does not turn on, after some time spontaneously turns off, on the contrary – it does not turn off until you turn it off from the mains… all this and other similar problems are caused by incorrect operation of these sensors on a particular burner and you should look there first of all. There is another option – problems with the control (processor). But they will be described further on.
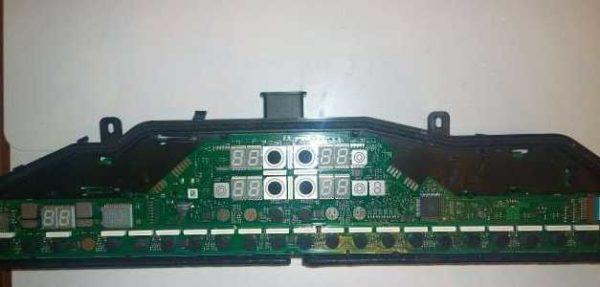
Problems with the touch panel
Sometimes the malfunction of the cooking surface is caused by incorrect operation of the touch panel. It is possible to understand that the matter is in it and by ear. Its correct operation is accompanied by sound signals. If there are none, something is wrong. The panel does not respond. This may be due to the fact that the surface and the panel are dirty and simply can not understand that they are addressed. In this case, you need to wash the panel, wipe it down, then try everything again.
Sometimes the control board can “glitch”. To eliminate the problem, de-energize (turn off the power completely by pulling the plug out of the socket or disconnecting the circuit breaker on the panel). Wait for about 20-30 minutes and turn it on again. A complete reboot will take place, perhaps the problem will be solved.
If all this does not help, you need to disassemble the surface, check the power supply, then the available element base – capacitors, varistors, transformer. If there are no problems here, for you to repair the cooking surface is over, because the remaining cause – microprocessor, but its testing – work for specialists.
Repair of induction panels
The peculiarity of the induction panel is that heating is turned on only when there are special dishes on the burner. It stops immediately after the cookware is removed. That is, you can only check whether the burner works by placing a suitable dish on it. But, in case of any problems, the control panel displays a message about the state of the device and an error code. Its decoding can be found in the manual, so we can determine the approximate nature of the damage.
If the surface does not turn on
If the stove does not work at all, you should start repairing the cooking surface of the induction type, as described above, with checking the power supply, cord, contacts, etc. To begin with, it is necessary to exclude the simplest options, and then look for damage further.
If nothing is found during inspection, and the induction cooking surface still does not work, disconnect it, carry it to the table with a spread cloth, laying face down, remove the glass-ceramic panel from it (unscrew the fixing bolts). Most problems with induction ovens are related to the power unit and breakdown of elements. This is due to voltage spikes and, to prevent such problems, it is better to put a stabilizer.
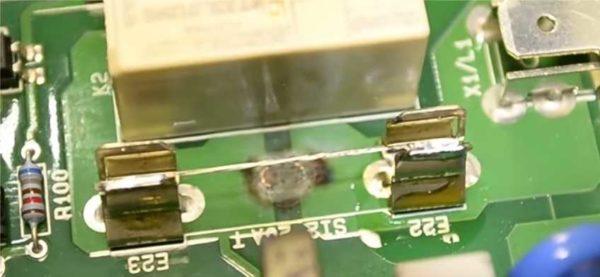
We start the check with a power part test. These are diode bridges, transistors and fuse. The fuse is one – it is not difficult to find and check it.
Diode bridges and transistors are located next to the heat sink and burner control keys. We turn the multimeter on to the test mode and check the diode bridges and transistors.
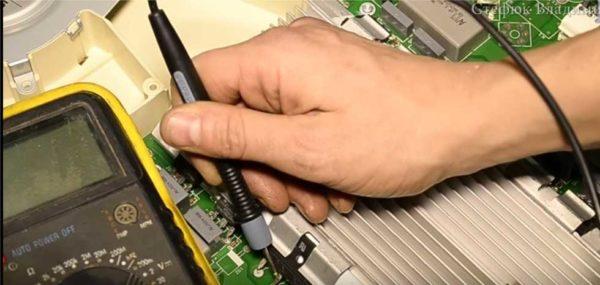
If there is a breakdown, we will hear the device beeping – this element is defective and must be replaced. We unsolder the old one and install a new one. If it is impossible to find a spare part of the same company, choose one with similar characteristics. But there may be problems when soldering, as they may have different dimensions. This is not so important, the performance characteristics are important.
After replacement, check all power supply circuits for breakdown and short circuits. Especially carefully check the part that is connected with broken elements – there may still be broken elements. If there are no other damages, assemble the panel, connect it and test it.
For a detailed repair process of the induction cooktop by AEG (Elektrolux), see the following video.
Other problems
The device of this technique is more complex and possible faults, as well as causes, are many. Here are the most common problems and methods of their elimination.
- No communication with the control panel. Most likely the problem is in the power supply or a bad contact. It is necessary to carefully inspect the right or left side, depending on which one is not working. Then check for power on the control board and all the wires that lead to it.
- One of the burners “does not see” the dishes. It is necessary to check the sensor responsible for this burner.

- The burner turns on by itself. Remove a metal object from the hob or clean the surface. This false activation can be caused by salt residue. Wash everything well and wipe it dry.
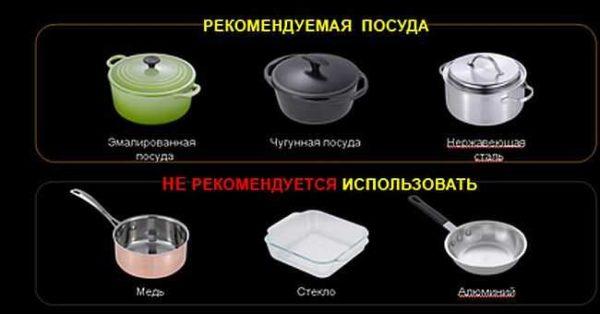
- The water in the pot is not heating properly. The problem is most likely in the pot. It does not conduct heat well.
- The burner overheats and shuts off. In most cases, the problem is also in the cookware. If the others react normally to the same cookware, check the sensor of the “defective” burner.
Avoid most problems can be avoided by carefully studying the instruction manual and powering the technique through a stabilizer. Then the repair of the cooking surface of the induction type may not be necessary at all.
Repair of gas cooktop
In the gas cooktop can be repaired independently only electric ignition and gas control system. With them, in principle, and the main problems arise. Since the gas cooktop with electric ignition is also connected to electricity, then in case of general problems with the electrical part (piezo ignition does not work at all), first check the presence of power in the socket, inspect the integrity of the wire. If everything is normal here, you can go deeper.
Electric ignition button does not work (no spark)
Electric ignition is a convenient thing, but periodically the spark stops “skipping” and the fire on some burner is not ignited. It can be ignited by pressing the button of another burner. They are connected in parallel and when you press one, there is a spark on all burners. But this situation is not normal and the spark must be restored. Repair of the cooking surface in this case is not very difficult. There are several reasons for this:
What else can be done – check the contacts and soldering. If necessary, press or clean the contacts from dirt, solder, if found cold, resolder. How can you tell if the solder is cold? If you pick up the tin with something hard (the end of a multimeter probe, for example), it moves or flies off, there may be cracks in it. In this case, heat up the soldering iron, re-melt the solder.
After ignition on the burner, the flame goes out
Many modern gas stoves or cooktops have a gas control function. Near each burner is a sensor that monitors the presence of flame. If there is no flame, the gas supply is cut off. The function is useful, but sometimes there are problems – after ignition, when you release the knob, the flame goes out. The thing is that the sensor – thermocouple – is dirty or out of order and “does not see” the flame.

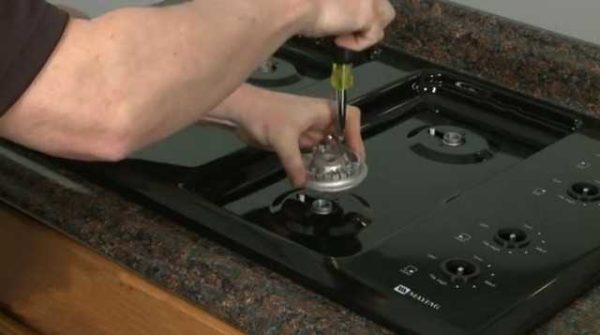
To begin with, you should try to clean all the sensors. They quickly become overgrown with grease during operation, so that they periodically require cleaning. First, we turn off the power, remove the burners, remove the handles, unscrew the front panel. Find the thermocouple on the burner that is not working. This is a small metal pin located close to the gas burner. In some models of gas cooktops it can be simply inserted, in others there is a lock. It is necessary to take the sensor out of the socket and clean it from dirt. Use ordinary kitchen chemicals for washing dishes or something stronger. It is important to achieve the result. We wash the sensors, dry them, put them back in place. You can check the work.
Sometimes it happens that even after cleaning, some burners do not work. This means that the thermocouple has failed. In this case, the repair of the cooking surface, working from gas, is the replacement of the thermocouple. How to get to it you already know, and it is disconnected simply: it is necessary to remove the corresponding wires from the pad. We take out the old sensor, put in a new one. Put the cover in place, check the work. That is, in fact, all.
One important point: if your equipment is under warranty, do not repair it yourself, otherwise you will be denied warranty repair.

")


