

Decorating a yard, garden or dacha is a fascinating and time-consuming affair, and it also requires a decent amount of money. To save money, many things to decorate the garden / plot can be done with their own hands. This time we will talk about how to make street vases for flowers. In detail, we will consider the process of manufacturing from two materials – wood and concrete. These are the most plastic and inexpensive materials, from which you can make very good things.
Article Content
Wooden vases
Wood may not be the best choice for making outdoor vases, but it is very affordable, plastic, easy to work with. That’s probably why it’s so popular. Wooden outdoor flowerpots can be made from scraps of boards, moisture-resistant plywood, timber, tree trunks, stumps, old barrels and tubs.
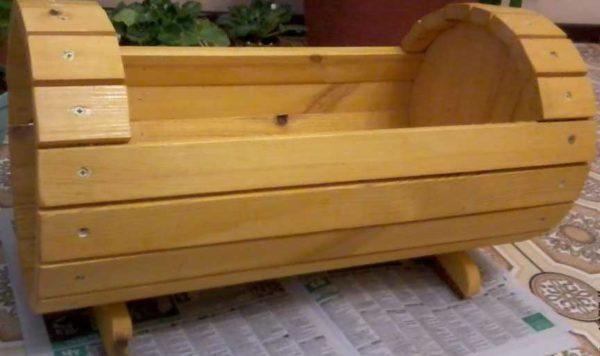
From boards and plywood
If you want the vase to keep its color for a long time and not gray, but you do not want to paint it with some covering paint (like oil), you will need to buy wood oil. It gives the wood a shade, but leaves the pores visible (like a stain). In parallel, this oil as if “preserves” it, protects it from fungi, insects, mold.
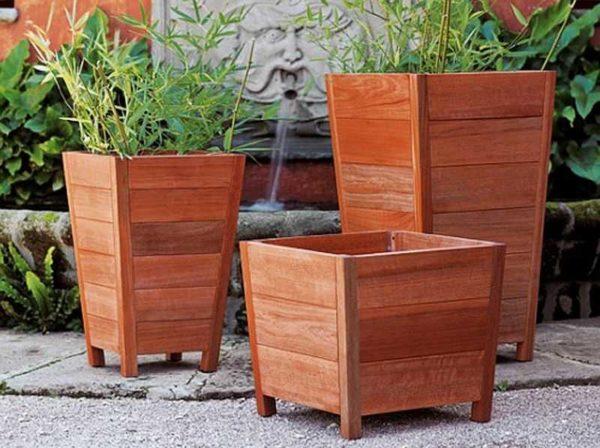
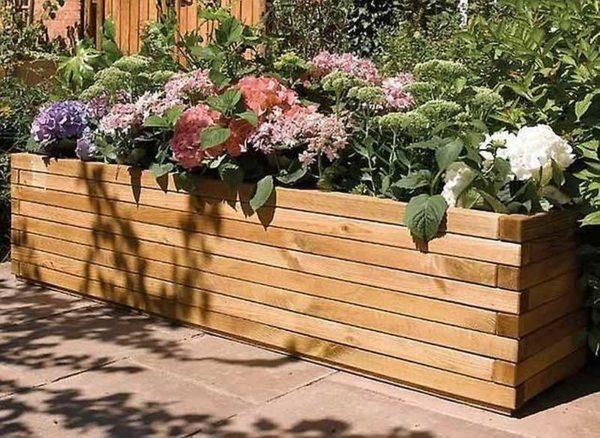
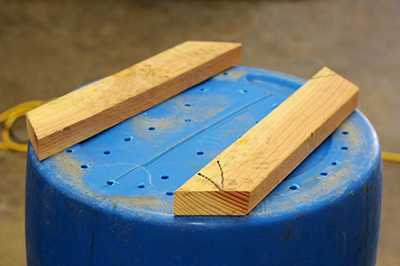
The easiest way to make flowerpots from rectangular or square-shaped boards. It is necessary to cut a few pieces of equal length, chip them into a box, nail the bottom.
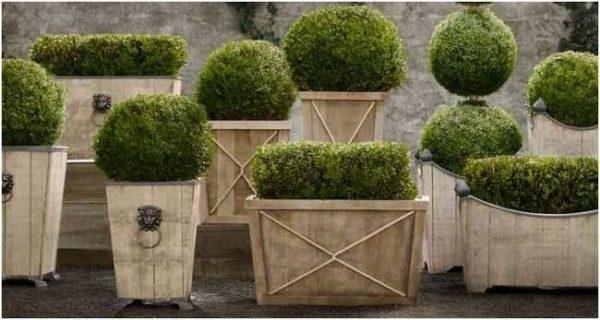
To the bottom of such a vase does not bloom, it should be raised on legs. In the simplest version to the bottom, at the corners, you can nail four small pieces of board. There is a desire – you can try to make more decorative legs (as in the photo above).
Nailing boards, do not try to knock the planks very tightly. When watering, they will swell and, if nailed closely, they can lift. However, and very large gaps should not be left – the earth through the bottom can spill.
Another way to make a street flower vase from wood – cut off four identical sections of a small cross-section bar 25-25 mm, for example). Use the bars as ribs of the structure, to them nail the boards, attach the bottom from below. This option is good in that such vases immediately have legs.
According to the same principle, you can make a vase from moisture-resistant plywood. Cut out of it the sides, attach them to the bars. Instead of nails, self-tapping wood screws are usually used, and you will also need a drill. Before screwing the self-tapping screw, drill a hole. Apply the sidewall to the bar post, drill, indenting 1 cm from the edge. The diameter of the drill is 1-2 mm less than the diameter of the screw. So, firstly, the bar will not burst, and secondly, the fastener enters the plywood more easily. Instead of wooden corners can take metal, better – from stainless steel.
The next variant of the flower vase – from a wooden bar (photo below). Here everything is even simpler – fold the bar so that the connection was then in one plane, then in another. After laying each bar, it is nailed to the located below. Nails must necessarily be hammered in the corners, on the long side can also be nailed once or twice.
Everything is simple. Difficulties can arise only with the first row. It can be fixed to some bottom, for example, knocked down from boards, a piece of waterproof plywood with holes drilled in it for water runoff.
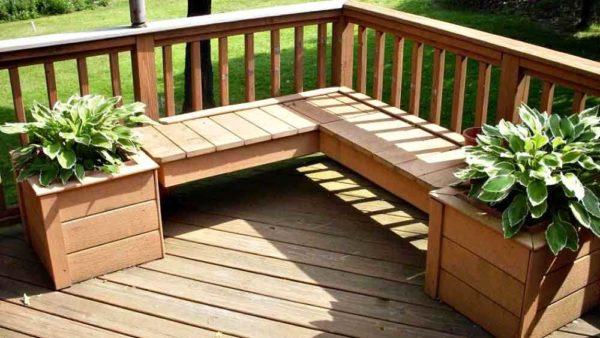
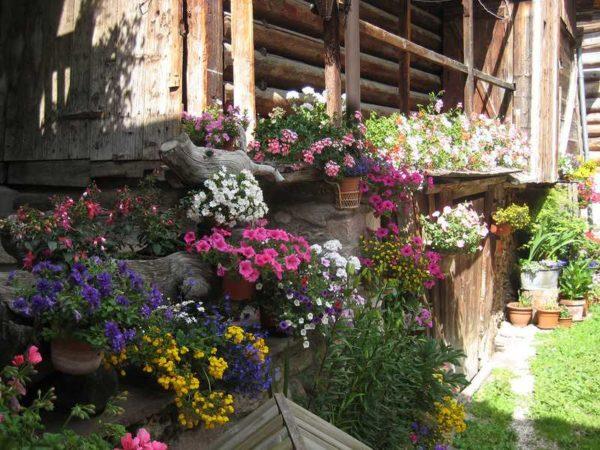
Any of these vases can be combined with a bench. It will turn out a wonderful corner for rest. Such a group can be put in the garden, near the entrance, somewhere on the plot, near a gazebo or a homemade small fountain.
From stumps and logs
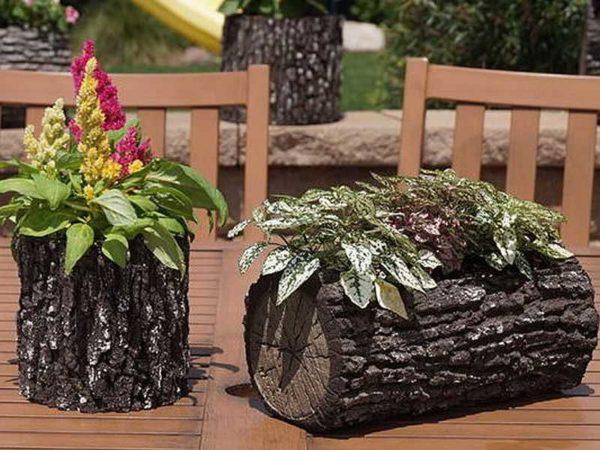
In the garden or on the dacha plot you have to periodically fell old trees. From their stumps and trunks, too, you can make street vases for flowers. First let’s talk about how to use the trunks. It is better not to strip the bark, so the look of the vases will be more decorative. Depending on the idea, the trunks are cut into chunks of some height. Cutting can be done with an ordinary hand saw, but faster – with a chainsaw. These chunks can be placed standing, you can lay them on their sides.
The main task is to remove part of the wood so that a container is formed, which can be filled with earth. There are several methods of removing the core. Usually take a drill and a large-diameter drill bit. A conical drill bit or in the form of a spatula (as in the photo) works better.
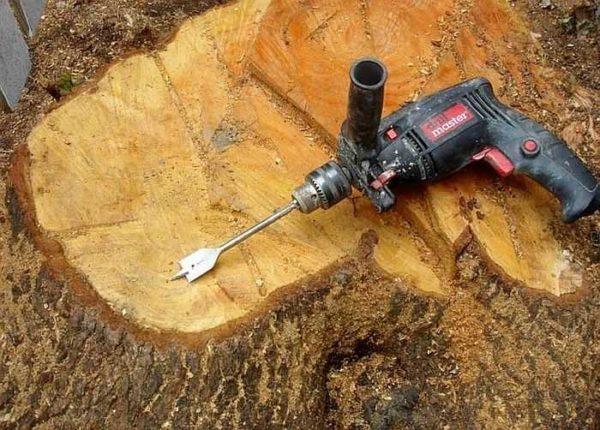
Make a number of holes to the depth you need. It depends on the type of plants that you plan to plant in this vase, but usually – 15-20 cm. You can make a lot of holes – the thinner the walls are, the easier it will be to remove them.
The walls are destroyed with a chisel or a wide chisel. The handle of these tools is knocked with a hammer, and the sharp blade breaks off pieces. Thus, gradually, the core is released. Then the edges of the resulting container are slightly leveled, using the same technique.
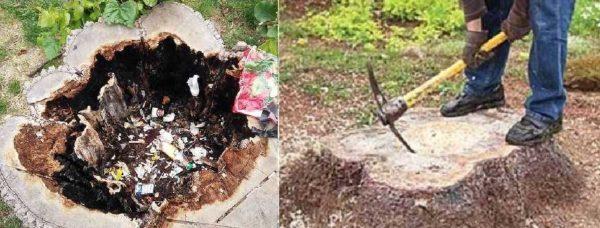
If the stump has a large diameter, you can use an axe or pickaxe. Only work carefully, so as not to destroy the walls. Near the walls, you can use a drill, finalize the interior of the vase with the same chisel.
Another option – by making some notches with an axe, crushing the wood, make a fire inside. But whether it will be possible to extinguish it in time is a question. Charred insides are then removed with a chisel or chisel.
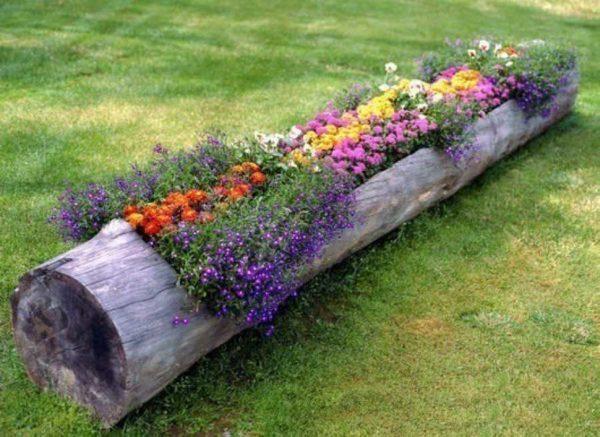
By the way, very interesting compositions can turn out from a very old and rotten deck. It is cleaned from very crumbling wood. The inside in this case is unscrewed very easily – the first to decay the inner part of the trunk. What is left can be coated with wood oil, stopping the destruction for a period of time.
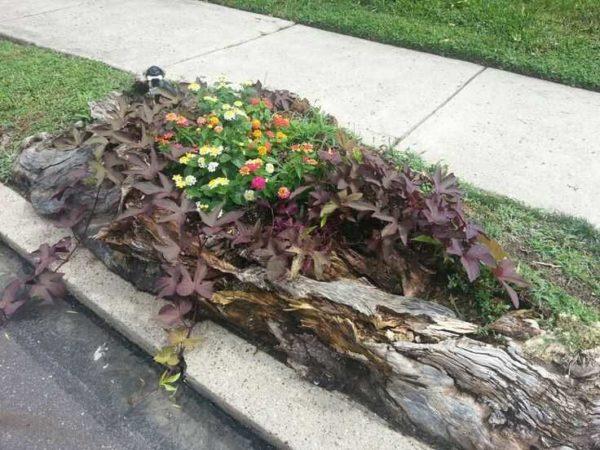
From such hollowed out stakes or stumps turn out excellent vases for flowers. Some ideas for decoration are collected in the photo gallery.
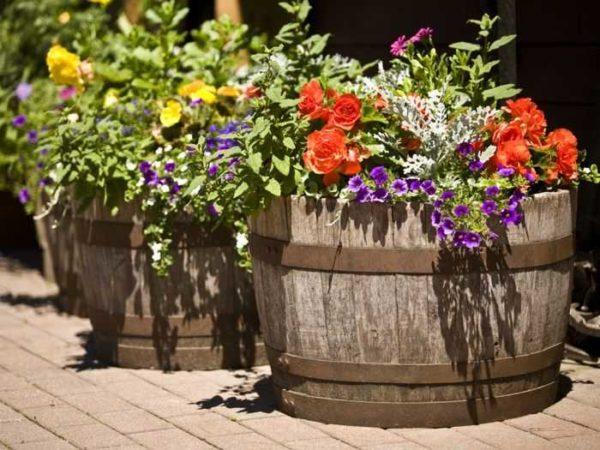
From barrels and other cooperage products
The easiest way to make outdoor flowerpots from old barrels, tubs and other containers that are no longer used and can not be used because of old age, but it is a pity to throw them away. They can be slightly processed with sandpaper – manually or by attaching the appropriate attachment to the drill / drill attachment. Then they can be painted, coated with exterior varnish or wood oil. And you can plant plants.

Barrels are sawn, and in any plane. But if you cut lengthwise, you will have to brace the boards together. Cut across the barrels are two identical (or almost) vases.
Even old wood can be untreated. So the composition looks more natural. But not in all styles such a vase will fit in. In this case, use a special paint for outdoor work, which can be worked on wood.
Outdoor vase for flowers made of plastic with a wooden lining
If outwardly you like wood, but you want to have an airtight container to avoid sweat on the site after watering, you can glue the plastic container with wooden laths. The slats are treated with antiseptics, painted, dried. Then you can proceed to transform the plastic container (bucket, tank, barrel) into a flower vase for street flowers.
First, holes are drilled in the bottom. The diameter is 10-14 mm. Leave the two opposite zones on the edges untouched. Here we attach the “legs” – two strips, cut so that they do not protrude beyond the contour of the barrel. Attach can be attached to the bolts, under the head drill a hole so that the fastener was “recessed”.
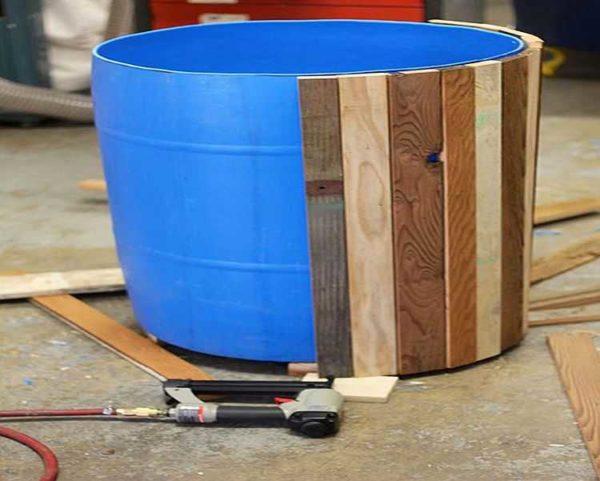
We take universal glue, which is suitable for gluing plastic and wood, and glue the strips on it. The narrower the strips, the more monolithic the surface will be. Such street vases for flowers do not shrivel and do not swell.
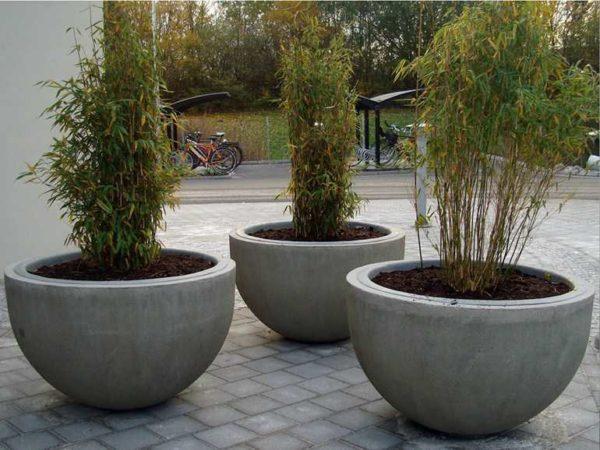
Homemade concrete flowerpots
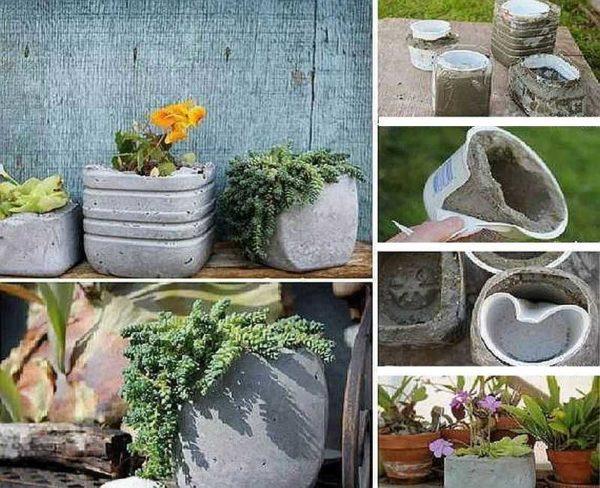
Concrete is good in that it can be poured into any shape. Plastic, glass, metal, wooden, clay vessels and even cardboard boxes will do.
It is most convenient to work with plastic – it is easy to take out of it. Even easier with glass, but such forms are usually disposable. It did not work out – they are broken.
What kind of concrete to use
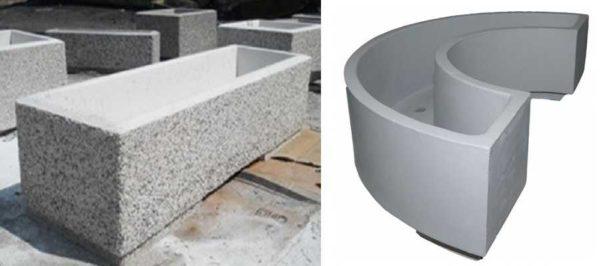
For the manufacture of street vases can be used ordinary concrete, consisting of cement and sand in a ratio of 1:3/4 (Portland cement grade not lower than M 400 and river clean sifted sand). The surface of such a vase will be monochrome, gray. In some cases, it looks stylish, and the gray color does not distract attention from the main – from the flowers. But not always.
More interesting looking products made of decorative concrete. It is also called artistic, art, architectural, acrylic, polymer – concrete. All of these are designations of the same product. In architectural concrete except cement and sand contains polymer additives, small fragments of natural minerals, some have dyes. The surface of the vase from decorative concrete turns out to be smoother, more interesting, with inclusions of natural stones. The specific type depends on the selected composition. Some types of decorative concrete are shown in the photo below.
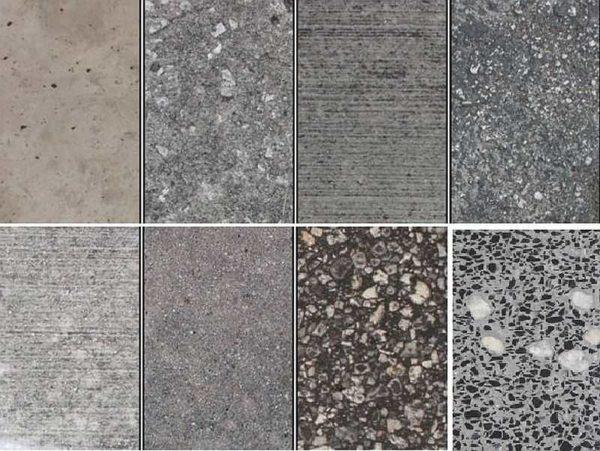
The surface of a vase made of decorative concrete is smoother, more interesting, with flecks of natural stones. The specific look depends on the chosen composition. Some types of decorative concrete are shown in the photo above.
From what to make molds for pouring a concrete vase
Any molds can be used, from almost any material. It is important that it does not soak and hold the form for 4-5 hours. Then the concrete sets and already holds itself. That’s why they make forms even from dense packing cardboard, well gluing coal and shrinking belts” of tape. But from caron can be made forms only for small vases – for a small group of plants. But the shape can be any.
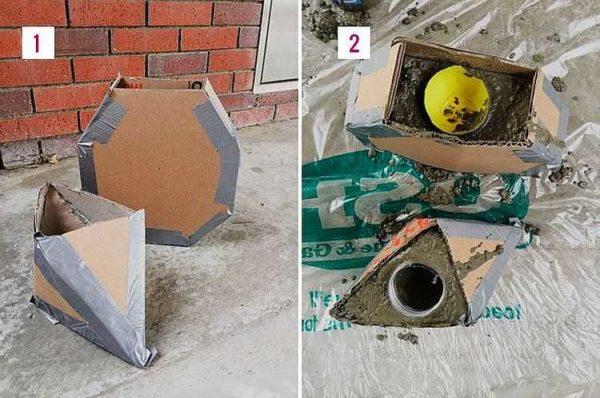
Actually, you need two molds – one for forming the outer surface, the second – much smaller – is inserted inside the first and forms a zone in which the soil is then poured and plants are planted. The inner shape is chosen based on the dimensions of the planned vase, but the thickness of the walls should not be less than 3 cm.
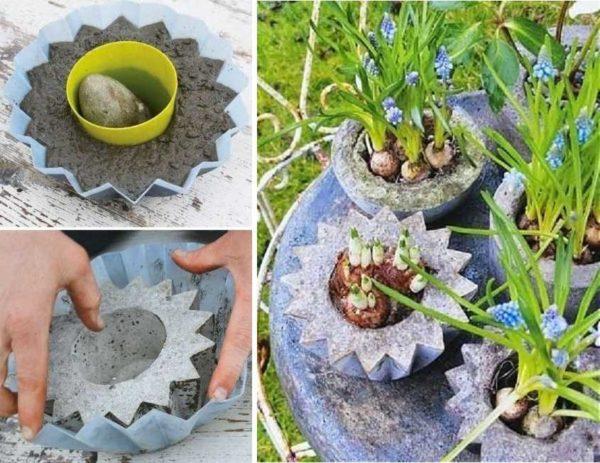
You can use plastic bowls, glasses, containers, trays, water flasks – large and small. You can knock down a mold from boards, plywood, pieces of other sheet material. It doesn’t matter. Anything, anything you can think of to use.
Is there an interestingly shaped basin or bowl? Also will do. And for the formation of the internal volume you can find something heavy, preferably the right shape, but it is absolutely not fundamental. Even a bowling ball will do. It is good because it is heavy and smooth – you can take it out easily.
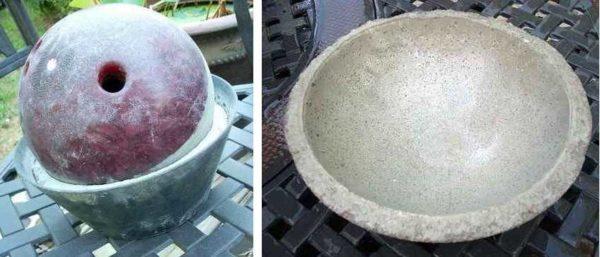
Round vases look best, but it’s not easy to find the right shape. Usually they are either plastic containers or glass balls, which are cut/broken after the concrete sets.
Manufacturing process
Cement can only be worked with at temperatures above +5°C. Ideal conditions are +20°C and high humidity, but temperature is more important. The place where you will leave the concrete to “ripen” should be in the shade.
You have found the right molds, the cement has been stirred. It should not be too liquid, not too thick. From the trowel or spatula should not run off, but also not so dry that it was possible to mold something out of it.
It is necessary to work with gloves – concrete corrodes hands very quickly. You need a trowel or something similar for laying out the mortar, a long thin stick or metal rod to remove air. You will also need either a large container of water or a piece of plastic wrap.
We take the molds, treat them with some grease. This is necessary in order to remove the vase from the mold easily. You can use the following preparations:
- Non-stick cooking spray. Harmless and effective.
- Special sprays for concrete. Cost much more expensive, but the effectiveness is the same.
- Motor oil.
- Universal lubricant VD-40.
Maybe other compositions work, but these are proven.
We treat the molds with one of the compositions. A large one inside, a small one outside. In the large form, pour a layer of 3-4 cm of mortar on the bottom, level it. This will be the bottom. If you want there to be drainage holes in the bottom, insert sections of tubes. You can use metal ones, cut them into pieces 3-4 cm long, treat them with grease on the outside too. In this case, the thickness of the bottom should be equal to the height of these tubes. And place them strictly under the bottom of the second form.
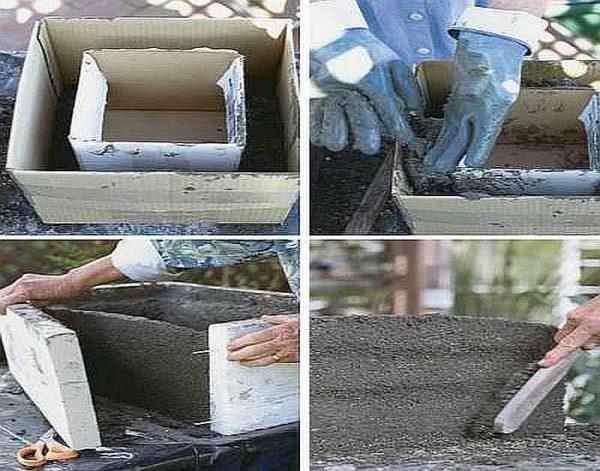
On the solution we put the second form. If it is light, we pour into it small stones, crushed stone, pebbles, sand. Fill the gaps between the two walls with mortar. If the material allows, knock on the walls with a hammer then take a rod or a thin stick, poke the mortar to the bottom, rock it from side to side. During these actions – knocking and poking – air bubbles come out of the concrete, it settles down a little. This procedure can be repeated a couple times. Then we take some smooth object (a spoon, for example), sprinkle it with grease and level the top of the wall. try to make the edge as even as possible – then it is hard to do something with it.
Poured concrete mold covered with a piece of polyethylene and in this form leave for at least a day. After 24 hours, the mold can be removed, but you can not use the vase yet. It can be lowered into a container of water and left there for a week. Another option is to cover it with a film and spray it with water three or four times a day. Sprinkle abundantly, until it darkens completely. Each time do not forget to cover with the film. After about 10-14 days you can start planting plants. That’s it, now concrete outdoor vases for flowers you can do with your own hands.
Finishing of the concrete vase
If you do not like the surface of the vase, it can be decorated. Do not make the vase too bright. He – only a background, for the flowers and greenery that will be planted in it. There are traditional methods – painting, there are more exotic – finishing with mosaics, pieces of broken ceramic tiles or pebbles.
When painting choose a paint that is suitable for concrete, the surface is pre-primed (in order to paint better hold and not sliding flakes).
For finishing with tiles or pebbles on the surface lay a layer of glue for tiles (for exterior work) thickness of 5-6 mm, and it is pressed into the pebbles. Work carefully, strazu erase traces of glue on the pebbles – it is then not removed.
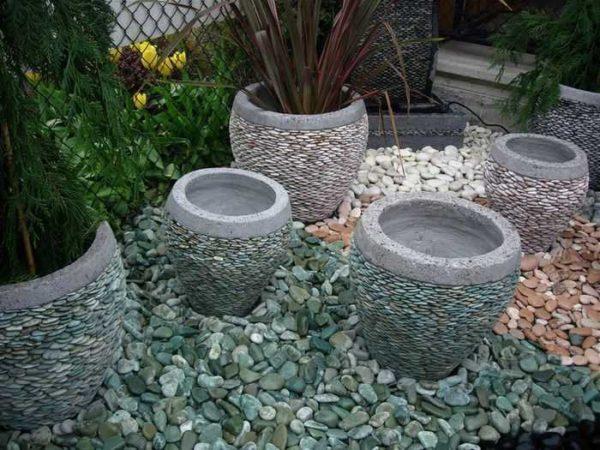
The finished vase is left to dry until the glue dries (the time is indicated on the package). Then the joints can be grouted, using standard tile grout. It is inconvenient to work, the gaps between the pebbles are too narrow. You can try to use thin plastic strips or narrow grouts for tiles.
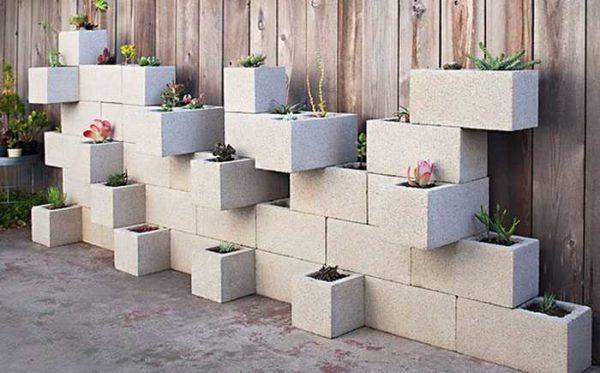
Vases from building concrete blocks
Hollow concrete blocks with large cells are suitable for planting plants. In the cells pour soil, plant flowers. You can lay out a whole wall from such blocks. The recipe is simple, but very spectacular.
And lastly video – a master class on how to make a vase from a car tire.


