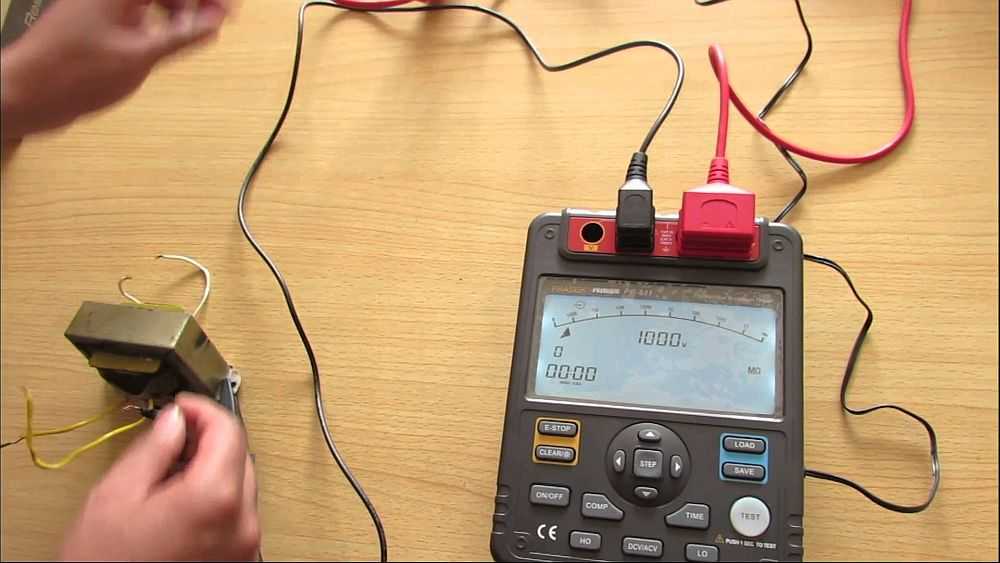
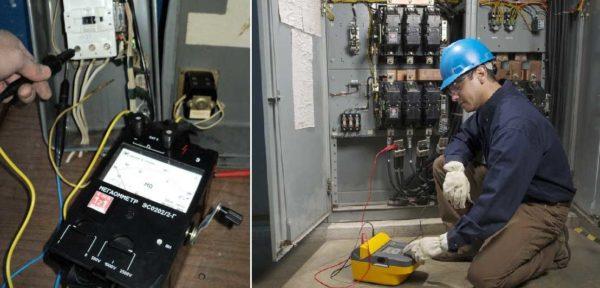
To assess the performance of the cable, wiring, it is necessary to measure the insulation resistance. There is a special device for this purpose – megaohmmeter. It supplies the measured circuit with high voltage, measures the current flowing through it, and displays the results on the screen or scale. How to use a megaohmmeter and consider in this article.
Artikli sisu
Seade ja tööpõhimõte
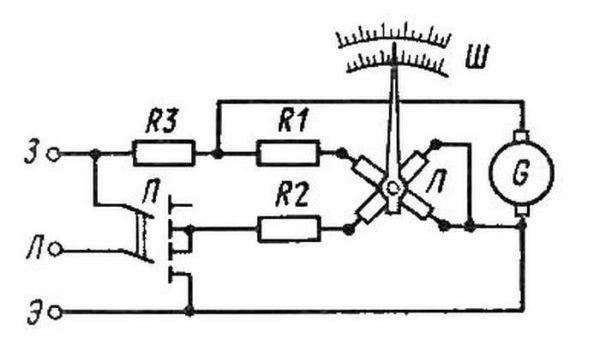
Megaohmmeter is a device for checking insulation resistance. There are two types of devices – electronic and arrow. Regardless of the type, any megaohmmeter consists of:
In pointer devices, the voltage is generated by a dynamo built into the housing. It is driven by the meter – he turns the knob of the device with a certain frequency (2 revolutions per second). Electronic models take power from the mains, but can also work from batteries.
The operation of a megaohmmeter is based on Ohm’s law: I=U/R. The device measures the current that flows between two connected objects (two cable cores, core-to-ground, etc.). Measurements are made with a calibrated voltage, the value of which is known, knowing the current and voltage, you can find the resistance: R=U/I, which is what the device does.
Before testing, the probes are placed in the appropriate sockets on the instrument and then connected to the object of measurement. During testing, a high voltage is generated in the instrument, which is transmitted to the object under test using the probes. The measurement results are displayed in mega ohms (MOhm) on the scale or screen.
Operating the megohmmeter
During testing, the mega ohmmeter produces very high voltages – 500 V, 1000 V, 2500 V. Due to this fact it is necessary to carry out measurements very carefully. At the enterprises to work with the device are allowed persons who have electrical safety group not lower than the 3rd.
Before making measurements with a megaohmmeter, the circuits to be tested are disconnected from the power supply. If you are going to check the condition of the wiring in the house or apartment, it is necessary to disconnect the switches on the switchboard or unscrew the plugs. After turning off all semiconductor devices.
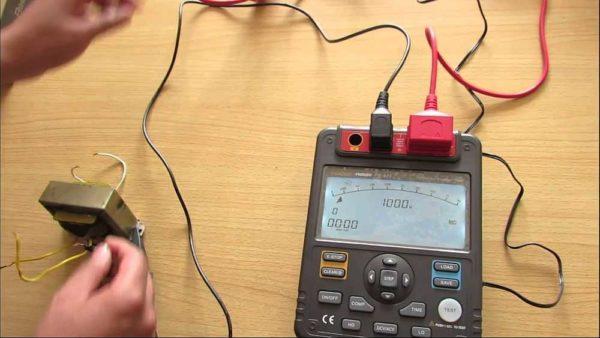
If you check the socket groups, you remove the plugs of all the devices that are included in them. If you check lighting circuits, unscrew the bulbs. They will not withstand the test voltage. When checking the insulation of motors, they are also completely disconnected from the power supply. After that, grounding is connected to the circuits under test. For this purpose, a multi-core wire in a sheath with a cross-section of at least 1.5 mm2 is attached to the “ground” busbar. This is the so-called portable grounding. For safer work, the free end with a bare conductor is attached to a dry wooden holder. But the bare end of the conductor must be accessible – so that it is possible to touch wires and cables with it.
Requirements for safe working conditions
Even if you want to measure the insulation resistance of a cable at home, before using a megaohmmeter it is worthwhile to familiarize yourself with the safety requirements. The basic rules are several:
- Hold the probes only by the insulated and limited by the stops.
- Before connecting the device, disconnect the voltage, make sure that there are no people nearby (throughout the measured route, if it is a cable).
- Before connecting the probes, remove residual voltage by connecting a portable earth connection. And disconnect it after the probes have been installed.
- After each measurement, remove residual voltage from the probes by connecting their bare parts together.
- After the measurement, connect the portable earth to the measured core, removing any residual charge.
- Work with gloves.
The rules are not very complicated, but your safety depends on their fulfillment.
How to connect the probes
There are usually three probe sockets on the instrument. They are located at the top of the instruments and are signed:
- E- shield;
- L – line;
- Z – ground;
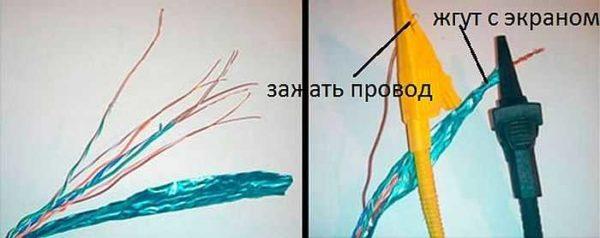
There are also three probes, one of which has two tips on one side. It is used when it is necessary to exclude leakage currents and is attached to the cable shield (if there is one). There is an “E” on the double lug of this probe. The plug that comes from this branch is installed in the corresponding socket. Its second plug is installed in the socket “L” – line. A single probe is always connected to the “ground” socket.
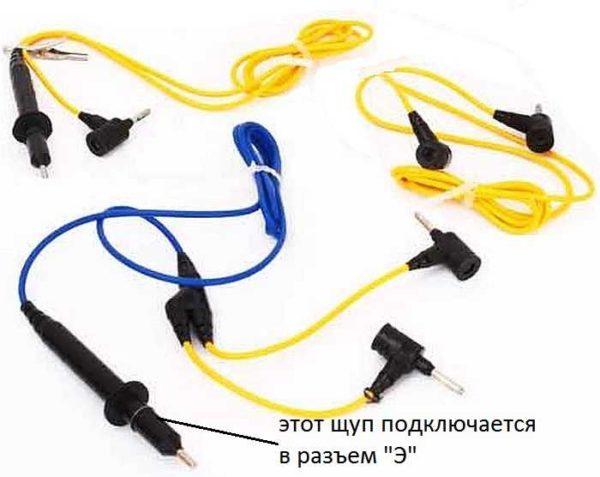
There are stops on the probes. When measuring with your hands, hold them in such a way that your fingers reach these stops. This is a prerequisite for safe operation (remember about high voltage).
If it is necessary to check only the insulation resistance without shielding, two single probes are placed – one in the “Z” terminal and the other in the “L” terminal. Using the crocodile clips on the ends connect the probes:
There are no other combinations. Checked more often insulation and its breakdown, work with the screen is quite rare, as the shielded cables themselves in apartments and private homes are rarely used. Actually, it is not very difficult to use a megaohmmeter. It is only important not to forget about the presence of high voltage and the need to remove the residual charge after each measurement. This is done by touching the ground wire to the newly measured wire. For safety, this wire can be attached to a dry wooden holder.
Measurement process
Set the voltage that the megaohmmeter will output. It is not chosen arbitrarily, but from a table. There are megaohmmeters that work with only one voltage, there are those that work with several. The latter, of course, are more convenient, since they can be used to test various devices and circuits. Switching the test voltage is done by a knob or button on the front panel of the device.
| Element name | Voltage of megaohmmeter | Minimum permissible insulation resistance | Märkused |
|---|---|---|---|
| Electrical products and apparatuses with voltage up to 50 V | 100 В | Must correspond to the nameplate resistance, but not less than 0.5 megohms. | During measurements semiconductor devices must be shunted |
| same, but with voltage from 50 V to 100 V | 250 В | ||
| same, but with voltage from 100 V to 380 V | 500-1000 В | ||
| above 380 V, but not more than 1000 V | 1000-2500 В | ||
| Jaotusseadmed, paneelid, voolujuhtmed | 1000-2500 В | Vähemalt 1 megohm | Mõõtke iga jaotusseadme osa |
| Elektrijuhtmestik, sealhulgas valgustusvõrk | 1000 В | Vähemalt 0,5 megohmi | Ohtlikes ruumides tuleks mõõtmisi teha kord aastas, muudes ruumides iga 3 aasta tagant. |
| Statsionaarsed elektripliidid | 1000 В | Vähemalt 1 megohm | Mõõtmine viiakse läbi köetud, lahti ühendatud ahju peal vähemalt kord aastas. |
Enne megaohmmeetri kasutamist veenduge, et liinil puudub pinge - testeri või indikaatorkruvikeeraja abil. Seejärel, olles seadet ette valmistanud (seadistanud pinge ja mõõtmise noole skaalal) ja ühendanud sondid, eemaldage maandus testitavast kaablist (kui mäletate, et see on enne töö alustamist ühendatud).
Järgmine samm on megaohmmeetri kasutusele võtmine: elektroonilistel mõõtjatel vajutame nuppu Test, noolega mõõtjatel keerame dünamo nuppu. Noolega mõõteriistadel keerame seda seni, kuni korpusel olev lamp süttib - see tähendab, et vooluringis on tekkinud vajalik pinge. Digitaalmõõtjatel stabiliseerub mingil hetkel ekraanil olev väärtus. Ekraanil olevad numbrid on isolatsioonitakistus. Kui see ei ole normist väiksem (keskmised on tabelis kirjas, täpsed on toote passis), siis on kõik normaalne.
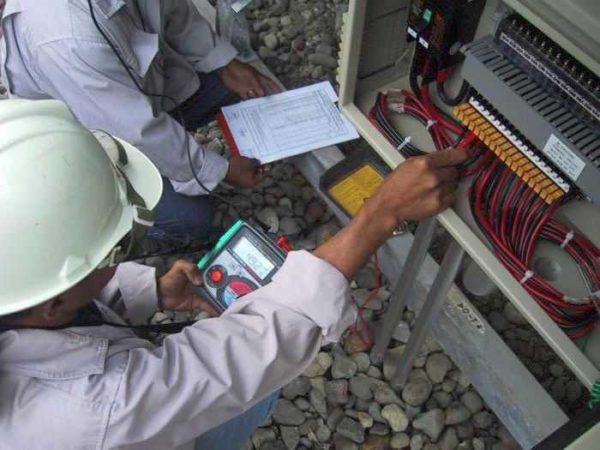
Pärast mõõtmise lõppu lõpetage megaohmmeetri nupu keeramine või vajutage elektroonilisel mudelil mõõtmise lõpetamise nuppu. Pärast seda võite sondi lahti ühendada, eemaldada jääkpinge.
Lühidalt öeldes on need kõik megaohmmeetri kasutamise reeglid. Mõningaid mõõtmisvõimalusi käsitletakse üksikasjalikumalt.
Measuring cable insulation resistance
Sageli on vaja mõõta kaabli või juhtme isolatsioonitakistust. Kui te oskate kasutada megaohmmeetrit, siis ühejuhtmelise kaabli kontrollimisel ei võta see rohkem kui minut aega, mitmejuhtmeliste puhul peate tegelema kauem. Täpne aeg sõltub juhtmete arvust - peate kontrollima igaüht.
Katsepinge valite sõltuvalt võrgu pingest, millega juhe töötab. Kui kavatsete seda kasutada 250 või 380 V juhtmestiku puhul, võite seadistada 1000 V (vt tabelit).
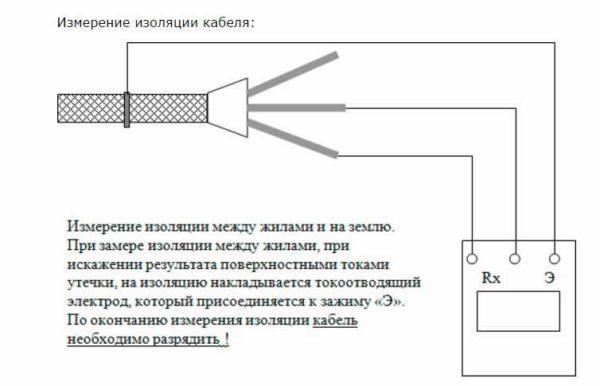
Ühejuhtmelise kaabli isolatsioonitakistuse kontrollimiseks ühendatakse üks sond südamiku külge, teine - soomuse külge, rakendage pinge. Kui soomus puudub, ühendatakse teine sond "maandusklemmile" ja rakendatakse samuti katsepinget. Vaadake näidud. Kui nool näitab rohkem kui 0,5 megohmi, on kõik normaalne, kaablit võib kasutada. Kui vähem - isolatsioon on katki ja seda ei saa kasutada.
Saate testida mitmetuumalist kaablit. Testimine toimub iga juhtme puhul eraldi. Kõik ülejäänud juhid on keeratud ühte kimpu. Kui on vaja kontrollida "maa" läbikukkumist, lisatakse ühisele kimbule vastavasse bussi ühendatud juhe.
Kui kaablile on lisatud kilp, metallmantel või soomus, siis lisatakse need ka juhtmestikule. Juhtmestiku moodustamisel on oluline tagada hea kontakt.
Pistikupesa rühmade isolatsioonitakistuse mõõtmine toimub samamoodi. Kõik seadmed lülitatakse pistikupesadest välja ja vool lülitatakse välja jaotuskilbist. Üks sond paigaldatakse maandusklemmile, teine - ühele faasile. Katsepinge on 1000 V (vastavalt tabelile). Lülitatakse sisse, kontrollitakse. Kui mõõdetud takistus on suurem kui 0,5 megohmi, on juhtmestik normaalne. Korrake teise südamiku puhul.
Kui juhtmestik on vana - seal on ainult faas ja null, testimine toimub kahe juhtme vahel. Parameetrid on sarnased.
Check the insulation resistance of the electric motor
Mõõtmiste teostamiseks ühendatakse mootor vooluvõrgust lahti. On vaja pääseda mähiste juhtmetele. Kuni 1000 V pingel töötavaid asünkroonmootoreid katsetatakse 500 V pingega.
Nende isolatsiooni kontrollimiseks ühendatakse üks sond mootori korpuse külge, teine asetatakse kordamööda igale klemmile. Samuti on võimalik kontrollida mähiste omavahelise ühenduse terviklikkust. Selle kontrollimiseks tuleb sondid asetada mähisepaaridele.

