
")
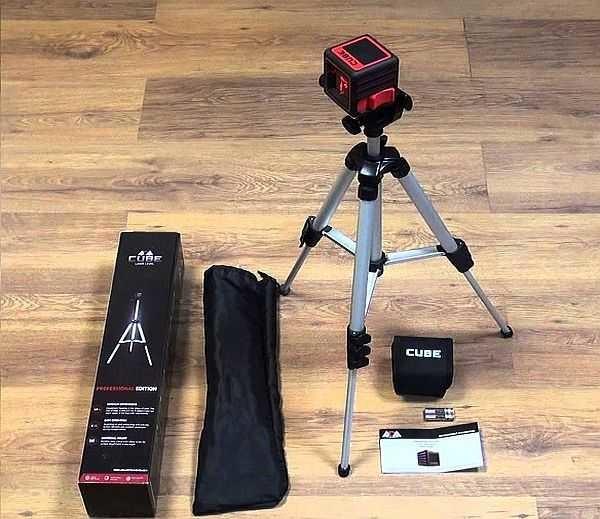
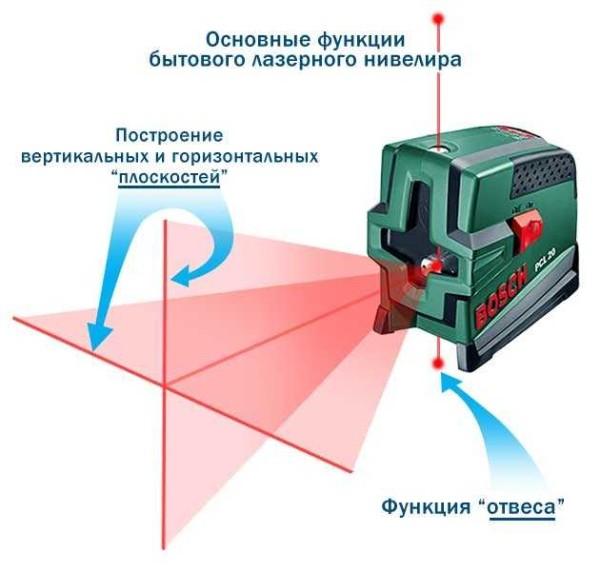
Many construction and finishing processes can be accelerated and facilitated. You only need to know how to use a laser level, and buy it, of course. These devices are also called plotters of planes or levels. The most common option – prism laser levels. In the body of this device are embedded several special LEDs and optical devices – prisms. Rays from the LED are refracted in the prisms, allowing you to build vertical and horizontal planes. On surfaces they are displayed in the form of red lines, which are convenient to mark, check deviations from vertical and horizontal and a lot of similar things.
Contents of the article
Preparation for work
Before using a laser level, it must be set vertically. There are two types of devices – with automatic position adjustment and without it. If your device does not have auto-adjustment, it has bubble levels and adjustable feet. You twist the legs so that the air bubbles are exactly in the center of the scale. The level can then be turned on.
If the laser level is auto-adjustable, small deviations – about 4° – it compensates on its own. When the position is adjusted, it beeps (in another variant it stops beeping) or the green LED lights up, indicating readiness for work (before that, the red LED lights up). If the normal position cannot be corrected by automatic correction, you will need to manually twist the feet so that the angle of deviation is smaller.
How to work with a level
Laser levels can have different sets of functions. The basic version has the ability to get vertical and horizontal planes, as well as include them together and get an intersection. In some models there is an opportunity to get a point in the zenith and under the device (plumb line, point – nadir), there is also a function of building two parallel vertical planes. Additional features are useful, but their presence increases the cost, as the system becomes more complex. Some manufacturers in the basic equipment add tripods or platforms that can be attached to the wall with a screw or magnet.
The models differ in the possible angle of the plane built in the horizontal surface (sweep angle). It can be from 110 ° to 360 °. It is easiest to work with the one that gives a full plane, but it belongs to professional models and costs a lot. It is possible to get a full plane with a small plane of light. To do this, the device is rotated around its axis.
When using the device outdoors, a laser catcher can be useful. It is usually bought separately. When buying it, it is necessary to check whether this model is compatible with your laser. Special glasses can be useful. They firstly protect your eyes from accidental exposure to the laser, and secondly allow you to see the beam more clearly.
Use when working on the floor
It is convenient to use a laser level when leveling the floor. You set it approximately in the middle of the room and turn on the construction of the horizontal plane. On the walls, a level line is beaten off, on which it is convenient to make markings.
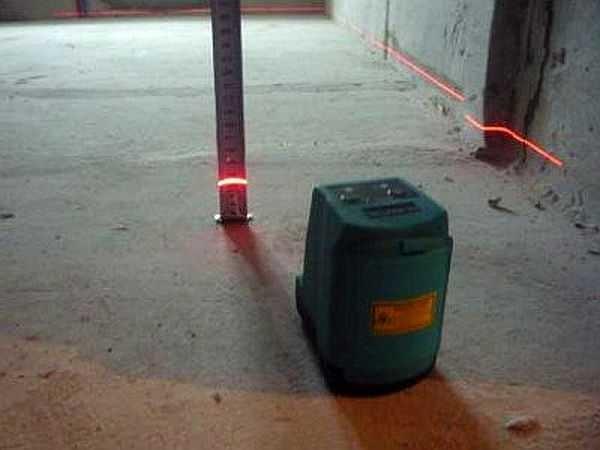
The laser beam is also displayed on any object you place in its path. Using this property and a ruler (tape measure) you can find the most protruding and the most “recessed” part of the floor. According to this data, you will determine at what minimum level you can do floor screed. Next, according to the found height make marks on the walls and proceed to the installation of beacons. They can also be set according to the beam. Having set the laser beam at the desired height, the back of the beacon is set so that it was evenly illuminated by it.
Using the same horizontal surface you can check how evenly the concrete in the screed is laid. The beam will be visible on the bumps, and the depressions can be found with the help of a lath.
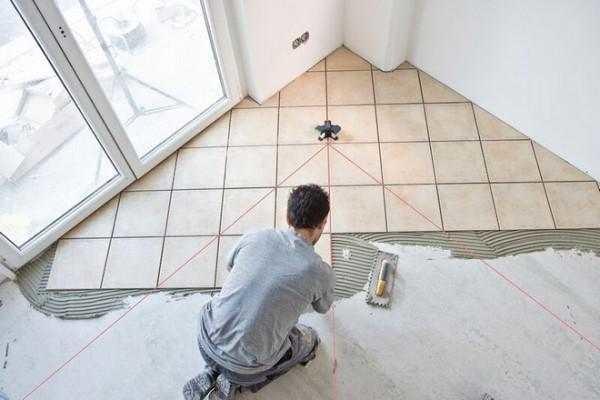
You can also use a laser level when laying tiles on the floor. To do this, you need to get the intersection of the rays on the floor. You set the desired mode, choose the direction in which you will lay tiles and, according to the line visible on the floor, align the seam.
What can do on the walls
Now consider how to use the laser level on the walls can be even more active:
- Check how crooked the wall is. Parallel to it, at a distance of a few centimeters, you beat off a horizontal plane with a laser. Using a ruler or tape measure the distance from the beam to several points of the wall. In this way you can determine how much the wall is blocked and in what place, you can find notches and bumps. This procedure is necessary when leveling the walls.
- Using the same technique, you can check the verticality of the corners.
- Mark a horizontal line for fixing something: furniture, profile for the ceiling from gypsum cardboard, etc.
- Get a crosshair for laying tiles on the wall.
- Have a vertical line to properly glue the first sheet of wallpaper. a horizontal line to evenly glue a border, etc.
- Check the verticality of the jambs on windows or doors.
- Mark a line for wiring.
You often have to use a laser level during repairs, and later in everyday life, when doing small jobs, it is often needed: to hang something evenly, to set the household appliances (washing machine, for example), etc.
Video lessons on working with a laser level (level)
How to check a laser level for accuracy
To be able to rely unconditionally on the readings of the laser level, it must be checked. In the technical characteristics of the model indicates the maximum permissible error for this device. It is specified in mm/m (millimeters per meter). Naturally, the smaller it is, the better, and this is one of the key parameters that you should pay attention to. But even comparing different devices of the same model, you can see a significant difference in the readings.
For a normal repair result, the deviation should be minimal, and it can be determined by checking. Ideally, this check should be done before purchase, but few stores will give you this opportunity. Then you can check the laser level at home, and if it did not pass the test, return or exchange (do not lose the receipt). The verification procedure itself is in the video. There are quite a lot of manipulations, but they are not complicated.


