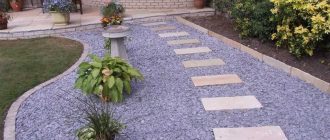
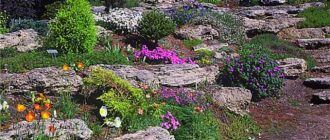
Krásný, dobře udržovaný trávník u domu - tento obrázek potěší nejen oko. Smaragdová tráva podtrhuje architektonická řešení, zvýrazňuje záhony, rambáty, alpské skluzavky. Chcete-li vytvořit trávník vlastníma rukama, nepotřebujete mnoho času, ale je nutné vědět, jak to udělat správně.
Základem téměř všech trávníků je tráva. Je různých druhů, s různými vlastnostmi, různých barev. V podnebí středního pásma Ruska se cítí dobře ne všechny z nich. Proto pokud se chystáte koupit hotovou směs, věnujte pozornost zónování: při prvním zimování riskujete ztrátu celého trávníku.
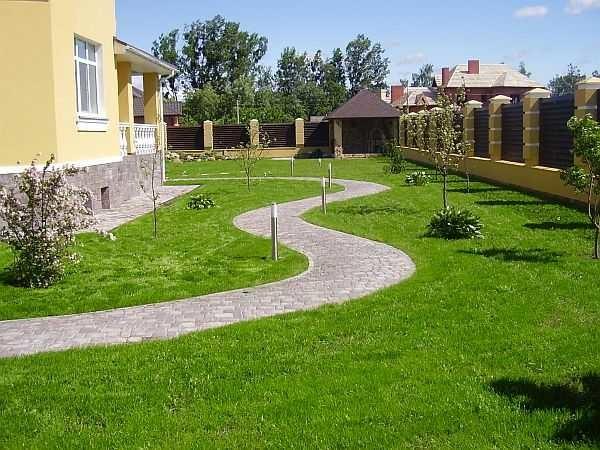
Obzvláště opatrní buďte u žita. Rychle klíčí, vytváří hustý a krásný koberec, ale v našem podnebí špatně snáší mrazy a vymrzá. Při nákupu hotové travní směsi se podívejte na její složení: mělo by v ní být málo žita. I když zmrzne, nenadělá velkou škodu.
Obsah článku
Kdy zasít trávu
Trávu můžete vysévat od 1. května do 15. srpna. Při jarním výsevu mírně zvyšte množství semen na metr čtvereční (o 10-15%). Tímto způsobem získáte rychleji krásný trávník a trávník bude v zimě silnější. Kvůli vysoké hustotě si rostliny začnou navzájem konkurovat a slabší budou vytlačeny. Do podzimu přežijí pouze ty silné.
Při letním výsevu dodržujte výsevek. Kvůli nedostatku času nebudou slabé rostliny včas vytlačeny, ale všechny budou touto konkurencí oslabeny. Proto je u letních trávníků důležitá dobrá péče.
Který trávník je nejlepší
Kostřava a modrá tráva jsou nejkrásněji zbarvené a nejhustší trávy. Jejich zeleň je jemná a smaragdová. Používají se k vytvoření parthenního trávníku. Pro jiné typy trávníků, po kterých se bude chodit, je však nelze použít: rychle se ušlapou. Na takových trávnících se častěji vysévají různé odrůdy volejí. Nejsou tak choulostivé, dobře snášejí určitý stupeň zátěže.

Kostřava je také vhodnější pro stinné trávníky. Ani ta však neroste v hlubokém a trvalém stínu. Základem fotosyntézy je slané světlo. A alespoň po určitou dobu musí být trávník osvětlen.
Typy trávníků
Jsme zvyklí, že trávník je nutně tráva, která pokrývá půdu. V něm mohou být uspořádány záhony, rabata, alpské skluzavky a další dekorativní prvky. To však není zcela pravda. Existují nejméně tři další druhy kvetoucích trávníků. Jsou nepochybně dekorativnější, ale těžko se po nich dá chodit.
Kvetoucí trávníky
Jejich základem jsou trávy, ale výrazně "naředěné" víceletými nebo jednoletými kvetoucími rostlinami. Jsou vybrány tak, aby kvetly po celé vegetační období - od poloviny jara do pozdního podzimu. Podle toho, které rostliny jsou do nich zařazeny, se rozlišují tři typy kvetoucích trávníků.
Louka
Už podle názvu je jasné, že ve složení rostlin, které lze vidět na skutečné louce. Jen výjimečně v plném složení a v přísně odměřeném poměru. K obilovinám se přidávají takoví tradiční obyvatelé louky, jako je jetel, heřmánek, sedmikráska, horský vřes, řebříček a další kvetoucí nebo okrasné listnaté rostliny. I přes hojnost květin jsou hlavními druhy trávy.
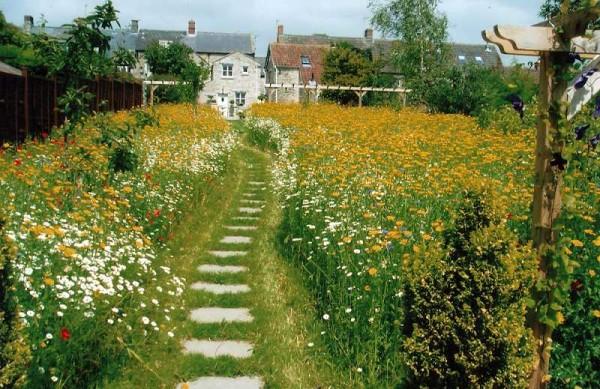
Je jasné, že sekat často taková krása nebude, ale jednou nebo dvakrát za sezónu pro obnovu a omlazení muset snížit. Rostliny jsou vytrvalé, takže při správné zálivce rychle obnoví dekorativnost. Oset celé území takovou směsí není vždy vhodné, ale některé plochy jsou velmi příjemné na pohled.
Maurský
Liší se tím, že se používají jednoleté květiny. Proto se takový trávník vůbec neseče. Trávy jsou vybírány nízké, je jich méně než květin. V maurském trávníku převládají květiny. A to jak výškově, tak i množstvím (podívejte se na fotografii).
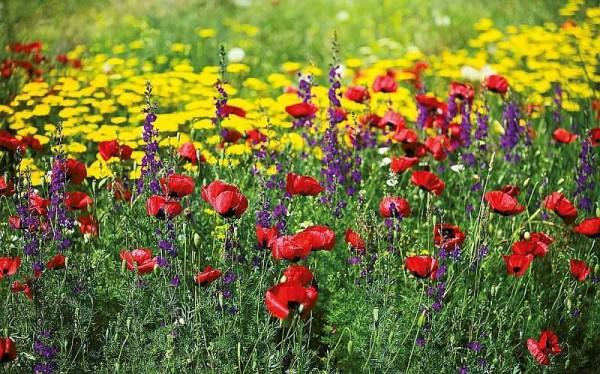
Jsou vybrány tak, aby kvetly co nejdéle. Obvykle ve složení mák, chrpa, měsíček, matiola, velkoplodý len, eschscholzia a další světlé letničky.
Bez trávy
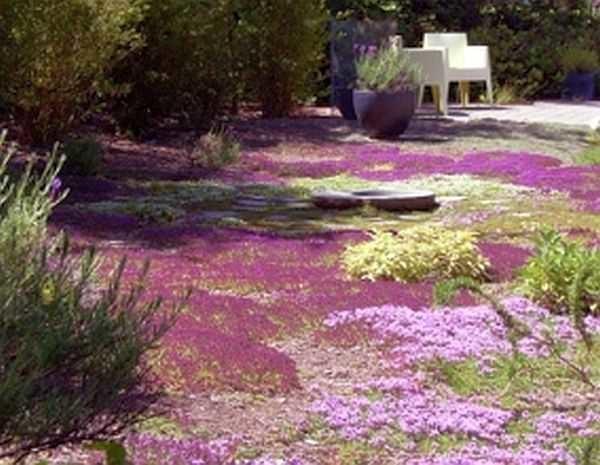
Jedná se o zcela neznámou skladbu trávníku tvořenou půdopokryvnými rostlinami. Zasít je v otevřeném terénu - marný obchod, pěstovat sazenice - dlouhé a koupit ready-made - drahé. Proto netravnatý trávník roste ne jeden rok a ne dva: rostliny rostou v malých množstvích a čekají na jejich růst. Tento trávník vlastníma rukama pěstovat nejtěžší: výsledky práce jsou viditelné až po několika letech, ale úsilí stojí za to.
Travnaté trávníky
Pro laické oko jsou různé typy trávníků téměř totožné: barva se může mírně lišit. Kromě různých odstínů zelené barvy však mají i odlišné vlastnosti: po některých lze chodit, jiné jsou kontraindikovány, liší se výsevní rychlostí a je třeba o ně jinak pečovat. Přirozeně se používají různé trávy s různými vlastnostmi.
Společné
Je nejodolnější proti sešlapání, můžete po ní chodit. Vybírají se trávy s tuhým, drsným vzhledem. Snadněji se však o ni pečuje, méně často se pleje, nejsou vidět některé přehmaty, které se často dělají při samovýsevu. Obyčejný trávník - vynikající volba pro daču.
Parterre
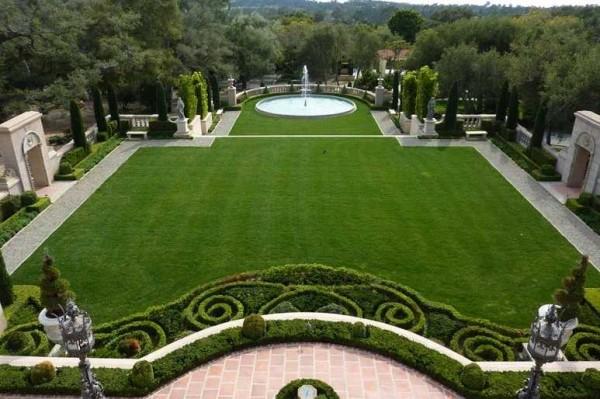
Jedná se o jeden z nejzdobnějších a nejparádnějších trávníků. Vyznačuje se vysokou dekorativností, trávy jsou vybírány jemné, krásné barvy. Tráva je nízká a hustá, při správné péči vypadá prostě nádherně. Takové trávníky jsou uspořádány na otevřených místech, ale tam, kde nikdo nebude chodit: příliš měkké trávy nevydrží takovou zátěž. Proto se parterové trávníky (viz foto) vysévají tam, kde lidé chodí pouze po cestách.
Speciální
Vysazuje se na svazích. Jako součást jeho trav, které mají rozsáhlý kořenový systém, schopný udržet půdu před vyplavením. Dekorativní hodnota takového krytu je průměrná, ale svůj hlavní účel plní dobře. Speciální trávníky lze vysadit na svahu vedoucím k řece nebo jezeru, pokud se na vašem pozemku nějaké nachází.
Sport
Směs je složitější - kromě tradičních odrůd trav jsou speciální, odolnější proti oděru. Dekorativnost sportovního trávníku není jeho hlavní charakteristikou, takže i velmi dobře udržovaný trávník vypadá mnohem hůře než běžný trávník, a to dokonce více než trávník v parteru. Má však velmi vysokou odolnost proti oděru.
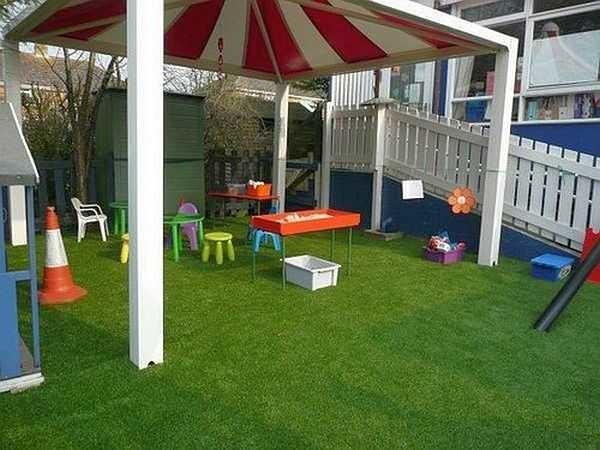
Vzhledem k použití speciálních travin jsou náklady na jeho údržbu vyšší a náročnější. Proto je nutné osít takovou směsí ty plochy, které budou aktivně využívány: plocha pro hry, plocha, kde se bude aktivně chodit - u altánu, sportoviště, houpačky. Zbytek plochy je často vyčleněn pro obyčejný trávník.
Přírodní
Pro tento typ nátěru nekupujte směsi, neprovádějte žádné práce. Jednoduše posekejte ty trávy, které jsou k dispozici. Nejčastěji se na zahradě ponechává přírodní trávník: dobře chrání půdu před vysycháním a požadavky na dekorativnost zde nejsou příliš vysoké. Příliš velké rostliny, které se nehodí do požadovaného obrazu, se odstraňují ručně. Zbytek se v procesu sečení stává jemnějším a jemnějším a tvoří trávník různých barev.
Jak vytvořit krásný trávník
Pěstování trávníku se skládá z několika fází:
- Příprava půdy - v případě potřeby odstranění plevelů - úprava kyselosti a zvýšení úrodnosti.
- Výsev trávy, pravidelné zavlažování.
- First mowing. It is carried out after the grass has reached a certain size.
- Regular maintenance and periodic mowing.
In the process, you will have to monitor the moisture content of the soil and remove weeds in a timely manner, from time to time to conduct fertilizing, sow the gaps that may appear after an overly dry summer or too harsh winter. This is, in brief, the whole technology of growing a lawn, and then detailed point by point.
Příprava půdy
The first thing to do is to assess the fertility of the soil. If the soil is clay or loam, grass will not grow normally on it. You will have to carry out serious soil preparation. There are two options: to fill the site from above with fertile soil or to remove the soil and in the resulting pit pour the earth.
It is easier, of course, to just fill in the soil, but this is not always possible: the soil layer in this case should be about 20 cm. Raising the lawn to such a height is not the most sensible solution: there will be problems with water drainage, high well-strengthened curbs are required, and the appearance is strange. Therefore, more often remove clay soils to a depth of 15-20 cm, and then in the resulting trench bring the earth.
If you choose the second option, at the bottom of the excavation can be laid geotextile. It will not let weeds grow through it, and you will have no problems with weeding.
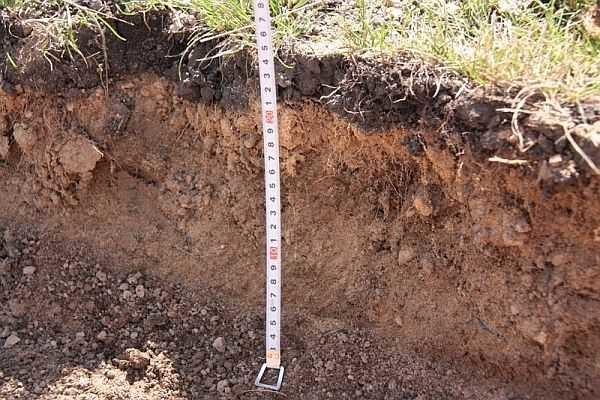
If the soil is normal, preparing the soil for lawn grass is not so difficult. First remove all weeds. This can be done mechanically – with a hoe and/or hands, you can use herbicides. They are diluted according to the instructions, water the place of the future lawn. After a few days, the vegetation turns yellow and dries up, it is removed. Simultaneously with the release from weeds, remove stones, roots, other fragments that can interfere with the growth of the terminal system.
The next stage is to check the acidity of the soil. Almost all grasses included in lawn mixtures grow well on neutral soils. If you want to have a beautiful lawn, you will have to correct its acidity. Therefore, in the store for gardeners and gardeners find a set for determining the acidity of the soil and check what kind of soil on your plot. It is just litmus paper, which should be placed on the soil, wait until it turns color and determine the acidity of your soil according to the color chart on the package. If the soil is acidic, add lime, if the reaction is alkaline – scatter crushed peat. Next comes the digging. Simultaneously with loosening remove those stones and roots that will get caught.
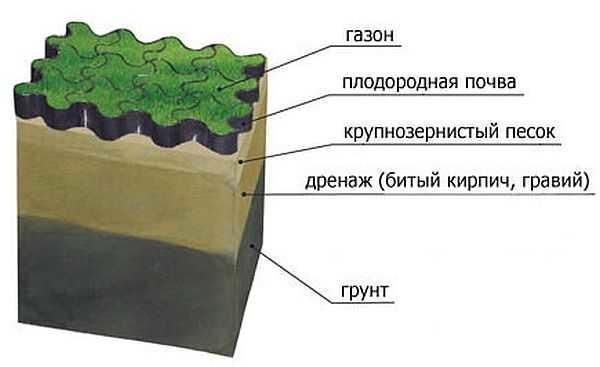
The next step is to add a fertile layer. Fertile, loose and light soil is brought in and distributed over the entire plot in an even layer 6-10 cm thick. The layer is leveled first with shovels, then with rakes. It is desirable to form a slight slope towards the fence: this way you will not have problems with overwatering the lawn in heavy rain: the water will run off the plot. The slope is minimal – 1 cm per meter or meter and a half. This is enough to ensure that the water drains away, and it will not be noticeable from the outside.
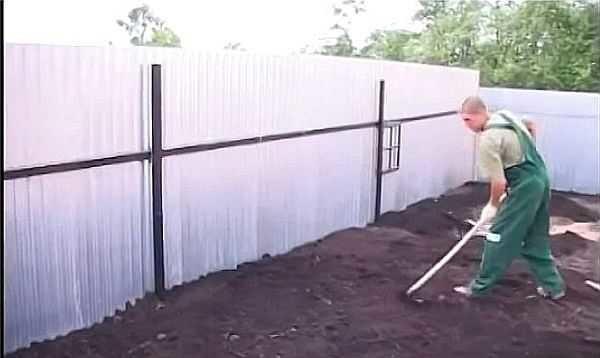
One tip: imported soil contains roots, stones, branches, etc. To remove them, it is sifted through a coarse mesh (as is done in construction when sifting sand). And the sifted is already distributed around the site.
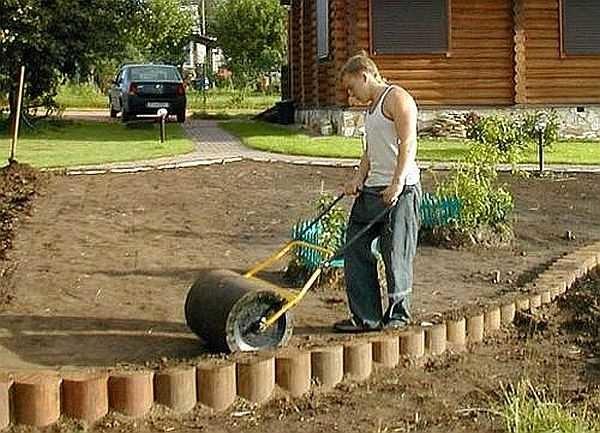
The next step in the arrangement of the lawn with your own hands – tamping or rolling. It allows you to compact the soil, and when a person steps on the lawn, the soil under the foot is not crushed, and remains even. Also this process allows you to identify irregularities that are bound to appear as a result of all land works.
If there is no special roller, it can be made from a piece of asbestos or iron pipe. Inside the pipe you thread a rod, to it you cling the handles (even just rope tied). All the roller for the lawn with your own hands you have made. Now it is dragged around the site, tamping the soil until it can stand on it without falling through.
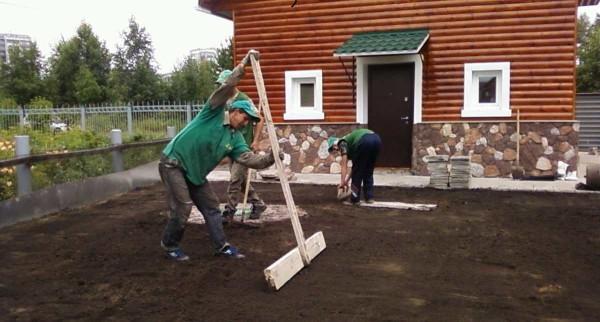
Rolling the lawn will definitely reveal humps and pits. Remove the excess from the humps, fill the holes. Having leveled the surface in this way, take a lawn roller and once again pass the area. To get a perfectly even surface, you can take a long board and pull it through two along the site, cutting off the edges of irregularities. Or make a device of two boards – as in the photo below. You can work with it alone.
Hnojení
Fertilizer can be applied at several stages (one of them). In principle, if you pour 6-10 cm of imported soil on top of the normal soil, fertilizers can not be used. But for more active growth – you can add:
- after scattering the imported soil on the plot and before leveling with a rake;
- if dry fertilizers are used, they can be mixed with seeds;
- spread and water the soil.
The most optimal method is watering. He guarantees a more even distribution of nutrients. But with this method, rarely anyone wants to bother, unless there is an automatic watering system. The other two are equivalent. It is more convenient to apply together with seeds: it takes less time.
Výsadba trávy
Beforehand it is necessary to rake a little loosen the tamped earth. Just go through with a light rake, slightly loosening the top layer. Now you can sow the grass.
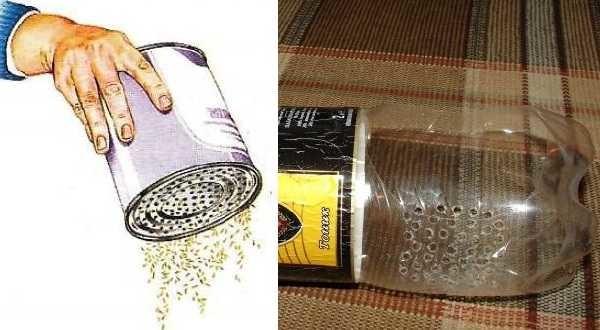
Buy a seeder, which costs about 200-300$ for a single application is hardly reasonable, so pour the seeds for the lawn in a bucket, and the old grandfather’s method of scattering on the surface: take a handful and passing a little through your fingers, scatter more or less evenly. Those who want at least some mechanization, you can offer two options for the simplest seeders for lawn grass, which are easy to make with their own hands. This is a tin or plastic bottle, in which holes are made (see photo).
So that it does not turn out that in one corner is dense, and in the other – empty, it is desirable to divide the plot and seeds into parts. The seed consumption is specified for each mixture. What is the area of the sown area, you can estimate on the spot and measure the amount that needs to be scattered. For those who make a lawn at home with their own hands for the first time, it is better to divide the measured amount into two equal parts and pass the site first along, and then across. So the seeds will be distributed more evenly.
After sowing, the seeds need to be covered with earth. There are two ways to do this:
- Walk the site with a rake, trying to cover the seeds with earth. This method is less reliable – many remain outside, they are pecked by birds, and the germination deteriorates.
- Sprinkle the rest of the imported earth on top. The layer is 3-5 mm. All seeds are covered with earth, are in the best conditions, germination is better.
At this point you can consider that the lawn with your own hands you have made. It remains to water and wait for the sprouts.
Zalévání a čekání
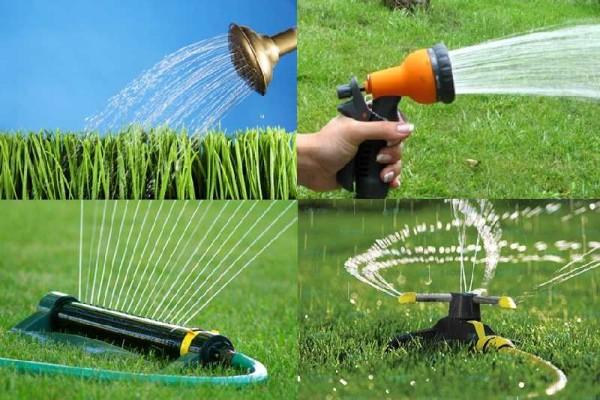
Water the lawn depending on the conditions: the soil should not dry out, but it should not be very wet either. The water should not come in large streams, there should be no streams or puddles. The stream is broken into small streams: install a sprinkler or sprinkler, if you water by hand, on the hose put on a nozzle. In the photo above you will see several options that will help solve the problem of watering. They are sold in stores.
There are also a few homemade options for lawn sprinklers. In most of them, it is a plastic bottle with holes made in it, connected to a watering hose. It can lay down and irrigate an adjacent area. If there is enough pressure in the system, you can tie it to a pole. In this case, the watering area will be larger. Sprinklers for watering the lawn with their own hands to make very simple. Look at the photo.
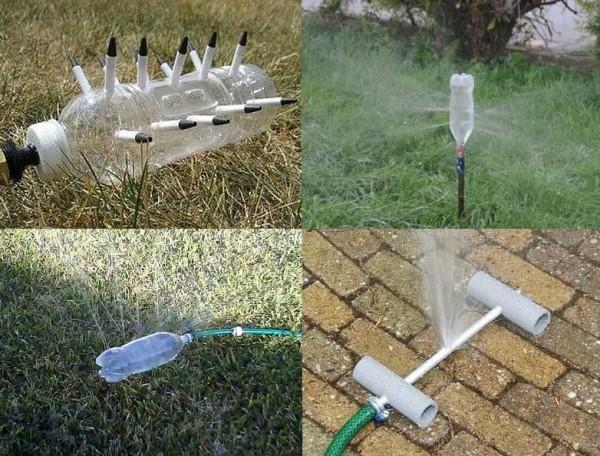
Another way to get small splashes: in a piece of plastic pipe make holes or make a thin kerf. You get either thin jets or a fan (bottom right photo).
Why should water be sprayed? Because for the normal development of the root system, the soil must be moist (but not wet) to a depth of about 6-10 cm. If it is just poured on top, it will only make things worse: the water displaces oxygen and the roots have nothing to breathe. So sprinkling or drip irrigation is the best way to water the lawn.
After seven to ten days, the first seedlings appear. They are still sparse, but don’t be disheartened. Only the seeds of some varieties, which germinate quickly, have sprouted. The others germinate later. With proper care after 20-30 days, the height of the grass stand reaches 10-15 cm. At this time it is necessary to carry out the first mowing. You leave about 5 cm of height for the first time. At this height, the grass will grow actively. After another 10-12 days, it will again be about 12 cm high. Now you can cut the grass shorter – leaving 3-3,5 cm.
Jak pečovat o trávník
The main care is timely watering, weed removal and periodic mowing. If you water by sprinkling, there will be enough oxygen in the soil and the plants should develop normally.

Problems with a lack of oxygen can occur after long heavy rains, when the water stands in puddles on the plot or when watering incorrectly with the same result. Lawn aeration is then necessary. For this purpose, a roller is used, similar to the one used when tamping the soil, but this one has points that pierce the turf. Through these punctures oxygen enters the soil and the plants start to grow better.

